
Spring中bean的生命周期
0.开发环境
开发工具:
STS(Spring Tool Suite)
jar包:
commons-logging-1.1.3.jarspring-beans-4.0.0.RELEASE.jarspring-context-4.0.0.RELEASE.jarspring-core-4.0.0.RELEASE.jarspring-expression-4.0.0.RELEASE.jar
bean的作用域
- Singleton 单例
- Prototype 多例
- Request 在一次请求中有效
- Session 在一此会话中有效
单例
在容器初始化的时候,就创建了此对象
测试bean: Student.java
package com.moon.ioc.scope;

public class Student {
	private Integer sid;
	private String sname;
	public Integer getSid() {
		return sid;
	}
	public void setSid(Integer sid) {
		this.sid = sid;
	}
	public String getSname() {
		return sname;
	}
	public void setSname(String sname) {
		this.sname = sname;
	}
	public Student() {
		super();
		// TODO Auto-generated constructor stub
	}
	/*@Override
	public String toString() {
		return "Student [sid=" + sid + ", sname=" + sname + "]";
	}*/

}
配置文件scope.xml,bean的属性scope设置为singleton
<?xml version="1.0" encoding="UTF-8"?>
<beans xmlns="http://www.springframework.org/schema/beans"
	xmlns:xsi="http://www.w3.org/2001/XMLSchema-instance"
	xsi:schemaLocation="http://www.springframework.org/schema/beans http://www.springframework.org/schema/beans/spring-beans.xsd">

	<bean id="student" class="com.moon.ioc.scope.Student" scope="singleton">
		<property name="sid" value="1001"></property>
		<property name="sname" value="王朝" ></property>
	</bean>
</beans>
测试代码:Test.java
package com.moon.ioc.scope;

import org.springframework.context.ApplicationContext;
import org.springframework.context.support.ClassPathXmlApplicationContext;

public class Test {
	public static void main(String[] args) {
		ApplicationContext ac = new ClassPathXmlApplicationContext("scope.xml");
		Student student1 = ac.getBean("student", Student.class);
		Student student2 = ac.getBean("student", Student.class);
		System.out.println(student1);
		System.out.println(student2);
	}
}
运行结果:
创建两个Student实例,内存地址是一样的
信息: Loading XML bean definitions from class path resource [scope.xml]
com.moon.ioc.scope.Student@402a079c
com.moon.ioc.scope.Student@402a079c
多例
在使用时才会创建对象
配置文件中,scope="prototype",
其他测试代码不变
bean的生命周期
Spring IOC容器对bean的生命周期进行管理的过程:
1.通过构造器或工厂方法创建bean实例
2.为bean的属性设置值和对其他bean的引用
3.调用bean的初始化方法(需要在配置文件中通过init-method指定)
4.bean可以使用了
5.当容器关闭时,调用bean的销毁方法(同样需要在配置文件中destroy-method指定)
测试bean: Person.java
package com.moon.ioc.life;

public class Person {
	private Integer id;
	private String sex;
	private String name;
	public Integer getId() {
		return id;
	}
	public void setId(Integer id) {

		System.out.println("Two: 依赖注入");
		this.id = id;
	}
	public String getSex() {
		return sex;
	}
	public void setSex(String sex) {
		this.sex = sex;
	}
	public String getName() {
		return name;
	}
	public void setName(String name) {
		this.name = name;
	}
	public Person() {
		System.out.println("One:创建对象");
	}

	@Override
	public String toString() {
		return "Four: 开始使用";
	}
	public void init() {
		System.out.println("Three: 初始化");
	}

	public void destroy() {
		System.out.println("Five: 销毁");
	}
}
配置文件:life.xml
<?xml version="1.0" encoding="UTF-8"?>
<beans xmlns="http://www.springframework.org/schema/beans"
	xmlns:xsi="http://www.w3.org/2001/XMLSchema-instance"
	xsi:schemaLocation="http://www.springframework.org/schema/beans http://www.springframework.org/schema/beans/spring-beans.xsd">

	<bean id="person" class="com.moon.ioc.life.Person" init-method="init" destroy-method="destroy">
		<property name="id" value="1001"></property>
		<property name="sex" value="男"></property>
	</bean>

	<bean class="com.moon.ioc.life.AfterHandler"></bean>
</beans>
测试代码: Test.java
public class Test {
	public static void main(String[] args) {
		ClassPathXmlApplicationContext ac = new ClassPathXmlApplicationContext("life.xml");
		Person person = ac.getBean("person",Person.class);
		System.out.println(person);

		ac.close();
	}
}
bean的后置处理器
1.bean后置处理器允许在调用初始化方法前后对bean进行额外的处理
2.bean后置处理器对IOC容器里的所有bean实例逐一处理
3.bean后置处理器需要实现接口:org.springframework.beans.factory.config.BeanPostProcessor
Spring将每个bean实例分别传递给上述接口的两个方法
- postProcessBeforeInitialization(Object String)
- postProcessAfterInitialization(Object String)
后置处理器:AfterHandler.java
package com.moon.ioc.life;

import org.springframework.beans.BeansException;
import org.springframework.beans.factory.config.BeanPostProcessor;

/**
 * bean的后置处理器
 *
 * 1.需要在配置文件中配置该类
 * 2.=对所有的bean起作用
 * @author Administrator
 *
 */
public class AfterHandler implements BeanPostProcessor{

	@Override
	public Object postProcessBeforeInitialization(Object bean, String beanName) throws BeansException {
		// TODO Auto-generated method stub
		Person person = (Person)bean;
		if("男".equals(person.getSex())) {
			person.setName("关宏宇");
		}else{
			person.setName("周芷若");
		}
		return person;
	}

	@Override
	public Object postProcessAfterInitialization(Object bean, String beanName) throws BeansException {
		// TODO Auto-generated method stub
		return bean;
	}

}
配置文件life.xml中配置处理器:
<bean class="com.moon.ioc.life.AfterHandler"></bean>
bean配置文件引用外部资源
1.引用以下两个jar包:
druid-1.1.9.jar
mysql-connector-java-5.1.7-bin.jar
2.外部资源文件db.properties
jdbc.driver=com.mysql.jdbc.Driver
jdbc.url=jdbc:mysql://localhost:3306/test
jdbc.username=root
jdbc.password=root
3.配置文件datasource.xml设置
第一种方法:
${key}通过键的方式取值.
<bean class="org.springframework.beans.factory.config.PropertyPlaceholderConfigurer">
    <property name="location" value="db.properties"></property>
</bean>

<bean id="datasource" class="com.alibaba.druid.pool.DruidDataSource">
	<property name="driverClassName" value="${jdbc.driver}"></property>
	<property name="url" value="${jdbc.url}"></property>
	<property name="username" value="${jdbc.username}"></property>
	<property name="password" value="${jdbc.password}"></property>
</bean>
第二种方法:
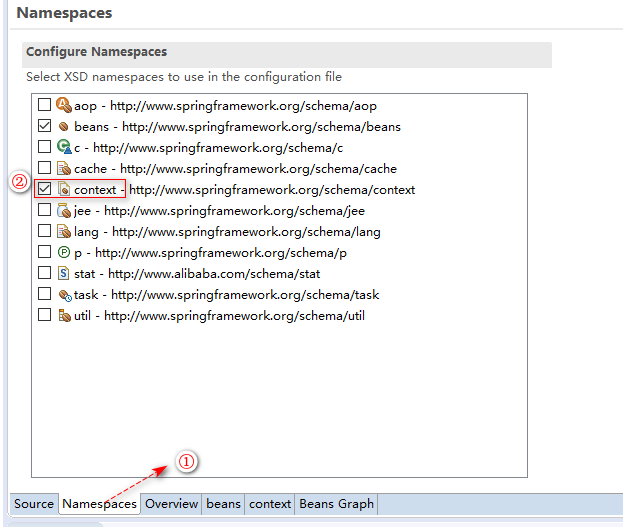
首先需要添加context命名空间:
配置文件设置:
<?xml version="1.0" encoding="UTF-8"?>
<beans xmlns="http://www.springframework.org/schema/beans"
	xmlns:xsi="http://www.w3.org/2001/XMLSchema-instance"
	xmlns:context="http://www.springframework.org/schema/context"
	xsi:schemaLocation="http://www.springframework.org/schema/beans http://www.springframework.org/schema/beans/spring-beans.xsd
		http://www.springframework.org/schema/context http://www.springframework.org/schema/context/spring-context-4.0.xsd">

	<!-- 加载资源文件 -->

	<!-- 第二种写法 -->
	<context:property-placeholder location="db.properties"/>

	<bean id="datasource" class="com.alibaba.druid.pool.DruidDataSource">
		<property name="driverClassName" value="${jdbc.driver}"></property>
		<property name="url" value="${jdbc.url}"></property>
		<property name="username" value="${jdbc.username}"></property>
		<property name="password" value="${jdbc.password}"></property>
	</bean>
</beans>
4.测试代码:Test.java
package com.moon.ioc.datasource;

import org.springframework.context.ApplicationContext;
import org.springframework.context.support.ClassPathXmlApplicationContext;

import com.alibaba.druid.pool.DruidDataSource;

/**
 * 引用外部资源文件
 * @author Administrator
 *
 */
public class Test {
	public static void main(String[] args) throws Exception {
		ApplicationContext ac = new ClassPathXmlApplicationContext("datasource.xml");

		DruidDataSource bean = ac.getBean("datasource",DruidDataSource.class);
		System.out.println(bean.getConnection());
	}
}

 浙公网安备 33010602011771号