
深入浅出的webpack构建工具--webpack4+vue搭建环境 (十三)
2018-09-24 12:07 龙恩0707 阅读(7889) 评论(0) 收藏 举报深入浅出的webpack构建工具--webpack4+vue搭建环境 (十三)
从上面一系列的webpack配置的学习,我们现在来使用webpack来搭建vue的开发环境。首先我们来设想下我们的项目的目录结构如下:
### 目录结构如下:
demo1                                       # 工程名
|   |--- dist                               # 打包后生成的目录文件
|   |--- node_modules                       # 所有的依赖包
|   |--- app
|   | |---index
|   | | |-- views                           # 存放所有vue页面文件
|   | | |-- components                      # 存放vue公用的组件
|   | | |-- app.js                          # vue入口配置文件
|   |--- views
|   | |-- index.html                        # html文件
|   |--- webpack.config.js                  # webpack配置文件
|   |--- .gitignore
|   |--- README.md
|   |--- package.json
|   |--- .babelrc                           # babel转码文件
因此需要依赖package.json文件配置如下:
{
  "name": "vue项目架构",
  "version": "1.0.0",
  "description": "",
  "main": "index.js",
  "scripts": {
    "dev": "webpack-dev-server --progress --colors --devtool cheap-module-eval-source-map --hot --inline",
    "build": "webpack --progress --colors --devtool cheap-module-source-map",
    "build:dll": "webpack --config webpack.dll.config.js"
  },
  "author": "tugenhua0707@qq.com",
  "sideEffects": false,
  "license": "ISC",
  "devDependencies": {
    "add-asset-html-webpack-plugin": "^2.1.3",
    "babel-core": "^6.26.3",
    "babel-loader": "^7.1.5",
    "babel-plugin-transform-runtime": "^6.23.0",
    "babel-preset-env": "^1.7.0",
    "babel-preset-stage-2": "^6.24.1",
    "clean-webpack-plugin": "^0.1.19",
    "css-loader": "^1.0.0",
    "cssnano": "^4.0.5",
    "extract-text-webpack-plugin": "^4.0.0-beta.0",
    "file-loader": "^1.1.11",
    "happypack": "^5.0.0",
    "html-webpack-plugin": "^3.2.0",
    "lodash-es": "^4.17.11",
    "mini-css-extract-plugin": "^0.4.2",
    "path": "^0.12.7",
    "postcss-cssnext": "^3.1.0",
    "postcss-loader": "^3.0.0",
    "postcss-pxtorem": "^4.0.1",
    "postcss-sprites": "^4.2.1",
    "style-loader": "^0.21.0",
    "stylus": "^0.54.5",
    "stylus-loader": "^3.0.2",
    "uglifyjs-webpack-plugin": "^1.2.7",
    "url-loader": "^1.0.1",
    "vue-loader": "^15.4.2",
    "vue-style-loader": "^4.1.2",
    "vue-template-compiler": "^2.5.17",
    "webpack": "^4.16.1",
    "webpack-cli": "^3.0.8",
    "webpack-deep-scope-plugin": "^1.6.0",
    "webpack-dev-server": "^3.1.4",
    "webpack-parallel-uglify-plugin": "^1.1.0"
  },
  "dependencies": {

  }
}
接着项目 views/index.html 代码初始化如下:
<!DOCTYPE html>
<html>
<head>
  <title>webpack4+vue项目架构</title>
  <meta charset="utf-8">
  <meta name="viewport" content="width=device-width,initial-scale=1.0,maximum-scale=1.0,user-scalable=0">
</head>
<body>
  <div id="app">
  </div>

</body>
</html>
.babelrc 转码文件代码如下:
{
  "plugins": [
     [
      "transform-runtime",
      {
        "polyfill": false
      }
     ]
   ],
   "presets": [
     [
       "env",
       {
         "modules": false   // 关闭Babel的模块转换功能,保留ES6模块化语法
       }
     ],
     "stage-2"
  ]
}
我们现在在 app/index/views 下新建一个test.vue 代码如下:
<style lang="stylus">

</style>

<template>
  <div class='app-container'>
    <div>
      <p v-if="datas.length > 0" v-for="(item, index) in datas">{{item}}</p>
    </div>
  </div>
</template>

<script type="text/javascript">
  export default {
    data() {
      return {
        datas: [1, 2, 3, 4]
      }
    }
  }
</script>
如上代码文件是vue文件,因此我们需要安装vue-loader等插件,安装命令如下:
npm i -D vue-loader css-loader vue-template-compiler vue-style-loader
vue框架运行需要的库,命令如下:
npm i --save vue
上面依赖的作用如下:
vue-loader: 解析和转换.vue文件,提取出其中的逻辑代码script,样式代码style及html模板template,再分别将他们交给对应的Loader去处理。
css-loader: 加载由vue-loader提取出的css代码。
vue-template-compiler: 将vue-loader 提取出的HTML模板编译成对应的可执行javascript代码。
然后我们编写下 app/index/app.js 的入口文件简单的代码如下:
import Vue from 'vue';

import Test from './views/test';

new Vue({
  el: '#app',
  render: h => h(Test)
});
接着 webpack.config.js 代码配置如下:
const path = require('path');

// 引入 mini-css-extract-plugin 插件
const MiniCssExtractPlugin = require('mini-css-extract-plugin');

// 清除dist目录下的文件
const ClearWebpackPlugin = require('clean-webpack-plugin');

const webpack = require('webpack');

// 引入打包html文件
const HtmlWebpackPlugin = require('html-webpack-plugin');

// 引入HappyPack插件
const HappyPack = require('happypack');

// 引入 ParallelUglifyPlugin 插件
const ParallelUglifyPlugin = require('webpack-parallel-uglify-plugin');

// 引入 webpack-deep-scope-plugin 优化
const WebpackDeepScopeAnalysisPlugin = require('webpack-deep-scope-plugin').default;

module.exports = {
  // 入口文件
  entry: {
    main: './app/index/app.js'
  },
  output: {
    filename: process.env.NODE_ENV === 'production' ? '[name].[contenthash].js' : 'bundle.js',
    // 将输出的文件都放在dist目录下
    path: path.resolve(__dirname, 'dist')
  },
  module: {
    rules: [
      {
        // 使用正则去匹配
        test: /\.styl$/,
        use: [
          MiniCssExtractPlugin.loader,
          {
            loader: 'css-loader',
            options: {}
          },
          {
            loader: 'postcss-loader',
            options: {
              ident: 'postcss',
              plugins: [
                require('postcss-cssnext')(),
                require('cssnano')(),
                require('postcss-pxtorem')({
                  rootValue: 16,
                  unitPrecision: 5,
                  propWhiteList: []
                }),
                require('postcss-sprites')()
              ]
            }
          },
          {
            loader: 'stylus-loader',
            options: {}
          }
        ]
      },
      {
        test: /\.css$/,
        use: [
          MiniCssExtractPlugin.loader,
          'happypack/loader?id=css-pack'
        ]
      },
      {
        test: /\.(png|jpg)$/,
        use: ['happypack/loader?id=image']
      },
      {
        test: /\.js$/,
        // 将对.js文件的处理转交给id为babel的HappyPack的实列
        use: ['happypack/loader?id=babel'],
        // loader: 'babel-loader',
        exclude: path.resolve(__dirname, 'node_modules') // 排除文件
      },
      {
        test: /\.vue$/,
        use: ['happypack/loader?id=vue-loader'],
        exclude: path.resolve(__dirname, 'node_modules') // 排除文件
      }
    ]
  },
  resolve: {
    extensions: ['*', '.js', '.json', '.vue']
  },
  devtool: 'cheap-module-eval-source-map',
  devServer: {
    port: 8081,
    host: '0.0.0.0',
    headers: {
      'X-foo': '112233'
    },
    inline: true,
    overlay: true,
    stats: 'errors-only'
  },
  mode: 'development', // 开发环境下
  // mode: 'production',
  plugins: [
    new HtmlWebpackPlugin({
      template: './views/index.html' // 模版文件
    }),
    new ClearWebpackPlugin(['dist']),

    new MiniCssExtractPlugin({
      filename: '[name].[contenthash:8].css'
    }),
    /****   使用HappyPack实例化    *****/
    new HappyPack({
      // 用唯一的标识符id来代表当前的HappyPack 处理一类特定的文件
      id: 'babel',
      // 如何处理.js文件,用法和Loader配置是一样的
      loaders: ['babel-loader']
    }),
    new HappyPack({
      // 用唯一的标识符id来代表当前的HappyPack 处理一类特定的文件
      id: 'vue-loader',
      // 如何处理.js文件,用法和Loader配置是一样的
      loaders: ['vue-loader']
    }),
    new HappyPack({
      id: 'image',
      loaders: [{
        loader: require.resolve('url-loader'),
        options: {
          limit: 10000,
          name: '[name].[ext]'
        }
      }]
    }),
    // 处理styl文件
    new HappyPack({
      id: 'css-pack',
      loaders: ['css-loader']
    }),
    // 使用 ParallelUglifyPlugin 并行压缩输出JS代码
    new ParallelUglifyPlugin({
      // 传递给 UglifyJS的参数如下:
      uglifyJS: {
        output: {
          /*
           是否输出可读性较强的代码,即会保留空格和制表符,默认为输出,为了达到更好的压缩效果,
           可以设置为false
          */
          beautify: false,
          /*
           是否保留代码中的注释,默认为保留,为了达到更好的压缩效果,可以设置为false
          */
          comments: false
        },
        compress: {
          /*
           是否在UglifyJS删除没有用到的代码时输出警告信息,默认为输出,可以设置为false关闭这些作用
           不大的警告
          */
          warnings: false,

          /*
           是否删除代码中所有的console语句,默认为不删除,开启后,会删除所有的console语句
          */
          drop_console: true,

          /*
           是否内嵌虽然已经定义了,但是只用到一次的变量,比如将 var x = 1; y = x, 转换成 y = 5, 默认为不
           转换,为了达到更好的压缩效果,可以设置为false
          */
          collapse_vars: true,

          /*
           是否提取出现了多次但是没有定义成变量去引用的静态值,比如将 x = 'xxx'; y = 'xxx'  转换成
           var a = 'xxxx'; x = a; y = a; 默认为不转换,为了达到更好的压缩效果,可以设置为false
          */
          reduce_vars: true
        }
      }
    }),
    new WebpackDeepScopeAnalysisPlugin()
  ]
};
然后我们运行 npm run dev 后,打包报错了:如下:
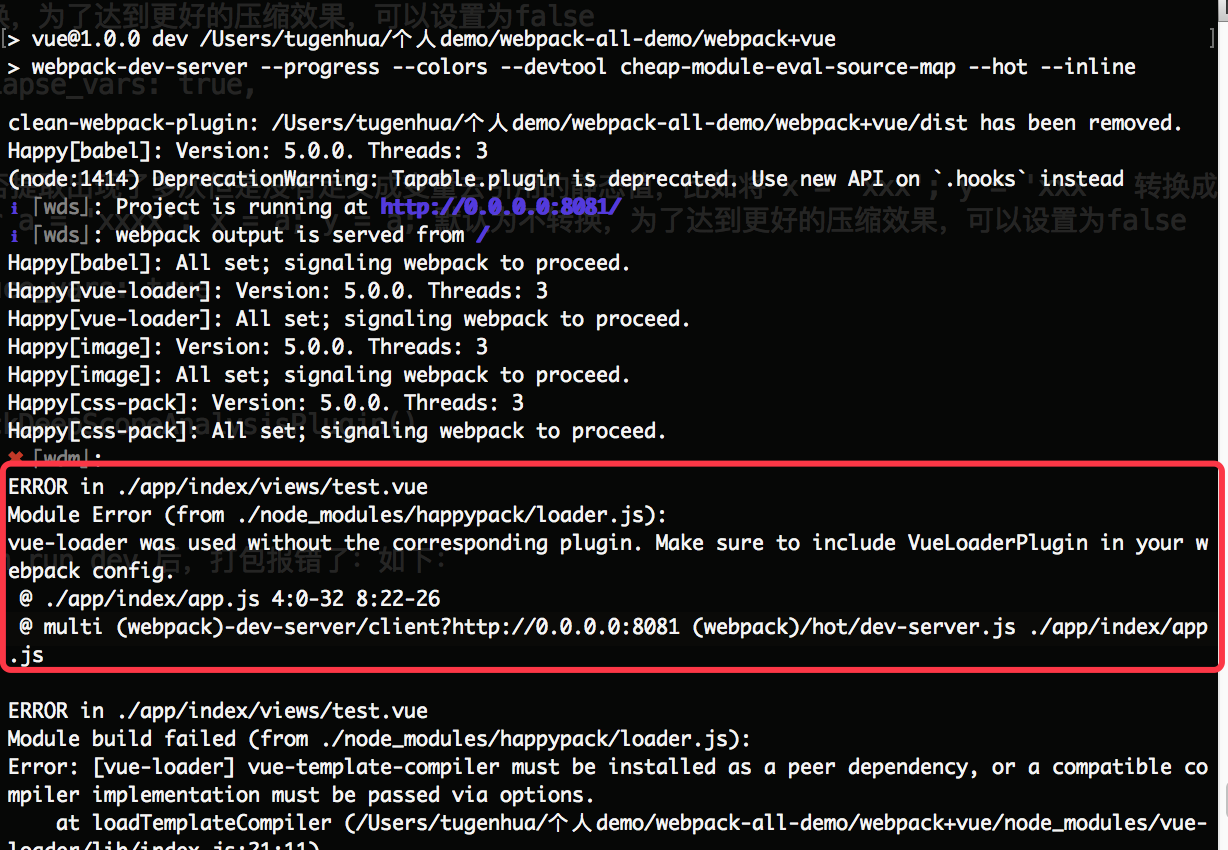
vue-loader was used without the corresponding plugin. Make sure to include VueLoaderPlugin in your webpack config.
通过百度搜索后,网上都说需要引入 VueLoaderPlugin 的webpack组件,webpack如下引入方式:
const VueLoaderPlugin = require('vue-loader/lib/plugin');
module.exports = {
  plugins: [
    new VueLoaderPlugin()
  ]
}
引入后,再运行还会报错,如下信息:
Error: [VueLoaderPlugin Error] No matching use for vue-loader is found.
Make sure the rule matching .vue files include vue-loader in its use.
我这边是使用的是"vue-loader": "^15.4.2", 我刚开始以为是 vue-loader 版本的问题了,然后当我修改版本到14版本后,还是会报错,然后在github上搜索这个答案,发现老外也提了这样的问题,说是不是版本的问题,最后尤雨溪回答,这和vue-loader版本没有关系,最后我搜索到 vue-loader 15.1, 它不支持happypack这个插件优化,可以看github(https://github.com/vuejs/vue-loader/issues/1339)上的提示,有了这个提示,我直接把webpack中和vue相关的 happypack的优化去掉,然后打包既然就可以了。
因此webpack中的vue配置就变成如下:
module.exports = {
  module: {
    rules: [
      {
        test: /\.vue$/,
        use: ['vue-loader']
      }
    ]
  }
}
一切准备就绪后,我们现在运行 npm run dev 后,会运行如下所示:
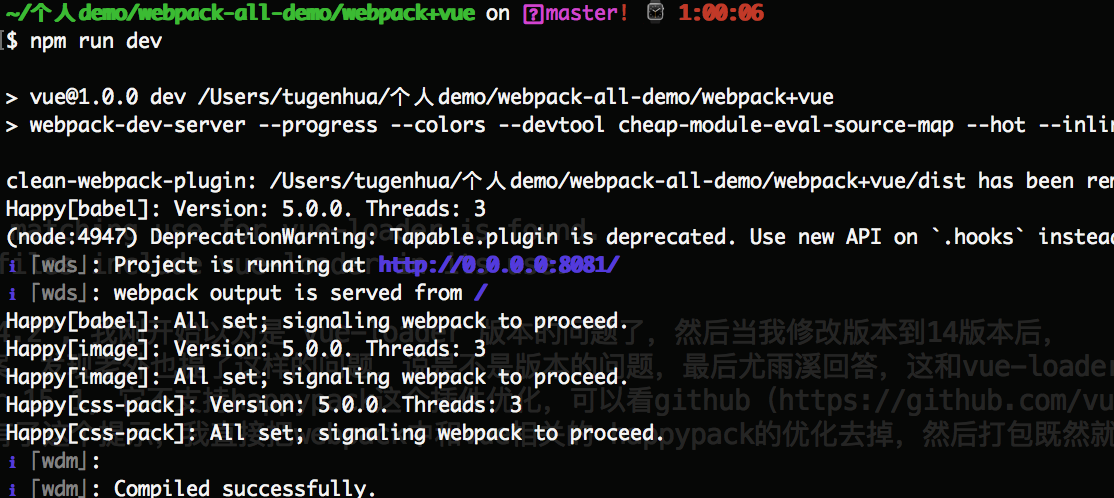
然后我们就可以在浏览器下 运行 http://0.0.0.0:8081/ 就可以看到vue页面了,当我们继续修改 test.vue的时候, 保存后更新。
理想是美好的,现实是残酷的,但是当我一切认为可以的时候,然后我们把对应的<style lang="stylus">样式加上,如下代码:
<style lang="stylus" >
  .app-container
    width 200px
</style>
<template>
  <div class='app-container'>
    <div>
      <p v-if="datas.length > 0" v-for="(item, index) in datas">{{item}}</p>
    </div>
  </div>
</template>

<script type="text/javascript">
  export default {
    data() {
      return {
        datas: [5, 2, 3, 4]
      }
    }
  }
</script>
继续打包,就报这样的错误了;如下:
Module parse failed: Unexpected token (2:0)
You may need an appropriate loader to handle this file type.
|
> .app-container
|   width 200px
最后github搜索,发现 webpack4 不兼容vue-loader 15.x.x版本,github点击查看(https://github.com/airyland/vux/issues/3060)或者可以看这个(https://segmentfault.com/a/1190000014586699)
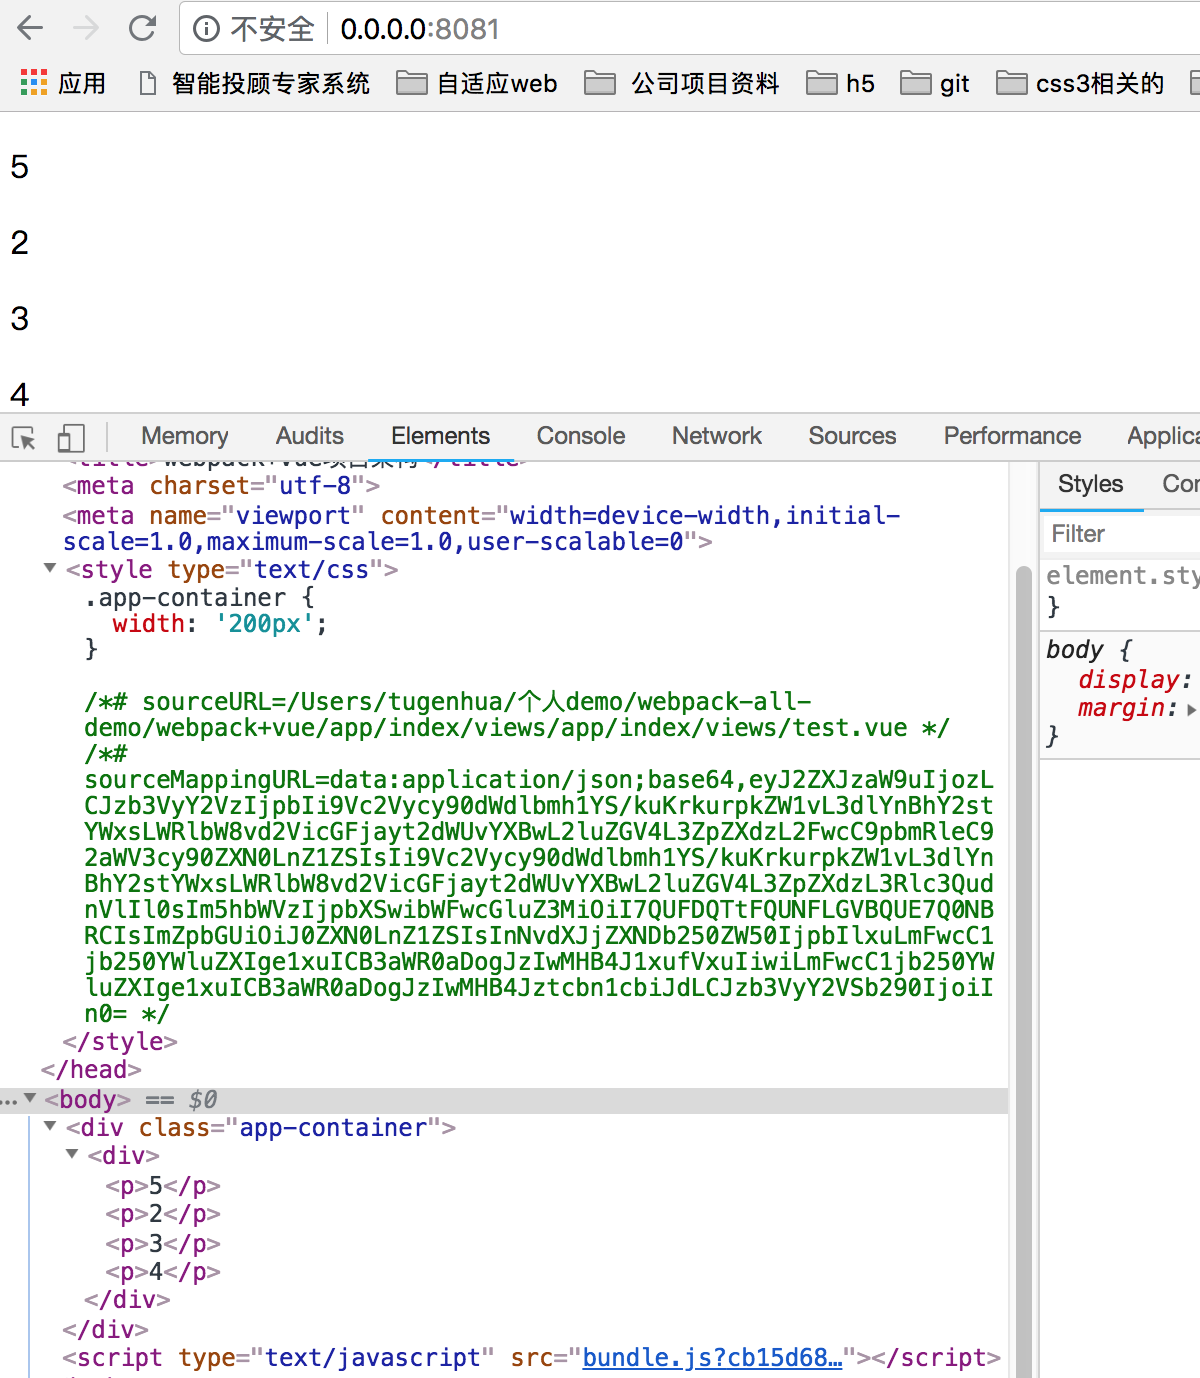
然后我把vue-loader 改成 "vue-loader": "^14.2.2",然后继续打包, 就没有问题了。
如下运行结果:
二:webpack4上如何提取css文件到单独的文件
webpack4以上貌似不能使用mini-css-extract-plugin提取css文件,比如我在代码里面这样写:
new MiniCssExtractPlugin({
  filename: process.env.NODE_ENV === 'production' ? 'css/[name].[contenthash:8].css' : '[name].css',
  chunkFilename: process.env.NODE_ENV === 'production' ? 'css/[id].[contenthash:8].css' : '[id].css'
}),
但是貌似提取不了,看到说webpack4还是可以用extract-text-webpack-plugin 只不过安装的时候插件名加个@next,于是就改用
extract-text-webpack-plugin来提取这个插件就可以打包在一个css文件内.
因此我们现在安装命令如下:
npm i extract-text-webpack-plugin@next -D
然后在webpack.config.js 这样配置代码即可:
// webpack.config.js
var ExtractTextPlugin = require("extract-text-webpack-plugin")

module.exports = {
  // other options...
  module: {
    rules: [
      {
        test: /\.vue$/,
        loader: 'vue-loader',
        options: {
          extractCSS: true
        }
      }
    ]
  },
  plugins: [
    new ExtractTextPlugin("style.css")
  ]
}
运行结构如下所示;可以看到css文件被提取出来了。

具体可以看官方文档(https://vue-loader-v14.vuejs.org/zh-cn/configurations/extract-css.html)
下面是github上的源码:
基于webpack4+vue 单页面(https://github.com/tugenhua0707/webpack-all-demo/tree/master/webpack%2Bvue)

 浙公网安备 33010602011771号