没有使用Spring Boot开发时,需要安装tomcat环境,项目打成war包后进行部署。
而Spring Boot默认使用tomcat作为嵌入式的Servlet容器。
如何定制和修改 Servlet 容器的相关配置
     在内置的 Tomcat 中,不再有 web.xml 文件可以供我们修改,在 SpringBoot 中修改 Servlet 容器相关的配置有两种方式可供选择:
   (1) 在application.roperties或者application.yml/yaml配置文件中修改,代码如下:
spring.mvc.date-format=yyyy-MM-dd
spring.thymeleaf.cache=false
spring.messages.basename=i18n.login
server.port=8081
server.context-path=/
server.tomcat.uri-encoding=UTF-8
(2) 编写一个 WebServerFactoryCustomizer:嵌入式的 Servlet 容器定制器,来修改 Servlet 容器   的配置。
新建 MyMvcConfig 类,代码如下:

@Configuration
public class MyMvcConfig {
    @Bean
    public WebServerFactoryCustomizer<ConfigurableWebServerFactory> webServerFactoryCustomizer(){
        return new WebServerFactoryCustomizer<ConfigurableWebServerFactory>() {
            @Override
            public void customize(ConfigurableWebServerFactory factory) {
                factory.setPort(8081);
            }
        };
    }
}
注册Servlet三大组件【Servlet、Filter、Listener】
Spring Boot对整合这些基本的Web组件(Servlet、Filter、Listener)也提供了很好的支持。
由于Spring Boot默认是以jar包的方式启动嵌入式的Servlet容器来启动SpringBoot的web应用,没有web.xml文件。所以用如下方式在Spring Boot项目中添加三个组件:
@WebServlet("/servlet")
public class MyServlet extends HttpServlet {
    @Override
    protected void doGet(HttpServletRequest req, HttpServletResponse resp) throws ServletException, IOException {
        doPost(req, resp);
    }
    @Override
    protected void doPost(HttpServletRequest req, HttpServletResponse resp) throws ServletException, IOException {
        resp.getWriter().write("Hello MyServlet");
        System.out.println("name:"+req.getParameter("name"));
    }
}
@WebFilter("/")
public class MyFilter implements Filter {
    @Override
    public void init(FilterConfig filterConfig) throws ServletException {
        System.out.println("MyFilter--init");
    }
    @Override
    public void doFilter(ServletRequest servletRequest, ServletResponse servletResponse, FilterChain filterChain) throws IOException, ServletException {
        System.out.println("myFilter--doFilter");
        filterChain.doFilter(servletRequest, servletResponse);
    }
    @Override
    public void destroy() {
        System.out.println("MyFilter--destroy");
    }
}
@WebListener
public class MyListener implements ServletContextListener {
    @Override
    public void contextInitialized(ServletContextEvent servletContextEvent) {
        System.out.println("web项目启动了。。。");
    }
    @Override
    public void contextDestroyed(ServletContextEvent servletContextEvent) {
        System.out.println("web项目销毁了。。。");
    }
}
当然想要使用三大组件的注解,就必须先在SpringBoot主配置类(即标注了@SpringBootApplication注解的类)上添加@ServletComponentScan注解,以实现对Servlet、Filter及Listener的扫描,代码如下:
@ServletComponentScan
@SpringBootApplication
public class HelloworldApplication {
    public static void main(String[] args) {
        SpringApplication.run(HelloworldApplication.class, args);
    }
}
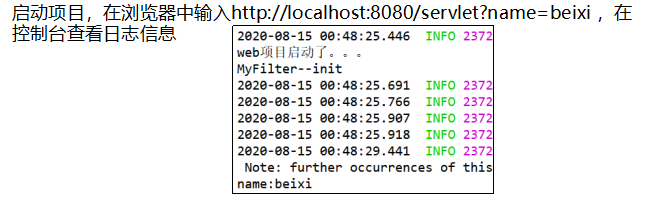
![]()
替换为其他嵌入式 Servlet 容器
 Spring Boot 默认使用的是 Tomcat,当然也是可以切换成其他的容器,而且切换的方式 也很简单,只需要引入其他容器的依赖,将当前容器的依赖排除即可。
jetty :在 pom.xml 文件中导入相关依赖:

<dependency>
    <groupId>org.springframework.boot</groupId>
    <artifactId>spring-boot-starter-web</artifactId>
    <exclusions><!-- 移除Tomcat -->
        <exclusion>
            <artifactId>spring-boot-starter-tomcat</artifactId>
            <groupId>org.springframework.boot</groupId>
        </exclusion>
    </exclusions>
</dependency>
<!-- 引入其他的Servlet容器 -->
<dependency>
    <groupId>org.springframework.boot</groupId>
    <artifactId>spring-boot-starter-jetty</artifactId>
</dependency>
undertow(不支持 JSP,但是是一个高性能的非阻塞的 Servlet 容器,并发性能好)。 引入 undertow 的方式同 jetty 一样,依赖如下:
<dependency>
    <groupId>org.springframework.boot</groupId>
    <artifactId>spring-boot-starter-web</artifactId>
    <exclusions>
        <exclusion>
            <artifactId>spring-boot-starter-tomcat</artifactId>
            <groupId>org.springframework.boot</groupId>
        </exclusion>
    </exclusions>
</dependency>
<!-- 引入其他的Servlet容器 -->
<dependency>
    <groupId>org.springframework.boot</groupId>
    <artifactId>spring-boot-starter-undertow</artifactId>
</dependency>