

go学习笔记——基本语法
1.*和&的区别
& 是取地址符号 , 即取得某个变量的地址 , 如 &a
* 是指针运算符 , 可以表示一个变量是指针类型 , 也可以表示一个指针变量所指向的存储单元 , 也就是这个地址所存储的值
参考:Go中*和&区别
println打印对象只能打印出其指针,需要使用fmt.Printf,如下
fmt.Printf("%+v\n", user)
2.defer
defer是Go语言提供的一种用于注册延迟调用的机制:让函数或语句可以在当前函数执行完毕后(包括通过return正常结束或者panic导致的异常结束)执行。
defer语句通常用于一些成对操作的场景:打开连接/关闭连接;加锁/释放锁;打开文件/关闭文件等。
defer在一些需要回收资源的场景非常有用,可以很方便地在函数结束前做一些清理操作。在打开资源语句的下一行,直接一句defer就可以在函数返回前关闭资源,可谓相当优雅。
f, _ := os.Open("defer.txt")
defer f.Close()
3.日志库
1.sirupsen/logrus
go get -u github.com/sirupsen/logrus
文档
https://pkg.go.dev/github.com/sirupsen/logrus#section-readme
使用
package main

import (
  "os"
  "github.com/sirupsen/logrus"
)

// Create a new instance of the logger. You can have any number of instances.
var log = logrus.New()

func main() {
  // The API for setting attributes is a little different than the package level
  // exported logger. See Godoc.
  log.Out = os.Stdout

  // You could set this to any `io.Writer` such as a file
  // file, err := os.OpenFile("logrus.log", os.O_CREATE|os.O_WRONLY|os.O_APPEND, 0666)
  // if err == nil {
  //  log.Out = file
  // } else {
  //  log.Info("Failed to log to file, using default stderr")
  // }

  log.WithFields(logrus.Fields{
    "animal": "walrus",
    "size":   10,
  }).Info("A group of walrus emerges from the ocean")
}
2.rs/zerolog
go get -u github.com/rs/zerolog/log
使用
log.Logger = log.With().Caller().Logger()
log.Info().Msg("hello world")

// Output: {"level": "info", "message": "hello world", "caller": "/go/src/your_project/some_file:21"}
3.uber/zap
go get -u go.uber.org/zap
文档
https://pkg.go.dev/go.uber.org/zap
zap提供了2种logger,分别是Logger和SugaredLogger
在性能要求高但是不是很重要的场景下,适合使用SugaredLogger
logger, _ := zap.NewProduction()
defer logger.Sync() // flushes buffer, if any
sugar := logger.Sugar()
sugar.Infow("failed to fetch URL",
  // Structured context as loosely typed key-value pairs.
  "url", url,
  "attempt", 3,
  "backoff", time.Second,
)
sugar.Infof("Failed to fetch URL: %s", url)
输出
{"level":"info","ts":1703922949.209576,"caller":"server/main.go:109","msg":"failed to fetch URL","url":"http://example.com","attempt":3,"backoff":1}
{"level":"info","ts":1703922949.209731,"caller":"server/main.go:115","msg":"Failed to fetch URL: http://example.com"}
在性能要求高且需要类型安全的场景下,适合使用Logger
logger, _ := zap.NewProduction()
defer logger.Sync()
url := "http://example.com"
logger.Info("failed to fetch URL",
	// Structured context as strongly typed Field values.
	zap.String("url", url),
	zap.Int("attempt", 3),
	zap.Duration("backoff", time.Second),
)
输出
{"level":"info","ts":1703923022.603034,"caller":"server/main.go:108","msg":"failed to fetch URL","url":"http://example.com","attempt":3,"backoff":1}
NewExample/NewDevelopment/NewProduction区别
NewExample适用于测试代码,它将DebugLevel及以上级别的日志以JSON格式标准输出,但省略了时间戳和调用函数,以保持示例输出简短和确定。
NewDevelopment适用于开发环境,它以人类友好的格式将DebugLevel及以上级别的日志写入标准错误。
NewProduction适用于生产环境,它将info level及以上级别的日志以JSON格式写入标准错误。
其他参考文档:Go 每日一库之 zap
golang常用库包:log日志记录-uber的Go日志库zap使用详解
4.kratos logrus
参考:go各框架的log日志
5.日志文件回滚
日志文件按时间回滚:natefinch/lumberjack
go get gopkg.in/natefinch/lumberjack.v2
4.strconv包
int转string
s := strconv.Itoa(i)
int64转string
s := strconv.FormatInt(i, 10)
string转int
i, err := strconv.Atoi(s)
string转int64
i, err := strconv.ParseInt(s, 10, 64)
float转string
v := 3.1415926535
s1 := strconv.FormatFloat(v, 'E', -1, 32)//float32
s2 := strconv.FormatFloat(v, 'E', -1, 64)//float64
string转float
s := "3.1415926535"
v1, err := strconv.ParseFloat(v, 32)
v2, err := strconv.ParseFloat(v, 64)
参考:Go语言从入门到精通 - 【精华篇】strconv包详解
5.属性复制
可以使用 jinzhu/copier
使用jinzhu/copier
go get github.com/jinzhu/copier
copy
copier.Copy(&employee, &user)
deepcopy,区别是deepcopy的时候,对dst的属性进行修改,是肯定不会影响src的
var dst User
copier.CopyWithOption(&dst, src, copier.Option{DeepCopy: true})
如果想在复制的时候,对属性进行修改,可以使用方法赋值,注意需要使用copier.Copy,如下
type User struct {
  Name string
  Age  int
}

func (u *User) DoubleAge() int {
  return 2 * u.Age
}

type Employee struct {
  Name      string
  DoubleAge int
  Role      string
}

func main() {
  user := User{Name: "dj", Age: 18}
  employee := Employee{}

  copier.Copy(&employee, &user)
  fmt.Printf("%#v\n", employee)
}
其他类似的库还有ulule/deepcoper,参考:golang struct拷贝工具(类似于java中 BeanUtils.copyProperties())
以及
https://github.com/jinzhu/copier
https://github.com/mohae/deepcopy
https://github.com/ulule/deepcopier
https://github.com/mitchellh/copystructure
https://github.com/globusdigital/deep-copy
https://github.com/getlantern/deepcopy
https://github.com/antlabs/deepcopy
https://github.com/go-toolsmith/astcopy
https://github.com/qdm12/reprint
https://github.com/huandu/go-clone
https://github.com/wzshiming/deepclone
https://github.com/davidwalter0/go-clone
6.其他数据结构
golang没有set,priorityqueue这些数据结构,可以使用emirpasic/gods
参考:https://github.com/emirpasic/gods
7.切片处理
可以使用samber/lo来对切片、数组或集合进行处理
go get github.com/samber/lo@v1
比如filter操作
even := lo.Filter([]int{1, 2, 3, 4}, func(x int, index int) bool {
    return x%2 == 0
})
// []int{2, 4}
map操作
import "github.com/samber/lo"

lo.Map([]int64{1, 2, 3, 4}, func(x int64, index int) string {
    return strconv.FormatInt(x, 10)
})
// []string{"1", "2", "3", "4"}
去重操作
uniqValues := lo.Uniq([]int{1, 2, 2, 1})
// []int{1, 2}
获得map的key,并转换成数组
不使用lo
m := map[string]int{
	"foo": 1,
	"bar": 2,
}
keys := make([]string, 0, len(m))
for key := range m {
	keys = append(keys, key)
}
使用lo
m := map[string]int{
	"foo": 1,
	"bar": 2,
}
keys := lo.Keys[string, int](m)
fmt.Println(keys)

// [foo bar]
range操作
result := lo.Range(4)
// [0, 1, 2, 3]

result := lo.Range(-4)
// [0, -1, -2, -3]

result := lo.RangeFrom(1, 5)
// [1, 2, 3, 4, 5]

result := lo.RangeFrom[float64](1.0, 5)
// [1.0, 2.0, 3.0, 4.0, 5.0]

result := lo.RangeWithSteps(0, 20, 5)
// [0, 5, 10, 15]

result := lo.RangeWithSteps[float32](-1.0, -4.0, -1.0)
// [-1.0, -2.0, -3.0]

result := lo.RangeWithSteps(1, 4, -1)
// []

result := lo.Range(0)
// []
8.时间处理
可以使用time或者carbon
1.time
字符串转time.Time
import (
	"fmt"
	"time"
)

func main() {
	timeStr := "2023-07-21 14:30:00"
	// DateTime   = "2006-01-02 15:04:05"
	// DateOnly   = "2006-01-02"
	// TimeOnly   = "15:04:05"
	// RFC3339     = "2006-01-02T15:04:05Z07:00"

	parsedTime, err := time.Parse(time.DateTime, timeStr)
	if err != nil {
		fmt.Println("解析时间字符串时出错:", err)
		return
	}

	fmt.Println("解析后的时间:", parsedTime)
}
time.Time转字符串
import (
	"fmt"
	"time"
)

func main() {
	// 获取当前时间
	currentTime := time.Now()
	// DateTime   = "2006-01-02 15:04:05"
	// DateOnly   = "2006-01-02"
	// TimeOnly   = "15:04:05"
	// RFC3339     = "2006-01-02T15:04:05Z07:00"
	timeStr := currentTime.Format(time.DateOnly)
	// 输出格式化后的时间字符串
	fmt.Println("格式化后的时间字符串:", timeStr)
}
2.carbon
go get -u github.com/golang-module/carbon/v2
文档
https://pkg.go.dev/github.com/golang-module/carbon/v2
9.断言
可以使用stretchr/testify
go get -u github.com/stretchr/testify
使用assert
import (
  "testing"
  "github.com/stretchr/testify/assert"
)

func TestSomething(t *testing.T) {

  // assert equality
  assert.Equal(t, 123, 123, "they should be equal")

  // assert inequality
  assert.NotEqual(t, 123, 456, "they should not be equal")

  // assert for nil (good for errors)
  assert.Nil(t, object)

  // assert for not nil (good when you expect something)
  if assert.NotNil(t, object) {

    // now we know that object isn't nil, we are safe to make
    // further assertions without causing any errors
    assert.Equal(t, "Something", object.Value)

  }

}
10.resty
在go中请求接口可以使用go-resty/resty框架
go get github.com/go-resty/resty/v2
get请求
// Create a Resty Client
client := resty.New()

resp, err := client.R().
      SetQueryParams(map[string]string{
          "page_no": "1",
          "limit": "20",
          "sort":"name",
          "order": "asc",
          "random":strconv.FormatInt(time.Now().Unix(), 10),
      }).
      SetHeader("Accept", "application/json").
      SetResult(&Result{}).
      SetAuthToken("BC594900518B4F7EAC75BD37F019E08FBC594900518B4F7EAC75BD37F019E08F").
      Get("/search_result")
post请求
// Create a Resty Client
client := resty.New()

// POST JSON string
// No need to set content type, if you have client level setting
resp, err := client.R().
      SetHeader("Content-Type", "application/json").
      SetBody(`{"username":"testuser", "password":"testpass"}`).
      SetResult(&AuthSuccess{}).    // or SetResult(AuthSuccess{}).
      Post("https://myapp.com/login")
11.单元测试
使用testing框架进行单元测试
package dao

import (
	"fmt"
	"gin-template/internal/database"
	"gin-template/internal/model"
	"testing"
)

func Test_userDo_Create(t *testing.T) {
	user := model.User{
		Username: "test",
		Email:    "test@test",
	}
	SetDefault(database.DB)

	err := User.Create(&user)
	if err != nil {
		fmt.Println("creat user")
	}
}
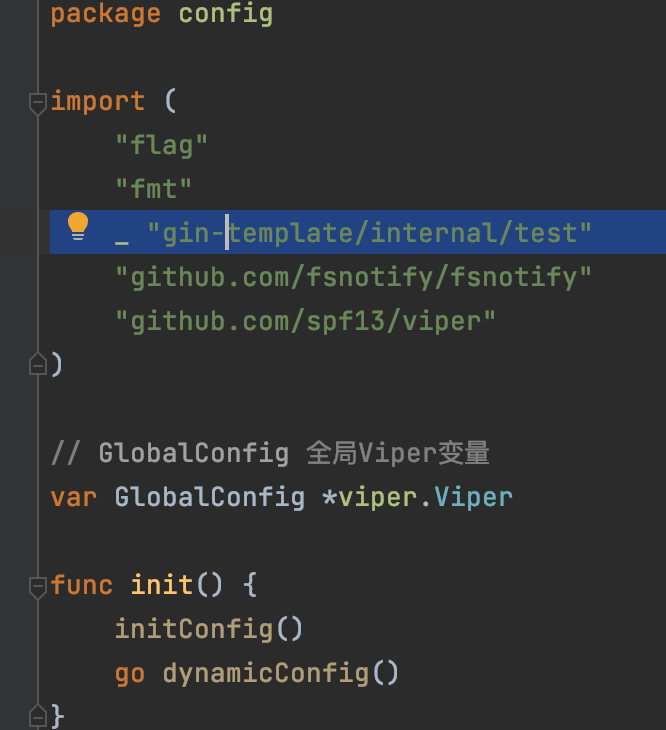
如果遇到go testing flag provided but not defined: -test.v的报错,解决方法是添加一个init.go文件
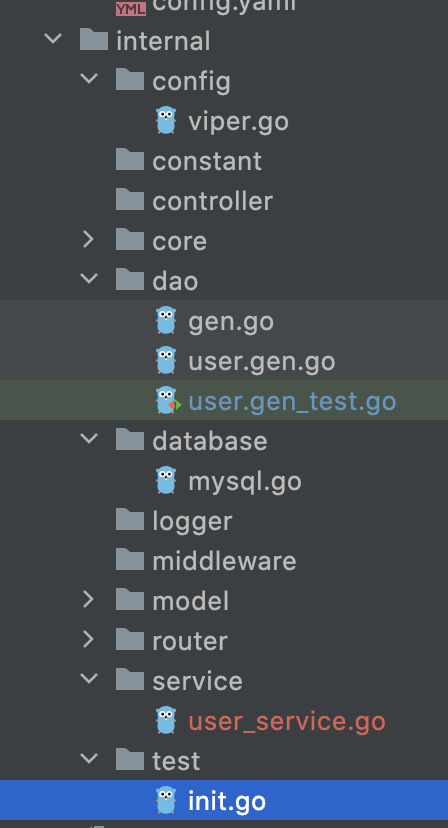
package test

import "testing"

func init() {
	testing.Init()
}
然后在使用了flag的地方添加的import中
_ "gin-template/internal/test"
参考:问题记录:flag provided but not defined: -test.v 异常处理过程
12.打桩工具——go monkey
go monkey可以用于在单元测试中进行打桩(指补齐未实现的代码)
本文只发表于博客园和tonglin0325的博客,作者:tonglin0325,转载请注明原文链接:https://www.cnblogs.com/tonglin0325/p/5290869.html

 浙公网安备 33010602011771号