
Spring注解驱动开发--属性值的自动装配
前言
Spring的自动装配指的是Spring利用依赖注入(DI),完成对IOC容器中各个组件的依赖关系赋值。很基础的东西,希望对大家能有帮助。
自动装配自定义组件
1.使用@Autowried自动注入
1)、默认优先按照类型去容器中找对应的组件:applicationContext.getBean(BookDao.class);找到就赋值
2)、如果找到多个相同类型的组件,再将属性的名称作为组件的id去容器中查找
applicationContext.getBean("bookDao")
3)、@Qualifier("bookDao"):使用@Qualifier指定需要装配的组件的id,而不是使用属性名
4)、自动装配默认一定要将属性赋值好,没有就会报错;可以使用@Autowired(required=false);
5)、@Primary:让Spring进行自动装配的时候,默认使用首选的bean;也可以继续使用@Qualifier指定需要装配的bean的名字
6)、 @Autowired:构造器,参数,方法,属性;都是从容器中获取参数组件的值
①[标注在方法位置]:@Bean+方法参数;参数从容器中获取;默认不写@Autowired效果是一样的;都能自动装配
②[标在构造器上]:如果组件只有一个有参构造器,这个有参构造器的@Autowired可以省略,参数位置的组件还是可以自动从容器中获取
③放在参数位置:
@Target({ElementType.CONSTRUCTOR, ElementType.METHOD, ElementType.PARAMETER, ElementType.FIELD, ElementType.ANNOTATION_TYPE})
@Retention(RetentionPolicy.RUNTIME)
@Documented
public @interface Autowired {

    /**
     * Declares whether the annotated dependency is required.
     * <p>Defaults to {@code true}.
     */
    boolean required() default true;

}
2.Spring还支持使用@Resource(JSR250)和@Inject(JSR330)[java规范的注解]
@Resource:
可以和@Autowired一样实现自动装配功能;默认是按照组件名称进行装配的;
没有能支持@Primary功能没有支持@Autowired(reqiured=false);
@Inject:
需要导入javax.inject的包,和Autowired的功能一样。没有required=false的功能;
@Autowired:Spring定义的; @Resource、@Inject都是java规范
自定义bean
public class BookService {

    //@Qualifier("bookDao")
    //@Autowired(required=false)
    //@Resource(name="bookDao2")
    @Inject
    private BookDao bookDao;

    public void print(){
        System.out.println(bookDao);
    }

    @Override
    public String toString() {
        return "BookService [bookDao=" + bookDao + "]";
    }


}


@Repository
public class BookDao {

    private String lable = "1";

    public String getLable() {
        return lable;
    }

    public void setLable(String lable) {
        this.lable = lable;
    }

    @Override
    public String toString() {
        return "BookDao [lable=" + lable + "]";
    }
}


@Controller
public class BookController {

    @Autowired
    private BookService bookService;

}
@Repository
public class BookDao {

    private String lable = "1";

    public String getLable() {
        return lable;
    }

    public void setLable(String lable) {
        this.lable = lable;
    }

    @Override
    public String toString() {
        return "BookDao [lable=" + lable + "]";
    }


}
配置中心
@Configuration
@ComponentScan({"com.atguigu.service","com.atguigu.dao",
    "com.atguigu.controller","com.atguigu.bean"})
public class MainConifgOfAutowired {

    @Primary
    @Bean("bookDao2")
    public BookDao bookDao(){
        BookDao bookDao = new BookDao();
        bookDao.setLable("2");
        return bookDao;
    }

    /**
     * @Bean标注的方法创建对象的时候,方法参数的值从容器中获取
     * @param car
     * @return
     */
    @Bean
    public Color color(Car car){
        Color color = new Color();
        color.setCar(car);
        return color;
    }


}
测试类
public class IOCTestAutowired {

    @Test
    public void test01(){
        AnnotationConfigApplicationContext applicationContext = new AnnotationConfigApplicationContext(MainConifgOfAutowired.class);

        BookService bookService = applicationContext.getBean(BookService.class);
        System.out.println(bookService);

        //BookDao bean = applicationContext.getBean(BookDao.class);
        //System.out.println(bean);

        Boss boss = applicationContext.getBean(Boss.class);
        System.out.println(boss);
        Car car = applicationContext.getBean(Car.class);
        System.out.println(car);

        Color color = applicationContext.getBean(Color.class);
        System.out.println(color);
        System.out.println(applicationContext);
        applicationContext.close();
    }

}
自动装配Spring底层组件
上面讲解了如何注入自定义组件,在开发中,自定义组件中有时需要注入Spring底层组件:可以使用以上方式注入spring底层组件,下面我们看看另一种方式
自定义组件实现xxxAware(ApplicationContext,BeanFactory,xxx)接口在创建对象的时候,会调用接口规定的方法注入相关组件,把Spring底层一些组件注入到自定义的Bean中。
每一个xxxAware:都有对应的xxxProcessor后置处理器来完成属性的注入
ApplicationContextAware==》ApplicationContextAwareProcessor;
@Component
public class Red implements ApplicationContextAware,BeanNameAware,EmbeddedValueResolverAware {

    private ApplicationContext applicationContext;

    @Override
    public void setApplicationContext(ApplicationContext applicationContext) throws BeansException {
        // TODO Auto-generated method stub
        System.out.println("传入的ioc:"+applicationContext);
        this.applicationContext = applicationContext;
    }

    @Override
    public void setBeanName(String name) {
        // TODO Auto-generated method stub
        System.out.println("当前bean的名字:"+name);
    }

    @Override
    public void setEmbeddedValueResolver(StringValueResolver resolver) {
        // spring中string的表达式的解析都是通过StringValueResolver 来完成的
        String resolveStringValue = resolver.resolveStringValue("你好 ${os.name} 我是 #{20*18}");
        System.out.println("解析的字符串:"+resolveStringValue);
    }


}
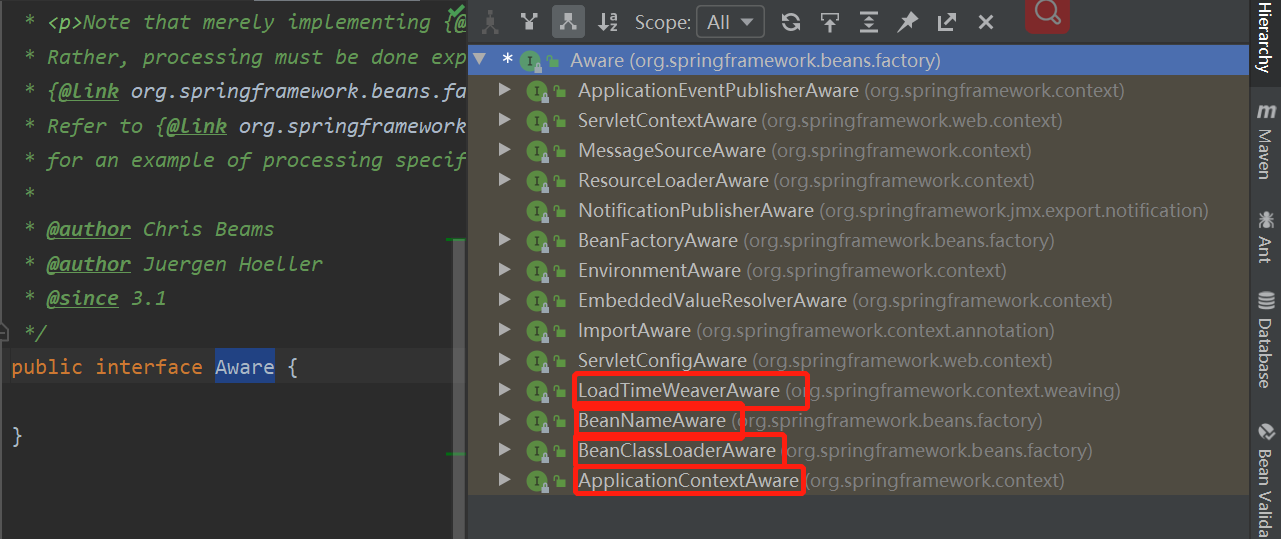
Aware的实现接口
Profile注解
Spring为我们提供的可以根据当前环境,动态的激活和切换一系列组件的功能
比如不同的环境中连接的数据源不同
开发环境、测试环境、生产环境根据配置获取自己的数据源
@Profile:指定组件在哪个环境的情况下才能被注册到容器中,不指定,任何环境下都能注册这个组件
1)、加了环境标识的bean,只有这个环境被激活的时候才能注册到容器中。默认是default环境
2)、写在配置类上,只有是指定的环境的时候,整个配置类里面的所有配置才能开始生效
3)、没有标注环境标识的bean在,任何环境下都是加载的;
dbconfig.properties文件
db.user=root
db.password=123456
db.driverClass=com.mysql.jdbc.Driver
配置文件
@PropertySource("classpath:/dbconfig.properties")
@Configuration
public class MainConfigOfProfile implements EmbeddedValueResolverAware{

    @Value("${db.user}")
    private String user;

    private StringValueResolver valueResolver;

    private String  driverClass;


    @Bean
    public Yellow yellow(){
        return new Yellow();
    }

    @Profile("test")
    @Bean("testDataSource")
    public DataSource dataSourceTest(@Value("${db.password}")String pwd) throws Exception{
        ComboPooledDataSource dataSource = new ComboPooledDataSource();
        dataSource.setUser(user);
        dataSource.setPassword(pwd);
        dataSource.setJdbcUrl("jdbc:mysql://localhost:3306/test");
        dataSource.setDriverClass(driverClass);
        return dataSource;
    }


    @Profile("dev")
    @Bean("devDataSource")
    public DataSource dataSourceDev(@Value("${db.password}")String pwd) throws Exception{
        ComboPooledDataSource dataSource = new ComboPooledDataSource();
        dataSource.setUser(user);
        dataSource.setPassword(pwd);
        dataSource.setJdbcUrl("jdbc:mysql://localhost:3306/ssm_crud");
        dataSource.setDriverClass(driverClass);
        return dataSource;
    }

    @Profile("prod")
    @Bean("prodDataSource")
    public DataSource dataSourceProd(@Value("${db.password}")String pwd) throws Exception{
        ComboPooledDataSource dataSource = new ComboPooledDataSource();
        dataSource.setUser(user);
        dataSource.setPassword(pwd);
        dataSource.setJdbcUrl("jdbc:mysql://localhost:3306/scw_0515");

        dataSource.setDriverClass(driverClass);
        return dataSource;
    }

    @Override
    public void setEmbeddedValueResolver(StringValueResolver resolver) {
        // TODO Auto-generated method stub
        this.valueResolver = resolver;
        driverClass = valueResolver.resolveStringValue("${db.driverClass}");
    }

}
激活Profile的方式
①使用代码的方式
在使用代码的方式激活环境之前,先看看spring的构造
public class AnnotationConfigApplicationContext extends GenericApplicationContext implements AnnotationConfigRegistry {
    private final AnnotatedBeanDefinitionReader reader;
    private final ClassPathBeanDefinitionScanner scanner;

    public AnnotationConfigApplicationContext() {
        this.reader = new AnnotatedBeanDefinitionReader(this);
        this.scanner = new ClassPathBeanDefinitionScanner(this);
    }

    public AnnotationConfigApplicationContext(DefaultListableBeanFactory beanFactory) {
        super(beanFactory);
        this.reader = new AnnotatedBeanDefinitionReader(this);
        this.scanner = new ClassPathBeanDefinitionScanner(this);
    }

  //一个构造,将所有的一切包含在其中,体会这种设计
    public AnnotationConfigApplicationContext(Class<?>... componentClasses) {
        this();
        this.register(componentClasses);
        this.refresh();
    }

    public AnnotationConfigApplicationContext(String... basePackages) {
        this();
        this.scan(basePackages);
        this.refresh();
    }

    public void setEnvironment(ConfigurableEnvironment environment) {
        super.setEnvironment(environment);
        this.reader.setEnvironment(environment);
        this.scanner.setEnvironment(environment);
    }

    public void setBeanNameGenerator(BeanNameGenerator beanNameGenerator) {
        this.reader.setBeanNameGenerator(beanNameGenerator);
        this.scanner.setBeanNameGenerator(beanNameGenerator);
        this.getBeanFactory().registerSingleton("org.springframework.context.annotation.internalConfigurationBeanNameGenerator", beanNameGenerator);
    }

    public void setScopeMetadataResolver(ScopeMetadataResolver scopeMetadataResolver) {
        this.reader.setScopeMetadataResolver(scopeMetadataResolver);
        this.scanner.setScopeMetadataResolver(scopeMetadataResolver);
    }

    public void register(Class<?>... componentClasses) {
        Assert.notEmpty(componentClasses, "At least one component class must be specified");
        this.reader.register(componentClasses);
    }

    public void scan(String... basePackages) {
        Assert.notEmpty(basePackages, "At least one base package must be specified");
        this.scanner.scan(basePackages);
    }

    public <T> void registerBean(@Nullable String beanName, Class<T> beanClass, @Nullable Supplier<T> supplier, BeanDefinitionCustomizer... customizers) {
        this.reader.registerBean(beanClass, beanName, supplier, customizers);
    }
}
代码的方式激活
 @Test
    public void test01(){
        AnnotationConfigApplicationContext applicationContext =
                new AnnotationConfigApplicationContext();
        //1、创建一个applicationContext
        //2、设置需要激活的环境
        applicationContext.getEnvironment().setActiveProfiles("dev");
        //3、注册主配置类
        applicationContext.register(MainConfigOfProfile.class);
        //4、启动刷新容器(再此之前,激活相应的环境,而有参的构造直接刷新了整个容器)
        applicationContext.refresh();


        String[] namesForType = applicationContext.getBeanNamesForType(DataSource.class);
        for (String string : namesForType) {
            System.out.println(string);
        }
        applicationContext.close();
    }
②指定运行时参数
使用命令行动态参数: 在虚拟机参数位置加载 -Dspring.profiles.active=test

 浙公网安备 33010602011771号