鸿蒙应用开发之——动画特效(十二星座之星空环绕)(高级)
一、工具
![]() DevEco Studio
DevEco Studio
 DevEco Studio
二、项目介绍
先来看看简单的特效
知识点:
1、动画示例1:
点击放大缩小
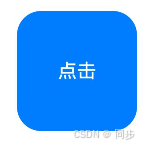
很简单在onClick()设置如下代码即可:
.onClick(() => {
          if (this.flag) {
            animateTo({
              duration: 2000,
              curve: Curve.EaseOut,
              iterations: 1,
              playMode: PlayMode.Normal,
              onFinish: () => {
                console.info('play end')
              }
            }, () => {
              this.widthSize = 60
              this.heightSize = 60
            })
          } else {
            animateTo({}, () => {
              this.widthSize = 100
              this.heightSize = 100
            })
          }
          this.flag = !this.flag
        })
2、动画示例2:
单击旋转

代码:
.animation({//自身转动特效
          duration: this.speed,
          curve: Curve.Linear,
          delay: 0,
          iterations: -1, // 设置-1表示动画无限循环
          playMode: PlayMode.Normal
        })
需要注意,rotateAngle = 360 speed -=1000发生变化才会触发动画。
所以改进后是这样的可以动态控制
.onClick(()=>{
          if (this.isCenter) {
            animateTo({//自身转动特效
              duration: 0,
              curve: Curve.Linear,
              delay: 0,
              iterations: 0, // 设置-1表示动画无限循环
              playMode: PlayMode.Normal
            }, () => {
              this.rotateAngle = 0
            })
            promptAction.showToast({
              message: '暂停',
              duration: 500
            })
          } else {
            animateTo({//自身转动特效
              duration: 5000,
              curve: Curve.Linear,
              delay: 0,
              iterations: -1, // 设置-1表示动画无限循环
              playMode: PlayMode.Normal
            }, () => {
              this.rotateAngle = 0
            })
            promptAction.showToast({
              message: '开始',
              duration: 500
            })
          }
          this.isCenter = !this.isCenter

          //clearInterval(this.intervalID);
        })
进一步优化(动画衔接问题,看起来更顺畅):
setInterval(()=> {//每0.1秒执行0.5°的转动,动画更平滑

    for (let index = 0; index < 12; index++) {
      let doubleAngle = (this.averageAngle - 30 * index + 0) * Math.PI / 180
      let sin = Math.sin(doubleAngle);
      let cos = Math.cos(doubleAngle);
      this.widAr[index] =this.radius1+this.radius1*cos
      this.heiAr[index] =this.radius2+this.radius2*sin * Math.cos(Math.PI * 5 / 18)
    }

    if (this.isRotate) {
      if (this.averageAngle<360) {//0~360°循环
        this.averageAngle+=0.5
      }else {
        this.averageAngle = 0;
      }
      this.rotateAngle = 360
    }


  }, 100)
3、动画示例3:
蚂蚁行走路径动画
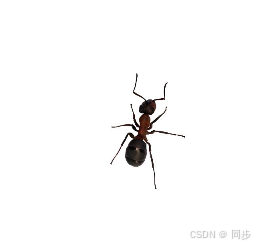
代码设置:
Column() {
      Image($r('app.media.ant'))
        .width(100)
        .height(100)
        .margin(50)
        // 执行动画:从起点移动到(300,200),再到(300,500),再到终点
        .motionPath({ path: 'Mstart.x start.y L300 200 L300 500 Lend.x end.y', from: 0.0, to: 2.0, rotatable: true })
        .onClick(() => {
          animateTo({ duration: 4000, curve: Curve.Linear }, () => {
            this.toggle = !this.toggle // 通过this.toggle变化组件的位置
          })
        })
    }.width('100%').height('28%').alignItems(this.toggle ? HorizontalAlign.Start : HorizontalAlign.Center)
点击执行
animateTo({ duration: 4000, curve: Curve.Linear }, () => { this.toggle = !this.toggle // 通过this.toggle变化组件的位置 })
触发路径动画motionPath({ path: 'Mstart.x start.y L300 200 L300 500 Lend.x end.y', from: 0.0, to: 2.0, rotatable: true })
监听蚂蚁位置后改变布局大小alignItems(this.toggle ? HorizontalAlign.Start : HorizontalAlign.Center)实现蚂蚁行走的过程。
4、动画示例4:
兔子跳舞动画
首秀用Row()+ForEach创建四只兔子。
Row() {
      ForEach(this.springs, (item: Spring) => {
        Motion({ iCurve: item.iCurve, dRotate: this.dRotate })
      })
    }
然后定义每只兔子的Spring动画效果:
private springs: Spring[] = [
    new Spring( curves.springMotion(1, 0)),
    new Spring( curves.responsiveSpringMotion(0.8, 0)),
    new Spring( curves.interpolatingSpring(10, 1, 228, 30)),
    new Spring(curves.springCurve(10, 1, 228, 30))
  ];
.onClick(() => {
this.dRotate = -50;
})只有点击执行动画,兔子就跳起来了,是不是很简单。
接下来我们来点干活,比较炫酷的动画场景。
十二星座之星空环绕
效果图:
首先准备十二张星座图片,Demo里面有(感兴趣可以去下载体验)
然后开始布局,使用RelativeContainer()相对布局
RelativeContainer() {


        Column(){
          Image($r('app.media.constellation1'))
            .width(this.img)
            .height(this.img)

          Text('天蝎座')
            .fontColor($r('app.color.white'))

        }.position({x:this.widAr[0],y:this.heiAr[0]})//星座旋转位置
        .id('star1')
        .onClick(()=>{
          promptAction.showToast({
            message: '点击天蝎座',
            duration: 500
          })
        })


        Column(){
          Image($r('app.media.constellation2'))
            .width(this.img)
            .height(this.img)

          Text('处女座')
            .fontColor($r('app.color.white'))

        }.position({x:this.widAr[1],y:this.heiAr[1]})
        .id('star2')
        .onClick(()=>{
          promptAction.showToast({
            message: '点击处女座',
            duration: 500
          })
        })

        Column(){
          Image($r('app.media.constellation3'))
            .width(this.img)
            .height(this.img)

          Text('双子座')
            .fontColor($r('app.color.white'))

        }.position({x:this.widAr[2],y:this.heiAr[2]})
        .id('star3')
        .onClick(()=>{
          promptAction.showToast({
            message: '点击双子座',
            duration: 500
          })
        })

        Column(){
          Image($r('app.media.constellation4'))
            .width(this.img)
            .height(this.img)

          Text('双鱼座')
            .fontColor($r('app.color.white'))

        } .position({x:this.widAr[3],y:this.heiAr[3]})
        .id('star4')
        .onClick(()=>{
          promptAction.showToast({
            message: '点击双鱼座',
            duration: 500
          })
        })

        Column(){
          Image($r('app.media.constellation5'))
            .width(this.img)
            .height(this.img)

          Text('金牛座')
            .fontColor($r('app.color.white'))

        } .position({x:this.widAr[4],y:this.heiAr[4]})
        .id('star5')
        .onClick(()=>{
          promptAction.showToast({
            message: '点击金牛座',
            duration: 500
          })
        })

        Column(){
          Image($r('app.media.constellation6'))
            .width(this.img)
            .height(this.img)

          Text('射手座')
            .fontColor($r('app.color.white'))

        }.position({x:this.widAr[5],y:this.heiAr[5]})
        .id('star6')
        .onClick(()=>{
          promptAction.showToast({
            message: '点击射手座',
            duration: 500
          })
        })

        Column(){
          Image($r('app.media.constellation7'))
            .width(this.img)
            .height(this.img)

          Text('狮子座')
            .fontColor($r('app.color.white'))

        }.position({x:this.widAr[6],y:this.heiAr[6]})
        .id('star7')
        .onClick(()=>{
          promptAction.showToast({
            message: '点击狮子座',
            duration: 500
          })
        })

        Column(){
          Image($r('app.media.constellation8'))
            .width(this.img)
            .height(this.img)

          Text('摩羯座')
            .fontColor($r('app.color.white'))

        }.position({x:this.widAr[7],y:this.heiAr[7]})
        .id('star8')
        .onClick(()=>{
          promptAction.showToast({
            message: '点击摩羯座',
            duration: 500
          })
        })

        Column(){
          Image($r('app.media.constellation9'))
            .width(this.img)
            .height(this.img)

          Text('巨蟹座')
            .fontColor($r('app.color.white'))

        }.position({x:this.widAr[8],y:this.heiAr[8]})
        .id('star9')
        .onClick(()=>{
          promptAction.showToast({
            message: '点击巨蟹座',
            duration: 500
          })
        })

        Column(){
          Image($r('app.media.constellation10'))
            .width(this.img)
            .height(this.img)

          Text('水瓶座')
            .fontColor($r('app.color.white'))

        }.position({x:this.widAr[9],y:this.heiAr[9]})
        .id('star10')
        .onClick(()=>{
          promptAction.showToast({
            message: '点击水瓶座',
            duration: 500
          })
        })

        Column(){
          Image($r('app.media.constellation11'))
            .width(this.img)
            .height(this.img)

          Text('天秤座')
            .fontColor($r('app.color.white'))

        } .position({x:this.widAr[10],y:this.heiAr[10]})
        .id('star11')
        .onClick(()=>{
          promptAction.showToast({
            message: '点击天秤座',
            duration: 500
          })
        })

        Column(){
          Image($r('app.media.constellation12'))
            .width(this.img)
            .height(this.img)

          Text('白羊座')
            .fontColor($r('app.color.white'))

        } .position({x:this.widAr[11],y:this.heiAr[11]})
        .id('star12')
        .onClick(()=>{
          promptAction.showToast({
            message: '点击白羊座',
            duration: 500
          })
        })


      }.width('100%')
      .height('100%')
      .onAreaChange((oldValue: Area, newValue: Area) => {
        this.radius1 = new Number(newValue.width).valueOf()/2-25
        this.radius2 = new Number(newValue.height).valueOf()/2-25
      })
先把图片贴上去,然后计算旋转位置。
需用到一些计算公式
椭圆的标准方程是(x/a)^2 + (y/b)^2 =1
偏心率e=√(1 - (b/a)^2)
然后根据公式代码实现旋转后的坐标:
setInterval(()=> {//每0.1秒执行0.5°的转动,动画更平滑

    for (let index = 0; index < 12; index++) {
      let doubleAngle = (this.averageAngle - 30 * index + 0) * Math.PI / 180
      let sin = Math.sin(doubleAngle);
      let cos = Math.cos(doubleAngle);
      this.widAr[index] =this.radius1+this.radius1*cos
      this.heiAr[index] =this.radius2+this.radius2*sin * Math.cos(Math.PI * 5 / 18)
    }

    if (this.isRotate) {
      if (this.averageAngle<360) {//0~360°循环
        this.averageAngle+=0.5
      }else {
        this.averageAngle = 0;
      }
      this.rotateAngle = 360
    }


  }, 100)
定义两个状态变量去更新UI:
@State widAr:Array = [this.radius1,this.radius1,this.radius1,this.radius1,this.radius1,this.radius1,this.radius1,this.radius1,this.radius1,this.radius1,this.radius1,this.radius1]
@State heiAr:Array = [this.radius2,this.radius2,this.radius2,this.radius2,this.radius2,this.radius2,this.radius2,this.radius2,this.radius2,this.radius2,this.radius2,this.radius2]
最后我们来监听点击事件:
.onTouch((event?: TouchEvent) => {//页面监听滑动控
      if(event){
        if (event.type === TouchType.Down) {
          this.eventType = 'Down'
          this.x1 =event.touches[0].x
          this.isRotate = false
        }
        if (event.type === TouchType.Up) {
          this.eventType = 'Up'
          this.isRotate = true
        }
        if (event.type === TouchType.Move) {
          this.eventType = 'Move'

          this.x2 =event.touches[0].x -this.x1


          //左右滑动控制转动
          if (event.touches[0].y            if (this.x2>0) {
              this.averageAngle +=5
            }else {
              this.averageAngle -=5
            }
          }else {
            if (this.x2>0) {
              this.averageAngle -=5
            }else {
              this.averageAngle +=5
            }
          }
        }
      }
    })
实现左右滑动加速效果,背景给一个星空背景,这样一来就实现了旋转的十二星辰。
源码Demo:MyAnimation: 鸿蒙动画特效旋转的十二星辰

 浙公网安备 33010602011771号