Nginx错误日志与优化专题
一、Nginx配置和内核优化 实现突破十万并发
二、一次Nignx的502页面的错误记录
(1)错误页面显示

错误日志:
2017/07/17 17:32:57 [error] 29071#0: *96 recv() failed (104: Connection reset by peer) while reading response header from upstream,
 client: 101.226.125.118, server: live.baidu.com, request: "GET /live/CY00013 HTTP/1.1", upstream: "http://show.baidu.com/live/123.html", host: "live.baidu.com"
(2)配置以及流程设置
本次采用Openresty 搭建的web服务器,使用代理服务器IP(192.168.1.166)代理被代理服务器IP(172.16.0.166)。改配置以及流程一直是合适的,结果在今天下午访问代理服务器出现Nginx 502 错误。配置信息:
    server {
        listen       80;
        #resolver 8.8.8.8;
        server_name   live.baidu.com;

        location / {
                proxy_pass http://show.baidu.com;
                proxy_set_header Host show.baidu.com;
                proxy_set_header X-Real-IP $remote_addr;
                proxy_set_header X-Real-PORT $remote_port;
                proxy_set_header X-Forwarded-For $proxy_add_x_forwarded_for;
        }
    }
IP地址和域名对应关系:
show.baidu.com (172.16.0.166)
live.baidu.com (192.168.1.166)
经过各种百度和google都说是后端服务器的原因,但是访问后端服务器也是正常的show.baidu.com (172.16.0.166),但是当访问关于一个和Redis有关的页面的时候就会出现,redis服务器已经断开连接,重启Redis服务器后正常工作
(3)总结:如果当前服务器是代理服务器,出现502的错误原因,则一般都是后端服务器的异常导致的
三、nginx错误日志文件Error.log常见错误详细说明
我们经常遇到各种各样的nginx错误日志,平时根据一些nginx错误日志就可以分析出原因了。不过不是很系统,这里网上看到一篇资料还是比较系统的关于nginx的error.log的详细说明,这里记录下,方便以后查看了解。

以上表格来自网络资料。这里只是记录下,方便以后查看。
四、Nginx错误日志说明
错误日志类型
-
类型1: upstream timed out
-
类型2: connect() failed
-
类型3: no live upstreams
-
类型4: upstream prematurely closed connection
-
类型5: 104: Connection reset by peer
-
类型6: client intended to send too large body
-
类型7: upstream sent no valid HTTP/1.0 header
|
类型 |
错误日志 |
原因 |
解决办法 |
|---|---|---|---|
| 1 | upstream timed out (110: Connection timed out) while connecting to upstream | nginx与upstream建立tcp连接超时,nginx默认连接建立超时为200ms | 排查upstream是否能正常建立tcp连接 |
| 1 | upstream timed out (110: Connection timed out) while reading response header from upstream | nginx从upstream读取响应时超时,nginx默认的读超时为20s,读超时不是整体读的时间超时,而是指两次读操作之间的超时,整体读耗时有可能超过20s | 排查upstream响应请求为什么过于缓慢 |
| 2 | connect() failed (104: Connection reset by peer) while connecting to upstream | nginx与upstream建立tcp连接时被reset | 排查upstream是否能正常建立tcp连接 |
| 2 | connect() failed (111: Connection refused) while connecting to upstream | nginx与upstream建立tcp连接时被拒 | 排查upstream是否能正常建立tcp连接 |
| 3 | no live upstreams while connecting to upstream | nginx向upstream转发请求时发现upstream状态全都为down | 排查nginx的upstream的健康检查为什么失败 |
| 4 | upstream prematurely closed connection | nginx在与upstream建立完tcp连接之后,试图发送请求或者读取响应时,连接被upstream强制关闭 | 排查upstream程序是否异常,是否能正常处理http请求 |
| 5 | recv() failed (104: Connection reset by peer) while reading response header from upstream | nginx从upstream读取响应时连接被对方reset | 排查upstream应用已经tcp连接状态是否异常 |
| 6 | client intended to send too large body | 客户端试图发送过大的请求body,nginx默认最大允许的大小为1m,超过此大小,客户端会受到http 413错误码 |
|
| 7 | upstream sent no valid HTTP/1.0 header | nginx不能正常解析从upstream返回来的请求行 |
=====================openresty 遇到的错误信息

错误: an upstream response is buffered to a temporary file
    #允许客户端请求的最大字节

    client_max_body_size 50m;

    #缓冲区最大字节

    client_body_buffer_size 256k;

    #代理服务器链接后端服务器的超时时间

    proxy_connect_timeout 30;

    #代理服务器等待后端服务器响应的超时时间

    proxy_read_timeout 60;

    #后端服务器返回数据给代理服务器的最大传输时间

    proxy_send_timeout 30;

    #代理服务器缓冲区大小,客户端的头信息会保存在这里

    proxy_buffer_size 64k;

    #代理服务器有几个缓冲区,最大是多大

    proxy_buffers 4 64k;

    #代理服务器烦方式可以申请更大的缓冲区,Nginx官方推荐为*2即可

    proxy_busy_buffers_size 128k;

    #代理服务器临时文件大小

    proxy_temp_file_write_size 256k;
======================Nignx + php5 出现的问题
修复Nginx 502错误:upstream sent too big header while reading response header from upstream

解决办法:
在Nginx配置文件的的http段,加入下面的配置
proxy_buffer_size  128k;
proxy_buffers   32 32k;
proxy_busy_buffers_size 128k;
重启Nginx错误依旧。再在host配置的php段加入下面配置
fastcgi_buffer_size 128k;
fastcgi_buffers 4 256k;
fastcgi_busy_buffers_size 256k;
重启Nginx 服务器即可
error 2
[error] 21501#0: *24372 FastCGI sent in stderr: "Primary script unknown" while reading response header from upstream, client: 12.232.112,
 request: "GET http://clientapi.ipip.net/echo.php?info=1234567890 HTTP/1.1", upstream: "fastcgi://unix:/var/run/php7.0.9-fpm.sock:",
摘要: 近日,为了让更新后台业务系统时,不影响线上用户的使用终止,故使用了nginx+tomcat集群,其中用到了memcached-session-manager组件来集中管理session,确实遇到了各种“坑”,这几天有时间陆续会把各种坑挖出来,记录一下已被忘记。 -----第一篇--nginx监听端口非80时的转发问题
该问题是最先发现的,由于之前对nginx不是特别的熟悉所以该问题是个入门级别的:
server {
    listen 80;
    server_name localhost;
    location / {
        proxy_pass http://192.168.1.100:8080;
        proxy_set_header Host $host;
        proxy_set_header X-Real-IP $remote_addr;
        proxy_set_header X-Forwarded-For $proxy_add_x_forwarded_for;
    }
}
以上是nginx默认监听端口号为80的情况,由于公司系统是内网应用,用户已经将链接收藏起来了,收藏后的地址是之前的单台tomcat的8080端口,为了不影响他们的操作习惯所以决定让nginx继续监听8080端口,保持对外端口相同。
于是乎,我便想当然的把nginx的端口号改成了8080,把tomcat的端口改为了8081。改后的nginx配置如下:
server {
    listen 8080;
    server_name localhost;
    location / {
        proxy_pass http://192.168.1.100:8081;
        proxy_set_header Host $host;
        proxy_set_header X-Real-IP $remote_addr;
        proxy_set_header X-Forwarded-For $proxy_add_x_forwarded_for;
    }
}
改完之后,重启测试发现问题了:
当访问http://localhost:8080后,浏览器自动跳转到了 http://localhost去了
这是为什么呢?????
原来,如果nginx的监听端口不是默认的80端口,改为其他非80端口后,后端服务tomcat中的request.getServerPort()方法无法获得正确的端口号,仍然返回到80端口。在response.sendRedirect()时,客户端可能无法获得正确的重定向URL。
所以正确的配置:
server {
    listen 8080;
    server_name localhost;
    location / {
        proxy_pass http://192.168.1.100:8081;
        proxy_set_header Host $host:8080;
        proxy_set_header X-Real-IP $remote_addr;
        proxy_set_header X-Forwarded-For $proxy_add_x_forwarded_for;
    }
}
安装报错:
make[2]: Entering directory `/usr/include/openssl'
make[2]: *** No rule to make target `clean'.  Stop.
make[2]: Leaving directory `/usr/include/openssl'
make[1]: *** [/usr/include/openssl//openssl/include/openssl/ssl.h] Error 2
make[1]: Leaving directory `/jowei/nginx-0.8.9'
make: *** [build] Error 2
–with-pcre Nginx的rewrite功能需要使用pcre库才能工作,而Nginx的编译参数里面的这个选项并不是像常规的那样指定pcre的安装目录,而是指定pcre源代码的目录。
也就是说,如果你的系统路径下已经可以找到pcre的lib和include文件,这个选项可以不指定了。如果你的系统没有安装pcre,那么就指定该选项,Nginx会在编译的时候从你指定的这个目录把pcre编译进来。
========20170516 视频直播遇到的问题=========================
遇到的错误1
2017/05/16 20:31:00 [alert] 194667#0: *842850 socket() failed (24: Too many open files) while connecting to upstream,
client: 122.234.65.111, server: 333.111.com, request: "GET /live/9410.ts HTTP/1.1",
upstream: "http://127.0.1.4:80/live/10.ts",
host: "2.24.87.6:8081",
referrer: "http://y.com/live/12"
遇到的错误2
2017/05/16 20:31:00 [crit] 194667#0: *842850 open() "/opt/openresty/nginx/html/50x.html" failed (24: Too many open files),
client: 122.234.65.11, server: 333.11.com, request: "GET /live/10.ts HTTP/1.1",
upstream: "http://127.0.1.4:80/live/10.ts",
host: "2.24.87.6:8081",
referrer: "http://y.com/live/12"
遇到的错误3
2017/05/16 20:31:12 [crit] 194667#0: *846706 open() "/opt/openresty/nginx/proxy_temp/4/19/0000158194" failed (24: Too many open files) while reading upstream,
其原因是Linux / Unix 设置了软硬文件句柄和打开文件的数目,可以使用’ulimit’命令来查看系统文件限制
ulimit -Hn
ulimit -Sn
1、阿里云配置文件
(1)/etc/security/limits.conf
# End of file
root soft nofile 65535
root hard nofile 65535
* soft nofile 65535
* hard nofile 65535

(2)/etc/sysctl.conf
【1】1核512M
vm.swappiness = 0
net.ipv4.neigh.default.gc_stale_time=120
net.ipv4.conf.all.rp_filter=0
net.ipv4.conf.default.rp_filter=0
net.ipv4.conf.default.arp_announce = 2
net.ipv4.conf.all.arp_announce=2
net.ipv4.tcp_max_tw_buckets = 5000
net.ipv4.tcp_syncookies = 1
net.ipv4.tcp_max_syn_backlog = 1024
net.ipv4.tcp_synack_retries = 2
net.ipv6.conf.all.disable_ipv6 = 1
net.ipv6.conf.default.disable_ipv6 = 1
net.ipv6.conf.lo.disable_ipv6 = 1
net.ipv4.conf.lo.arp_announce=2

【2】4核4G
vm.swappiness = 0
net.ipv4.neigh.default.gc_stale_time=120
net.ipv4.conf.all.rp_filter=0
net.ipv4.conf.default.rp_filter=0
net.ipv4.conf.default.arp_announce = 2
net.ipv4.conf.all.arp_announce=2
#net.ipv4.tcp_max_tw_buckets = 5000
net.ipv4.tcp_max_tw_buckets = 20000
net.ipv4.tcp_syncookies = 1

#add by sss
net.ipv4.ip_local_port_range = 1024 65000
net.ipv4.tcp_tw_reuse=1
net.ipv4.tcp_tw_recycle=1
net.ipv4.tcp_fin_timeout=30

#net.ipv4.tcp_max_syn_backlog = 1024
net.ipv4.tcp_max_syn_backlog = 4096
net.ipv4.tcp_synack_retries = 2
net.ipv6.conf.all.disable_ipv6 = 1
net.ipv6.conf.default.disable_ipv6 = 1
net.ipv6.conf.lo.disable_ipv6 = 1
net.ipv4.conf.lo.arp_announce=2
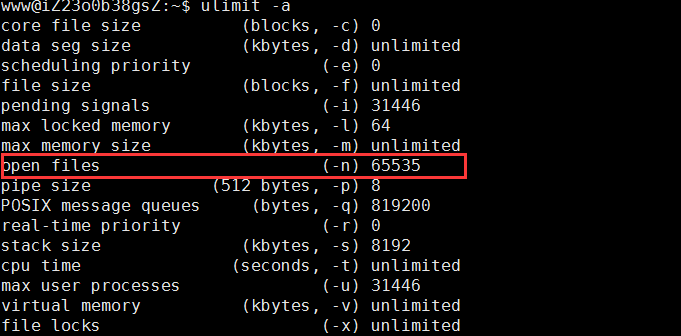
(3)ulimit -a
www@iZ23o0b38gsZ:~$ ulimit -a
core file size          (blocks, -c) 0
data seg size           (kbytes, -d) unlimited
scheduling priority             (-e) 0
file size               (blocks, -f) unlimited
pending signals                 (-i) 31446
max locked memory       (kbytes, -l) 64
max memory size         (kbytes, -m) unlimited
open files                      (-n) 65535
pipe size            (512 bytes, -p) 8
POSIX message queues     (bytes, -q) 819200
real-time priority              (-r) 0
stack size              (kbytes, -s) 8192
cpu time               (seconds, -t) unlimited
max user processes              (-u) 31446
virtual memory          (kbytes, -v) unlimited
file locks                      (-x) unlimited
2、公司服务器配置信息
(1)/etc/security/limits.conf 是空的

本地服务器信息查看
www@ubuntu5:/opt/openresty/nginx/logs$ ulimit -Hn
4096
www@ubuntu5:/opt/openresty/nginx/logs$ ulimit -Sn
1024
(2)/etc/sysctl.conf 也是空的

(3)ulimit -a
core file size          (blocks, -c) 0
data seg size           (kbytes, -d) unlimited
scheduling priority             (-e) 0
file size               (blocks, -f) unlimited
pending signals                 (-i) 126277
max locked memory       (kbytes, -l) 64
max memory size         (kbytes, -m) unlimited
open files                      (-n) 1024
pipe size            (512 bytes, -p) 8
POSIX message queues     (bytes, -q) 819200
real-time priority              (-r) 0
stack size              (kbytes, -s) 8192
cpu time               (seconds, -t) unlimited
max user processes              (-u) 126277
virtual memory          (kbytes, -v) unlimited
file locks                      (-x) unlimited

3、解决办法
参考文献1:http://www.drupal001.com/2013/07/nginx-open-files-error/
参考文献2:Nginx 出現 500 Error 修復 (too many open file, connection)
ulimit -a
阿里云4核4G
www@iZ23o0b38gsZ:~$ ulimit -a
core file size          (blocks, -c) 0
data seg size           (kbytes, -d) unlimited
scheduling priority             (-e) 0
file size               (blocks, -f) unlimited
pending signals                 (-i) 31446
max locked memory       (kbytes, -l) 64
max memory size         (kbytes, -m) unlimited
open files                      (-n) 65535
pipe size            (512 bytes, -p) 8
POSIX message queues     (bytes, -q) 819200
real-time priority              (-r) 0
stack size              (kbytes, -s) 8192
cpu time               (seconds, -t) unlimited
max user processes              (-u) 31446
virtual memory          (kbytes, -v) unlimited
file locks                      (-x) unlimited
阿里云1核512M
root@iZ23nl9zsjyZ:~# ulimit -a
core file size          (blocks, -c) 0
data seg size           (kbytes, -d) unlimited
scheduling priority             (-e) 0
file size               (blocks, -f) unlimited
pending signals                 (-i) 3738
max locked memory       (kbytes, -l) 64
max memory size         (kbytes, -m) unlimited
open files                      (-n) 65535
pipe size            (512 bytes, -p) 8
POSIX message queues     (bytes, -q) 819200
real-time priority              (-r) 0
stack size              (kbytes, -s) 8192
cpu time               (seconds, -t) unlimited
max user processes              (-u) 3738
virtual memory          (kbytes, -v) unlimited
file locks                      (-x) unlimited
请对比以上数据做出自己的优化方式
[1]vim /etc/security/limits.conf 文件添加以下内容
# End of file
root soft nofile 65535
root hard nofile 65535
* soft nofile 65535
* hard nofile 65535
[2] vim /etc/sysctl.conf 添加以下内容
vm.swappiness = 0
net.ipv4.neigh.default.gc_stale_time=120
net.ipv4.conf.all.rp_filter=0
net.ipv4.conf.default.rp_filter=0
net.ipv4.conf.default.arp_announce = 2
net.ipv4.conf.all.arp_announce=2
#net.ipv4.tcp_max_tw_buckets = 5000
net.ipv4.tcp_max_tw_buckets = 20000
net.ipv4.tcp_syncookies = 1

#add by sss
net.ipv4.ip_local_port_range = 1024 65000
net.ipv4.tcp_tw_reuse=1
net.ipv4.tcp_tw_recycle=1
net.ipv4.tcp_fin_timeout=30

#net.ipv4.tcp_max_syn_backlog = 1024
net.ipv4.tcp_max_syn_backlog = 4096
net.ipv4.tcp_synack_retries = 2
net.ipv6.conf.all.disable_ipv6 = 1
net.ipv6.conf.default.disable_ipv6 = 1
net.ipv6.conf.lo.disable_ipv6 = 1
net.ipv4.conf.lo.arp_announce=2
[3]这个只是针对当前客户
sudo echo ulimit -n 65535 >>/etc/profile
source /etc/profile    #加载修改后的profile
查看系统句柄文件数
当前系统文件句柄的最大数目,只用于查看,不能设置修改
cat /proc/sys/fs/file-max

查看进程打开文件数
如果需要查看所有进程的文件打开数,如下图命令lsof |wc -l


 浙公网安备 33010602011771号