MySQL系列 | 安装 MySQL 5.7 on Ubuntu 16.04 | 18.04
介绍
MySQL是世界上最受欢迎的开源关系数据库管理系统。广泛用于apache2,Nginx,IIS等Web服务器。MySQL具有客户端/服务器体系结构,支持InnoDB存储引擎,可以安装在Ubuntu,Debian,CentOS,Windows等各种操作系统上。
Step 1: Add MySQL APT Repository in Ubuntu
Ubuntu随附默认软件包存储库。因此,如果我们要添加/安装最新的存储库,则必须添加/安装软件包存储库。以下是使用命令行添加/下载最新的MySQL APT存储库的命令
$ sudo wget http://repo.mysql.com/mysql-apt-config_0.8.9-1_all.deb
输出结果
www@iZbp1c61wsgboarqkiz0twZ:~$ sudo wget http://repo.mysql.com/mysql-apt-config_0.8.9-1_all.deb
[sudo] password for www:
--2020-01-07 18:13:29--  http://repo.mysql.com/mysql-apt-config_0.8.9-1_all.deb
Resolving repo.mysql.com (repo.mysql.com)... 23.1.245.43
Connecting to repo.mysql.com (repo.mysql.com)|23.1.245.43|:80... connected.
HTTP request sent, awaiting response... 200 OK
Length: 35950 (35K) [application/x-debian-package]
Saving to: ‘mysql-apt-config_0.8.9-1_all.deb’

mysql-apt-config_0.8.9-1_all.deb                             100%[===========================================================================================================================================>]  35.11K   184KB/s    in 0.2s

2020-01-07 18:13:30 (184 KB/s) - ‘mysql-apt-config_0.8.9-1_all.deb’ saved [35950/35950]
然后,下面的命令是安装上面下载的apt存储库
$ sudo dpkg -i mysql-apt-config_0.8.9-1_all.deb
当我们运行上面的命令时,如下面的提示符将打开,请单击“确定”。

Step 2: Update MySQL Repository
更新apt仓库
$ sudo apt-get update
错误消息
Err:4 http://repo.mysql.com/apt/ubuntu bionic InRelease
The following signatures were invalid: EXPKEYSIG 8C718D3B5072E1F5 MySQL Release Engineering <mysql-build@oss.oracle.com>
Reading package lists... Done
W: GPG error: http://repo.mysql.com/apt/ubuntu bionic InRelease: The following signatures were invalid: EXPKEYSIG 8C718D3B5072E1F5 MySQL Release Engineering <mysql-build@oss.oracle.com>
E: The repository 'http://repo.mysql.com/apt/ubuntu bionic InRelease' is not signed.
N: Updating from such a repository can't be done securely, and is therefore disabled by default.
N: See apt-secure(8) manpage for repository creation and user configuration details.
W: The repository ‘https://repo.mysql.com/apt/ubuntu xenial InRelease’ is not signed.
在更新apt软件包时,如果您收到KEYEXPIRED消息。使用以下命令检查过期的密钥列表,要续订过期的密钥,
$ sudo apt-key adv --keyserver keys.gnupg.net --recv-keys 8C718D3B5072E1F5
输出内容
www@iZbp1c61wsgboarqkiz0twZ:~$ sudo apt-key adv --keyserver keys.gnupg.net --recv-keys 8C718D3B5072E1F5
Executing: /tmp/apt-key-gpghome.ro9G1rmzGZ/gpg.1.sh --keyserver keys.gnupg.net --recv-keys 8C718D3B5072E1F5
gpg: key 8C718D3B5072E1F5: 3 duplicate signatures removed
gpg: key 8C718D3B5072E1F5: 102 signatures not checked due to missing keys
gpg: key 8C718D3B5072E1F5: "MySQL Release Engineering <mysql-build@oss.oracle.com>" 29 new signatures
gpg: Total number processed: 1
gpg:         new signatures: 29
更新系统存储库。
$ sudo apt-get update
Hit:1 http://mirrors.cloud.aliyuncs.com/ubuntu bionic InRelease
Hit:2 http://mirrors.cloud.aliyuncs.com/ubuntu bionic-updates InRelease
Hit:3 http://mirrors.cloud.aliyuncs.com/ubuntu bionic-security InRelease
Get:4 http://repo.mysql.com/apt/ubuntu xenial InRelease [21.6 kB]
Get:5 http://repo.mysql.com/apt/ubuntu xenial/mysql-5.7 Sources [944 B]
Get:6 http://repo.mysql.com/apt/ubuntu xenial/mysql-apt-config i386 Packages [566 B]
Get:7 http://repo.mysql.com/apt/ubuntu xenial/mysql-apt-config amd64 Packages [566 B]
Get:8 http://repo.mysql.com/apt/ubuntu xenial/mysql-5.7 i386 Packages [5,650 B]
Get:9 http://repo.mysql.com/apt/ubuntu xenial/mysql-5.7 amd64 Packages [5,656 B]
Get:10 http://repo.mysql.com/apt/ubuntu xenial/mysql-tools amd64 Packages [4,344 B]
Get:11 http://repo.mysql.com/apt/ubuntu xenial/mysql-tools i386 Packages [3,596 B]
Fetched 42.9 kB in 2s (23.5 kB/s)
Reading package lists... Done
Step 3: Install MySQL 5.7 on Ubuntu
使用以下命令安装MySQL 5.7
$ sudo apt-get install mysql-server
现在,安装过程将提示root用户使用默认密码,然后再次输入相同的密码。


Step 4: Secure MySQL Installation
mysql_secure_installation,该脚本可以执行多项与安全性相关的操作。在命令提示符下运行以下脚本,询问以下选项。
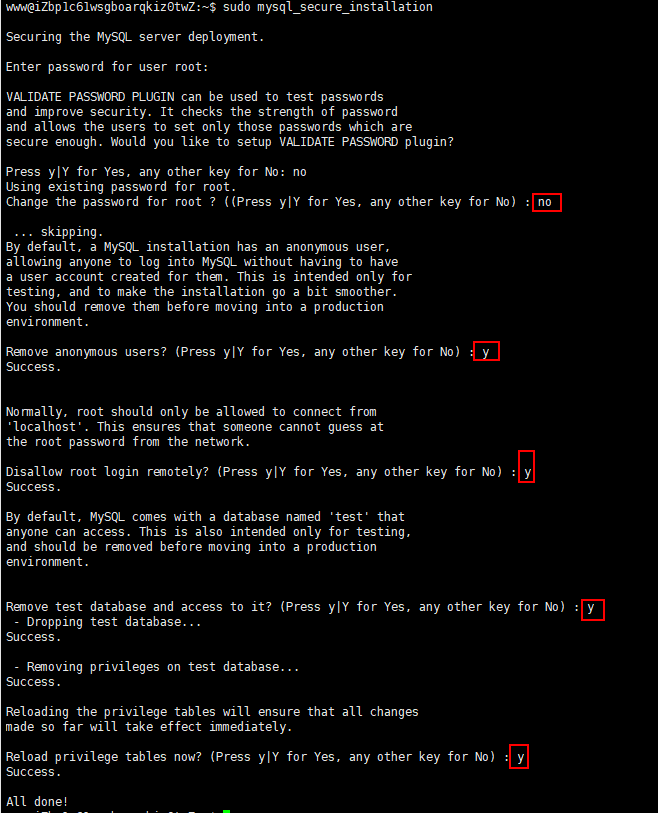
$ sudo mysql_secure_installation

Securing the MySQL server deployment.

Enter password for user root:

VALIDATE PASSWORD PLUGIN can be used to test passwords
and improve security. It checks the strength of password
and allows the users to set only those passwords which are
secure enough. Would you like to setup VALIDATE PASSWORD plugin?

Press y|Y for Yes, any other key for No: no
Using existing password for root.
Change the password for root ? ((Press y|Y for Yes, any other key for No) : no

 ... skipping.
By default, a MySQL installation has an anonymous user,
allowing anyone to log into MySQL without having to have
a user account created for them. This is intended only for
testing, and to make the installation go a bit smoother.
You should remove them before moving into a production
environment.

Remove anonymous users? (Press y|Y for Yes, any other key for No) : y
Success.


Normally, root should only be allowed to connect from
'localhost'. This ensures that someone cannot guess at
the root password from the network.

Disallow root login remotely? (Press y|Y for Yes, any other key for No) : y
Success.

By default, MySQL comes with a database named 'test' that
anyone can access. This is also intended only for testing,
and should be removed before moving into a production
environment.


Remove test database and access to it? (Press y|Y for Yes, any other key for No) : y
 - Dropping test database...
Success.

 - Removing privileges on test database...
Success.

Reloading the privilege tables will ensure that all changes
made so far will take effect immediately.

Reload privilege tables now? (Press y|Y for Yes, any other key for No) : y
Success.

All done!
Step 5: Login to MySQL
现在,使用以下命令登录到MySQL 5.7 Server,并使用密码登录在安装过程中输入的密码。
~$ mysql -u root -p
Enter password:
Welcome to the MySQL monitor.  Commands end with ; or \g.
Your MySQL connection id is 4
Server version: 5.7.28 MySQL Community Server (GPL)

Copyright (c) 2000, 2019, Oracle and/or its affiliates. All rights reserved.

Oracle is a registered trademark of Oracle Corporation and/or its
affiliates. Other names may be trademarks of their respective
owners.

Type 'help;' or '\h' for help. Type '\c' to clear the current input statement.

mysql>
mysql>
mysql> show databases;
+--------------------+
| Database           |
+--------------------+
| information_schema |
| mysql              |
| performance_schema |
| sys                |
+--------------------+
4 rows in set (0.00 sec)
Step 6: Create MySQL Remote User
首先,以root用户使用命令行登录MySQL Server,下面是创建用户的命令,这里我创建用户“www”。
mysql> CREATE USER 'www'@'%' IDENTIFIED BY 'www123456';
Query OK, 0 rows affected (0.00 sec)
接下来,使用以下命令将特权分配给数据库,在这里,我将所有数据库特权分配给www用户, 如果要为特定数据库分配特权,请使用数据库名称替换“.”。
mysql> GRANT ALL PRIVILEGES ON * . * TO 'www'@'%';
Query OK, 0 rows affected (0.00 sec)
或者
mysql> GRANT ALL PRIVILEGES ON *.* TO 'www'@'%' WITH GRANT OPTION;
Query OK, 0 rows affected (0.00 sec)
要生效,请使用以下命令重新加载特权
mysql> FLUSH PRIVILEGES;
Query OK, 0 rows affected (0.00 sec)
Step 7: How to Enable MySQL Remote Access
默认情况下,出于安全原因,在MySQL数据库服务器中禁用远程访问。 要启用MySQL Server的远程连接,我们必须更改MySQL配置文件中的
打开 /etc/mysql/mysql.conf.d/mysqld.cnf 文件
sudo vim /etc/mysql/mysql.conf.d/mysqld.cnf
在[mysqld]部分下面找到该行
[mysqld]
bind-address = 127.0.0.1
并替换为
bind-address = 0.0.0.0
输出
[mysqld]
pid-file	= /var/run/mysqld/mysqld.pid
socket		= /var/run/mysqld/mysqld.sock
datadir		= /var/lib/mysql
log-error	= /var/log/mysql/error.log
# By default we only accept connections from localhost
bind-address	= 0.0.0.0
# Disabling symbolic-links is recommended to prevent assorted security risks
symbolic-links=0
重新启动MySQL Server生效
$ sudo systemctl restart mysql.service
查看MySQL状态

Step 8: Start/Restart/Stop MySQL Server Using Command Line
$ sudo systemctl start mysql.service
$ sudo systemctl restart mysql.service
$ sudo systemctl stop mysql.service
其他
安装命令
    1  ls
    2  sudo wget http://repo.mysql.com/mysql-apt-config_0.8.9-1_all.deb
    3  exit
    4  sudo wget http://repo.mysql.com/mysql-apt-config_0.8.9-1_all.deb
    5  ls
    6  sudo dpkg -i mysql-apt-config_0.8.9-1_all.deb
    7  ls
    8  sudo apt-get update
    9  sudo apt-key adv --keyserver keys.gnupg.net --recv-keys 8C718D3B5072E1F5
   10  sudo apt-get update
   11  sudo apt-get install mysql-server
   12  sudo mysql_secure_installation
   13  mysql -u root -p
   14  sudo vim /etc/mysql/mysql.conf.d/mysqld.cnf
   15  sudo systemctl restart mysql.service
   16  sudo systemctl status mysql.service
   17  ifconfig
   18  ps -aux|grep mysql
   19  cat /etc/passwd
   20  history
   21  history >> install.log

 浙公网安备 33010602011771号