

1、创建数据库表
-- ----------------------------
-- Table structure for items
-- ----------------------------
DROP TABLE IF EXISTS `items`;
CREATE TABLE `items` (
  `id` int(11) NOT NULL AUTO_INCREMENT,
  `name` varchar(32) NOT NULL COMMENT '商品名称',
  `price` float(10,1) NOT NULL COMMENT '商品定价',
  `detail` text COMMENT '商品描述',
  `pic` varchar(64) DEFAULT NULL COMMENT '商品图片',
  `createtime` datetime NOT NULL COMMENT '生产日期',
  PRIMARY KEY (`id`)
) ENGINE=InnoDB AUTO_INCREMENT=4 DEFAULT CHARSET=utf8;

-- ----------------------------
-- Records of items
-- ----------------------------
INSERT INTO `items` VALUES ('1', '台式机', '3000.0', '该电脑质量非常好!!!!', null, '2016-02-03 13:22:53');
INSERT INTO `items` VALUES ('2', '笔记本', '6000.0', '笔记本性能好,质量好!!!!!', null, '2015-02-09 13:22:57');
INSERT INTO `items` VALUES ('3', '背包', '200.0', '名牌背包,容量大质量好!!!!', null, '2015-02-06 13:23:02');

-- ----------------------------
-- Table structure for user
-- ----------------------------
DROP TABLE IF EXISTS `user`;
CREATE TABLE `user` (
  `id` int(11) NOT NULL AUTO_INCREMENT,
  `username` varchar(32) NOT NULL COMMENT '用户名称',
  `birthday` date DEFAULT NULL COMMENT '生日',
  `sex` char(1) DEFAULT NULL COMMENT '性别',
  `address` varchar(256) DEFAULT NULL COMMENT '地址',
  PRIMARY KEY (`id`)
) ENGINE=InnoDB AUTO_INCREMENT=27 DEFAULT CHARSET=utf8;

-- ----------------------------
-- Records of user
-- ----------------------------
INSERT INTO `user` VALUES ('1', '王五', null, '2', null);
INSERT INTO `user` VALUES ('10', '张三', '2014-07-10', '1', '北京市');
INSERT INTO `user` VALUES ('16', '张小明', null, '1', '河南郑州');
INSERT INTO `user` VALUES ('22', '陈小明', null, '1', '河南郑州');
INSERT INTO `user` VALUES ('24', '张三丰', null, '1', '河南郑州');
INSERT INTO `user` VALUES ('25', '陈小明', null, '1', '河南郑州');
INSERT INTO `user` VALUES ('26', '王五', null, null, null);
2、导入SSM整合的相关jar包

需要的话可以下载最基础的jar包 提取码iecv
3、 整合思路
1)、在数据访问层Repository:
1、SqlMapConfig.xml,空文件即可,但是需要文件头。
2、applicationContext-dao.xml
数据库连接池
SqlSessionFactory对象,需要spring和mybatis整合包下的。
配置mapper文件扫描器。
2)、在业务逻辑层Service:
1、applicationContext-service.xml包扫描器,扫描@service注解的类。
2、applicationContext-trans.xml配置事务。
3)、在控制访问层Controller:
1、Springmvc.xml
包扫描器,扫描@Controller注解的类。
配置注解驱动
配置视图解析器
4)、Web.xml文件:
1、配置spring
2、配置前端控制器。
4、配置sqlMapConfig.xml文件
使用逆向工程来生成Mapper相关代码,不需要配置别名。
创建资源文件夹config,在config/mybatis下创建SqlMapConfig.xml
<?xml version="1.0" encoding="UTF-8" ?>
<!DOCTYPE configuration
PUBLIC "-//mybatis.org//DTD Config 3.0//EN"
"http://mybatis.org/dtd/mybatis-3-config.dtd">

<configuration>
    <!--定义别名  -->
    <typeAliases>
        <!-- 批量别名定义,扫描整个包下的类,别名为:类名(大小写不敏感) -->
        <package name="com.gmw.entity"/>
    </typeAliases>

    <!-- 加载mapper.xml映射文件 -->
    <mappers>
        <package name="com.gmw.repository"/>
    </mappers>

</configuration>
5、配置applicationContext-dao.xml文件
配置数据源、配置SqlSessionFactory、mapper扫描器。
<?xml version="1.0" encoding="UTF-8"?>
<beans xmlns:xsi="http://www.w3.org/2001/XMLSchema-instance"
    xmlns="http://www.springframework.org/schema/beans" xmlns:context="http://www.springframework.org/schema/context"
    xmlns:aop="http://www.springframework.org/schema/aop" xmlns:tx="http://www.springframework.org/schema/tx"
    xsi:schemaLocation="http://www.springframework.org/schema/beans http://www.springframework.org/schema/beans/spring-beans-4.2.xsd
        http://www.springframework.org/schema/context http://www.springframework.org/schema/context/spring-context-4.2.xsd
        http://www.springframework.org/schema/aop http://www.springframework.org/schema/aop/spring-aop-4.2.xsd
        http://www.springframework.org/schema/tx http://www.springframework.org/schema/tx/spring-tx-4.2.xsd">

    <!--引入外部属性文件: -->
    <context:property-placeholder location="classpath:db.properties" />

    <!--配置C3P0连接池 -->
    <bean id="dataSource" class="com.mchange.v2.c3p0.ComboPooledDataSource">
        <property name="driverClass" value="${jdbc.driverClass}"></property>
        <property name="jdbcUrl" value="${jdbc.jdbcUrl}"></property>
        <property name="user" value="${jdbc.user}"></property>
        <property name="password" value="${jdbc.password}"></property>
    </bean>

    <!-- 配置SqlSessionFactory -->
    <bean id="sqlSessionFactory" class="org.mybatis.spring.SqlSessionFactoryBean">
        <!-- 配置mybatis核心配置文件 -->
        <property name="configLocation" value="classpath:mybatis/SqlMapConfig.xml" />
        <!-- 配置数据源 -->
        <property name="dataSource" ref="dataSource" />
    </bean>

    <!-- Mapper代理的方式,扫描包方式配置代理 -->
    <!-- 每个mapper代理对象的id就是类名,首字母小写 -->
    <bean  class="org.mybatis.spring.mapper.MapperScannerConfigurer">
        <!-- 配置Mapper接口所在的包,不需要类名 -->
        <property name="basePackage" value="com.gmw.repository" />
    </bean>

</beans>
6、配置db.properties属性文件
配置数据库相关信息
jdbc.driverClass=com.mysql.jdbc.Driver
jdbc.jdbcUrl=jdbc:mysql://localhost:3306/springmvc?characterEncoding=utf-8
jdbc.user=root
jdbc.password=root
7、配置applicationContext-service.xml文件
<?xml version="1.0" encoding="UTF-8"?>
<beans xmlns:xsi="http://www.w3.org/2001/XMLSchema-instance"
    xmlns="http://www.springframework.org/schema/beans"
    xmlns:context="http://www.springframework.org/schema/context"
    xmlns:aop="http://www.springframework.org/schema/aop"
    xmlns:tx="http://www.springframework.org/schema/tx"
    xsi:schemaLocation="http://www.springframework.org/schema/beans http://www.springframework.org/schema/beans/spring-beans-4.2.xsd
        http://www.springframework.org/schema/context http://www.springframework.org/schema/context/spring-context-4.2.xsd
        http://www.springframework.org/schema/aop http://www.springframework.org/schema/aop/spring-aop-4.2.xsd
        http://www.springframework.org/schema/tx http://www.springframework.org/schema/tx/spring-tx-4.2.xsd">

    <!-- 开启注解扫描 -->
    <context:component-scan base-package="com.gmw.service"></context:component-scan>

</beans>
8、配置applicationContext-trans.xml文件
<?xml version="1.0" encoding="UTF-8"?>
<beans xmlns:xsi="http://www.w3.org/2001/XMLSchema-instance"
    xmlns="http://www.springframework.org/schema/beans"
    xmlns:context="http://www.springframework.org/schema/context"
    xmlns:aop="http://www.springframework.org/schema/aop"
    xmlns:tx="http://www.springframework.org/schema/tx"
    xsi:schemaLocation="http://www.springframework.org/schema/beans http://www.springframework.org/schema/beans/spring-beans-4.2.xsd
        http://www.springframework.org/schema/context http://www.springframework.org/schema/context/spring-context-4.2.xsd
        http://www.springframework.org/schema/aop http://www.springframework.org/schema/aop/spring-aop-4.2.xsd
        http://www.springframework.org/schema/tx http://www.springframework.org/schema/tx/spring-tx-4.2.xsd">

    <!-- 1.配置事务管理器,真正管理事务的对象-->
    <bean id="transactionManager" class="org.springframework.jdbc.datasource.DataSourceTransactionManager">
        <!-- 注入数据源dataSource,因为事务操作的是connection -->
        <property name="dataSource"  ref="dataSource"></property>
    </bean>

    <!-- 2.配置事务的通知 -->
    <!--配置事务的增强-->
    <tx:advice id="txAdvice" transaction-manager="transactionManager">
        <tx:attributes>
            <!--
                isolation="DEFAULT"    隔离级别
                    default:默认,Mysql默认:可重复读
                    READ_UNCOMMITTED:未提交读
                    READ_COMMITTED:已提交读
                    REPEATABLE_READ:可重复读
                    SERIALIZABLE:串行化的
                propagation="REQUIRED"传播行为
                read-only="false"    只读
                timeout="-1"    过期时间
                rollback-for=""    -Exception
                no-rollback-for=""+Exception
            -->
            <tx:method name="save*" propagation="REQUIRED" isolation="DEFAULT"/>
            <tx:method name="add*" propagation="REQUIRED" isolation="DEFAULT"/>
            <tx:method name="del*" propagation="REQUIRED" isolation="DEFAULT"/>
            <tx:method name="update*" propagation="REQUIRED" isolation="DEFAULT"/>
            <tx:method name="modify*" propagation="REQUIRED" isolation="DEFAULT"/>
            <tx:method name="get*" propagation="REQUIRED" isolation="DEFAULT" read-only="true"/>
            <tx:method name="find*" propagation="REQUIRED" isolation="DEFAULT" read-only="true"/>
            <tx:method name="query*" propagation="REQUIRED" isolation="DEFAULT" read-only="true"/>
        </tx:attributes>
    </tx:advice>

    <!-- 配置切面 -->
    <aop:config>
        <aop:pointcut expression="execution(* com.hp.service.impl.*ServiceImpl.*(..))" id="pc"/>
        <aop:advisor advice-ref="txAdvice" pointcut-ref="pc"/>
    </aop:config>

    <!-- 开启事务管理的注解 -->
    <!-- <tx:annotation-driven transaction-manager="transactionManager"/> -->
</beans>
9、配置 springmvc.xml文件
<?xml version="1.0" encoding="UTF-8"?>
<beans xmlns:xsi="http://www.w3.org/2001/XMLSchema-instance"
    xmlns="http://www.springframework.org/schema/beans" xmlns:context="http://www.springframework.org/schema/context"
    xmlns:aop="http://www.springframework.org/schema/aop" xmlns:tx="http://www.springframework.org/schema/tx"
    xmlns:mvc="http://www.springframework.org/schema/mvc"
    xsi:schemaLocation="http://www.springframework.org/schema/mvc http://www.springframework.org/schema/mvc/spring-mvc-4.2.xsd
        http://www.springframework.org/schema/beans http://www.springframework.org/schema/beans/spring-beans-4.2.xsd
        http://www.springframework.org/schema/context http://www.springframework.org/schema/context/spring-context-4.2.xsd
        http://www.springframework.org/schema/aop http://www.springframework.org/schema/aop/spring-aop-4.2.xsd
        http://www.springframework.org/schema/tx http://www.springframework.org/schema/tx/spring-tx-4.2.xsd">

    <!--配置controller扫描包 -->
    <context:component-scan base-package="com.gmw.controller"></context:component-scan>

    <!-- 使用<mvc:annotation-driven>替代注解处理器和适配器的配置。 -->
    <!-- 在注解适配器中加入messageConverters,解析json -->

    <mvc:annotation-driven/>


    <!-- 配置视图解析器 -->
    <bean
        class="org.springframework.web.servlet.view.InternalResourceViewResolver">
        <!--配置逻辑视图的前缀 -->
        <property name="prefix" value="/WEB-INF/jsp/"></property>
        <!--配置逻辑视图的后缀 -->
        <property name="suffix" value=".jsp"></property>
    </bean>


    <!--  配置图片上传解析器 -->
    <!-- 文件上传,id必须设置为multipartResolver -->
     <bean id="multipartResolver" class="org.springframework.web.multipart.commons.CommonsMultipartResolver">
        <!-- 设置文件上传大小,单位为字节byte -->
        <property name="maxUploadSize" value="5000000" />
        <property name="defaultEncoding" value="utf-8"></property>
    </bean>

</beans>
10、配置applicationContext.xml文件,用来整合配置文件
<?xml version="1.0" encoding="UTF-8"?>
<beans xmlns:xsi="http://www.w3.org/2001/XMLSchema-instance"
    xmlns="http://www.springframework.org/schema/beans" xmlns:context="http://www.springframework.org/schema/context"
    xmlns:aop="http://www.springframework.org/schema/aop" xmlns:tx="http://www.springframework.org/schema/tx"
    xmlns:mvc="http://www.springframework.org/schema/mvc"
    xsi:schemaLocation="http://www.springframework.org/schema/mvc http://www.springframework.org/schema/mvc/spring-mvc-4.2.xsd
        http://www.springframework.org/schema/beans http://www.springframework.org/schema/beans/spring-beans-4.2.xsd
        http://www.springframework.org/schema/context http://www.springframework.org/schema/context/spring-context-4.2.xsd
        http://www.springframework.org/schema/aop http://www.springframework.org/schema/aop/spring-aop-4.2.xsd
        http://www.springframework.org/schema/tx http://www.springframework.org/schema/tx/spring-tx-4.2.xsd">

    <import resource="applicationContext-dao.xml"/>
    <import resource="applicationContext-service.xml"/>
    <import resource="applicationContext-trans.xml"/>
    <import resource="springmvc.xml"/>
</beans>
11、配置web.xml文件
<?xml version="1.0" encoding="UTF-8"?>
<web-app xmlns:xsi="http://www.w3.org/2001/XMLSchema-instance" xmlns="http://java.sun.com/xml/ns/javaee" xsi:schemaLocation="http://java.sun.com/xml/ns/javaee http://java.sun.com/xml/ns/javaee/web-app_2_5.xsd" id="WebApp_ID" version="2.5">
  <display-name>springmvc-helloworld</display-name>
  <welcome-file-list>
    <welcome-file>index.html</welcome-file>
    <welcome-file>index.htm</welcome-file>
    <welcome-file>index.jsp</welcome-file>
    <welcome-file>default.html</welcome-file>
    <welcome-file>default.htm</welcome-file>
    <welcome-file>default.jsp</welcome-file>
  </welcome-file-list>

      <!--配置spring配置文件的路径 -->
      <!--
    <context-param>
        <param-name>contextConfigLocation</param-name>
        <param-value>classpath:spring/applicationContext*.xml</param-value>
    </context-param>
    -->
    <!--使用监听器加载Spring配置文件 -->
    <!--
    <listener>
        <listener-class>org.springframework.web.context.ContextLoaderListener</listener-class>
    </listener>
    -->

    <servlet>
        <servlet-name>DispatcherServlet</servlet-name>
        <servlet-class>org.springframework.web.servlet.DispatcherServlet</servlet-class>
        <init-param>
            <param-name>contextConfigLocation</param-name>
            <param-value>classpath:spring/applicationContext.xml</param-value>
        </init-param>
        <load-on-startup>1</load-on-startup>
    </servlet>
    <servlet-mapping>
        <servlet-name>DispatcherServlet</servlet-name>
        <url-pattern>/</url-pattern>
    </servlet-mapping>

    <filter>
        <filter-name>encoding</filter-name>
        <filter-class>org.springframework.web.filter.CharacterEncodingFilter</filter-class>
        <!--设置编码参是UTF8 -->
        <init-param>
            <param-name>encoding</param-name>
            <param-value>UTF-8</param-value>
        </init-param>
    </filter>
    <filter-mapping>
        <filter-name>encoding</filter-name>
        <url-pattern>/*</url-pattern>
    </filter-mapping>

</web-app>
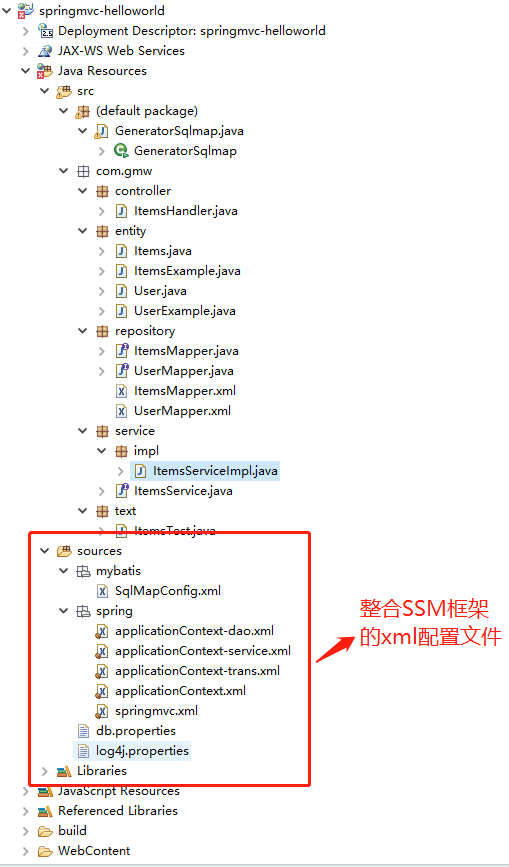
注:这样就基本配置好了SSM框架整合....
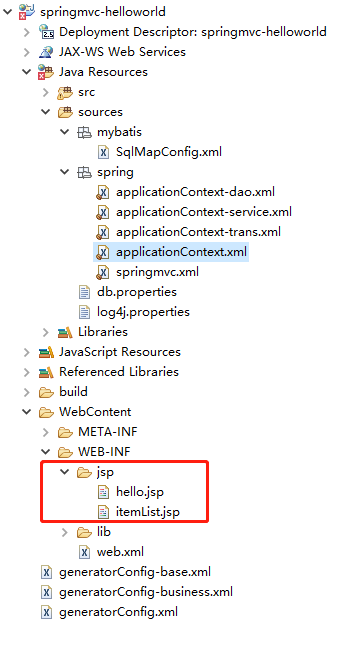
12、实现商品列表显示
1). 加入jsp页面
2). 效果
配置完效果如下图:
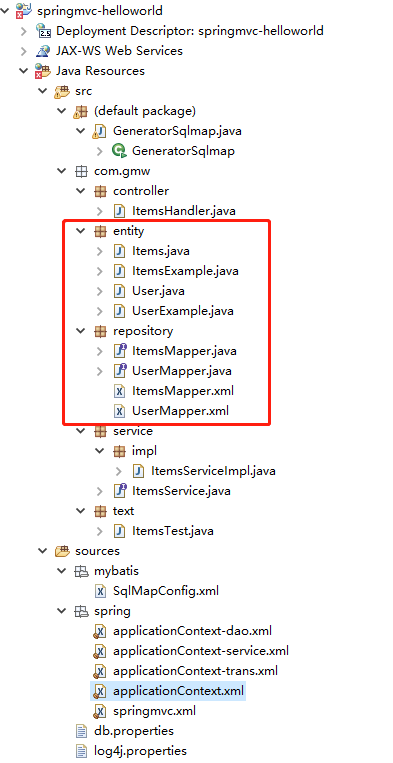
3). DAO开发
使用逆向工程,生成代码
逆向工程生成代码如下图:
4). ItemService接口
public interface ItemService {
    /**

     * 查询商品列表
     * @return
     */

    List<Item>queryItemList();

}
5). ItemServiceImpl实现类
@Service

publicclass ItemServiceImpl implements ItemService {

    @Autowired

    private ItemMapper itemMapper;

    @Override

    public List<Item>queryItemList() {

       // 从数据库查询商品数据

       List<Item>list = this.itemMapper.selectByExample(null);

       returnlist;

    }

}
6). ItemController
@Controller

publicclass ItemController {

    @Autowired

    private ItemService itemService;

    /**

     * 显示商品列表

     * @return

     */

    @RequestMapping("/itemList")

    public ModelAndView queryItemList() {

       // 获取商品数据

       List<Item>list = this.itemService.queryItemList();

       ModelAndView modelAndView = newModelAndView();

       // 把商品数据放到模型中

       modelAndView.addObject("itemList", list);

       // 设置逻辑视图

       modelAndView.setViewName("itemList");

       returnmodelAndView;

    }

}
7). 测试
访问url:http://127.0.0.1:8080/springmvc-web/itemList
效果如下图:


 浙公网安备 33010602011771号