
ElasticSearch笔记(狂神说)
Elasticsearch概述
一、什么是Elasticsearch?
狂神说视频:https://www.bilibili.com/video/BV17a4y1x7zq
参考:https://www.cnblogs.com/DAYceng/p/14755532.html
参考:https://blog.csdn.net/qq_21197507/article/details/115076913
参考:https://blog.csdn.net/gouzhengju1454/article/details/117707976
1.1 ELK的下载地址
ElasticSearch: https://mirrors.huaweicloud.com/elasticsearch/?C=N&O=D
logstash: https://mirrors.huaweicloud.com/logstash/?C=N&O=D
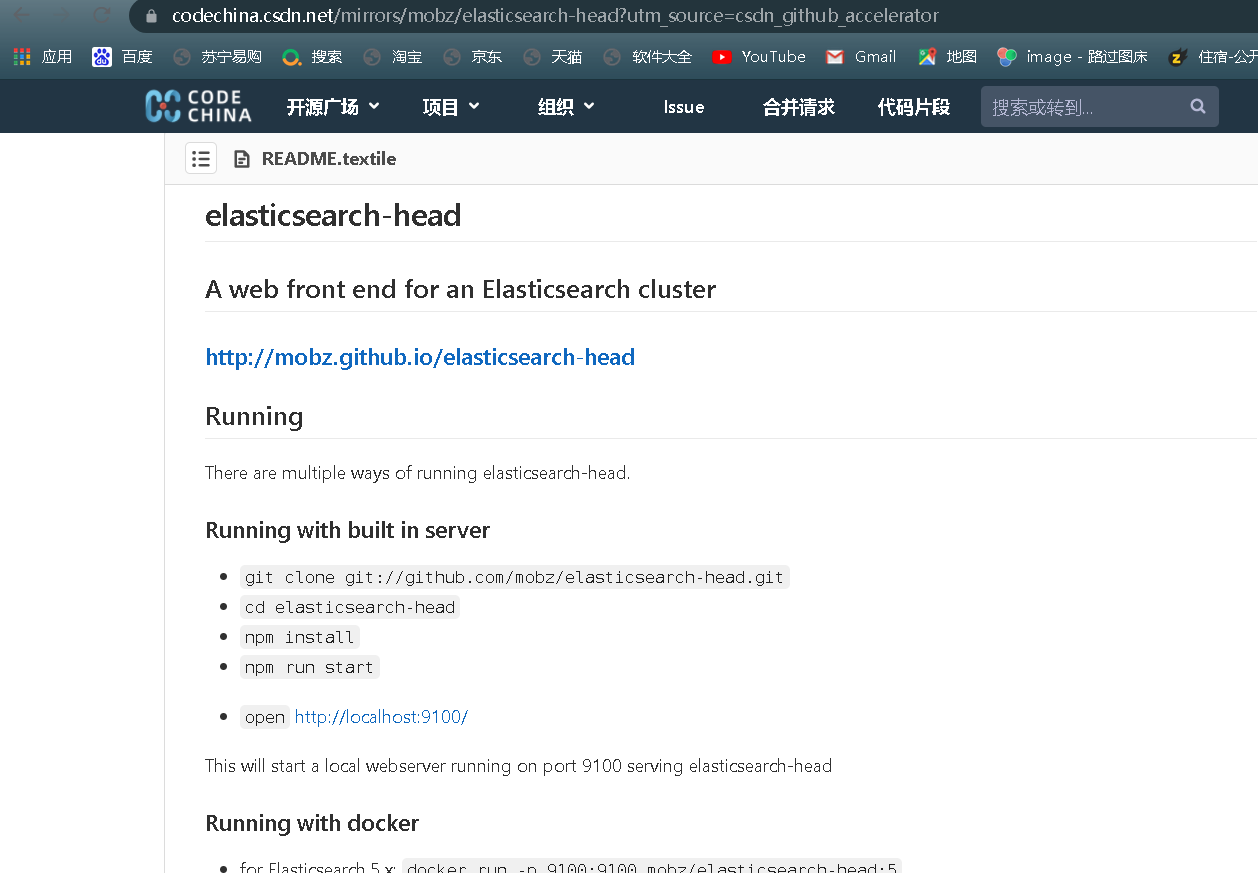
可视化界面elasticsearch-head.https://github.com/mobz/elasticsearch-head
kibana: https://mirrors.huaweicloud.com/kibana/?C=N&O=D
ik分词器 https://github.com/medcl/elasticsearch-analysis-ik
jdk必须是1.8及以上的版本
Lucene简介
![]()
-
Lucene是一套用于全文检索和搜寻的开源程序库,由Apache软件基金会支持和提供
-
Lucene提供了一个简单却强大的应用程序接口(API),能够做全文索引和搜寻,在Java开发环境里Lucene是一个成熟的免费开放源代码工具
-
Lucene并不是现成的搜索引擎产品,但可以用来制作搜索引擎产品
-
Lucene是一套信息检索工具包! jar包!不包含搜索引擎系统!
Lucene包含:索引结构!读写索引的工具!排序,搜索规则...工具类!等Lucene和ElasticSearch关系:
简单来说,Elasticsearch是基于Lucene做了一些封装和**增强 **
Elasticsearch简介
Elasticsearch是一个实时分布式搜索和分析引擎。它让你以前所未有的速度处理大数据成为可能。
它用于全文搜索、结构化搜索、分析以及将这三者混合使用:
维基百科使用Elasticsearch提供全文搜索并高亮关键字 ,以及输入实时搜索(search-asyou-type)和搜索纠错(did-you-mean)等搜索建议功能。
英国卫报使用Elasticsearch结合用户日志和社交网络数据提供给他们的编辑以实时的反馈,以便及时了解公众对新发表的文章的回应。
StackOverflow结合全文搜索与地理位置查询,以及more-like-this功能来找到相关的问题和答案。
Github使用Elasticsearch检索1300亿行的代码。
并且Elasticsearch不仅用于大型企业,它还让像DataDog以及Klout这样的创业公司将最初的想法变成可扩展的解决方案。
Elasticsearch可以在你的笔记本。上运行,也可以在数以百计的服务器上处理PB级别的数据。
Elasticsearch是一个基于Apache Lucene(TM)的开源搜索引擎。 无论在开源还是专有领域, Lucene可以被认为是迄今为止最先进、性能最好的、功能最全的搜索引擎库。
但是, Lucene只是一个库。想要使用它,你必须使用Java来作为开发语言并将其直接集成到你的应用中,更糟糕的是, Lucene非常复杂,你需要深入了解检索的相关知识来理解它是如何工作的。
Elasticsearch也使用Java开发并使用Lucene作为其核心来实现所有索引和搜索的功能,它的目的是通过简单的RESTful API(REST风格的网络接口,是当下主流的API)来隐藏Lucene的复杂性,从而让全文搜索变得简单。
ElasticSearch的应用场景
1、维基百科,类似百度百科,全文检索,高亮,搜索推荐
2、The Guardian (国外新闻网站) , 类似搜狐新闻,用户行为日志(点击,浏览,收藏,评论) +社交网络数据(对某某新闻的相关看法) ,数据分析,给到每篇新闻文章的作者,让他知道他的文章的公众反馈
3、Stack Overflow (国外的程序异常讨论论坛) , IT问题,程序的报错, 提交上去,有人会跟你讨论和回答,全文检索,搜索相关问题和答案,程序报错了,就会将报错信息粘贴到里面去,搜索有没有对应的答案
4、GitHub (开源代码管理)
5、电商网站,检索商品.
6、日志数据分析, logstash采集日志, ES进行复杂的数据分析, ELK技术, elasticsearch(搜索)+logstash(过滤)+kibana(可视化分析)
7、商品价格监控网站,用户设定某商品的价格阈值,当低于该阈值的时候,发送通知消息给用户,比如说订阅牙膏的监控:如果高露洁牙膏的家庭套装低于50块钱,就通知我,我就去买
8、BI系统 ,商业智能, Business Intelligence.比如说有个大型商场集团, BI分析一下某某区域最近3年的用户消费金额的趋势以及用户群体的组成构成,产出相关的数张报表, 最近3年,每年消费金额呈现100%的增长,而且用户群体85%是高级白领。。。
9、国内:站内搜索(电商,招聘,门户,等等),IT系统搜索(OA,CRM,ERP,等等),数据分析(ES热门的一个使用场景)
总而言之,Elasticsearch就是提供高效、个性化检索需求的一种解决方案
ELK简介
ELK是Elasticsearch、Logstash、Kibana三大开源框架首字母大写简称。市面上也被成为Elastic Stack。
其中Elasticsearch是一个基于Lucene、分布式、通过Restful方式进行交互的近实时搜索平台框架。像类似百度、谷歌这种大数据全文搜索引擎的场景都可以使用Elasticsearch作为底层支持框架,可见Elasticsearch提供的搜索能力确实强大,市面上很多时候我们简称Elasticsearch为es.
Logstash是ELK的中央数据流引擎,用于从不同目标(文件/数据存储/MQ )收集的不同格式数据,经过过滤后支持输出以到不同目的地(文件/MQ/redis/elasticsearch/kafka等)。
Kibana可以将es的数据通过友好的页面展示出来 ,提供实时分析的功能。
总结一下就是:收集清洗数据-->建立索引,储存-->Kibana分析
市面上很多开发只要提到ELK能够一致说出它是一 个日志分析架构技术栈总称,但实际上ELK不仅仅适用于日志分析,它还可以支持其它任何数据分析和收集的场景,日志分析和收集只是更具有代表性,并非唯一性。

二、其他搜索引擎
Solr简介
Solr是Apache下的一个顶级开源项目,采用java开发,它是基于Lucene的全文搜索服务器。Solr提供了比Lucene更为丰富的查询语言,同时实现了可配置、可扩展,并对索引、搜索性能进行了优化
Solr可以独立运行在Jetty、Tomcat等这些Servlet容器中 , Solr索引的实现方法很简单,用POST方法向Solr服务器发送一个描述Field及其内容的XML文档,Solr根据xml文档添加、删除、更新索引。
列如:搜索name==dayceng<>
Solr 搜索只需要发送HTTP GET请求,然后对Solr返回xml、json等格式的查询结果进行解析,组织页面布局。Solr不提供构建UI的功能, Solr提供了一个管理界面,通过管理界面可以查询Solr的配置和运行情况。
solr是基于lucene开发企业级搜索服务器,实际上就是封装了lucene.
Solr是一个独立的企业级搜索应用服务器,它对外提供类似于Web-service的API接口。用户可以通过http请求,向搜索引擎服务器提交一定格式的文件,生成索引;也可以通过提出查找请求,并得到返回结果。
ES与Solr对比
单纯地对已有的数据进行搜索,Solr更快

当建立实时索引时,Solr会产生IO阻塞,查询性能较差,此时ES具有明显优势

随着搜索量的增加,Solr的劣势愈发明显,ES无明显变化

总结
1、ES基本是开箱即用,非常简单。Solr安装略微复杂
2、Solr 利用Zookeeper进行分布式管理,而Elasticsearch 自身带有分布式协调管理功能。
3、Solr 支持更多格式的数据,比如JSON、XML、 CSV ,而Elasticsearch仅支持JSON文件格式。
4、Solr 官方提供的功能更多,而Elasticsearch本身更注重于核心功能,高级功能多有第三方插件提供,例如图形化界面需要kibana友好支撑
5、Solr 查询快,但更新索引时慢(即插入删除慢) ,用于电商等查询多的应用;
●ES建立索引快(即查询慢) ,即实时性查询快,用于facebook新浪等搜索。
●Solr是传统搜索应用的有力解决方案,但Elasticsearch 更适用于新兴的实时搜索应用。
6、Solr比较成熟,有一个更大,更成熟的用户、开发和贡献者社区,而Elasticsearch相对开发维护者较少,更新太快,学习使用成本较高。
Elasticsearch安装
注意:java版本至少为JDK1.8或以上
一、安装
windows下解压即可使用
二、Elasticsearch目录介绍
bin 相关启动文件
config 配置文件
log4j2.properties 日志配置文件
jvm.options java虚拟机配置文件
elasticsearch.yml ES配置文件(默认端口:9200,这里在tpot中,docker默认分配的是1111,需要再映射到9200才行)
lib 相关jar包
logs 日志
modules 功能模块
plugins 插件
三、启动
双击bin下的elasticsearch.bat()即可

四、测试访问
访问其暴露的端口进行验证( http://127.0.0.1:9200/ )

五、安装可视化界面Elasticsearch-head
访问http://localhost:9100/

此时因为跨域访问(跨端口)导致集群无法连接,要通过配置elasticsearch.yml来解决
六、解决跨域问题
配置es,打开elasticsearch.yml文件,在最后一行加入(注意yalm语法,冒号后要加一个空格)
http.cors.enabled: true
http.cors.allow-origin: "*"
使用elasticsearch.bat重启es,连接成功

注1:Linux下可能会因为进程问题启动失败
#查看elastic的进程号 并杀死
ps aux | grep elasticsearch

kill -9 进程号
#重启 -d 后台运行
./bin/elasticsearch -d
注2:Linux下eshead启动失败,提示9100端口占用
#查看占用端口的进程id
lsof -i:9100
#杀死进行
kill -9 4852
七、Kibana安装
Kibana是一个针对Elasticsearch的开源分析及可视化平台 ,用来搜索、查看交互存储在Elasticsearch索引中的数据。 使用Kibana,可以通过各种图表进行高级数据分析及展示。Kibana让海量数据更容易理解。它操作简单,基于浏览器的用户界面可以快速创建仪表板( dashboard )实时显示Elasticsearch查询动态。设置Kibana非常简单。无需编码或者额外的基础架构,几分钟内就可以完成Kibana安装并启动Elasticsearch索引监测。
官网:https://www.elastic.co/cn/kibana
注意:使用的ES版本要与Kibana的对应
下载完成解压,双击kibana.bat启动即可

汉化
在Kibana目录下的config中修改Kibana.yml文件,最后一行加上
i18n.locale: "zh-CN"
重启即可
ES核心概念
概述
Elasticsearch是面向文档的一种数据库,这意味着其不再需要行列式的表格字段约束。
ES会存储整个构造好的数据或文档,然而不仅仅是储存数据,这使得文档中每个数据可以被标识,进而可以被检索。在ES中,执行index,search,sort或过滤文档等操作都不是传统意义上的行列式的数据。
ES从根本上对数据的不同思考方式也正是他能应对复杂数据结构的全文检索的原因之一。
关系型数据库与Elasticsearch的对比
以下数据格式均为JSON
| Relational DB | Elasticsearch |
|---|---|
| 数据库(database) | 索引(index) |
| 表(tables) | 类型(types,新版本中逐步弃用) |
| 行(rows) | 文档(documents) |
| 字段(columns) | 字段(file) |
Elasticsearch(一般为集群)中可以包含多个索引(对应数据库) ,每个索引中可以包含多个类型(对应表) ,每个类型下又包含多个文档(对应行),每个文档中又包含多个字段(对应列)。
物理设计:
Elasticsearch在后台把每个索引划分成多个分片,每分分片可以在集群中的不同服务器间迁移(方便集群的搭建)
实际上只建立一个索引它自己也是一个集群,默认名称就是elasticsearch

逻辑设计:
一个索引类型中,包含多个文档,如文档1 ,文档2。
当我们索引一篇文档时,可以通过这样的一个顺序找到它:
索引-->类型-->文档ID
通过这个组合我们就能索引到某个具体的文档。
(注:ID不必是整数,实际上它是个字符串。)
文档
Elasticsearch是面向文档的,那么就意味着索引和搜索数据的最小单位是文档, Elasticsearch中,文档有几个重要属性:
●自我包含,一篇文档同时包含字段和对应的值,也就是同时包含key:value
●可以是层次型的,一个文档中包含着文档,复杂的逻辑实体就是这么来的(即文档就是JSON格式的对象,可用fastjson进行自动转换自动)
●灵活的结构,文档不依赖预先定义的模式,我们知道关系型数据库中,要提前定义字段才能使用,在Elasticsearch中,对于字段是非常灵活的,有时候我们可以忽略该字段,或者动态的添加一个新的字段。
我们可以随意的新增或者忽略某个字段,但每个字段的类型非常重要。比如一个年龄字段类型,可以是字符串也可以是整形。因为elasticsearch会保存字段和类型之间的映射及其他的设置。这种映射具体到每个映射的每种类型,这也是为什么在elasticsearch中,类型有时候也称为映射类型
文档就是一条条打好标签的数据
举个例子:
user
1 xiaoming 22
2 liming 19
。。。
这是一个表,名称为user,里面的每一行就是一个文档,文档中包含着序号、名字、年龄等信息(有点像之前要使用TFIDF算法时做的那个设备文档)
类型
类型是文档的逻辑容器,就像关系型数据库一样,表格是行的容器。
类型中对于字段的定义称为映射,比如name可以映射为字符串类型。
我们说文档是无模式的,它们不需要拥有映射中所定义的所有字段,比如新增一个字段。那么elasticsearch是怎么做的呢?elasticsearch会自动的将新字段加入映射,但是这个字段的不确定它是什么类型,elasticsearch就开始猜,如果这个值是18 ,那么elasticsearch会认为它是整形。
但是elasticsearch也可能猜不对 ,所以最安全的方式就是提前定义好所需要的映射,这点跟关系型数据库殊途同归了,先定义好字段,然后再使用
类比MySQL中,建立一个表的时候需要设定的数据类型

索引
索引是映射类型的容器, elasticsearch中的索引是一个非常大的文档集合(即数据库)。索引存储了映射类型的字段和其他设置。 然后它们被存储到了各个分片上了。我们来研究下分片是如何工作的。
物理设计: 节点和分片如何工作

存在数据库的数据可以通过不同的分片放在不同的集群上
一个集群至少有一个节点,而一个节点就是一个elasricsearch进程,节点可以有多个索引默认的,如果你创建索引,那么索引将会有个5个分片( primary shard ,又称主分片)构成,每一个主分片会有一个副本( replica shard ,又称复制分片)

上图是一个有3个节点的集群,可以看到主分片和对应的复制分片都不会在同一个节点内(比如主分片P0和主分片的复制分片P1分别在节点1/3,同样的分片Px在每个至少有一个),当某个节点挂掉了,数据也不至于丢失。
实际上,一个分片是一个Lucene索引,一个包含倒排索引的文件目录,倒排索引的结构使得elasticsearch在不扫描全部文档的情况下,就能告诉你哪些文档包含特定的关键字。什么是倒排索引?
倒排索引
elasticsearch使用的是一种称为倒排索引的结构 ,采用Lucene倒排索引作为底层。这种结构适用于快速的全文搜索,一个索引由文档中所有不重复的列表构成,对于每一个词,都有一个包含它的文档列表。
例如,现在有两个文档,每个文档包含如下内容:
study every day, good good up to forever #文档1包含的内容
To forever, study every day, good good up #文档2包含的内容
为了创建倒排索引,我们首先要将每个文档拆分成独立的词(或称为词条或者tokens) ,然后创建一个包含所有不重复的词条的排序列表,然后列出每个词条出现在哪个文档:(大小写要区分,重复单词也要加入)
| term | doc_1 | doc_2 |
|---|---|---|
| Study | 〇 | X |
| To | X | 〇 |
| forever | 〇 | 〇 |
| every | 〇 | 〇 |
| study | X | 〇 |
| day | 〇 | 〇 |
| good | 〇 | 〇 |
| up | 〇 | 〇 |
| to | 〇 | X |
| every | 〇 | 〇 |
现在,我们试图搜索to forever,只需要查看每个词条在对应文档是否出现即可。这里to和forever在doc1里面都有,而doc2中to没有,所以搜索结果为:doc1的权重更大,即“to forever”更可能出现在doc1
| term | doc_1 | doc_2 |
|---|---|---|
| to | 〇 | X |
| forever | 〇 | 〇 |
| SUM | 2 | 1 |
这里的“权重”,即为文档的score,es搜索完成会对分数进行自动统计
两个文档都匹配,但是第一个文档比第二个匹配程度更高。如果没有别的条件,这两个包含关键字的文档都将返回。
再举一个例子
再来看一个示例比如我们通过博客标签来搜索博客文章。 那么倒排索引列表就是这样的一个结构:

如果要搜索含有python标签的文章,那相对于查找所有原始数据而言,查找倒排索引后的数据将会快的多。只需要查看标签这一栏,然后获取相关的文章ID即可。比如这里搜索“Linux”就绝对不会出现1或者2
elasticsearch的索引和Lucene的索引对比
在elasticsearch中,索引(数据库)这个词被频繁使用。在elasticsearch中 ,索引被分为多个分片,每份分片是一个Lucene的索引。所以一个elasticsearch索引是由多个Lucene倒排索引组成的。(因为elasticsearch使用Lucene作为底层)

如无特指,说起索引都是指elasticsearch的索引。
IK分词器
什么是IK分词器?
分词:即把一段中文或者别的划分成一个个的关键字,我们在搜索时候会把自己的信息进行分词,会把数据库中或者索引库中的数据进行分词,然后进行一个匹配操作,默认的中文分词是将每个字看成一个词,比如“我爱黎明”会被分为"我","爱","“黎","明" 。这显然是不符合要求的,所以我们需要安装中文分词器IK来解决这个问题。
IK提供了两个分词算法: ik. smart和ik_max_ word
其中ik_smart为最少切分, ik _max_word为最细粒度划分
安装IK分词器
1、下载
2、安装
解压后放入es的插件目录plugins下即可

3、重启es加载插件

可使用以下命令查看插件列表
elasticsearch-plugin list
4、启动Kibana测试
测试ik_smart(使用RESTful风格的语句发起GET请求,对我们提供的JSON数据进行分词)
GET _analyze
{
"analyzer": "ik_smart",
"text": ["新型冠状病毒"]
}
运行结果:

测试ik _max _word
GET _analyze
{
"analyzer": "ik_max_word",
"text": ["新型冠状病毒"]
}
运行结果:最细粒度划分会把所有可能的组合都划分出来(划分方式由某个字典规定)

问题:当遇到自造词时,拆分结果不是我们想要的

这时需要把关键词加入字典
配置IK分词器
添加自定义字典
在
elasticsearch-7.6.1\plugins\ik\config
中可以找到配置文件IKAnalyzer.cfg.xml

只需要在config目录下新建一个自己的.dic字典文件并录入IKAnalyzer.cfg.xml中然后重启es即可

测试能够识别自定义词语

REST风格
概念
一种软件架构风格,而不是标准,只是提供了一组设计原则和约束条件。它主要用于客户端和服务器交互类的软件。基于这个风格设计的软件可以更简洁,更有层次,更易于实现缓存等机制。
即通过不同的命令实现不同的操作
基本REST命令
| method | url地址 | 描述 |
|---|---|---|
| PUT | localhost:9200/索引名称/类型名称/文档id | 创建文档(指定文档id ) |
| POST | localhost:9200/索弓|名称/类型名称 | 创建文档(随机文档id ) |
| POST | localhost:9200/索引名称/类型名称/文档id/_ update | 修改文档 |
| DELETE | localhost:9200/索引名称/类型名称/文档id | 删除文档 |
| GET | localhost:9200/索引名称/类型名称/文档id | 查询文档(通过文档id) |
| POST | localhost:9200/索弓|名称/类型名称/_ search | 查询所有数据 |
测试
关于索引的操作
1、创建一个索引
PUT /索引名/类型名(新版本逐步废弃)/文档ID
{
请求体
}
PUT /test1/type/1
{
  "name": "xiaoming",
  "age": 13
}


注意:
1、创建的索引名要小写
2、es head中数据浏览不显示内容就换个浏览器试试
2、更新一个索引
修改索引依旧可以使用PUT,此时返回的版本号会增加,"result"会提示update,但如果漏了一些信息,原始信息就会丢失,故现在一般使用POST来更新索引
POST /test1/type1/1
{
 "doc":{
   "name": "张三"
 }
}


没有写age,它就会保持原样(如果用PUT的话age就直接没了)
3、删除一个索引
DELETE test1(索引名或文档记录ID)
4、指定类型
常用的字段类型有:
●字符串类型
text、keyword
●数值类型
long,. integer, short, byte, double, float, half float, scaled float
●日期类型
date
●te布尔值类型
boolean
●二进制类型
binary.
创建一个t2索引(或者说索引库)但不创建文档,此时称其为一个“规则”

查看t2,里面没有值,后续可以往里面放数据

通过GET可以查看规则信息

GET请求很好用,除了规则,还可以查看索引、文档的信息
注:
1、新版本es中正在逐步弃用type,我们创建索引库的时候可以将原来的type换成_doc,这样es就会自动帮我们配置字段类型
如下面的新建的test3:

2、查看默认配置命令 GET _cat/indices?v
可以使用这个命令查看集群健康状态等一些信息

关于文档的操作基本操作
1、添加数据
PUT /dayceng/user/1
{
  "name": "DAYceng",
  "age": "22",
  "desc": "如此生活三十年",
  "tags": ["穷","阿宅","脚本小子"]
}
2、查询(获取,GET)数据

3、简单搜索(GET条件查询)
GET /dayceng/user/_search?q=name:条件

简单的条件查询可根据默认的映射规则产生基本查询结果
(这里的"_score"代表匹配度,分值越高,匹配度越高)
说明:

字段name,它的类型是keyword,此时进行搜索,分词器不会对类型为keyword的name进行分词(即如果你搜“丹”是不会返回“丹霞”的结果的),如果类型是text则可以查到
复杂操作(主要是搜索)
复杂搜索select(排序、分页、模糊/精准查询、高亮)
1、使用请求体查询
一般来说,我们进行搜索不是直接写条件搜索,而是需要构建一个JSON格式的请求体,这样可以设置更多参数以实现定制化的搜索
GET /dayceng/user/_search
{
  "query": {
    "match": {
      "name": "丹霞"
    }
  }
}

如果有相似关键字的多个结果,他们的分数会有不同

hits是我们比较关注的一部分,其中包含:
索引和文档的信息
查询的结果总数
查询出来的具体的文档
分数:用来判断哪个结果更加符合预期
通过hits我们可以把数据的信息遍历出来,让我们想要的结果优先显示出来
后面使用java操控es,所有的方法和对象就是这里的hits、source等key
2、请求体参数
我们通过在请求体后添加参数的方式实现一些自定义的操作
筛选结果
只返回特定结果
GET /dayceng/user/_search
{
  "query": {
    "match": {
      "name": "丹霞"
    }
  },
   "_source":["name","tags"]
}

排序
GET /dayceng/user/_search
{
  "query": {
    "match": {
      "name": "丹霞"
    }
  },
  "sort": [
    {
      "age": {
        "order": "desc"
      }
    }
  ]
}
注意:排序只能用于数值类型,我这里的age是text类型,运行就会报错

"Text fields are not optimised for operations that require per-document field data like aggregations and sorting, so these operations are disabled by default. Please use a keyword field instead. Alternatively, set fielddata=true on [age] in order to load field data by uninverting the inverted index. Note that this can use significant memory."
把“age”换成“age.keyword”即可正常排序

分页
GET /dayceng/user/_search
{
  "query": {
    "match": {
      "name": "丹霞在"
    }
  },
  "sort": [
    {
      "age.keyword": {
        "order": "desc"
      }
    }
  ],
   "from": 0,---从第几个数据开始
   "size": 2 ---返回几个数据

}

过滤
使用filter参数即可

gt:大于
gte:大于等于
lt:小于
lte:小于等于
(以上条件可混合使用)
3、布尔值查询
使用布尔值可进行多条件查询
must:设置的所有match都要匹配才会返回结果
must not:返回与设置条件相反的结果
should:满足条件之一即可返回结果
GET /dayceng/user/_search
{
  "query": {
    "bool": {
      "must": [
        {
          "match": {
            "name": "DAYceng"
          }
        },
        {
          "match": {
            "age": 22
          }
        }
      ]
    }
  }

}

4、精确查询
term查询是直接使用倒排索引进行精确查询的
term与match的比较
·term使用倒排索引直接进行精确查询
·match则会使用分词器进行解析后再查询(先分析文档,在通过分析结果进行查询)
类型text与keyword的比较
text会使用分词器进行分词后再查询

keyword不会拆分特定词语

5、高亮查询
使用highlight参数
GET /dayceng/user/_search
{
  "query": {
    "match": {
      "name": "丹霞"
    }
  },
  "highlight": {
    "fields": {
      "name":{}
    }
  }
}

在highlight中也可以自定义高亮标签
GET /dayceng/user/_search
{
  "query": {
    "match": {
      "name": "丹霞"
    }
  },
  "highlight": {
    "pre_tags": "<p class=key style='color:red'>",
    "post_tags": "</p>",
    "fields": {
      "name":{}
    }
  }
}

SpringBoot整合
官方文档:https://www.elastic.co/guide/en/elasticsearch/client/java-rest/7.6/index.html
1、创建工程
略
目录结构

2、导入依赖
注意依赖版本和安装的版本一致
<dependency>
    <groupId>org.elasticsearch.client</groupId>
    <artifactId>elasticsearch-rest-high-level-client</artifactId>
    <version>7.6.2</version>
</dependency>
导入elasticsearch
<dependency>
<groupId>org.springframework.boot</groupId>
<artifactId>spring-boot-starter-data-elasticsearch</artifactId>
</dependency>
提前导入fastjson、lombok
<dependency>
<groupId>com.alibaba</groupId>
<artifactId>fastjson</artifactId>
<version>1.2.70</version>
</dependency>
<!-- lombok需要安装插件 -->
<dependency>
<groupId>org.projectlombok</groupId>
<artifactId>lombok</artifactId>
<optional>true</optional>
</dependency>
3、创建并编写配置类
package com.example.demo.config;

import org.apache.http.HttpHost;
import org.elasticsearch.client.RestClient;
import org.elasticsearch.client.RestHighLevelClient;
import org.springframework.context.annotation.Bean;
import org.springframework.context.annotation.Configuration;

@Configuration
public class ElasticsearchConfig {
    @Bean
    public RestHighLevelClient restHighLevelClient(){
        RestHighLevelClient client=new RestHighLevelClient(
                RestClient.builder(
                        new HttpHost("127.0.0.1",9200,"http")
                )

        );
        return client;
    }

}
4、创建并编写实体类
@Data
@NoArgsConstructor
@AllArgsConstructor
public class User implements Serializable {


    private String name;
    private Integer age;
}
5、测试
所有测试均在
SpringbootElasticsearchApplicationTests中编写
注入 RestHighLevelClient
@Autowired
public RestHighLevelClient restHighLevelClient;
索引的操作
1、索引的创建
// 测试索引的创建, Request PUT liuyou_index
@Test
public void testCreateIndex() throws IOException {
    CreateIndexRequest request = new CreateIndexRequest("liuyou_index");
    CreateIndexResponse response = restHighLevelClient.indices().create(request,     RequestOptions.DEFAULT);

    System.out.println(response.isAcknowledged());// 查看是否创建成功
    System.out.println(response);// 查看返回对象
    restHighLevelClient.close();
}
2、索引的获取,并判断其是否存在
// 测试获取索引,并判断其是否存在
@Test
public void testIndexIsExists() throws IOException {
     GetIndexRequest request = new GetIndexRequest("index");
     boolean exists = restHighLevelClient.indices().exists(request, RequestOptions.DEFAULT);
     System.out.println(exists);// 索引是否存在
     restHighLevelClient.close();
}
3、索引的删除
// 测试索引删除
@Test
public void testDeleteIndex() throws IOException {
    DeleteIndexRequest request = new DeleteIndexRequest("liuyou_index");
    AcknowledgedResponse response = restHighLevelClient.indices().delete(request,     RequestOptions.DEFAULT);
    System.out.println(response.isAcknowledged());// 是否删除成功
    restHighLevelClient.close();
}
文档的操作
1、文档的添加
// 测试添加文档(先创建一个User实体类,添加fastjson依赖)
@Test
public void testAddDocument() throws IOException {
// 创建一个User对象
    User liuyou = new User("liuyou", 18);
// 创建请求
    IndexRequest request = new IndexRequest("liuyou_index");
// 制定规则 PUT /liuyou_index/_doc/1
    request.id("1");// 设置文档ID
    request.timeout(TimeValue.timeValueMillis(1000));// request.timeout("1s")
// 将我们的数据放入请求中
    request.source(JSON.toJSONString(liuyou), XContentType.JSON);
// 客户端发送请求,获取响应的结果
    IndexResponse response = restHighLevelClient.index(request, RequestOptions.DEFAULT);
    System.out.println(response.status());// 获取建立索引的状态信息 CREATED
    System.out.println(response);// 查看返回内容             IndexResponse[index=liuyou_index,type=_doc,id=1,version=1,result=created,seqNo=0,primaryTerm=1,shards={"total":2,"successful":1,"failed":0}]
}
2、文档信息的获取
// 测试获得文档信息
@Test
public void testGetDocument() throws IOException {
    GetRequest request = new GetRequest("liuyou_index","1");
    GetResponse response = restHighLevelClient.get(request, RequestOptions.DEFAULT);
    System.out.println(response.getSourceAsString());// 打印文档内容
    System.out.println(request);// 返回的全部内容和命令是一样的
    restHighLevelClient.close();
}
3、文档的获取,并判断其是否存在
// 获取文档,判断是否存在 get /liuyou_index/_doc/1
@Test
public void testDocumentIsExists() throws IOException {
    GetRequest request = new GetRequest("liuyou_index", "1");
// 不获取返回的 _source的上下文了
    request.fetchSourceContext(new FetchSourceContext(false));
    request.storedFields("_none_");

    boolean exists = restHighLevelClient.exists(request, RequestOptions.DEFAULT);
    System.out.println(exists);
}
4、文档的更新
// 测试更新文档内容
@Test
public void testUpdateDocument() throws IOException {
    UpdateRequest request = new UpdateRequest("liuyou_index", "1");
    User user = new User("lmk",11);
    request.doc(JSON.toJSONString(user),XContentType.JSON);
    UpdateResponse response = restHighLevelClient.update(request, RequestOptions.DEFAULT);
    System.out.println(response.status()); // OK
    restHighLevelClient.close();
}
5、文档的删除
// 测试删除文档
@Test
public void testDeleteDocument() throws IOException {
    DeleteRequest request = new DeleteRequest("liuyou_index", "1");
    request.timeout("1s");
    DeleteResponse response = restHighLevelClient.delete(request, RequestOptions.DEFAULT);
    System.out.println(response.status());// OK
}
6、文档的查询
// 查询
// SearchRequest 搜索请求
// SearchSourceBuilder 条件构造
// HighlightBuilder 高亮
// TermQueryBuilder 精确查询
// MatchAllQueryBuilder
// xxxQueryBuilder ...
@Test
public void testSearch() throws IOException {
// 1.创建查询请求对象
    SearchRequest searchRequest = new SearchRequest();

// 2.构建搜索条件
    SearchSourceBuilder searchSourceBuilder = new SearchSourceBuilder();
// (1)查询条件 使用QueryBuilders工具类创建
// 精确查询
    TermQueryBuilder termQueryBuilder = QueryBuilders.termQuery("name", "liuyou");
// // 匹配查询
// MatchAllQueryBuilder matchAllQueryBuilder = QueryBuilders.matchAllQuery();


// (2)其他<可有可无>:(可以参考 SearchSourceBuilder 的字段部分)
// 设置高亮
    searchSourceBuilder.highlighter(new HighlightBuilder());
// // 分页
// searchSourceBuilder.from();
// searchSourceBuilder.size();
    searchSourceBuilder.timeout(new TimeValue(60, TimeUnit.SECONDS));
// (3)条件投入
    searchSourceBuilder.query(termQueryBuilder);

// 3.添加条件到请求
    searchRequest.source(searchSourceBuilder);

// 4.客户端查询请求
    SearchResponse search = restHighLevelClient.search(searchRequest,     RequestOptions.DEFAULT);

// 5.查看返回结果
    SearchHits hits = search.getHits();
    System.out.println(JSON.toJSONString(hits));
    System.out.println("=======================");
    for (SearchHit documentFields : hits.getHits()) {
        System.out.println(documentFields.getSourceAsMap());
    }
}
前面的操作都无法批量添加数据
// 上面的这些api无法批量增加数据(只会保留最后一个source)
@Test
public void test() throws IOException {
    IndexRequest request = new IndexRequest("bulk");// 没有id会自动生成一个随机ID
    request.source(JSON.toJSONString(new User("liu",1)),XContentType.JSON);
    request.source(JSON.toJSONString(new User("min",2)),XContentType.JSON);
    request.source(JSON.toJSONString(new User("kai",3)),XContentType.JSON);
    IndexResponse index = restHighLevelClient.index(request, RequestOptions.DEFAULT);
    System.out.println(index.status());// created
}
7、批量添加数据
// 特殊的,真的项目一般会 批量插入数据
@Test
public void testBulk() throws IOException {
    BulkRequest bulkRequest = new BulkRequest();
    bulkRequest.timeout("10s");

    ArrayList<User> users = new ArrayList<>();
    users.add(new User("liuyou-1",1));
    users.add(new User("liuyou-2",2));
    users.add(new User("liuyou-3",3));
    users.add(new User("liuyou-4",4));
    users.add(new User("liuyou-5",5));
    users.add(new User("liuyou-6",6));

// 批量请求处理
    for (int i = 0; i < users.size(); i++) {
        bulkRequest.add(
// 这里是数据信息
        new IndexRequest("bulk")
            .id(""+(i + 1)) // 没有设置id 会自定生成一个随机id
            .source(JSON.toJSONString(users.get(i)),XContentType.JSON)
        );
    }

    BulkResponse bulk = restHighLevelClient.bulk(bulkRequest, RequestOptions.DEFAULT);
    System.out.println(bulk.status());// ok
}
ElasticSearch实战
仿京东商城搜索(高亮)
1、工程创建(springboot)
创建过程略
目录结构

2、基本编码
①导入依赖
<properties>
<java.version>1.8</java.version>
<elasticsearch.version>7.6.1</elasticsearch.version>
</properties>

<dependencies>
<!-- jsoup解析页面 -->
<!-- 解析网页 爬视频可 研究tiko -->
<dependency>
<groupId>org.jsoup</groupId>
<artifactId>jsoup</artifactId>
<version>1.10.2</version>
</dependency>
<!-- fastjson -->
<dependency>
<groupId>com.alibaba</groupId>
<artifactId>fastjson</artifactId>
<version>1.2.70</version>
</dependency>
<!-- ElasticSearch -->
<dependency>
<groupId>org.springframework.boot</groupId>
<artifactId>spring-boot-starter-data-elasticsearch</artifactId>
</dependency>
<!-- thymeleaf -->
<dependency>
<groupId>org.springframework.boot</groupId>
<artifactId>spring-boot-starter-thymeleaf</artifactId>
</dependency>
<!-- web -->
<dependency>
<groupId>org.springframework.boot</groupId>
<artifactId>spring-boot-starter-web</artifactId>
</dependency>
<!-- devtools热部署 -->
<dependency>
<groupId>org.springframework.boot</groupId>
<artifactId>spring-boot-devtools</artifactId>
<scope>runtime</scope>
<optional>true</optional>
</dependency>
<!-- -->
<dependency>
<groupId>org.springframework.boot</groupId>
<artifactId>spring-boot-configuration-processor</artifactId>
<optional>true</optional>
</dependency>
<!-- lombok 需要安装插件 -->
<dependency>
<groupId>org.projectlombok</groupId>
<artifactId>lombok</artifactId>
<optional>true</optional>
</dependency>
<!-- test -->
<dependency>
<groupId>org.springframework.boot</groupId>
<artifactId>spring-boot-starter-test</artifactId>
<scope>test</scope>
</dependency>
</dependencies>
②导入前端素材
链接:https://pan.baidu.com/s/1M5uWdYsCZyzIAOcgcRkA_A
提取码:qk8p
复制这段内容后打开百度网盘手机App,操作更方便哦
③编写 application.preperties配置文件
# 更改端口,防止冲突
server.port=9999
# 关闭thymeleaf缓存
spring.thymeleaf.cache=false
④测试controller和view
@Controller
public class IndexController {

@GetMapping({"/","index"})
 public String index(){
 return "index";
 }
}

到这里可以先去编写爬虫,编写之后,回到这里
⑤编写Config
@Configuration
public class ElasticSearchConfig {
     @Bean
     public RestHighLevelClient restHighLevelClient(){
          RestHighLevelClient client = new RestHighLevelClient(
             RestClient.builder(
                 new HttpHost("127.0.0.1",9200,"http")
             )
           );
           return client;
     }
}
⑥编写service
因为是爬取的数据,那么就不走Dao,以下编写都不会编写接口,开发中必须严格要求编写
ContentService
/**
 * @author Liu Na
 * @ClassName com.example.demojd.controller.ContentService
 * @Description 类描述
 * Created by LiuNa on 2021/6/9
 * CopyRight ©  2021 Liu Na .All right reserved
 */
@Service
public class ContentService {

    @Autowired
    private RestHighLevelClient restHighLevelClient;


    // 1、解析数据放入 es 索引中
    public Boolean parseContent(String keyword) throws IOException {
// 获取内容
        List<Content> contents = HtmlParseUtil.parseJD(keyword);
// 内容放入 es 中
        BulkRequest bulkRequest = new BulkRequest();
        bulkRequest.timeout("2m"); // 可更具实际业务是指
        for (int i = 0; i < contents.size(); i++) {
            bulkRequest.add(
                    new IndexRequest("jd_goods")
                            .id(""+(i+1))
                            .source(JSON.toJSONString(contents.get(i)), XContentType.JSON)
            );
        }
        BulkResponse bulk = restHighLevelClient.bulk(bulkRequest, RequestOptions.DEFAULT);
        restHighLevelClient.close();
        return !bulk.hasFailures();
    }

    // 2、根据keyword分页查询结果
    public List<Map<String, Object>> search(String keyword, Integer pageIndex, Integer pageSize) throws IOException {
        if (pageIndex < 0){
            pageIndex = 0;
        }

        SearchRequest jd_goods = new SearchRequest("jd_goods");
// 创建搜索源建造者对象
        SearchSourceBuilder searchSourceBuilder = new SearchSourceBuilder();
// 条件采用:精确查询 通过keyword查字段name
        TermQueryBuilder termQueryBuilder = QueryBuilders.termQuery("name", keyword);
        searchSourceBuilder.query(termQueryBuilder);
        searchSourceBuilder.timeout(new TimeValue(60, TimeUnit.SECONDS));// 60s
// 分页
        searchSourceBuilder.from(pageIndex);
        searchSourceBuilder.size(pageSize);
// 高亮
// ....

// 搜索源放入搜索请求中
        jd_goods.source(searchSourceBuilder);
// 执行查询,返回结果
        SearchResponse searchResponse = restHighLevelClient.search(jd_goods, RequestOptions.DEFAULT);
        restHighLevelClient.close();

// 解析结果
        SearchHits hits = searchResponse.getHits();
        List<Map<String,Object>> results = new ArrayList<>();
        for (SearchHit documentFields : hits.getHits()) {
            Map<String, Object> sourceAsMap = documentFields.getSourceAsMap();
            results.add(sourceAsMap);
        }

// 返回查询的结果
        return results;
    }
}
⑦编写controller
@Controller
public class ContentController {

    @Autowired
    private ContentService contentService;

    @ResponseBody
    @GetMapping("/parse/{keyword}")
    public Boolean parse(@PathVariable("keyword") String keyword) throws IOException {
        return contentService.parseContent(keyword);
    }

    @ResponseBody
    @GetMapping("/search/{keyword}/{pageIndex}/{pageSize}")
    public List<Map<String, Object>> parse(@PathVariable("keyword") String keyword,
                                           @PathVariable("pageIndex") Integer pageIndex,
                                           @PathVariable("pageSize") Integer pageSize) throws IOException {
        return contentService.search(keyword,pageIndex,pageSize);
    }
}
⑧测试结果
1、解析数据放入 es 索引中


2、根据keyword分页查询结果
3、爬虫(jsoup)
数据获取:数据库、消息队列、爬虫、…
①搜索京东搜索页面,并分析页面
http://search.jd.com/search?keyword=java
页面如下

审查页面元素
页面列表id:J_goodsList

目标元素:img、price、name

②爬取数据(获取请求返回的页面信息,筛选出可用的)
创建HtmlParseUtil,并简单编写
public class HtmlParseUtil {
    public static void main(String[] args) throws IOException {
/// 使用前需要联网
// 请求url
        String url = "http://search.jd.com/search?keyword=java";
// 1.解析网页(jsoup 解析返回的对象是浏览器Document对象)
        Document document = Jsoup.parse(new URL(url), 30000);
// 使用document可以使用在js对document的所有操作
// 2.获取元素(通过id)
        Element j_goodsList = document.getElementById("J_goodsList");
// 3.获取J_goodsList ul 每一个 li
        Elements lis = j_goodsList.getElementsByTag("li");
// 4.获取li下的 img、price、name
        for (Element li : lis) {
            String img = li.getElementsByTag("img").eq(0).attr("src");// 获取li下 第一张图片
            String name = li.getElementsByClass("p-name").eq(0).text();
            String price = li.getElementsByClass("p-price").eq(0).text();

            System.out.println("=======================");
            System.out.println("img : " + img);
            System.out.println("name : " + name);
            System.out.println("price : " + price);
        }
    }
}
运行结果

原因是啥?
一般图片特别多的网站,所有的图片都是通过延迟加载的
// 打印标签内容
Elements lis = j_goodsList.getElementsByTag("li");
System.out.println(lis);
打印所有li标签,发现img标签中并没有属性src的设置,只是data-lazy-ing设置图片加载的地址

创建HtmlParseUtil、改写
- 更改图片获取属性为
data-lazy-img - 与实体类结合,实体类如下
封装为方法
@Data
@AllArgsConstructor
@NoArgsConstructor
public class Content implements Serializable {
    private static final long serialVersionUID = -8049497962627482693L;
    private String name;
    private String img;
    private String price;
}
public class HtmlParseUtil {
    public static void main(String[] args) throws IOException {
        System.out.println(parseJD("java"));
    }


    public static List<Content> parseJD(String keyword) throws IOException {
/// 使用前需要联网
// 请求url
        String url = "http://search.jd.com/search?keyword=" + keyword;
// 1.解析网页(jsoup 解析返回的对象是浏览器Document对象)
        Document document = Jsoup.parse(new URL(url), 30000);
// 使用document可以使用在js对document的所有操作
// 2.获取元素(通过id)
        Element j_goodsList = document.getElementById("J_goodsList");
//j_goodsList 如果这里为空   用下面这个方法
//Document document = Jsoup.connect(url).userAgent("Mozilla/5.0 (Windows NT 5.1; zh-CN) AppleWebKit/535.12 (KHTML, like Gecko) Chrome/22.0.1229.79 Safari/535.12").timeout(30000).get();
// 3.获取J_goodsList ul 每一个 li
        Elements lis = j_goodsList.getElementsByTag("li");
// System.out.println(lis);
// 4.获取li下的 img、price、name
// list存储所有li下的内容
        List<Content> contents = new ArrayList<Content>();
        for (Element li : lis) {
// 由于网站图片使用懒加载,将src属性替换为data-lazy-img
            String img = li.getElementsByTag("img").eq(0).attr("data-lazy-img");// 获取li下 第一张图片
            String name = li.getElementsByClass("p-name").eq(0).text();
            String price = li.getElementsByClass("p-price").eq(0).text();
// 封装为对象
            Content content = new Content(name,img,price);
// 添加到list中
            contents.add(content);
        }
// System.out.println(contents);
// 5.返回 list
        return contents;
    }
}
结果展示

4、搜索高亮
在3、的基础上添加内容
①ContentService
// 3、 在2的基础上进行高亮查询
    public List<Map<String, Object>> highlightSearch(String keyword, Integer pageIndex, Integer pageSize) throws IOException {

        SearchRequest searchRequest = new SearchRequest("jd_goods");

        SearchSourceBuilder searchSourceBuilder = new SearchSourceBuilder();
// 精确查询,添加查询条件
        TermQueryBuilder termQueryBuilder = QueryBuilders.termQuery("name", keyword);
        searchSourceBuilder.timeout(new TimeValue(60, TimeUnit.SECONDS));
        searchSourceBuilder.query(termQueryBuilder);
// 分页
        searchSourceBuilder.from(pageIndex);
        searchSourceBuilder.size(pageSize);
// 高亮 =========
        HighlightBuilder highlightBuilder = new HighlightBuilder();
        highlightBuilder.field("name");
        highlightBuilder.preTags("<span style='color:red'>");
        highlightBuilder.postTags("</span>");
        searchSourceBuilder.highlighter(highlightBuilder);

// 执行查询
        searchRequest.source(searchSourceBuilder);
        SearchResponse searchResponse = restHighLevelClient.search(searchRequest, RequestOptions.DEFAULT);
// 解析结果 ==========
        SearchHits hits = searchResponse.getHits();
        List<Map<String, Object>> results = new ArrayList<>();
        for (SearchHit documentFields : hits.getHits()) {
// 使用新的字段值(高亮),覆盖旧的字段值
            Map<String, Object> sourceAsMap = documentFields.getSourceAsMap();
// 高亮字段
            Map<String, HighlightField> highlightFields = documentFields.getHighlightFields();
            HighlightField name = highlightFields.get("name");
// 替换
            if (name != null){
                Text[] fragments = name.fragments();
                StringBuilder new_name = new StringBuilder();
                for (Text text : fragments) {
                    new_name.append(text);
                }
                sourceAsMap.put("name",new_name.toString());
            }
            results.add(sourceAsMap);
        }
        return results;
    }
②ContentController
@ResponseBody
@GetMapping("/h_search/{keyword}/{pageIndex}/{pageSize}")
public List<Map<String, Object>> highlightParse(@PathVariable("keyword") String keyword,
@PathVariable("pageIndex") Integer pageIndex,
@PathVariable("pageSize") Integer pageSize) throws IOException {
        return contentService.highlightSearch(keyword,pageIndex,pageSize);
        }
③结果展示

5、前后端分离(简单使用Vue)
删除Controller 方法上的 @ResponseBody注解

①下载并引入Vue.min.js和axios.js
如果安装了nodejs,可以按如下步骤,没有可以到后面素材处下载
npm install vue
npm install axios


②修改静态页面
引入js
<script th:src="@{/js/vue.min.js}"></script>
<script th:src="@{/js/axios.min.js}"></script>
修改后的index.html
<!DOCTYPE html>
<html xmlns:th="http://www.thymeleaf.org">

<head>
<meta charset="utf-8"/>
<title>狂神说Java-ES仿京东实战</title>
<link rel="stylesheet" th:href="@{/css/style.css}"/>
<script th:src="@{/js/jquery.min.js}"></script>
</head>

<body class="pg">
<div class="page">
<div id="app" class=" mallist tmall- page-not-market ">

<!-- 头部搜索 -->
<div id="header" class=" header-list-app">
<div class="headerLayout">
<div class="headerCon ">
<!-- Logo-->
<h1 id="mallLogo">
<img th:src="@{/images/jdlogo.png}" alt="">
</h1>

<div class="header-extra">

<!--搜索-->
<div id="mallSearch" class="mall-search">
<form name="searchTop" class="mallSearch-form clearfix">
<fieldset>
<legend>天猫搜索</legend>
<div class="mallSearch-input clearfix">
<div class="s-combobox" id="s-combobox-685">
<div class="s-combobox-input-wrap">
<input v-model="keyword" type="text" autocomplete="off" id="mq"
class="s-combobox-input" aria-haspopup="true">
</div>
</div>
<button type="submit" @click.prevent="searchKey" id="searchbtn">搜索</button>
</div>
</fieldset>
</form>
<ul class="relKeyTop">
<li><a>狂神说Java</a></li>
<li><a>狂神说前端</a></li>
<li><a>狂神说Linux</a></li>
<li><a>狂神说大数据</a></li>
<li><a>狂神聊理财</a></li>
</ul>
</div>
</div>
</div>
</div>
</div>

<!-- 商品详情页面 -->
<div id="content">
<div class="main">
<!-- 品牌分类 -->
<form class="navAttrsForm">
<div class="attrs j_NavAttrs" style="display:block">
<div class="brandAttr j_nav_brand">
<div class="j_Brand attr">
<div class="attrKey">
品牌
</div>
<div class="attrValues">
<ul class="av-collapse row-2">
<li><a href="#"> 狂神说 </a></li>
<li><a href="#"> Java </a></li>
</ul>
</div>
</div>
</div>
</div>
</form>

<!-- 排序规则 -->
<div class="filter clearfix">
<a class="fSort fSort-cur">综合<i class="f-ico-arrow-d"></i></a>
<a class="fSort">人气<i class="f-ico-arrow-d"></i></a>
<a class="fSort">新品<i class="f-ico-arrow-d"></i></a>
<a class="fSort">销量<i class="f-ico-arrow-d"></i></a>
<a class="fSort">价格<i class="f-ico-triangle-mt"></i><i class="f-ico-triangle-mb"></i></a>
</div>

<!-- 商品详情 -->
<div class="view grid-nosku" >

<div class="product" v-for="result in results">
<div class="product-iWrap">
<!--商品封面-->
<div class="productImg-wrap">
<a class="productImg">
<img :src="result.img">
</a>
</div>
<!--价格-->
<p class="productPrice">
<em v-text="result.price"></em>
</p>
<!--标题-->
<p class="productTitle">
<a v-html="result.name"></a>
</p>
<!-- 店铺名 -->
<div class="productShop">
<span>店铺: 狂神说Java </span>
</div>
<!-- 成交信息 -->
<p class="productStatus">
<span>月成交<em>999笔</em></span>
<span>评价 <a>3</a></span>
</p>
</div>
</div>
</div>
</div>
</div>
</div>
</div>
<script th:src="@{/js/vue.min.js}"></script>
<script th:src="@{/js/axios.min.js}"></script>
<script>
new Vue({
el:"#app",
data:{
"keyword": '', // 搜索的关键字
"results":[] // 后端返回的结果
},
methods:{
searchKey(){
var keyword = this.keyword;
console.log(keyword);
axios.get('h_search/'+keyword+'/0/20').then(response=>{
console.log(response.data);
this.results=response.data;
})
}
}
});

</script>
</body>
</html>
测试

疑惑:
1、使用term(精确查询)时,我发现三个问题,问题如下:
字段值必须是一个词(索引中存在的词),才能匹配
-
问题:中文字符串,term查询时无法查询到数据(比如,“编程”两字在文档中存在,但是搜索不到)
-
原因:索引为配置中文分词器(默认使用standard,即所有中文字符串都会被切分为单个中文汉字作为单词),所以没有超过1个汉字的词,也就无法匹配,进而查不到数据
-
解决:创建索引时配置中文分词器,如
-
查询的英文字符只能是小写,大写都无效
PUT example { "mappings": { "properties": { "name":{ "type": "text", "analyzer": "ik_max_word" // ik分词器 } } } }- 查询时英文单词必须是完整的

 浙公网安备 33010602011771号