使用mkcert为localhost添加ssl证书
1:基础环境
Windows11-x64-23H2-22631.3155
Nginx-1.24.0
Mkcert-v1.4.4-windows-amd64
2:安装Nginx

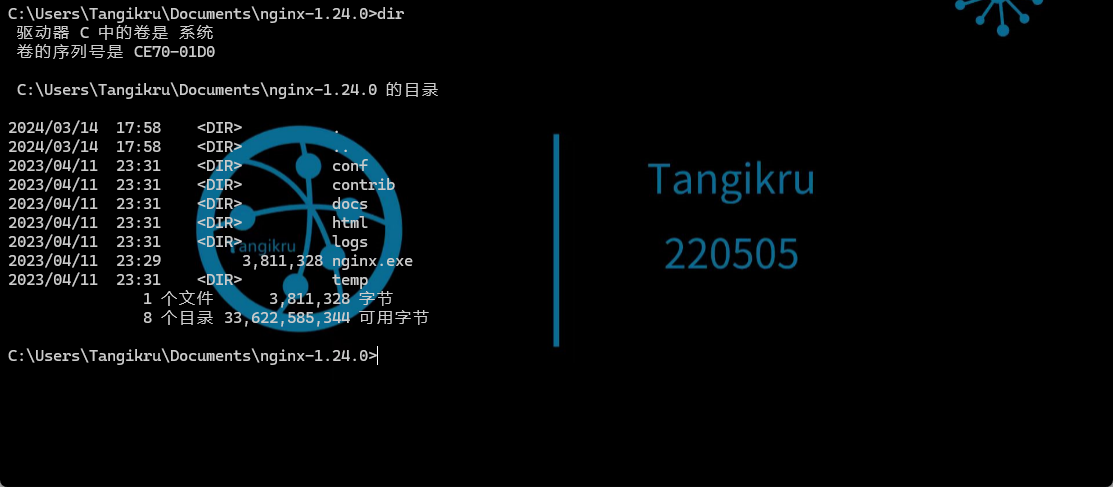
2-1:解压后得到如下文件

2-2:将此目录在cmd中打开
2-3:启动Nginx
.\nginx.exe

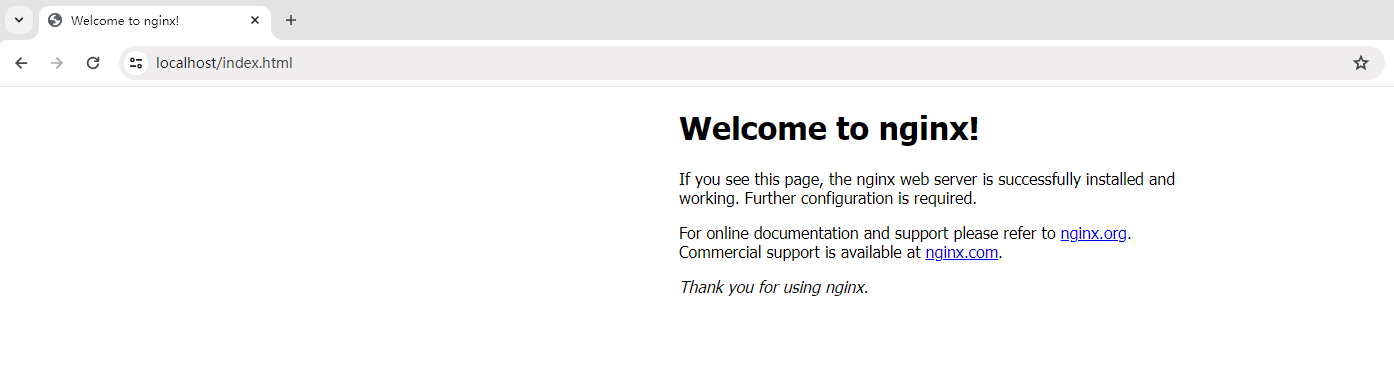
2-4:浏览器查看
2-5:拓展命令
.\nginx.exe
.\nginx.exe -s reload
.\nginx.exe -s stop
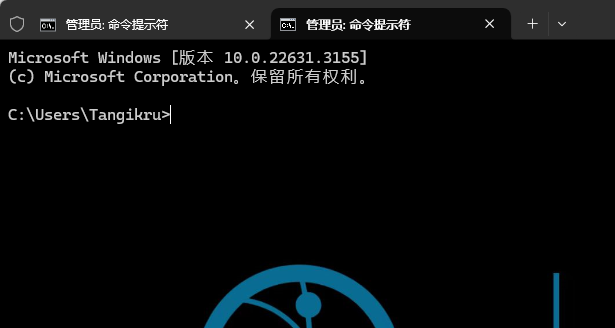
3:管理员打开CMD
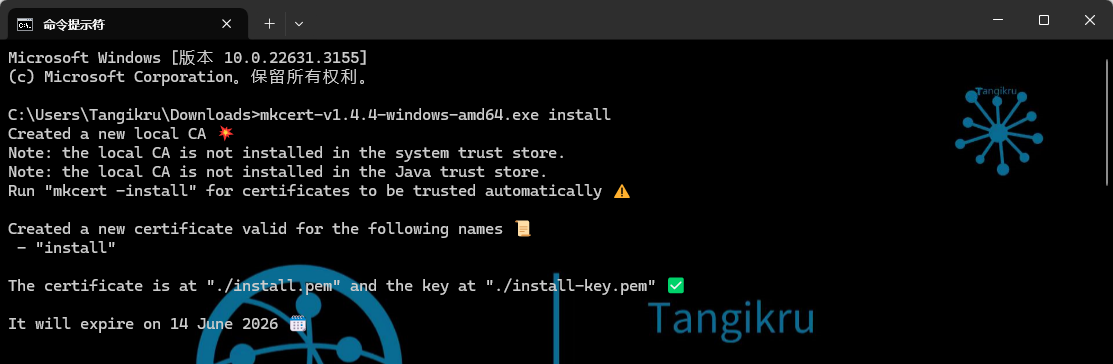
3-1:进行安装
mkcert-v1.4.4-windows-amd64.exe install
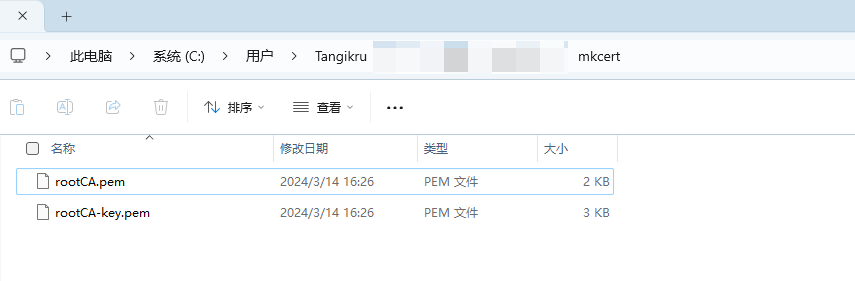
3-2:查看证书存放位置
mkcert-v1.4.4-windows-amd64.exe -CAROOT

3-3:查看目录下生成的文件
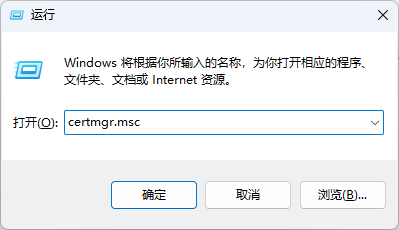
3-4:查看证书控制台
win+r 输入 certmgr.msc
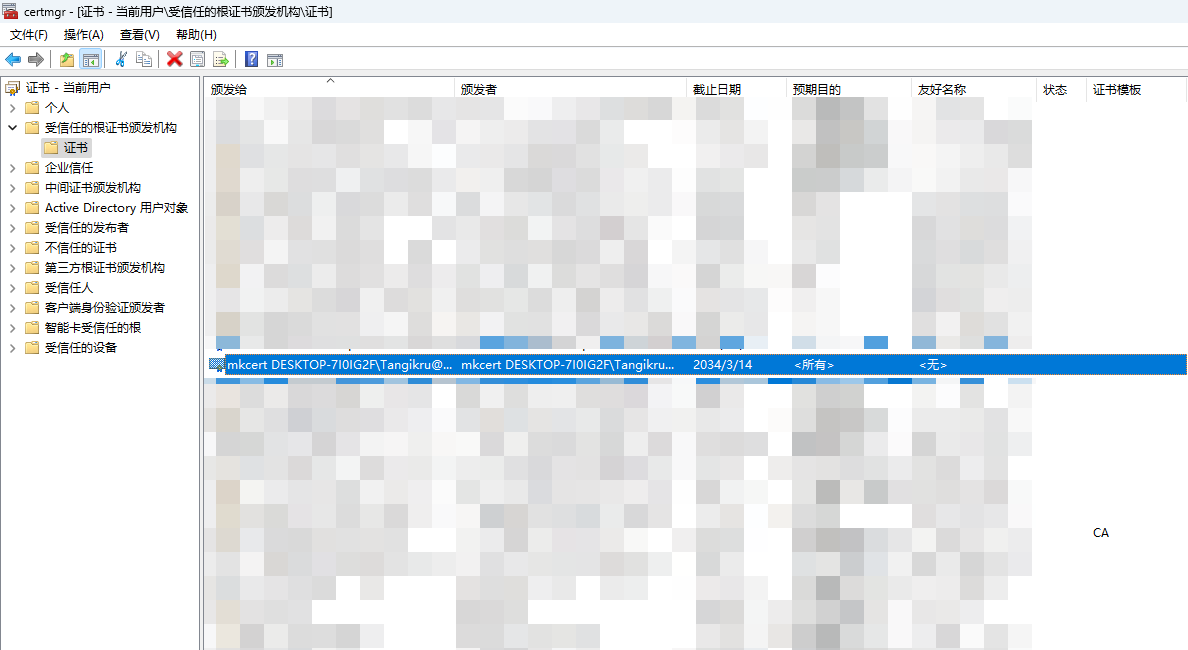
3-5:双击查看

3-6:证书已安装,为localhost 127.0.0.1 ::1生成自签证书
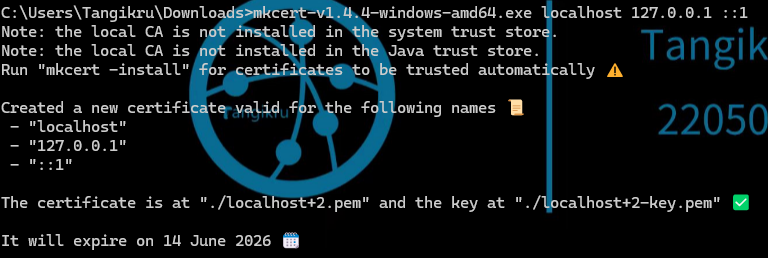
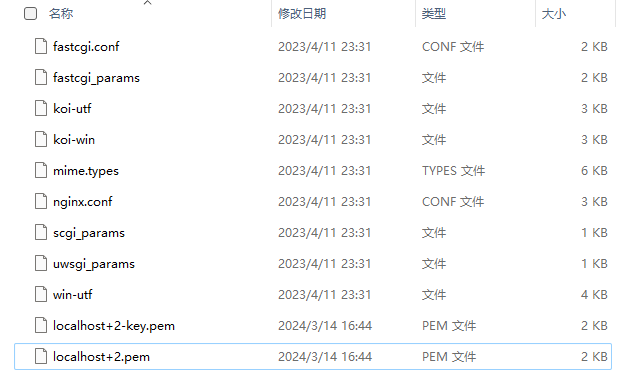
3-7:完成后会在mkcert-v1.4.4-windows-amd64.exe文件同目录下生成pem文件和key文件

3-8:将localhost+2.pem localhost+2-key.pem移动到nginx的conf目录下
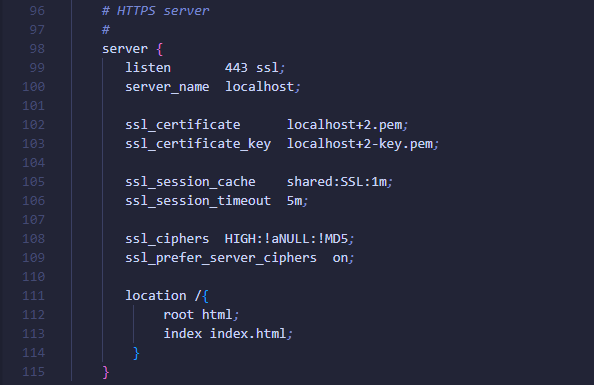
3-9:更改nginx配置文件nginx.conf
    server {
       listen       443 ssl;
       server_name  localhost;

       ssl_certificate      localhost+2.pem;
       ssl_certificate_key  localhost+2-key.pem;

       ssl_session_cache    shared:SSL:1m;
       ssl_session_timeout  5m;

       ssl_ciphers  HIGH:!aNULL:!MD5;
       ssl_prefer_server_ciphers  on;

       location /{
            root html;
            index index.html;
        }
    }
3-10:重启nginx服务

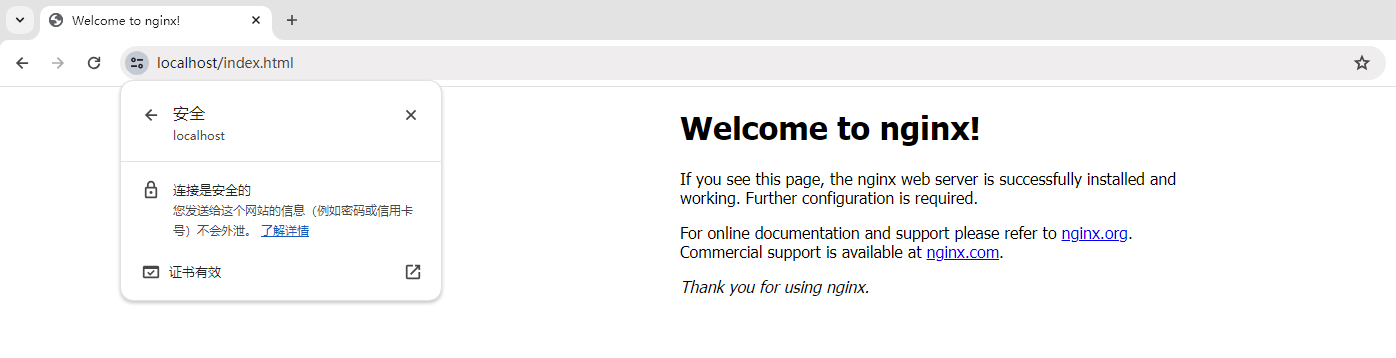
3-11:浏览器验证
4:完结撒花~
本文来自博客园,作者:Tangikru,转载请注明原文链接:https://www.cnblogs.com/tangikru/p/18073543

 浙公网安备 33010602011771号