kubernetes configmap配置方法
configmap解释
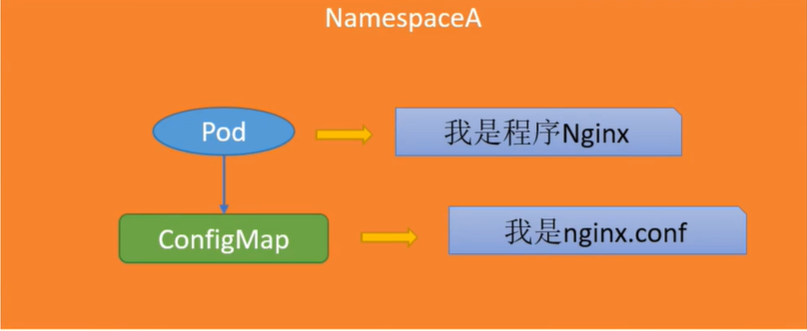
在k8s运行期间会有一些依赖的配置文件,他们存在宿主机中的一个目录中或者代码里,如果配置放生变化,pod在另一台服务器启动,在没有这些配置的时候,可能会导致pod无法正常运行,如果pod没有挂载配置文件,修改配置会更加麻烦,configmap用于解决此类问题
有了configmap后,就可以实现配置与pod分离,哪怕pod挂了,重启的pod依然会读到这个配置文件,免除人工干预和业务不可用的状况出现
官方文档: https://kubernetes.io/zh/docs/concepts/configuration/configmap/
configmap例子
configmap示例:
apiVersion: v1
kind: ConfigMap
metadata:
  name: game-demo
data:
  # property-like keys; each key maps to a simple value
  player_initial_lives: "3"
  ui_properties_file_name: "user-interface.properties"

  # file-like keys
  game.properties: |
    enemy.types=aliens,monsters
    player.maximum-lives=5
  user-interface.properties: |
    color.good=purple
    color.bad=yellow
    allow.textmode=true
1. configmap基于目录创建
#创建comfigmap文件夹
mkdir -p configmap/conf

写入演示配置:
[root@k8s-master01 ~]# cat configmap/conf/game.conf
lives=3
seret.code=ture

[root@k8s-master01 ~]# cat configmap/conf/game2.conf
color.good=purple
user=tomcat

[root@k8s-master01 configmap]# kubectl create configmap cmfromdir --from-file=conf/
configmap/cmfromdir created


#检查
[root@k8s-master01 configmap]# kubectl get configmaps
NAME               DATA   AGE
cmformdir          3      5s


#查看:
[root@k8s-master01 conf]# kubectl get cm cmfromdir -o yaml
apiVersion: v1
data:
  game.conf: |
    lives=3
    seret.code=ture
  game2.conf: |
    color.good=purple
    user=tomcat
kind: ConfigMap
metadata:
  creationTimestamp: "2021-07-24T09:57:20Z"
  name: cmfromdir
  namespace: default
  resourceVersion: "1533829"
  uid: 45a67622-0ec0-4862-af9a-3fd29ea63653


#查看:
[root@k8s-master01 configmap]# kubectl describe configmaps cmfromdir
Name:         cmfromdir
Namespace:    default
Labels:       <none>
Annotations:  <none>

Data
====
game.conf:
----
lives=3
seret.code=ture
test_env=chenleilei

game2.conf:
----
color.good=purple
user=tomcat

Events:  <none>
2. configmap基于文件创建
# 如果一个目录中有很多配置文件,只需要其中一个配置文件,则可以使用以下方法

# 如 创建一个 redis配置文件
cat conf/redis.conf
password redis123


[root@k8s-master01 conf]# kubectl create cm cmfromfile --from-file=redis.conf
configmap/cmfromfile created


检查:
[root@k8s-master01 conf]# kubectl get cm cmfromfile  -o yaml
apiVersion: v1
data:
  redis.conf: |
    password redis123      #检查此处是否存在值
kind: ConfigMap
metadata:
  creationTimestamp: "2021-07-27T03:50:25Z"
  name: cmfromfile
  namespace: default
  resourceVersion: "1776478"
  uid: 575ae214-c1eb-43b2-8201-715921563de1


#检查这个目录:
[root@k8s-master01 conf]# ls
game2.conf  game.conf  redis.conf

通过:  kubectl create cm cmfromfile --from-file=redis.conf
只把redis.conf 创建了。这是基于文件创建的办法。
3. 自定义配置文件名称
#单个文件创建自定义名

kubectl create configmap [configmap名] --from-file=[自定义的文件名字]=[需要自定义的文件]

[root@k8s-master01 conf]# kubectl create cm cmspecialname --from-file=game-conf=game.conf
configmap/cmspecialname created

[root@k8s-master01 conf]# kubectl get cm
NAME               DATA   AGE
cmspecialname      1      4s


[root@k8s-master01 conf]# kubectl get configmaps cmspecialname -o yaml
apiVersion: v1
data:
  game-conf: |      ### 这里的配置文件名称已经改变了[这是k8s中的一个功能,但并不常用,知道就可以了]
    lives=3
    seret.code=ture
    test_env=chenleilei
kind: ConfigMap
metadata:
  creationTimestamp: "2021-07-29T02:49:46Z"
  name: cmspecialname
  namespace: default
  resourceVersion: "1864212"
  uid: 29536467-8f0c-4547-b9d6-aa8ecd1e0e51


#自定义多个文件名称,如下:
[root@k8s-master01 conf]# kubectl create cm cmspecialname3 --from-file=game-conf=game.conf --from-file=redis-conf=redis.conf
configmap/cmspecialname2 created

#这样就把 game.conf和redis.conf分别定义为了  game-conf 与 redis-conf

#查看configmap
[root@k8s-master01 conf]# kubectl get cm
NAME               DATA   AGE
cmformdir          3      19m
cmspecialname      1      3m18s
cmspecialname3     2      12s    #新名称
envfromliteral     2      46h
kube-root-ca.crt   1      27d
redis-conf         1      40h
4. 选择命名空间创建configmap
# #通常,在不同的命名空间下也会有配置引用,但是不同命名空间无法相互使用configmap,所以需要在对应命名空间创建configmap
# configmap也可以创建在不同的命名空间下面,如在kube-public空间创建:
[root@k8s-master01 conf]# kubectl create cm cmspecialname3 --from-file=game-conf=game.conf --from-file=redis-conf=redis.conf -n kube-public
configmap/cmspecialname3 created

[root@k8s-master01 conf]# kubectl get configmaps cmspecialname3 -o yaml
apiVersion: v1
data:
  game-conf: |
    lives=3
    seret.code=ture
    test_env=chenleilei
  redis-conf: |
    password redis123
kind: ConfigMap
metadata:
  creationTimestamp: "2021-07-28T08:07:55Z"
  name: cmspecialname3
  namespace: default
  resourceVersion: "1838693"
  uid: a4ecd8c5-b8da-40cb-bc55-ec369b7f482f

#这样会在 kube-public 命名空间创建 redis.conf 配置文件,检查:
[root@k8s-master01 conf]# kubectl get cm -n  kube-public
NAME               DATA   AGE
cluster-info       1      25d
cmspecialname2     2      81s    # 新建的configmap
kube-root-ca.crt   1      25d
5. 基于env文件创建configmap [--from-env-file ]
以env文件创建configmap: ‘--from-env-file’
#基于环境变量创建configmap [适用于环境变量较多的情况]
[root@k8s-master01 conf]# cat game.conf
lives=3
seret.code=ture

[root@k8s-master01 conf]# kubectl create cm gameenvcm --from-env-file=game.conf
configmap/gameenvcm created


[root@k8s-master01 conf]# kubectl get cm gameenvcm -o yaml
apiVersion: v1
data:
  lives: "3"
  seret.code: ture
  test_env: chenleilei
kind: ConfigMap
metadata:
  creationTimestamp: "2021-07-29T03:01:49Z"
  name: gameenvcm
  namespace: default
  resourceVersion: "1865617"
  uid: ee31d97a-48c2-48dd-b971-8f7b45255763
6. 基于命令行创建多个变量
--from-literal=
[root@k8s-master01 conf]# kubectl create cm envfromliteral --from-literal=level=INFO --from-literal=PASSWORD=redis123
configmap/envfromliteral created

[root@k8s-master01 conf]# kubectl get cm envfromliteral -o yaml
apiVersion: v1
data:
  PASSWORD: redis123
  level: INFO
kind: ConfigMap
metadata:
  creationTimestamp: "2021-07-27T04:20:49Z"
  name: envfromliteral
  namespace: default
  resourceVersion: "1780015"
  uid: 9f212cfc-2cce-42d5-9d62-bced22e869e4
7. 基于yaml文件创建configmap
[root@k8s-master01 conf]# cat cm.yaml apiVersion: v1kind: ConfigMapmetadata: name: game-demodata: # 类属性键;每一个键都映射到一个简单的值 player_initial_lives: "3" ui_properties_file_name: "user-interface.properties" # 类文件键 game.properties: | enemy.types=aliens,monsters player.maximum-lives=5 user-interface.properties: | color.good=purple color.bad=yellow allow.textmode=true #查看:[root@k8s-master01 conf]# kubectl create -f cm.yaml configmap/game-demo created#这种方式创建,在kubectl edit编辑的时候不太好改,会出现串行的问题。建议使用配置文件的方式来创建configmap问题 如:[root@k8s-master01 conf]# kubectl edit cm game-demo # Please edit the object below. Lines beginning with a '#' will be ignored,# and an empty file will abort the edit. If an error occurs while saving this file will be# reopened with the relevant failures.#apiVersion: v1data: game.properties: "enemy.types=aliens,monsters\nplayer.maximum-lives=5 \n" #会出现 \n 这种东西 player_initial_lives: "3" ui_properties_file_name: user-interface.properties user-interface.properties: | color.good=purple color.bad=yellow allow.textmode=truekind: ConfigMapmetadata: creationTimestamp: "2021-07-27T04:26:35Z" name: game-demo namespace: default resourceVersion: "1780686" uid: 270d373e-8485-4a15-970d-06de6728dae7
创建configmap总结:
#创建configmap的几种办法:kubectl create configmap -hkubectl create cm cmfromdir --from-file=conf/kubectl create cm cmfromfile --from-file=conf/redis.conf kubectl create cm cmspecialname --from-file=game-conf=game.confkubectl create cm cmspecialname2 --from-file=game-conf=game.conf --from-file=redis-conf=redis.confkubectl create cm gameenvcm --from-env-file=game.confkubectl create cm envfromliteral --from-literal=level=INFO --from-literal=PASSWORD=redis123kubectl create -f cm.yaml

 微信赞赏
微信赞赏

 支付宝赞赏
支付宝赞赏


 浙公网安备 33010602011771号