

第四周作业
1、自建yum仓库,分别为网络源和本地源
网络源配置
[BaseOS]
name=CentOS-$releasever
baseurl=https://mirrors.aliyun.com/centos/$releasever-stream/BaseOS/$basearch/os/
        https://repo.huaweicloud.com/centos/$releasever-stream/BaseOS/$basearch/os/
        https://mirrors.tuna.tsinghua.edu.cn/centos/$releasever-stream/BaseOS/$basearch/os/
        https://mirrors.cloud.tencent.com/centos/$releasever-stream/BaseOS/$basearch/os/
gpgcheck=0
gpgkey=https://mirrors.aliyun.com/centos/RPM-GPG-KEY-CentOS-Official

[AppStream]
name=AppStream-$releasever
baseurl=https://mirrors.aliyun.com/centos/$releasever-stream/AppStream/$basearch/os/
        https://repo.huaweicloud.com/centos/$releasever-stream/AppStream/$basearch/os/
        https://mirrors.tuna.tsinghua.edu.cn/centos/$releasever-stream/AppStream/$basearch/os/
        https://mirrors.cloud.tencent.com/centos/$releasever-stream/AppStream/$basearch/os/
gpgcheck=0
gpgkey=https://mirrors.aliyun.com/centos/RPM-GPG-KEY-CentOS-Official

[extras]
name=extras-$releasever
baseurl=https://mirrors.aliyun.com/centos/$releasever/extras/$basearch/os/
        https://repo.huaweicloud.com/centos/$releasever/extras/$basearch/os/
        https://mirrors.tuna.tsinghua.edu.cn/centos/$releasever/extras/$basearch/os/
        https://mirrors.cloud.tencent.com/centos/$releasever/extras/$basearch/os/
gpgcheck=0
enabled=1

[epel]
name=EPEL-$releasever
baseurl=https://mirrors.aliyun.com/epel/$releasever/Everything/$basearch/
        https://repo.huaweicloud.com/epel/$releasever/Everything/$basearch/
        https://mirrors.tuna.tsinghua.edu.cn/epel/$releasever/Everything/$basearch/
        https://mirrors.cloud.tencent.com/epel/$releasever/Everything/$basearch/
gpgcheck=0
enabled=1
gpgkey=https://repo.huaweicloud.com/epel/RPM-GPG-KEY-EPEL-8
本地源配置
[BaseOS]
name=CentOS-$releasever
baseurl=file://misc/cd/BaseOS
gpgcheck=0
gpgkey=https://mirrors.aliyun.com/centos/RPM-GPG-KEY-CentOS-Official

[AppStream]
name=AppStream-$releasever
baseurl=file://misc/cd/AppStream
gpgcheck=0
gpgkey=https://mirrors.aliyun.com/centos/RPM-GPG-KEY-CentOS-Official
[BaseOS]
name=CentOS-$releasever
baseurl=http://10.0.0.8:8080/centos/8/BaseOS/
gpgcheck=0
gpgkey=https://mirrors.aliyun.com/centos/RPM-GPG-KEY-CentOS-Official

[AppStream]
name=AppStream-$releasever
baseurl=http://10.0.0.8:8080/centos/8/AppStream
gpgcheck=0
gpgkey=https://mirrors.aliyun.com/centos/RPM-GPG-KEY-CentOS-Official
2、编译安装http2.4,实现可以正常访问,并将编译步骤和结果提交。
安装相关包 dnf install gcc make autoconf apr-devel apr-util-devel pcre devel openssl-devel redhat-rpm-config 下载并解压缩包 wget https://mirror.bit.edu.cn/apache//httpd/httpd-2.4.46.tar.bz2 tar xvf httpd-2.4.46.tar.bz2 -C /usr/local/src 配置 cd /usr/local/src/httpd-2.4.43/ ./configure --prefix=/apps/httpd --sysconfdir=/etc/httpd --enable-ssl 出现提示找不到 APR 包执行安装 yum -y install apr-devel 出现缺少文件时使用,查找缺失文件所在包 yum provides /usr/lib/rpm/redhat/redhat-hardened-ld 编译并安装 -j指定使用多个作业,加快编译速度 make -j 4 && make install 配置环境 echo 'PATH=/apps/httpd/bin:$PATH' > /etc/profile.d/httpd.sh 生效 . /etc/profile.d/httpd.sh 运行 apachectl start 添加apache用户 useradd -r -s /sbin/nologin -d /var/www -c Apache -u 48 apache 修改配置文件,指定user和group,修改访问端口为8080 vim /etc/httpd/httpd.conf 配置生效和验证 apachectl restart 查看进程 ps aux | grep apache
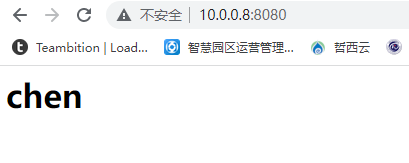
在/var/lib/www/html中新建index.html首页文件夹
浏览器访问:http://10.0.0.8:8080/
3、利用sed 取出ifconfig命令中本机的IPv4地址
ifconfig eth0 | sed -rn '/netmask/s#(.*inet )(.*)(n.*)#\2#gp'
4、删除/etc/fstab文件中所有以#开头,后面至少跟一个空白字符的行的行首的#和空白字符
sed -nr 's/^#[[:space:]]+(.*)/\1/p' /etc/fstab
5、处理/etc/fstab路径,使用sed命令取出其目录名和基名
取目录名
echo /etc/fstab/ | sed -nr 's#(.*)/([^/]+)/?#\1#p'
取基名
echo /etc/fstab/ | sed -nr 's#(.*)/([^/]+)/?#\2#p'
6、列出ubuntu软件管理工具apt的一些用法(自由总结)
用法与rpm类似
配置源,修改阿里云的APT源为清华源
sed -i 's/mirrors.aliyun.com/mirrors.tuna.tsinghua.edu.cn/' /etc/apt/sources.list

基本用法
1、安装包
apt install tree

2、删除包
apt remove tree

3、更新包索引 相当于yum clean all;yum makecache
apt update

4、升级包:要升级系统,请首先更新软件包索引,再升级
apt upgrade

5、apt列出仓库软件包,等于yum list
apt list

6、搜索安装包
apt search nginx

7、查看某个安装包的详细信息
apt show apache2

8、在线安装软件包
apt install apache2

9、卸载单个软件包但是保留配置⽂件
apt remove apache2

10、删除安装包并解决依赖关系
apt autoremove apache2

11、卸载单个软件包删除配置⽂件
apt purge apache2

12、升级所有已安装且可升级到新版本的软件包
apt upgrade

13、升级整个系统,必要时可以移除旧软件包
apt full-upgrade

14、编辑source源⽂件
apt edit-sources

15、查看仓库中软件包有哪些版本可以安装
apt-cache madison nginx

16、安装软件包的时候指定安装具体的版本
apt install nginx=1.14.0-0ubuntu1.6

 浙公网安备 33010602011771号