
ansible-playbook源码安装apache
| IP | 主机名 | |
| 控制节点: | 192.168.6.130 | ansible |
| 受控节点: | 192.168.6.132 | localhost |
1. 安装完ansible以后创建项目
[root@ansible ~]# cd /etc/ansible/  # 进到ansible
[root@ansible ansible]# ls   # 有一个主配置文件
ansible.cfg
[root@ansible ansible]# cd
[root@ansible ~]# cd /opt/   # 去到opt
[root@ansible opt]# ls
[root@ansible opt]# mkdir httpd  #创建一个httpd的目录,用于存放清单文件,变量,模板,主playbook,等文件
[root@ansible opt]# cd httpd/
[root@ansible httpd]# cp /etc/ansible/ansible.cfg . # 复制一个主配置文件到项目文件
[root@ansible httpd]# ls
ansible.cfg
[root@ansible httpd]# vi ansible.cfg  #编辑主配置文件,使其能找到清单文件
inventory      = inventory   #取消注释,修改如下
[root@ansible httpd]# vi inventory  #生成清单文件,编辑要控制的主机
[web]
web01.example.com# 添加本控制主机的域名或者ip
[root@ansible httpd]# ls
ansible.cfg  inventory
[root@ansible httpd]# vim /etc/hosts #添加主机
192.168.6.132 web01.example.com  #被控制的主机域名和ip
[root@ansible httpd]# ping web01.example.com  # 此时可以平通
PING web01.example.com (192.168.6.132) 56(84) bytes of data.
64 bytes from web01.example.com (192.168.6.132): icmp_seq=1 ttl=64 time=2.16 ms
64 bytes from web01.example.com (192.168.6.132): icmp_seq=2 ttl=64 time=3.23 ms
64 bytes from web01.example.com (192.168.6.132): icmp_seq=3 ttl=64 time=0.604 ms
64 bytes from web01.example.com (192.168.6.132): icmp_seq=4 ttl=64 time=1.13 ms
2.设置免密登录
[root@ansible ~]# ssh-keygen -t rsa  #生成一对密钥
Generating public/private rsa key pair.
Enter file in which to save the key (/root/.ssh/id_rsa):
Enter passphrase (empty for no passphrase):
Enter same passphrase again:
Your identification has been saved in /root/.ssh/id_rsa.
Your public key has been saved in /root/.ssh/id_rsa.pub.
The key fingerprint is:
SHA256:GeVp3IdUo8YgsmVOy2GcPt9EiwM3C6nSfAlt9HpfDao root@ansible
The key's randomart image is:
+---[RSA 3072]----+
|      .+Ooo ..o  |
|      .XOOo*.o . |
|     o.===*=*.o  |
|    . + ==+.oo o |
|     . .So.+. . .|
|         ..o..   |
|          E .    |
|                 |
|                 |
+----[SHA256]-----+
[root@ansible ~]# ls -a
.                .ansible       .bash_profile  .lesshst  .tcshrc
..               .bash_history  .bashrc        mysql     .viminfo
anaconda-ks.cfg  .bash_logout   .cshrc         .ssh   #存放在.ssh文件里
[root@ansible ~]# ssh-copy-id root@web01.example.com  #把私钥传到受控主机中
/usr/bin/ssh-copy-id: INFO: Source of key(s) to be installed: "/root/.ssh/id_rsa.pub"
The authenticity of host 'web01.example.com (192.168.6.132)' can't be established.
ECDSA key fingerprint is SHA256:R4221x3Nm3YeiqqIC3luK3PrweoxKeEj+r5m+5ARb4M.
Are you sure you want to continue connecting (yes/no/[fingerprint])? yes
/usr/bin/ssh-copy-id: INFO: attempting to log in with the new key(s), to filter out any that are already installed
/usr/bin/ssh-copy-id: INFO: 1 key(s) remain to be installed -- ifyou are prompted now it is to install the new keys
root@web01.example.com's password:
Permission denied, please try again.
root@web01.example.com's password:  输入密码

Number of key(s) added: 1

Now try logging into the machine, with:   "ssh 'root@web01.example.com'"
and check to make sure that only the key(s) you wanted were added.

[root@ansible ~]# ssh web01.example.com  # 尝试连接受控主机
Last failed login: Mon Jul 18 18:39:48 CST 2022 from 192.168.6.130 on ssh:notty
There was 1 failed login attempt since the last successful login.
Last login: Mon Jul 18 18:20:17 2022 from 192.168.6.1
[root@localhost ~]# ip a  # 此时以连接上,查看受控主机的ip
1: lo: <LOOPBACK,UP,LOWER_UP> mtu 65536 qdisc noqueue state UNKNOWN group default qlen 1000
    link/loopback 00:00:00:00:00:00 brd 00:00:00:00:00:00
    inet 127.0.0.1/8 scope host lo
       valid_lft forever preferred_lft forever
    inet6 ::1/128 scope host
       valid_lft forever preferred_lft forever
2: ens160: <BROADCAST,MULTICAST,UP,LOWER_UP> mtu 1500 qdisc mq state UP group default qlen 1000
    link/ether 00:0c:29:ee:b6:70 brd ff:ff:ff:ff:ff:ff
    inet 192.168.6.132/24 brd 192.168.6.255 scope global noprefixroute ens160
       valid_lft forever preferred_lft forever
    inet6 fe80::20c:29ff:feee:b670/64 scope link
       valid_lft forever preferred_lft forever
[root@localhost ~]# exit  # 退出
注销
[root@ansible opt]# cd httpd/
[root@ansible httpd]# ls
ansible.cfg  inventory
[root@ansible httpd]# ansible all -m ping  #使用ping模块可ping通
web01.example.com | SUCCESS => {
    "ansible_facts": {
        "discovered_interpreter_python": "/usr/libexec/platform-python"
    },
    "changed": false,
    "ping": "pong"
}
3.配置国内源
[root@ansible ~]# cd /etc/yum.repos.d/ # 查看源
[root@ansible yum.repos.d]# ls
CentOS-Base.repo  CentOS-SIG-ansible-29.repo
[root@ansible yum.repos.d]# cd
[root@ansible ~]# cd /opt/httpd/
[root@ansible httpd]# mkdir files  # 创建一个files目录用于存放文件或者软件包
[root@ansible httpd]# cd /opt/httpd/files
[root@ansible files]# cp /etc/yum.repos.d/CentOS-Base.repo .  #把源复制一个到当前目录
[root@ansible files]# cd ..  #返回上级目录
[root@ansible httpd]# vim yum.yml  # 编写一个polybook用于把源传到控制节点

---
- hosts: all    #在那个主机执行
  tasks:       #任务
     - name: delete yum    #删除对面的源
        file:                  #用file模块
          name: /etc/yum.repos.d/  #目标位子
          state: absent                #状态是删除


     - name: copy yum   # 任务名字
      copy:                     # 用到的copy模块
        src: files/CentOS-Base.repo   #文件存放的位子
        dest: /etc/yum.repos.d/        #文件放到受控节点的位子


[root@ansible httpd]# ansible-playbook yum.yml  #执行

PLAY [all] ***************************************************************************************************************************

TASK [Gathering Facts] ***************************************************************************************************************
ok: [web01.example.com]

TASK [copy yum] **********************************************************************************************************************
changed: [web01.example.com]

PLAY RECAP ***************************************************************************************************************************
web01.example.com          : ok=2    changed=1    unreachable=0    failed=0    skipped=0    rescued=0    ignored=0

[root@ansible httpd]# ansible all -m shell -a 'dnf clean all'  #命令行模式清理缓存
[WARNING]: Consider using the dnf module rather than running 'dnf'.  If you need to use command because dnf is insufficient you can
add 'warn: false' to this command task or set 'command_warnings=False' in ansible.cfg to get rid of this message.
web01.example.com | CHANGED | rc=0 >>
13 文件已删除
[root@ansible httpd]# ansible all -m shell -a 'dnf makecache'#命令行模式建立缓存
[WARNING]: Consider using the dnf module rather than running 'dnf'.  If you need to use command because dnf is insufficient you can
add 'warn: false' to this command task or set 'command_warnings=False' in ansible.cfg to get rid of this message.
web01.example.com | CHANGED | rc=0 >>
CentOS-8.5.2111 - Base - mirrors.aliyun.com     163 kB/s | 4.6 MB     00:28
CentOS-8.5.2111 - Extras - mirrors.aliyun.com   3.5 kB/s |  10 kB     00:02
CentOS-8.5.2111 - AppStream - mirrors.aliyun.co  93 kB/s | 8.4 MB     01:32
元数据缓存已建立。
[root@localhost yum.repos.d]# ls  # 受控主机查看
CentOS-Base.repo
4.编写主playbook
[root@ansible httpd]# vim apache.yml
---
- hosts: web01.example.com  #在那台主机上实施
  vars_files:                           # 引用的变量
    - vars/apache.yml                    # 变量存放的位子
  tasks:
    - name: Installing depend pkgs        #任务名字安装依赖包
      yum:                                #用yum模块
        name: "{{ install_apache_depend_pkgs }}"   #
        state: present                         #状态提供

    - name: Create apache user          #创建系统用户
      user:                            #用user模块
        name: apache                  #用户名字
        state: present               #状态提供
        create_home: no              #不要家目录
        shell: /sbin/nologin        #不能登录
        system: yes                 #系统用户

    - name: provide software package    # 提供软件包
      copy:                             #用copy模块
        src: "{{ item }}"             #位子在vars目录的变量里
        dest: /usr/src/               #目标位子在受控主机的usr/src
      loop: "{{ apache_software }}"   # 循环这个变量

    - name: provide install script     #提供安装脚本
      template:                        #用到template模块
        src: template/install_apache.sh.j2  # 脚本的位子
        dest: /tmp/install_apache.sh         #目标位子
        owner: root                     #属主是root
        group: root                     #属组是root
        mode: '0755'                   #权限是755

    - name: install apache             #安装apache
      shell: /tmp/install_apache.sh    #用shell执行tmp下的安装脚本

    - name: httpd service          #设置apache的service文件
      template:                       #用到template
        src: template/httpd.service.j2   #模板文件的位子
        dest: /usr/lib/systemd/system/httpd.service  #目标位子以及叫什么名字

    - name: Refreshing configuration Files   #更新配置文件
      shell: systemctl daemon-reload         # 用shell模块更新

    - name: Start apache         # 启动apache,设置开机自启
      service:               #用service模块
        name: httpd            #httpd服务
        state: started        # 状态是启动
        enabled: yes          #要开机自启
5.编写变量
[root@ansible httpd]# cd vars/ # 进到vars目录
[root@ansible vars]# ls
apache.yml
[root@ansible vars]# vim apache.yml  # 所有的变量存在这里

install_apache_depend_pkgs:     #  安装依赖包和安装所需的工具编写如下
  - make
  - openssl-devel
  - pcre-devel
  - expat-devel
  - libtool
  - gcc
  - gcc-c++

apache_software:      # 下载软件包
  - files/apr-1.7.0.tar.gz
  - files/apr-util-1.6.1.tar.gz
  - files/httpd-2.4.54.tar.gz

install_dir: /usr/local/apache  #路径等于这个变量
6.模板文件的编写
[root@ansible httpd]# mkdir template  创建一个目录用于放模板文件
[root@ansible httpd]# cd template/
[root@ansible template]# ls
httpd.service.j2  install_apache.sh.j2
[root@ansible template]# cat httpd.service.j2   #配置apache的开关机文件修改如下
[Unit]
Description=httpd server daemon
After=network.target sshd-keygen.target

[Service]
Type=forking
ExecStart={{ install_dir }}/bin/apachectl start
ExecStop={{ install_dir }}/bin/apachectl stop
ExecReload=/bin/kill -HUP $MAINPID

[Install]
WantedBy=multi-user.target
[root@ansible template]# cat install_apache.sh.j2 #编译安装的脚本文件,加入了判断
#!/bin/bash
install_dir=/usr/local/apache
cd /usr/src/
tar -xf apr-1.7.0.tar.gz
tar -xf apr-util-1.6.1.tar.gz
tar -xf httpd-2.4.54.tar.gz

cd /usr/src/apr-1.7.0
sed -i '/$RM "$cfgfile"/d' configure
if [ ! -d /usr/local/apr ];then
   ./configure --prefix=/usr/local/apr && make && make install
fi

cd ../apr-util-1.6.1
if [ ! -d /usr/local/apr-util ];then
   ./configure --prefix=/usr/local/apr-util --with-apr=/usr/local/apr && make && make install
fi

cd ../httpd-2.4.54
if [ ! -d $install_dir ];then
   ./configure --prefix=$install_dir \
    --enable-so \
    --enable-ssl \
    --enable-cgi \
    --enable-rewrite \
    --with-zlib \
    --with-pcre \
    --with-apr=/usr/local/apr \
    --with-apr-util=/usr/local/apr-util/ \
    --enable-modules=most \
    --enable-mpms-shared=all \
    --with-mpm=prefork && \
    make && make install
fi
7.关闭防火墙和selinux
[root@ansible httpd]# cat firewalld.yml
---
- hosts: all
  tasks:
    - name: stop firewalld   #关闭防火墙
      service:                  #用service
        name: firewalld
        state: stopped      #状态是关闭
        enabled: no         #开机不自起

    - name: Modify the SElinux     #修改selinux
      lineinfile:                           #用lineinfile模块
        path: /etc/selinux/config    # 位子
        regexp: '^SELINUX='         #从这里开始
        line: SELINUX=disabled        #修改成这样
[root@ansible httpd]# ansible-playbook firewalld.yml   #执行
8.执行主playbook
[root@ansible httpd]# ansible-playbook apache.yml

PLAY [web01.example.com] *******************************************************

TASK [Gathering Facts] *********************************************************
ok: [web01.example.com]

TASK [Installing depend pkgs] **************************************************
ok: [web01.example.com]

TASK [Create apache user] ******************************************************
ok: [web01.example.com]

TASK [provide software package] ************************************************
ok: [web01.example.com] => (item=files/apr-1.7.0.tar.gz)
ok: [web01.example.com] => (item=files/apr-util-1.6.1.tar.gz)
ok: [web01.example.com] => (item=files/httpd-2.4.54.tar.gz)

TASK [provide install script] **************************************************
changed: [web01.example.com]

TASK [install apache] **********************************************************
changed: [web01.example.com]

TASK [httpd service] ***********************************************************
ok: [web01.example.com]

TASK [Refreshing configuration Files] ******************************************
changed: [web01.example.com]

TASK [Start apache] ************************************************************
changed: [web01.example.com]

PLAY RECAP *********************************************************************
web01.example.com          : ok=9    changed=4    unreachable=0 failed=0    skipped=0    rescued=0    ignored=0
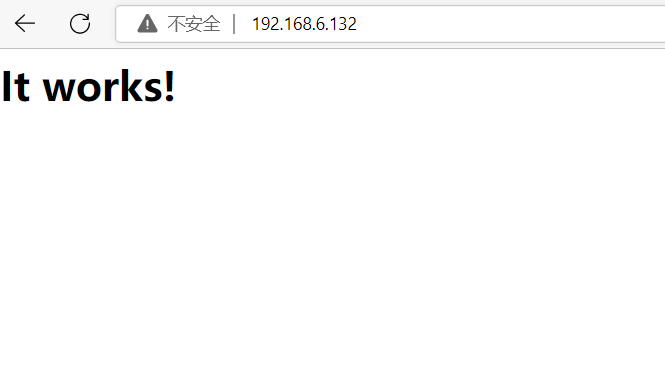
9.受控节点查看
[root@localhost ~]# cat /etc/selinux/config # selinux永久关闭
# This file controls the state of SELinux on the system.
# SELINUX= can take one of these three values:
# enforcing - SELinux security policy is enforced.
# permissive - SELinux prints warnings instead of enforcing.
# disabled - No SELinux policy is loaded.
SELINUX=disabled
# SELINUXTYPE= can take one of these three values:
# targeted - Targeted processes are protected,
# minimum - Modification of targeted policy. Only selected processes are protected.
# mls - Multi Level Security protection.
SELINUXTYPE=targeted
[root@localhost ~]# systemctl status firewalld # 防火墙关闭
● firewalld.service - firewalld - dynamic firewall daemon
Loaded: loaded (/usr/lib/systemd/system/firewalld.service; disabled; vendor preset: enabled)
Active: inactive (dead)
Docs: man:firewalld(1)
7月 18 18:20:15 localhost.localdomain systemd[1]: Starting firewalld - dynamic firewall daemon...
7月 18 18:20:15 localhost.localdomain systemd[1]: Started firewalld - dynamic firewall daemon.
7月 18 18:20:15 localhost.localdomain firewalld[1056]: WARNING: AllowZoneDrifting is enabled. This is considered an insecure configur>
7月 18 15:48:44 localhost.localdomain systemd[1]: Stopping firewalld - dynamic firewall daemon...
7月 18 15:48:45 localhost.localdomain systemd[1]: firewalld.service: Succeeded.
7月 18 15:48:45 localhost.localdomain systemd[1]: Stopped firewalld - dynamic firewall daemon.
[root@localhost ~]# ss -antl  #端口号起来了
State  Recv-Q Send-Q Local Address:Port Peer Address:Port Process
LISTEN 0      128          0.0.0.0:22        0.0.0.0:*
LISTEN 0      128                *:80              *:*
LISTEN 0      128             [::]:22           [::]:*
[root@localhost ~]# systemctl status httpd  # 开机自启
● httpd.service - httpd server daemon
   Loaded: loaded (/usr/lib/systemd/system/httpd.service; enabled>
   Active: active (running) since Mon 2022-07-18 17:10:24 CST; 15>
  Process: 77384 ExecStart=/usr/local/apache/bin/apachectl start >
 Main PID: 77387 (httpd)
    Tasks: 6 (limit: 11202)
   Memory: 5.6M
   CGroup: /system.slice/httpd.service
           ├─77387 /usr/local/apache/bin/httpd -k start
           ├─77388 /usr/local/apache/bin/httpd -k start
           ├─77389 /usr/local/apache/bin/httpd -k start
           ├─77390 /usr/local/apache/bin/httpd -k start
           ├─77391 /usr/local/apache/bin/httpd -k start
           └─77392 /usr/local/apache/bin/httpd -k start

7月 18 17:10:24 localhost.localdomain systemd[1]: Starting httpd >
7月 18 17:10:24 localhost.localdomain apachectl[77384]: AH00558: >
7月 18 17:10:24 localhost.localdomain systemd[1]: Started httpd s

 浙公网安备 33010602011771号