Python+Tornado开发微信公众号
本文已同步到专业技术网站 www.sufaith.com, 该网站专注于前后端开发技术与经验分享, 包含Web开发、Nodejs、Python、Linux、IT资讯等板块.
本教程针对的是已掌握Python语言基本用法并且掌握其任一Web框架的用户。
本教程使用的Python版本为3.5.0, Web框架为Tornado, IDE开发工具为PyCharm,整个开发过程是在Windows环境下测试开发,最终上线部署至centos服务器。
备注:
(1) 如果您是python小白,建议参考 Python入门教程
(2) 对tornado框架还不熟悉的同学,建议参考 Tornado中文文档
本教程整体框架如下:
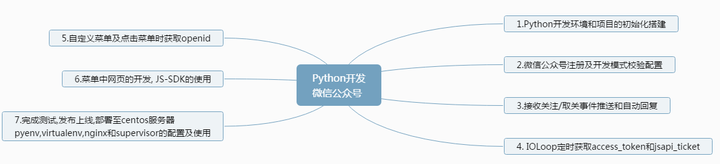
1. Python开发环境和项目的初始化搭建;
2. 微信公众号注册及开发模式校验配置;
3. 接收关注/取关事件推送和自动回复;
4. IOLoop定时获取access_token和jsapi_ticket;
5. 自定义菜单及点击菜单时获取openid;
6. 菜单中网页的开发, JS-SDK的使用;
7. 完成测试,发布上线,部署至centos服务器。
思维导图如下:
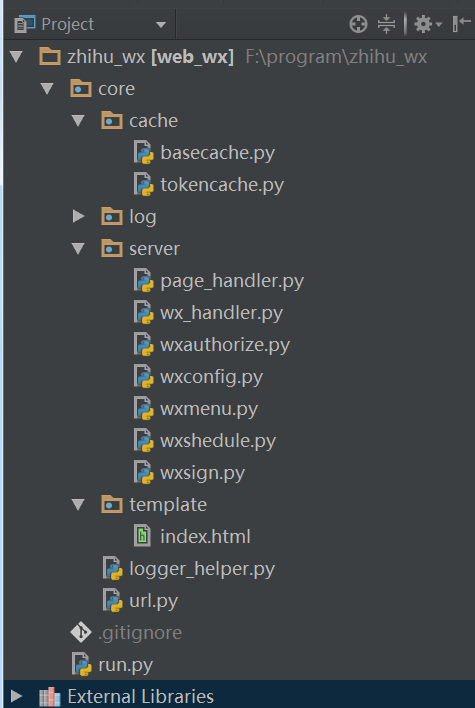
整体项目结构如下:
下面我们正式进入详细的开发流程
一. Python开发环境和项目的初始化搭建
1. 安装python及pip,并配置环境变量,安装tornado框架
Python及pip安装参考教程windows下面安装Python和pip终极教程
(1) 下载Python包并安装 点此下载
(2) 将python配置到系统环境变量
(3) 下载pip包并安装 点此下载
(4) 将pip配置到系统环境变量
(5) 使用pip安装tornado框架 指令为:
pip install tornado
2. 选择一款开发Python的IDE
本教程使用的是PyCharm点击下载
附带: PyCharm 2016.2.3专业版注册码
3. 选择一个代码托管平台
本教程使用的是开源中国Git@osc代码托管平台 码云 - 开源中国代码托管平台,请自行注册,并配置账户下的SSH密钥,关于Git的使用,请参考教程 Git教程 - 廖雪峰的官方网站
4. 创建Web项目
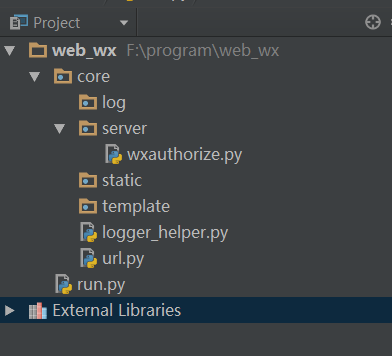
使用Tornado搭建项目入口,端口号为8000,项目搭建至完成微信校验所需的基本代码如下:
项目整体目录
为了方便调试,编写了日志管理文件 logger_helper.py
备注: 为防止日志输出报错, 请各位同学注意修改日志输出目录为自己定义的文件目录
import logging
from logging import Logger
from logging.handlers import TimedRotatingFileHandler

'''日志管理类'''


def init_logger(logger_name):
    if logger_name not in Logger.manager.loggerDict:
        logger1 = logging.getLogger(logger_name)
        logger1.setLevel(logging.INFO)  # 设置最低级别
        # logger1.setLevel(logging.DEBUG)  # 设置最低级别
        df = '%Y-%m-%d %H:%M:%S'
        format_str = '[%(asctime)s]: %(name)s %(levelname)s %(lineno)s %(message)s'
        formatter = logging.Formatter(format_str, df)
        # handler all
        try:
            handler1 = TimedRotatingFileHandler('/usr/web_wx/log/all.log', when='D', interval=1, backupCount=7)
        except Exception:
            handler1 = TimedRotatingFileHandler('F:\program\web_wx\core\log\/all.log', when='D', interval=1, backupCount=7)
        handler1.setFormatter(formatter)
        handler1.setLevel(logging.DEBUG)
        logger1.addHandler(handler1)
        # handler error
        try:
            handler2 = TimedRotatingFileHandler('/usr/web_wx/log/error.log', when='D', interval=1, backupCount=7)
        except Exception:
            handler2 = TimedRotatingFileHandler('F:\program\web_wx\core\log\error.log', when='D', interval=1, backupCount=7)
        handler2.setFormatter(formatter)
        handler2.setLevel(logging.ERROR)
        logger1.addHandler(handler2)

        # console
        console = logging.StreamHandler()
        console.setLevel(logging.DEBUG)
        # 设置日志打印格式
        console.setFormatter(formatter)
        # 将定义好的console日志handler添加到root logger
        logger1.addHandler(console)

    logger1 = logging.getLogger(logger_name)
    return logger1


logger = init_logger('runtime-log')

if __name__ == '__main__':
    logger.debug('test-debug')
    logger.info('test-info')
    logger.warn('test-warn')
    logger.error('test-error')
微信服务端校验的接口文件 wxauthorize.py
from core.logger_helper import logger import hashlib import tornado.web class WxSignatureHandler(tornado.web.RequestHandler): """ 微信服务器签名验证, 消息回复 check_signature: 校验signature是否正确 """ def data_received(self, chunk): pass def get(self): try: signature = self.get_argument('signature') timestamp = self.get_argument('timestamp') nonce = self.get_argument('nonce') echostr = self.get_argument('echostr') logger.debug('微信sign校验,signature='+signature+',×tamp='+timestamp+'&nonce='+nonce+'&echostr='+echostr) result = self.check_signature(signature, timestamp, nonce) if result: logger.debug('微信sign校验,返回echostr='+echostr) self.write(echostr) else: logger.error('微信sign校验,---校验失败') except Exception as e: logger.error('微信sign校验,---Exception' + str(e)) def check_signature(self, signature, timestamp, nonce): """校验token是否正确""" token = 'test12345' L = [timestamp, nonce, token] L.sort() s = L[0] + L[1] + L[2] sha1 = hashlib.sha1(s.encode('utf-8')).hexdigest() logger.debug('sha1=' + sha1 + '&signature=' + signature) return sha1 == signature
配置Tornado的url路由规则 url.py
from core.server.wxauthorize import WxSignatureHandler
import tornado.web


'''web解析规则'''

urlpatterns = [
    (r'/wxsignature', WxSignatureHandler),  # 微信签名
   ]
基本配置文件 run.py
import os
import tornado.httpserver
import tornado.ioloop
import tornado.web
from tornado.options import define, options
from core.url import urlpatterns


define('port', default=8000, help='run on the given port', type=int)


class Application(tornado.web.Application):
    def __init__(self):
        settings = dict(
            template_path=os.path.join(os.path.dirname(__file__), "core/template"),
            static_path=os.path.join(os.path.dirname(__file__), "core/static"),
            debug=True,
            login_url='/login',
            cookie_secret='MuG7xxacQdGPR7Svny1OfY6AymHPb0H/t02+I8rIHHE=',
        )
        super(Application, self).__init__(urlpatterns, **settings)


def main():
    tornado.options.parse_command_line()
    http_server = tornado.httpserver.HTTPServer(Application())
    http_server.listen(options.port)
    tornado.ioloop.IOLoop.current().start()

if __name__ == '__main__':
    main()
(5) 同步项目文件至Git托管平台
项目入口文件及微信校验文件已编写好,使用Git同步代码至托管平台,接下来需要配置端口映射,使外网能访问到我们的本地项目,便于完成微信服务端校验.
5. 使用花生壳,配置本地测试所需端口映射
微信公众号开发需要配置服务端URL, 验证URL的有效性,这个URL必须以http://或https://开头,分别支持80端口和443端口,我们目前测试阶段都是在自己电脑上测试(本地测试),为了满足不断修改代码能够即时生效, 因此需要一个外网ip端口映射到本地(内网穿透),我本人使用的是花生壳内网穿透服务,下面是花生壳的使用流程:
(1) 花生壳的账户注册 花生壳软件-内网也能用!内网动态域名,注册成功后,会赠送一个免费域名,这个域名同时也配备了一个公网ip
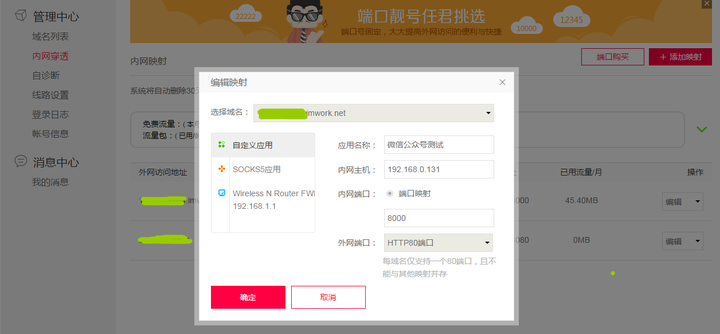
(2) 进入到花生壳管理界面, 选择内网穿透菜单,进入到配置界面
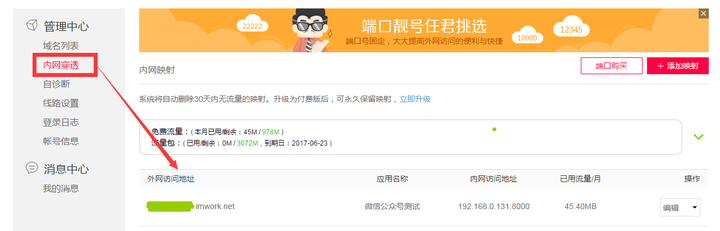
(3) 选择 右边的"编辑"操作,弹出编辑映射面板,在"内网主机"一项,填上自己本地电脑的ip地址,端口填写自己将要创建的web应用端口,我本地项目用的端口号为8000,此处填写8000即可
二. 微信公众号注册及开发模式校验配置
1. 微信公众号注册
官网链接https://mp.weixin.qq.com/,依次填写信息进行注册
2.微信公众开发模式校验配置
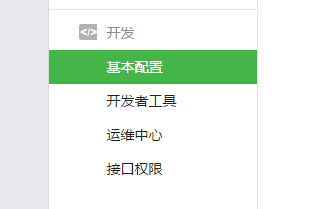
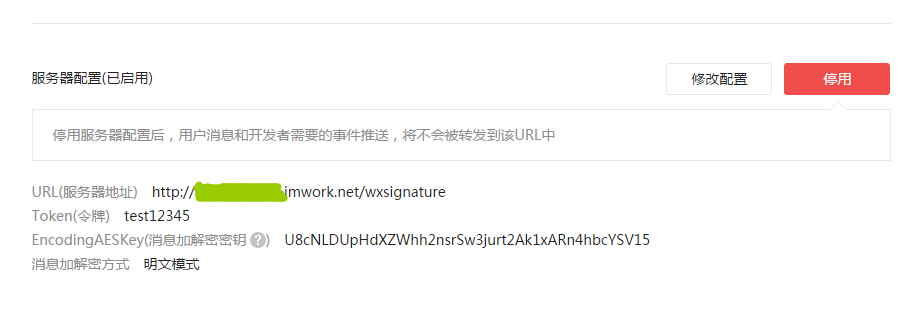
(1)登录微信公众号后, 进入基本配置,如下:
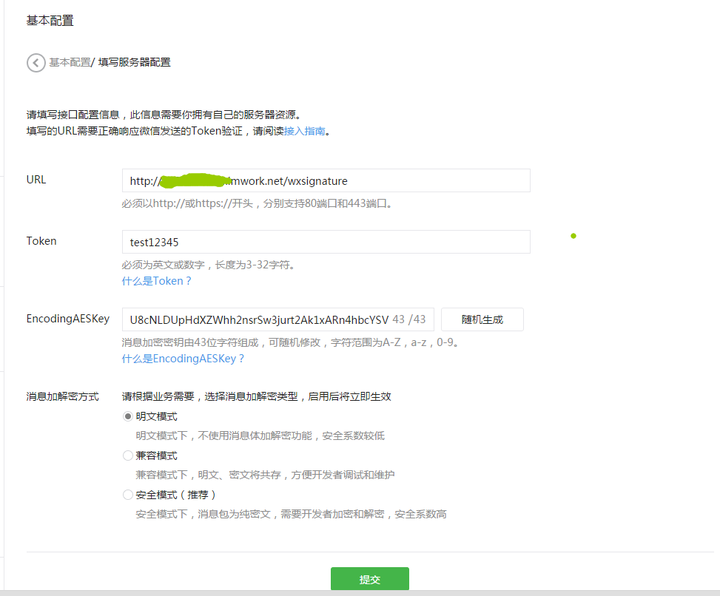
URL 填写为: 花生壳的域名+我们项目中微信校验的接口名:
http://XXXXXXX.imwork.net/wxsignature
token 填写为我们项目中自定义的token: test12345
EncodingAESKey 点击"随机生成"按钮即可,消息加密方式使用明文模式
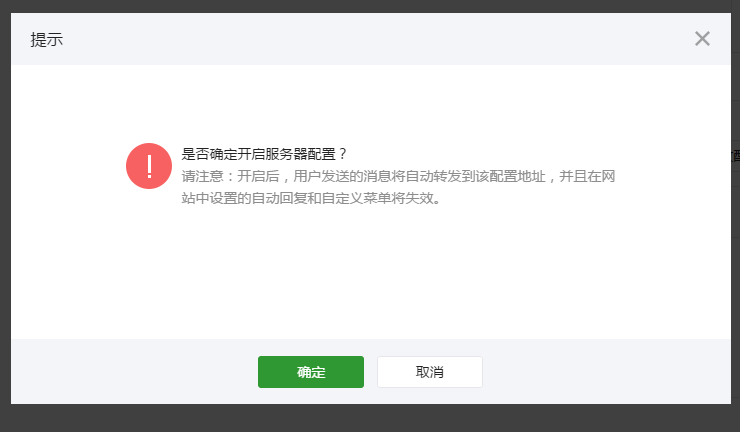
填写完毕后,先启动我们的项目,运行python run.py指令后, 保证我们的服务器是运行着的, 然后点击"提交",如果你是按照以上流程操作的话,会提示提交成功,否则校验失败,需要我们通过日志检查是哪一块出了问题.
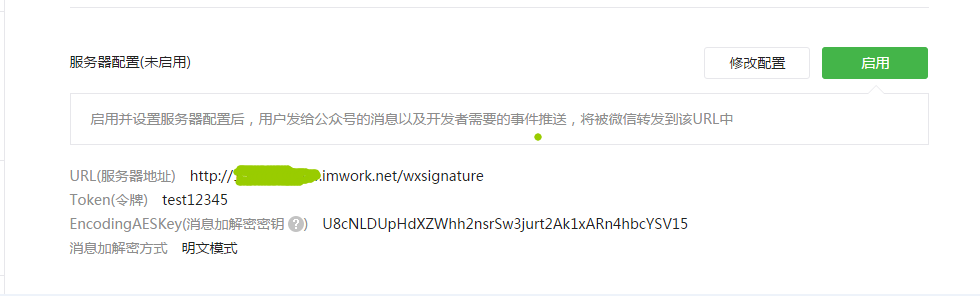
(2) 接下来,校验成功后,点击启用,即可激活开发者模式
三.接收关注/取关事件推送和自动回复
1. 接收关注/取关事件推送
在开发模式中,有新用户关注我们的公众号时,微信公众平台会使用http协议的Post方式推送数据至我们的后台微信校验的接口,在接收到消息后,我们后台发送一条欢迎语给该用户,关于微信公众平台推送消息的具体内容和数据格式,详见微信开发文档
- wxauthorize.py
以下是在该文件中增加的post方法,用来接收事件推送
def post(self):
        body = self.request.body
        logger.debug('微信消息回复中心】收到用户消息' + str(body.decode('utf-8')))
        data = ET.fromstring(body)
        ToUserName = data.find('ToUserName').text
        FromUserName = data.find('FromUserName').text
        MsgType = data.find('MsgType').text
        if MsgType == 'event':
            '''接收事件推送'''
            try:
                Event = data.find('Event').text
                if Event == 'subscribe':
                    # 关注事件
                    CreateTime = int(time.time())
                    reply_content = '欢迎关注我的公众号~'
                    out = self.reply_text(FromUserName, ToUserName, CreateTime, reply_content)
                    self.write(out)
            except:
                pass

def reply_text(self, FromUserName, ToUserName, CreateTime, Content):
        """回复文本消息模板"""
        textTpl = """<xml> <ToUserName><![CDATA[%s]]></ToUserName> <FromUserName><![CDATA[%s]]></FromUserName> <CreateTime>%s</CreateTime> <MsgType><![CDATA[%s]]></MsgType> <Content><![CDATA[%s]]></Content></xml>"""
        out = textTpl % (FromUserName, ToUserName, CreateTime, 'text', Content)
        return out
2. 自动回复
(1) 同接收关注/取关事件推送消息一样,用户给我们公众号发送消息时,微信公众平台也会推送数据至我们的后台微信校验的接口,在接收到消息后,我们取出自定义的关键字进行匹配,匹配到了就执行自动回复
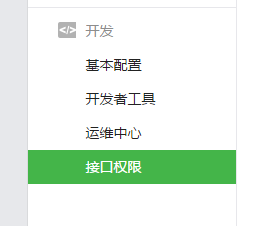
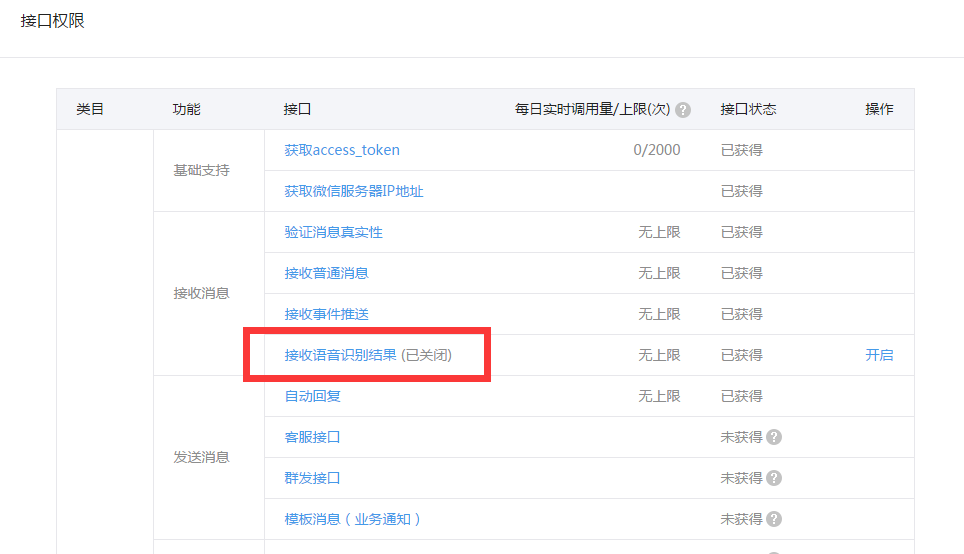
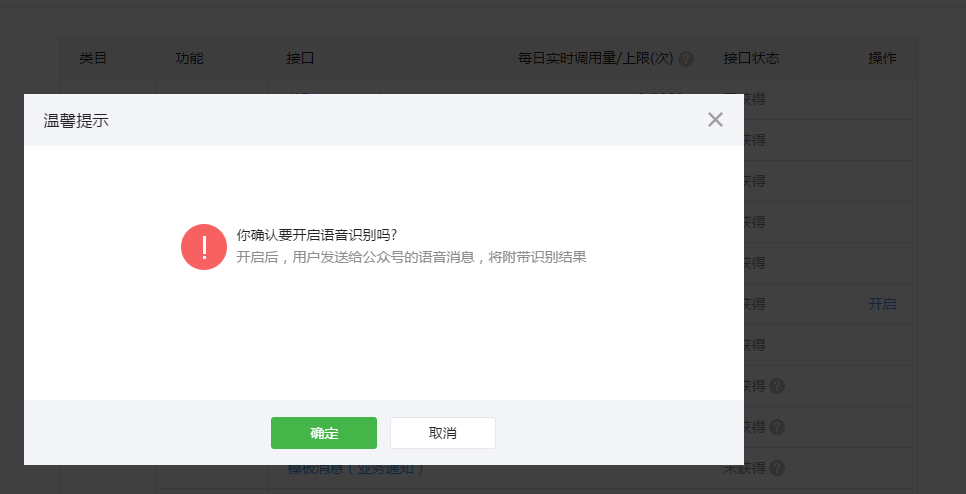
(2) 微信公众平台也提供了语音识别功能, 将用户发送的语音内容识别转化为文字,发送给我们后台,在使用该功能时需要在接口权限中打开语音识别功能.
- wxauthorize.py
以下是在该文件中post方法中增加的一个判断,用来匹配用户文本消息和语音消息中的关键字
def post(self):
        body = self.request.body
        logger.debug('微信消息回复中心】收到用户消息' + str(body.decode('utf-8')))
        data = ET.fromstring(body)
        ToUserName = data.find('ToUserName').text
        FromUserName = data.find('FromUserName').text
        MsgType = data.find('MsgType').text
        if MsgType == 'text' or MsgType == 'voice':
            '''文本消息 or 语音消息'''
            try:
                MsgId = data.find("MsgId").text
                if MsgType == 'text':
                    Content = data.find('Content').text  # 文本消息内容
                elif MsgType == 'voice':
                    Content = data.find('Recognition').text  # 语音识别结果,UTF8编码
                if Content == u'你好':
                    reply_content = '您好,请问有什么可以帮助您的吗?'
                else:
                    # 查找不到关键字,默认回复
                    reply_content = "客服小儿智商不够用啦~"
                if reply_content:
                    CreateTime = int(time.time())
                    out = self.reply_text(FromUserName, ToUserName, CreateTime, reply_content)
                    self.write(out)
            except:
                pass

        elif MsgType == 'event':
            '''接收事件推送'''
            try:
                Event = data.find('Event').text
                if Event == 'subscribe':
                    # 关注事件
                    CreateTime = int(time.time())
                    reply_content = self.sys_order_reply
                    out = self.reply_text(FromUserName, ToUserName, CreateTime, reply_content)
                    self.write(out)
            except:
                pass

    def reply_text(self, FromUserName, ToUserName, CreateTime, Content):
        """回复文本消息模板"""
        textTpl = """<xml> <ToUserName><![CDATA[%s]]></ToUserName> <FromUserName><![CDATA[%s]]></FromUserName> <CreateTime>%s</CreateTime> <MsgType><![CDATA[%s]]></MsgType> <Content><![CDATA[%s]]></Content></xml>"""
        out = textTpl % (FromUserName, ToUserName, CreateTime, 'text', Content)
        return out
四. IOLoop定时获取access_token和jsapi_ticket
1. access_token
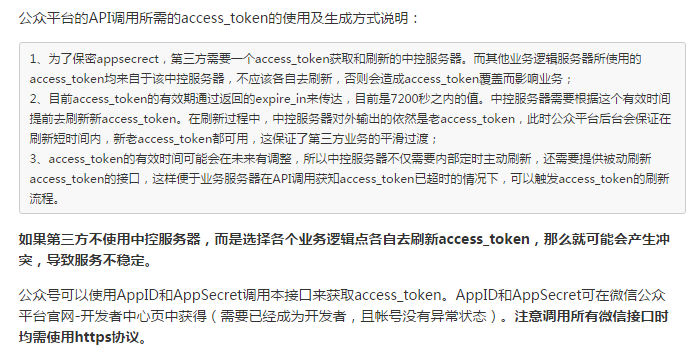
access_token是公众号的全局唯一票据,公众号调用各接口时都需使用access_token。开发者需要进行妥善保存。access_token的存储至少要保留512个字符空间。access_token的有效期目前为2个小时,需定时刷新,重复获取将导致上次获取的access_token失效。以下是文档中的说明 详见微信开发文档
2. jsapi_ticket
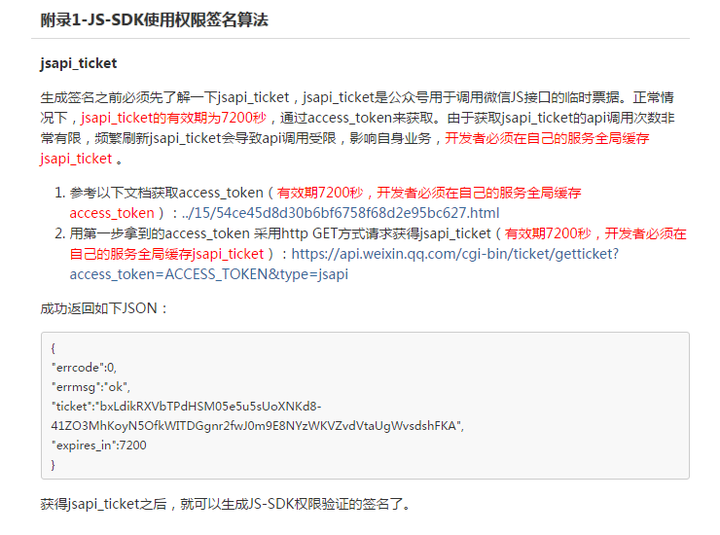
jsapi_ticket是公众号用于调用微信JS接口的临时票据。正常情况下,jsapi_ticket的有效期为7200秒,通过access_token来获取。由于获取jsapi_ticket的api调用次数非常有限,频繁刷新jsapi_ticket会导致api调用受限,影响自身业务,开发者必须在自己的服务全局缓存jsapi_ticket 。参考文档JS-SDK使用权限签名算法
3. Redis数据库
如果有对Redis不了解的同学,可参考Redis快速入门
- basecache.py
import redis

"""缓存服务器"""
CACHE_SERVER = {
    'host': '127.0.0.1',
    'port': 6379,
    'database': 0,
    'password': '',
}

class BaseCache(object):
    """
    缓存类父类

    redis_ctl:                          redis控制句柄
    """

    _host = CACHE_SERVER.get('host', '')
    _port = CACHE_SERVER.get('port', '')
    _database = CACHE_SERVER.get('database', '')
    _password = CACHE_SERVER.get('password', '')

    @property
    def redis_ctl(self):
        """redis控制句柄"""
        redis_ctl = redis.Redis(host=self._host, port=self._port, db=self._database, password=self._password)
        return redis_ctl
- tokencache.py
from core.cache.basecache import BaseCache
from core.logger_helper import logger


class TokenCache(BaseCache):
    """
    微信token缓存

    set_cache               添加redis
    get_cache               获取redis
    """
    _expire_access_token = 7200  # 微信access_token过期时间, 2小时
    _expire_js_token = 30 * 24 * 3600   # 微信js网页授权过期时间, 30天
    KEY_ACCESS_TOKEN = 'access_token'  # 微信全局唯一票据access_token
    KEY_JSAPI_TICKET = 'jsapi_ticket'  # JS_SDK权限签名的jsapi_ticket

    def set_access_cache(self, key, value):
        """添加微信access_token验证相关redis"""
        res = self.redis_ctl.set(key, value)
        self.redis_ctl.expire(key, self._expire_access_token)
        logger.debug('【微信token缓存】setCache>>>key[' + key + '],value[' + value + ']')
        return res

    def set_js_cache(self, key, value):
        """添加网页授权相关redis"""
        res = self.redis_ctl.set(key, value)
        self.redis_ctl.expire(key, self._expire_js_token)
        logger.debug('【微信token缓存】setCache>>>key[' + key + '],value[' + value + ']')
        return res

    def get_cache(self, key):
        """获取redis"""
        try:
            v = (self.redis_ctl.get(key)).decode('utf-8')
            logger.debug(v)
            logger.debug('【微信token缓存】getCache>>>key[' + key + '],value[' + v + ']')
            return v
        except Exception:
            return None
4. 使用tornado的 Ioloop 实现定时获取access_token和 jsapi_ticket,并将获取到的access_token和 jsapi_ticket保存在Redis数据库中
- wxconfig.py
class WxConfig(object):
    """
    微信开发--基础配置

    """
    AppID = 'wxxxxxxxxxxxxxxxx'  # AppID(应用ID)
    AppSecret = '024a7fcxxxxxxxxxxxxxxxxxxxx'  # AppSecret(应用密钥)

    '''获取access_token'''
    config_get_access_token_url = 'https://api.weixin.qq.com/cgi-bin/token?grant_type=client_credential&appid=%s&secret=%s' % (AppID, AppSecret)
wxshedule.py
from core.logger_helper import logger
import tornado.ioloop
import requests
import json
from core.server.wxconfig import WxConfig
from core.cache.tokencache import TokenCache


class WxShedule(object):
    """
    定时任务调度器

    excute                      执行定时器任务
    get_access_token            获取微信全局唯一票据access_token
    get_jsapi_ticket           获取JS_SDK权限签名的jsapi_ticket
    """
    _token_cache = TokenCache()  # 微信token缓存实例
    _expire_time_access_token = 7000 * 1000  # token过期时间

    def excute(self):
        """执行定时器任务"""
        logger.info('【获取微信全局唯一票据access_token】>>>执行定时器任务')
        tornado.ioloop.IOLoop.instance().call_later(0, self.get_access_token)
        tornado.ioloop.PeriodicCallback(self.get_access_token, self._expire_time_access_token).start()
        # tornado.ioloop.IOLoop.current().start()

    def get_access_token(self):
        """获取微信全局唯一票据access_token"""
        url = WxConfig.config_get_access_token_url
        r = requests.get(url)
        logger.info('【获取微信全局唯一票据access_token】Response[' + str(r.status_code) + ']')
        if r.status_code == 200:
            res = r.text
            logger.info('【获取微信全局唯一票据access_token】>>>' + res)
            d = json.loads(res)
            if 'access_token' in d.keys():
                access_token = d['access_token']
                # 添加至redis中
                self._token_cache.set_access_cache(self._token_cache.KEY_ACCESS_TOKEN, access_token)
                # 获取JS_SDK权限签名的jsapi_ticket
                self.get_jsapi_ticket()
                return access_token
            elif 'errcode' in d.keys():
                errcode = d['errcode']
                logger.info(
                    '【获取微信全局唯一票据access_token-SDK】errcode[' + errcode + '] , will retry get_access_token() method after 10s')
                tornado.ioloop.IOLoop.instance().call_later(10, self.get_access_token)
        else:
            logger.error('【获取微信全局唯一票据access_token】request access_token error, will retry get_access_token() method after 10s')
            tornado.ioloop.IOLoop.instance().call_later(10, self.get_access_token)

    def get_jsapi_ticket(self):
        """获取JS_SDK权限签名的jsapi_ticket"""
        access_token = self._token_cache.get_cache(self._token_cache.KEY_ACCESS_TOKEN)
        if access_token:
            url = 'https://api.weixin.qq.com/cgi-bin/ticket/getticket?access_token=%s&type=jsapi' % access_token
            r = requests.get(url)
            logger.info('【微信JS-SDK】获取JS_SDK权限签名的jsapi_ticket的Response[' + str(r.status_code) + ']')
            if r.status_code == 200:
                res = r.text
                logger.info('【微信JS-SDK】获取JS_SDK权限签名的jsapi_ticket>>>>' + res)
                d = json.loads(res)
                errcode = d['errcode']
                if errcode == 0:
                    jsapi_ticket = d['ticket']
                    # 添加至redis中
                    self._token_cache.set_access_cache(self._token_cache.KEY_JSAPI_TICKET, jsapi_ticket)
                else:
                    logger.info('【微信JS-SDK】获取JS_SDK权限签名的jsapi_ticket>>>>errcode[' + errcode + ']')
                    logger.info('【微信JS-SDK】request jsapi_ticket error, will retry get_jsapi_ticket() method after 10s')
                    tornado.ioloop.IOLoop.instance().call_later(10, self.get_jsapi_ticket)
            else:
                logger.info('【微信JS-SDK】request jsapi_ticket error, will retry get_jsapi_ticket() method after 10s')
                tornado.ioloop.IOLoop.instance().call_later(10, self.get_jsapi_ticket)
        else:
            logger.error('【微信JS-SDK】获取JS_SDK权限签名的jsapi_ticket时,access_token获取失败, will retry get_access_token() method after 10s')
            tornado.ioloop.IOLoop.instance().call_later(10, self.get_access_token)

if __name__ == '__main__':

    wx_shedule = WxShedule()
    """执行定时器"""
    wx_shedule.excute()
- run.py 将定时器的启动放在主程序入口处,保证每次启动服务器时,重新启动定时器
import os
import tornado.httpserver
import tornado.ioloop
import tornado.web
from tornado.options import define, options
from core.url import urlpatterns
from core.server.wxshedule import WxShedule

define('port', default=8000, help='run on the given port', type=int)


class Application(tornado.web.Application):
    def __init__(self):
        settings = dict(
            template_path=os.path.join(os.path.dirname(__file__), "core/template"),
            static_path=os.path.join(os.path.dirname(__file__), "core/static"),
            debug=True,
            login_url='/login',
            cookie_secret='MuG7xxacQdGPR7Svny1OfY6AymHPb0H/t02+I8rIHHE=',
        )
        super(Application, self).__init__(urlpatterns, **settings)


def main():
    tornado.options.parse_command_line()
    http_server = tornado.httpserver.HTTPServer(Application())
    http_server.listen(options.port)
    # 执行定时任务
    wx_shedule = WxShedule()
    wx_shedule.excute()
    tornado.ioloop.IOLoop.current().start()

if __name__ == '__main__':
    main()
五. 自定义菜单及点击菜单时获取openid
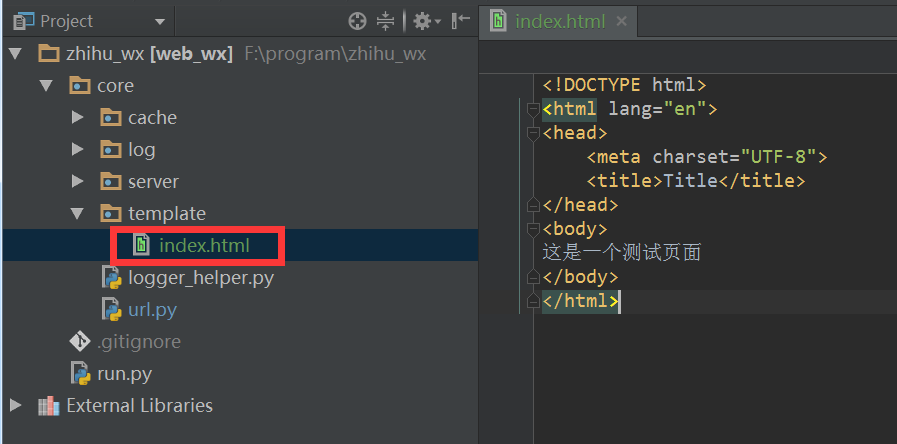
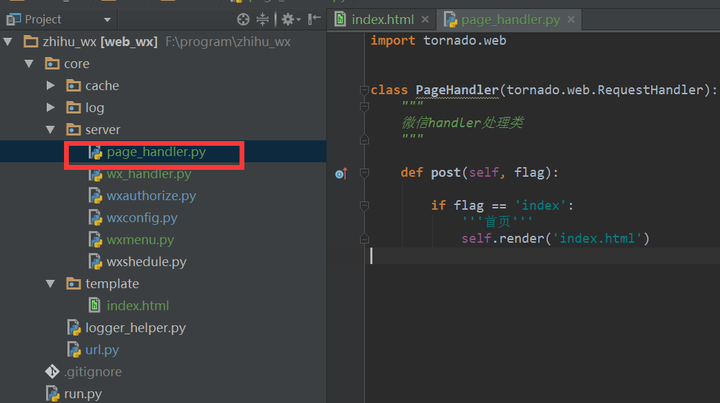
1. 编写菜单对应的html页面
- 先在template模板文件夹下制作一个html页面,用于点击自定义菜单时跳转到的网页.
- 编写一个页面处理类,用于接收tornado.web.RequestHandler请求
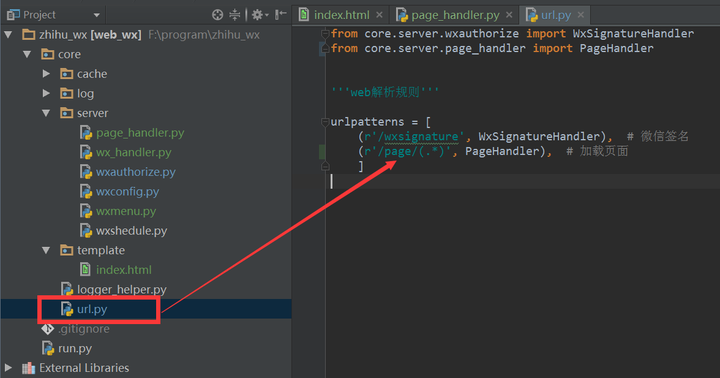
- 给PageHandler添加url规则
2.创建一个菜单,并给菜单添加获取授权code的URL
以下是微信公众平台官方文档给出的具体流程,详见 网页授权获取用户基本信息
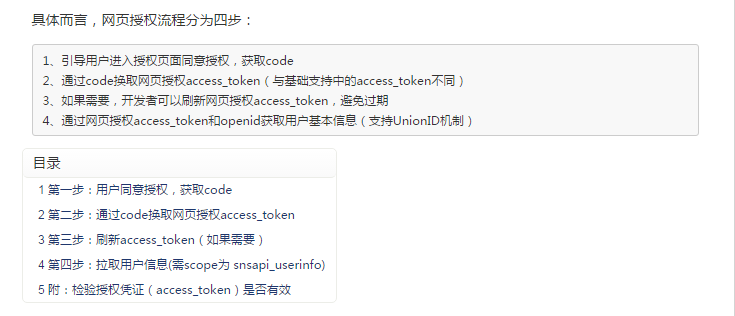
我们希望在用户点击自定义菜单时,需要先获取用户的openid,以便从我们自己的后台中通过该openid获取这个用户更多的信息,比如它对应的我们后台中的uid等, 如果我们后台中没有这个用户,则需要执行绑定等操作.
因此我们需要给这个自定义菜单按钮添加一个对应的URL,点击这个菜单,跳转到这个URL,这个URL会触发获取code操作,获取到code后,通过获取授权的access_token接口,获取openid及access_token
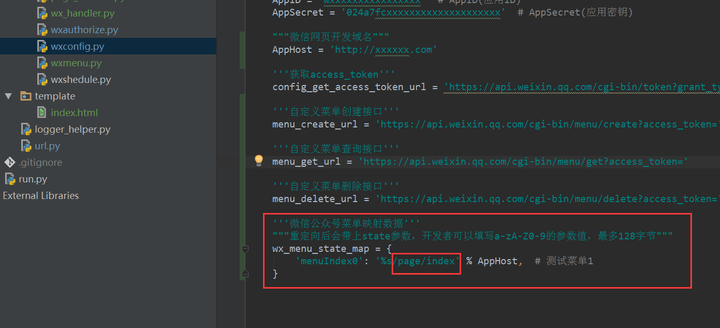
(1) 给菜单添加url,及state映射关系
- state为自定义字符串,可以用来标识是用户点击了哪一个菜单,放在一个dict字典中,当前我们制作的第一个菜单就对应 /page/index 映射
(2) 点击菜单时,触发获取code接口,微信公众平台携带code和state请求访问我们后台的 /wx/wxauthor 接口,根据state字段获取 /page/index 映射,用来做重定向用.通过code换取网页授权access_token及openid,拿到openid后我们就可以重定向跳转到 /page/index映射对应的页面 index.html
附:涉及到的主要程序代码如下:
- wxconfig.py
class WxConfig(object):
    """
    微信开发--基础配置

    """
    AppID = 'wxxxxxxxxxxxxxxxx'  # AppID(应用ID)
    AppSecret = '024a7fcxxxxxxxxxxxxxxxxxxxx'  # AppSecret(应用密钥)

    """微信网页开发域名"""
    AppHost = 'http://xxxxxx.com'

    '''获取access_token'''
    config_get_access_token_url = 'https://api.weixin.qq.com/cgi-bin/token?grant_type=client_credential&appid=%s&secret=%s' % (AppID, AppSecret)

    '''自定义菜单创建接口'''
    menu_create_url = 'https://api.weixin.qq.com/cgi-bin/menu/create?access_token='

    '''自定义菜单查询接口'''
    menu_get_url = 'https://api.weixin.qq.com/cgi-bin/menu/get?access_token='

    '''自定义菜单删除接口'''
    menu_delete_url = 'https://api.weixin.qq.com/cgi-bin/menu/delete?access_token='

    '''微信公众号菜单映射数据'''
    """重定向后会带上state参数,开发者可以填写a-zA-Z0-9的参数值,最多128字节"""
    wx_menu_state_map = {
        'menuIndex0': '%s/page/index' % AppHost,  # 测试菜单1
    }
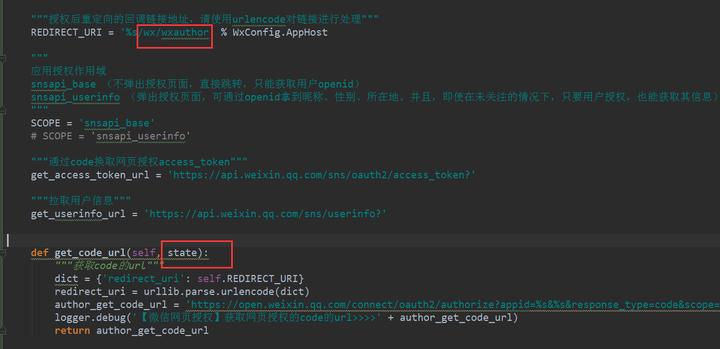
- wxauthorize.py 中的 WxAuthorServer类
class WxAuthorServer(object):
    """
    微信网页授权server

    get_code_url                            获取code的url
    get_auth_access_token                   通过code换取网页授权access_token
    refresh_token                           刷新access_token
    check_auth                              检验授权凭证(access_token)是否有效
    get_userinfo                            拉取用户信息
    """

    """授权后重定向的回调链接地址,请使用urlencode对链接进行处理"""
    REDIRECT_URI = '%s/wx/wxauthor' % WxConfig.AppHost

    """
    应用授权作用域
    snsapi_base (不弹出授权页面,直接跳转,只能获取用户openid)
    snsapi_userinfo (弹出授权页面,可通过openid拿到昵称、性别、所在地。并且,即使在未关注的情况下,只要用户授权,也能获取其信息)
    """
    SCOPE = 'snsapi_base'
    # SCOPE = 'snsapi_userinfo'

    """通过code换取网页授权access_token"""
    get_access_token_url = 'https://api.weixin.qq.com/sns/oauth2/access_token?'

    """拉取用户信息"""
    get_userinfo_url = 'https://api.weixin.qq.com/sns/userinfo?'


    def get_code_url(self, state):
        """获取code的url"""
        dict = {'redirect_uri': self.REDIRECT_URI}
        redirect_uri = urllib.parse.urlencode(dict)
        author_get_code_url = 'https://open.weixin.qq.com/connect/oauth2/authorize?appid=%s&%s&response_type=code&scope=%s&state=%s#wechat_redirect' % (WxConfig.AppID, redirect_uri, self.SCOPE, state)
        logger.debug('【微信网页授权】获取网页授权的code的url>>>>' + author_get_code_url)
        return author_get_code_url

    def get_auth_access_token(self, code):
        """通过code换取网页授权access_token"""
        url = self.get_access_token_url + 'appid=%s&secret=%s&code=%s&grant_type=authorization_code' % (WxConfig.AppID, WxConfig.AppSecret, code)
        r = requests.get(url)
        logger.debug('【微信网页授权】通过code换取网页授权access_token的Response[' + str(r.status_code) + ']')
        if r.status_code == 200:
            res = r.text
            logger.debug('【微信网页授权】通过code换取网页授权access_token>>>>' + res)
            json_res = json.loads(res)
            if 'access_token' in json_res.keys():
                return json_res
            elif 'errcode' in json_res.keys():
                errcode = json_res['errcode']
- wxmenu.py
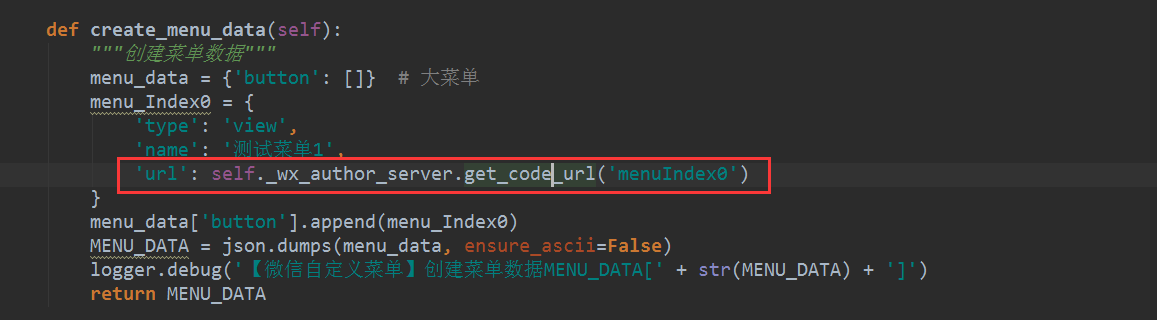
import requests
import json
from core.server.wxconfig import WxConfig
from core.cache.tokencache import TokenCache
from core.logger_helper import logger
from core.server.wxauthorize import WxAuthorServer


class WxMenuServer(object):
    """
    微信自定义菜单

    create_menu                     自定义菜单创建接口
    get_menu                        自定义菜单查询接口
    delete_menu                     自定义菜单删除接口
    create_menu_data                创建菜单数据
    """

    _token_cache = TokenCache()  # 微信token缓存
    _wx_author_server = WxAuthorServer()  # 微信网页授权server

    def create_menu(self):
        """自定义菜单创建接口"""
        access_token = self._token_cache.get_cache(self._token_cache.KEY_ACCESS_TOKEN)
        if access_token:
            url = WxConfig.menu_create_url + access_token
            data = self.create_menu_data()
            r = requests.post(url, data.encode('utf-8'))
            logger.debug('【微信自定义菜单】自定义菜单创建接口Response[' + str(r.status_code) + ']')
            if r.status_code == 200:
                res = r.text
                logger.debug('【微信自定义菜单】自定义菜单创建接口' + res)
                json_res = json.loads(res)
                if 'errcode' in json_res.keys():
                    errcode = json_res['errcode']
                    return errcode
        else:
            logger.error('【微信自定义菜单】自定义菜单创建接口获取不到access_token')

    def get_menu(self):
        """自定义菜单查询接口"""
        access_token = self._token_cache.get_cache(self._token_cache.KEY_ACCESS_TOKEN)
        if access_token:
            url = WxConfig.menu_get_url + access_token
            r = requests.get(url)
            logger.debug('【微信自定义菜单】自定义菜单查询接口Response[' + str(r.status_code) + ']')
            if r.status_code == 200:
                res = r.text
                logger.debug('【微信自定义菜单】自定义菜单查询接口' + res)
                json_res = json.loads(res)
                if 'errcode' in json_res.keys():
                    errcode = json_res['errcode']
                    return errcode
        else:
            logger.error('【微信自定义菜单】自定义菜单查询接口获取不到access_token')

    def delete_menu(self):
        """自定义菜单删除接口"""
        access_token = self._token_cache.get_cache(self._token_cache.KEY_ACCESS_TOKEN)
        if access_token:
            url = WxConfig.menu_delete_url + access_token
            r = requests.get(url)
            logger.debug('【微信自定义菜单】自定义菜单删除接口Response[' + str(r.status_code) + ']')
            if r.status_code == 200:
                res = r.text
                logger.debug('【微信自定义菜单】自定义菜单删除接口' + res)
                json_res = json.loads(res)
                if 'errcode' in json_res.keys():
                    errcode = json_res['errcode']
                    return errcode
        else:
            logger.error('【微信自定义菜单】自定义菜单删除接口获取不到access_token')

    def create_menu_data(self):
        """创建菜单数据"""
        menu_data = {'button': []}  # 大菜单
        menu_Index0 = {
            'type': 'view',
            'name': '测试菜单1',
            'url': self._wx_author_server.get_code_url('menuIndex0')
        }
        menu_data['button'].append(menu_Index0)
        MENU_DATA = json.dumps(menu_data, ensure_ascii=False)
        logger.debug('【微信自定义菜单】创建菜单数据MENU_DATA[' + str(MENU_DATA) + ']')
        return MENU_DATA

if __name__ == '__main__':
    wx_menu_server = WxMenuServer()
    '''创建菜单数据'''
    # wx_menu_server.create_menu_data()
    # '''自定义菜单创建接口'''
    wx_menu_server.create_menu()
    '''自定义菜单查询接口'''
    # wx_menu_server.get_menu()
    '''自定义菜单删除接口'''
    # wx_menu_server.delete_menu()
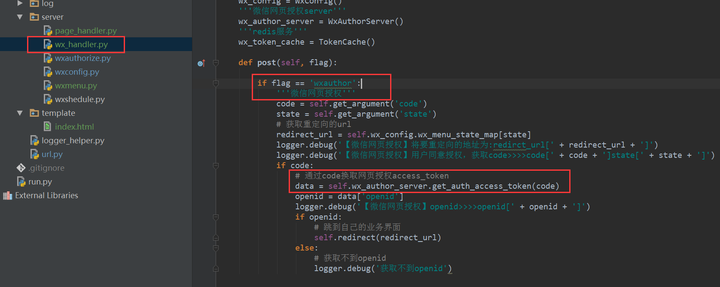
wx_handler.py
import tornado.web
from core.logger_helper import logger
from core.server.wxauthorize import WxConfig
from core.server.wxauthorize import WxAuthorServer
from core.cache.tokencache import TokenCache


class WxHandler(tornado.web.RequestHandler):
    """
    微信handler处理类
    """

    '''微信配置文件'''
    wx_config = WxConfig()
    '''微信网页授权server'''
    wx_author_server = WxAuthorServer()
    '''redis服务'''
    wx_token_cache = TokenCache()

    def post(self, flag):

        if flag == 'wxauthor':
            '''微信网页授权'''
            code = self.get_argument('code')
            state = self.get_argument('state')
            # 获取重定向的url
            redirect_url = self.wx_config.wx_menu_state_map[state]
            logger.debug('【微信网页授权】将要重定向的地址为:redirct_url[' + redirect_url + ']')
            logger.debug('【微信网页授权】用户同意授权,获取code>>>>code[' + code + ']state[' + state + ']')
            if code:
                # 通过code换取网页授权access_token
                data = self.wx_author_server.get_auth_access_token(code)
                openid = data['openid']
                logger.debug('【微信网页授权】openid>>>>openid[' + openid + ']')
                if openid:
                    # 跳到自己的业务界面
                    self.redirect(redirect_url)
                else:
                    # 获取不到openid
                    logger.debug('获取不到openid')
六. 菜单中网页的开发, JS-SDK的使用
在完成自定义菜单后,我们就可以开发自己的网页了,在网页中涉及到获取用户地理位置,微信支付等,都需要使用微信公众平台提供的JS-SDK,详见 微信JS-SDK说明文档
1. 获取JS-SDK权限签名
- wxsign.py
import time
import random
import string
import hashlib
from core.server.weixin.wxconfig import WxConfig
from core.server.cache.tokencache import TokenCache
from core.logger_helper import logger


class WxSign:
    """\
    微信开发--获取JS-SDK权限签名

    __create_nonce_str              随机字符串
    __create_timestamp              时间戳
    sign                            生成JS-SDK使用权限签名
    """

    def __init__(self, jsapi_ticket, url):
        self.ret = {
            'nonceStr': self.__create_nonce_str(),
            'jsapi_ticket': jsapi_ticket,
            'timestamp': self.__create_timestamp(),
            'url': url
        }

    def __create_nonce_str(self):
        return ''.join(random.choice(string.ascii_letters + string.digits) for _ in range(15))

    def __create_timestamp(self):
        return int(time.time())

    def sign(self):
        string = '&'.join(['%s=%s' % (key.lower(), self.ret[key]) for key in sorted(self.ret)])
        self.ret['signature'] = hashlib.sha1(string.encode('utf-8')).hexdigest()
        logger.debug('【微信JS-SDK】获取JS-SDK权限签名>>>>dict[' + str(self.ret) + ']')
        return self.ret

if __name__ == '__main__':

    token_cache = TokenCache()

    jsapi_ticket = token_cache.get_cache(token_cache.KEY_JSAPI_TICKET)
    # 注意 URL 一定要动态获取,不能 hardcode
    url = '%s/order/index' % WxConfig.AppHost
    sign = WxSign(jsapi_ticket, url)
    print(sign.sign())
七. 完成测试,发布上线,部署至centos服务器
本测试项目发布上线时使用的服务器为阿里云的centos 6.5服务器,系统python版本为2.7,为保证多个Python版本共存,及当前项目环境的纯净,需要使用pyenv及虚拟环境virtualenv
同时我们采用 nginx 做负载均衡和静态文件伺服,supervisor做守护进程管理
1. 安装pyenv
(1) 下载
$ git clone git://github.com/yyuu/pyenv.git ~/.pyenv
(2) 配置
$ echo 'export PYENV_ROOT="$HOME/.pyenv"' >> ~/.bashrc
$ echo 'export PATH="$PYENV_ROOT/bin:$PATH"' >> ~/.bashrc
$ echo 'eval "$(pyenv init -)"' >> ~/.bashrc
(3) 重新加载shell
$ exec $SHELL -l
2.通过pyenv安装多个版本的python
(1) 安装相关依赖
yum install readline readline-devel readline-static -y
yum install openssl openssl-devel openssl-static -y
yum install sqlite-devel -y
yum install bzip2-devel bzip2-libs -y
(2) 安装需要的python版本
pyenv install 3.5.0

pyenv rehash # 然后刷新python版本

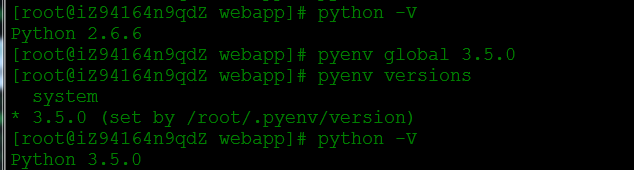
(3) 设置全局Python版本
$ pyenv global 3.5.0
3.使用虚拟环境virtualenv
(1) 安装
$ pip install virtualenv
(2) 使用方法
(a)进入项目目录
$ virtualenv --no-site-packages wx_env
(b)用source进入该环境
$ source wx_env/bin/activate
注意到命令提示符变了,有个(venv)前缀,表示当前环境是一个名为venv的Python环境
4.导出本地项目的关联关系,并在centos上安装
pip freeze > ./requirements.txt
pip install -r requirements.txt
5.安装redis服务
(1)下载redis Redis
(2) 上传至 /usr/local文件夹
(3) 解压 tar -xzvf redis-3.2.3.tar.gz
(4) 重命名redis-3.2.3文件名为redis
(4) 进入目录 cd /usr/local/redis
(5) 编译安装
make
make install
(6) 修改配置文件
vi /etc/redis/redis.conf
仅修改: daemonize yes (no-->yes)
(7) 启动
/usr/local/bin/redis-server /usr/local/redis/redis.conf
(8) 查看启动
ps -ef | grep redis
6.安装nginx
(1) 下载安装包:
wget http://nginx.org/download/nginx-1.10.0.tar.gz
(2) 解压Nginx的tar包,并进入解压好的目录
tar -zxvf nginx-1.10.0.tar.gz
cd nginx-1.10.0/
(3) 安装zlib和pcre库
yum -y install zlib zlib-devel
yum -y install pcre pcre-devel
(4) 配置、编译并安装
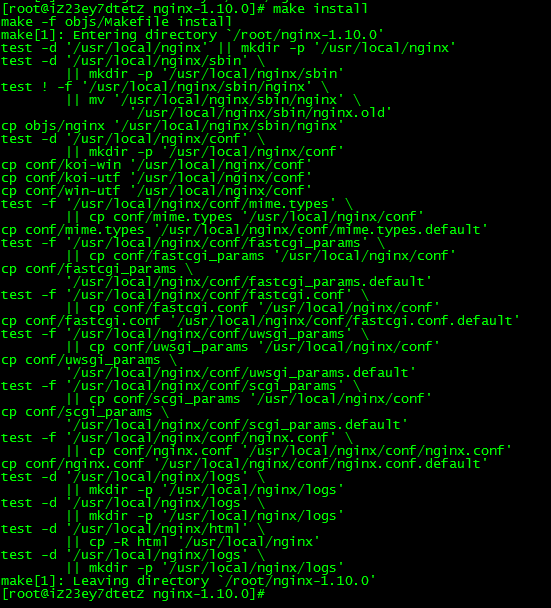
./configure
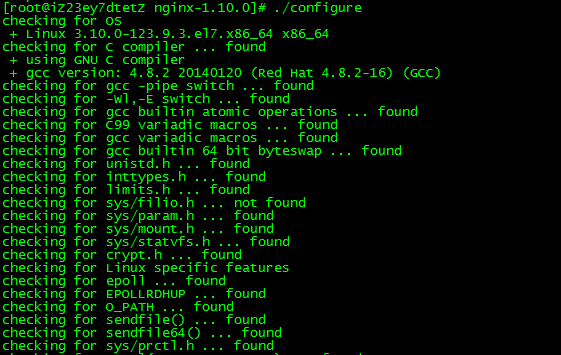
make
make install
![]()
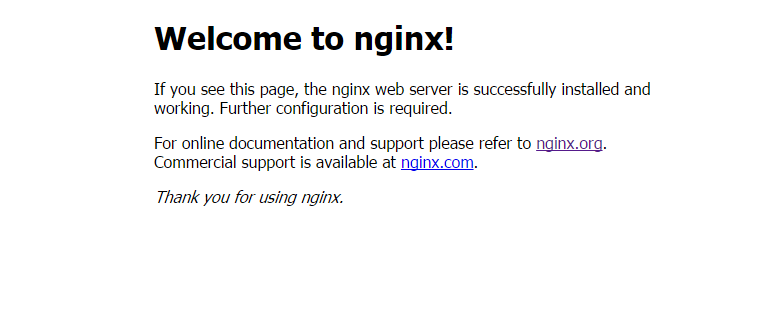
(5) 启动nginx
/usr/local/nginx/sbin/nginx
访问服务器后如下图显示说明Nginx运正常。
7.配置nginx
user nobody;
worker_processes 1;
#error_log logs/error.log;
#error_log logs/error.log notice;
#error_log logs/error.log info;
#pid logs/nginx.pid;
events {
    worker_connections 1024;
}

http {
    include mime.types;
    default_type application/octet-stream;

    upstream web_wx {
        server 127.0.0.1:8001;
        server 127.0.0.1:8002;
        server 127.0.0.1:8003;
        server 127.0.0.1:8004;

    }

    sendfile on; #tcp_nopush on; keepalive_timeout 65;
    proxy_read_timeout 200;
    tcp_nopush on;
    tcp_nodelay on;
    gzip on;
    gzip_min_length 1000;
    gzip_proxied any;

    server {
        listen 80;
        server_name localhost; # redirect server error pages to the static page /50x.html # error_page 500 502 503 504 /50x.html;
        location = /50x.html {
            root html;
        }

        location / {
            proxy_pass_header Server;
            proxy_set_header Host $http_host; #    proxy_redirect false; proxy_set_header X-Real-IP $remote_addr;
            proxy_set_header X-Scheme $scheme;
            proxy_pass http://web_wx; }

    }

}
8.配置Supervisord
(1) 安装
yum install supervisor
(2) 设置开机自启
wget -O /etc/rc.d/init.d/supervisord https://gist.githubusercontent.com/gracece/21e5719b234929799eeb/raw/supervisord
(3)将守护进程添加为服务
chmod +x /etc/rc.d/init.d/supervisord
chkconfig --add supervisord #加为服务
ntsysv    #运行ntsysv,选中supervisord启动系统时跟着启动。
(4) 设置 /etc/supervisord.conf文件
[unix_http_server]
file=/tmp/supervisor.sock   ; (the path to the socket file)
;chmod=0700                 ; socket file mode (default 0700)
;chown=nobody:nogroup       ; socket file uid:gid owner
;username=user              ; (default is no username (open server))
;password=123               ; (default is no password (open server))

;[inet_http_server]         ; inet (TCP) server disabled by default
;port=127.0.0.1:9001        ; (ip_address:port specifier, *:port for all iface)
;username=user              ; (default is no username (open server))
;password=123               ; (default is no password (open server))

[supervisord]
logfile=/tmp/supervisord.log ; (main log file;default $CWD/supervisord.log)
logfile_maxbytes=50MB        ; (max main logfile bytes b4 rotation;default 50MB)
logfile_backups=10           ; (num of main logfile rotation backups;default 10)
loglevel=info                ; (log level;default info; others: debug,warn,trace)
pidfile=/tmp/supervisord.pid ; (supervisord pidfile;default supervisord.pid)
nodaemon=false               ; (start in foreground if true;default false)
minfds=1024                  ; (min. avail startup file descriptors;default 1024)
minprocs=200                 ; (min. avail process descriptors;default 200)
;umask=022                   ; (process file creation umask;default 022)
;user=chrism                 ; (default is current user, required if root)
;identifier=supervisor       ; (supervisord identifier, default is 'supervisor')
;directory=/tmp              ; (default is not to cd during start)
;nocleanup=true              ; (don't clean up tempfiles at start;default false)
;childlogdir=/tmp            ; ('AUTO' child log dir, default $TEMP)
;environment=KEY="value"     ; (key value pairs to add to environment)
;strip_ansi=false            ; (strip ansi escape codes in logs; def. false)


[rpcinterface:supervisor]
supervisor.rpcinterface_factory = supervisor.rpcinterface:make_main_rpcinterface

[supervisorctl]
serverurl=unix:///tmp/supervisor.sock ; use a unix:// URL  for a unix socket
;serverurl=http://127.0.0.1:9001 ; use an http:// url to specify an inet socket
;username=grace             ; should be same as http_username if set
;password=grace               ; should be same as http_password if set
;prompt=mysupervisor         ; cmd line prompt (default "supervisor")
;history_file=~/.sc_history  ; use readline history if available


[group:tornadoApp]
programs=web_wx
[program:web_wx
]
command=python /var/web_wx/run.py --port=80%(process_num)02d
directory=/var/web_wx/
process_name = %(program_name)s%(process_num)d
autorestart=true
redirect_stderr=true
stdout_logfile=/var/log/tornado.log
stdout_logfile_maxbytes=500MB
stdout_logfile_backups=50
stderr_logfile=/var/log/tornado-error.log
loglevel=info
numprocs = 4
numprocs_start = 1
(5) 开启守护进程服务
supervisord
supervisorctl reload all
supervisorctl status
福利:
本文已同步到我的个人技术网站 IT干货-sufaith 该网站包括Python, Linux, Nodejs, 前端开发等模块, 专注于程序开发中的技术、经验总结与分享, 欢迎访问.

 浙公网安备 33010602011771号