Windows环境下安装配置Teamcity配合git自动发布mvc,webapi站点
以下是本人配置Teamcity具体环境和步骤,只实现了项目发布,打包。Nodejs npm gulp没有配置成功,后期补上。
1 环境安装
本人使用的是windows7 sp1 64位系统,(.net framework 4.5.2)
1.1 Teamcity 安装
下载地址:http://www.jetbrains.com/teamcity/download/
这里我们选择windows版本
安装文件:TeamCity-10.0.3.exe。
双击开始安装,下一步直到结束,安装成功后,默认8080端口
1.2 MSBuildTools 安装
下载地址:https://www.microsoft.com/zh-CN/download/details.aspx?id=48159
文件名:BuildTools_Full.exe
下载完毕之后直接安装即可
1.3 7z 安装
下载地址:http://www.7-zip.org/download.html
文件名:7z1604-x64.exe
下载完毕后安装,注意需要把7z.exe地址配置到环境变量PATH中。
1.4 git 安装
下载地址:https://git-scm.com/downloads
这里我们选择windows版本
文件名:Git-2.11.1-64-bit.exe
2 Teamcity配置
2.1 工具,组件安装
2.1.1 Nuget Tools 安装
点击Administrator进入管理员界面

点击Integrations-tools后,点击install tool..
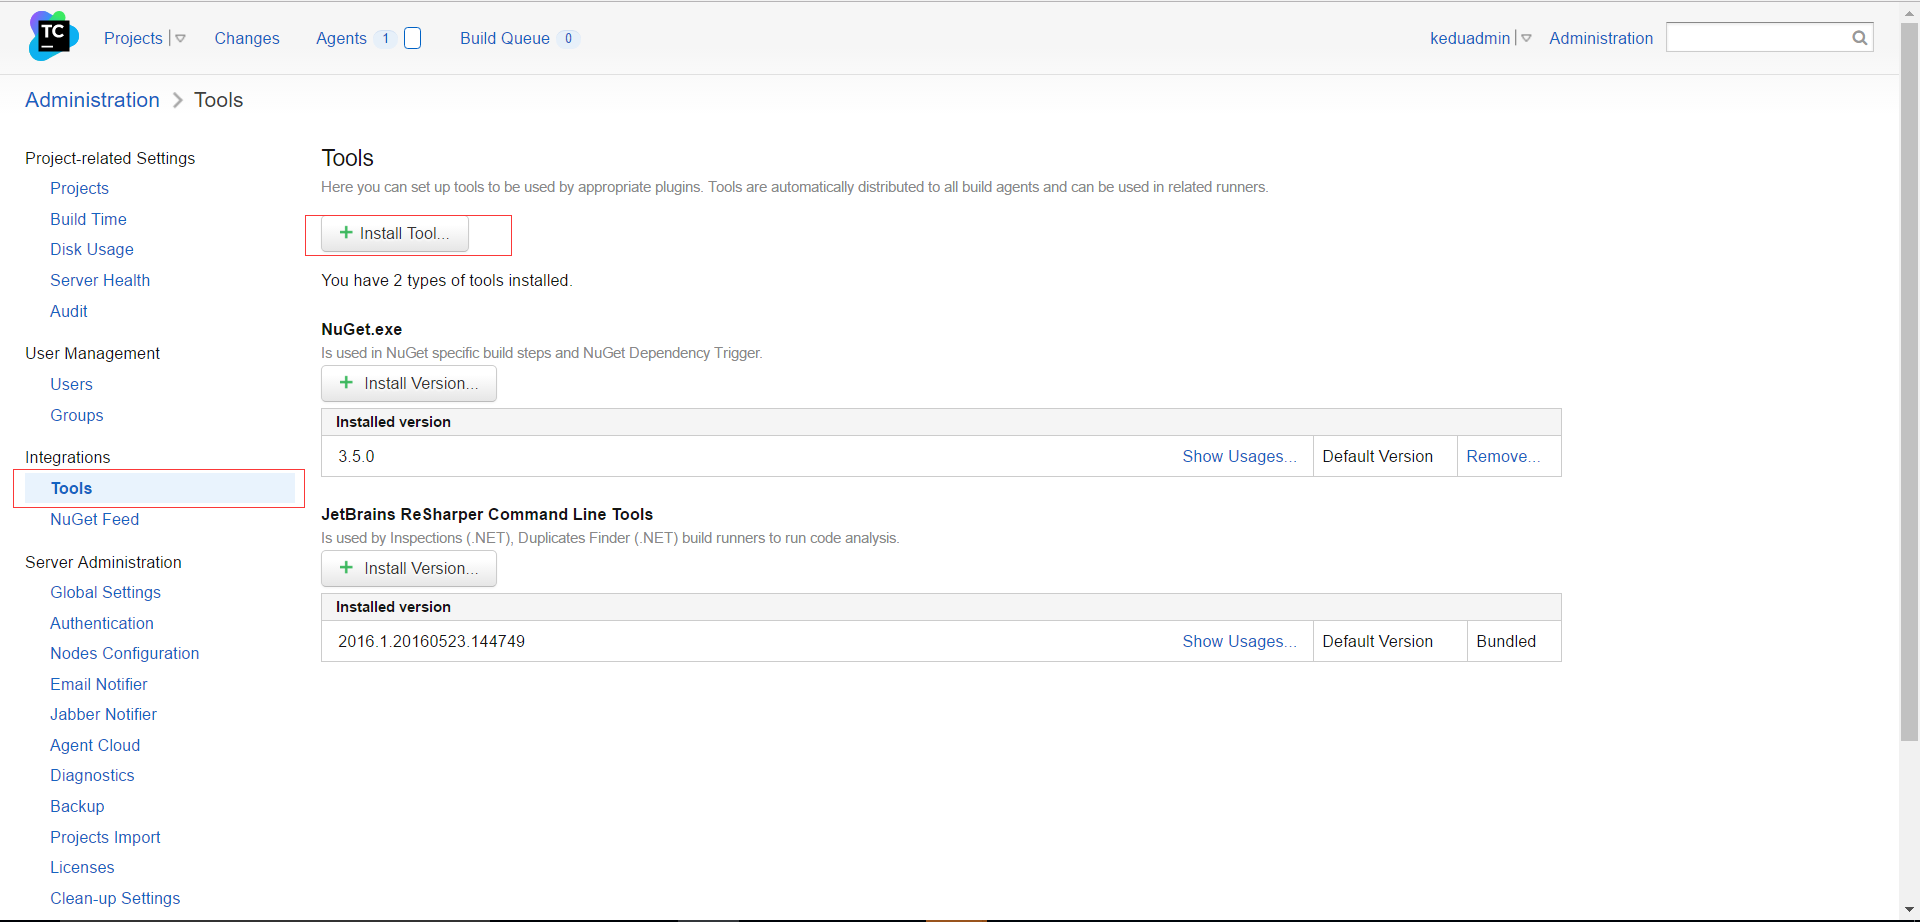
然后选择Nuget安装即可。
2.2 新建项目
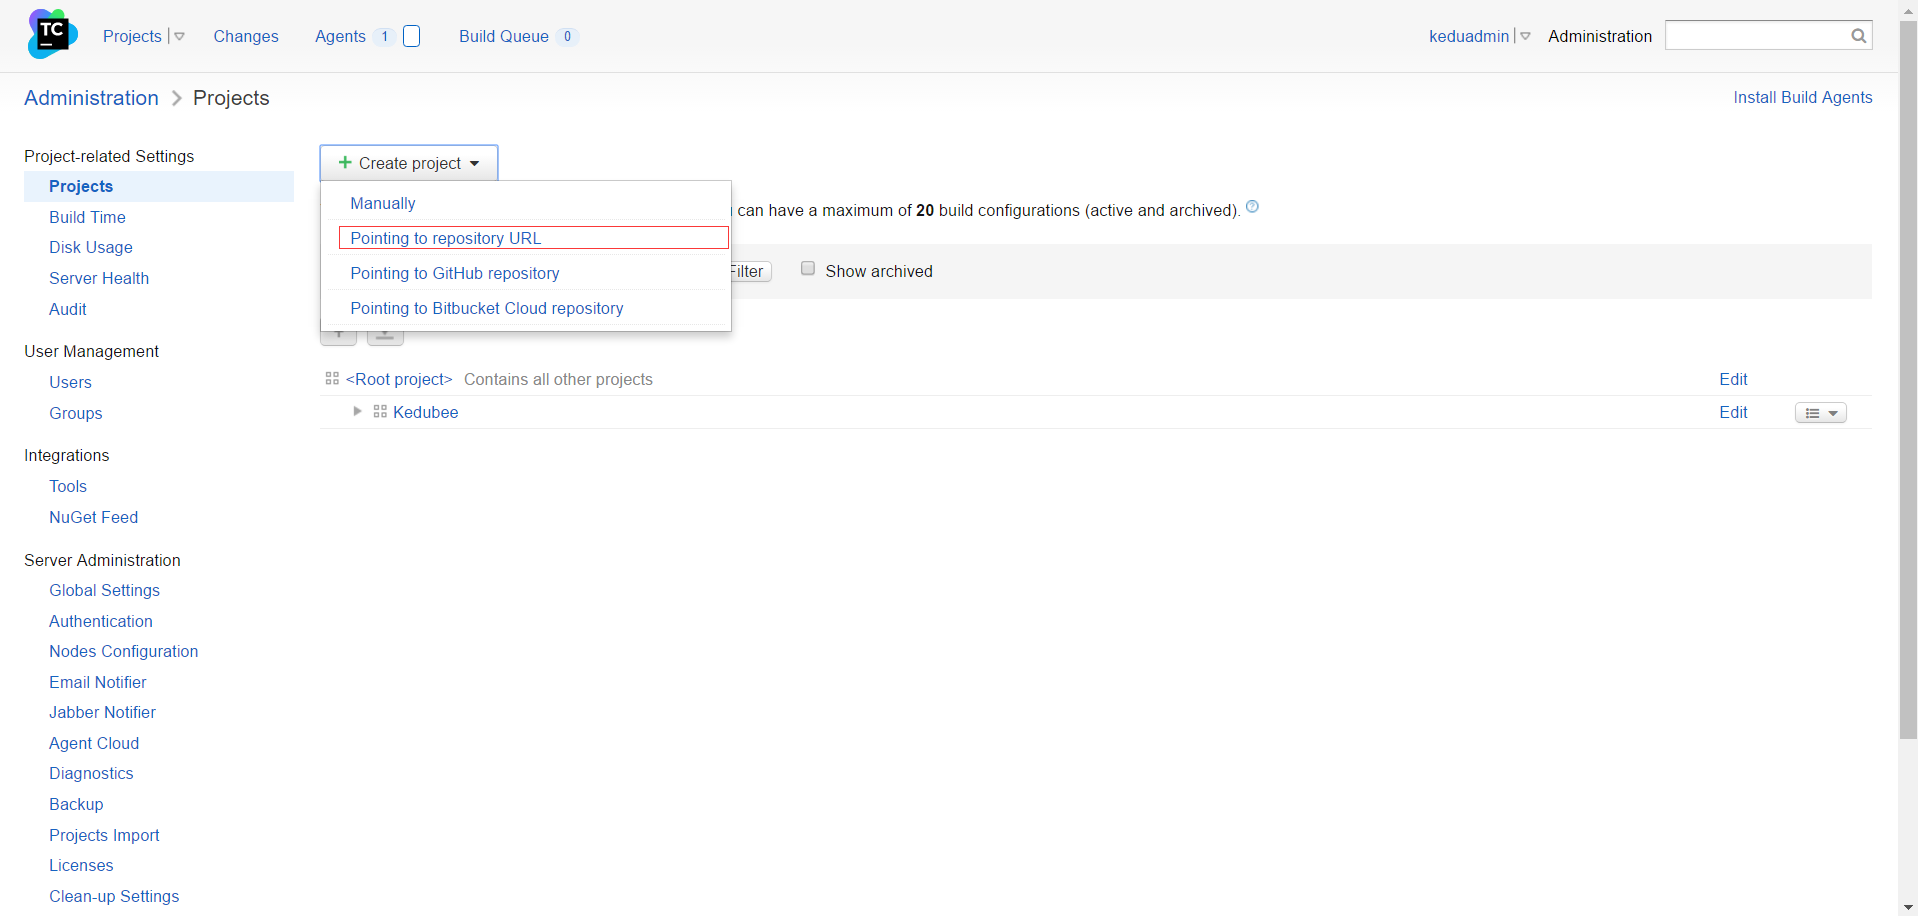
这里我们选择Pointing to repository URL (自己的git仓库地址)
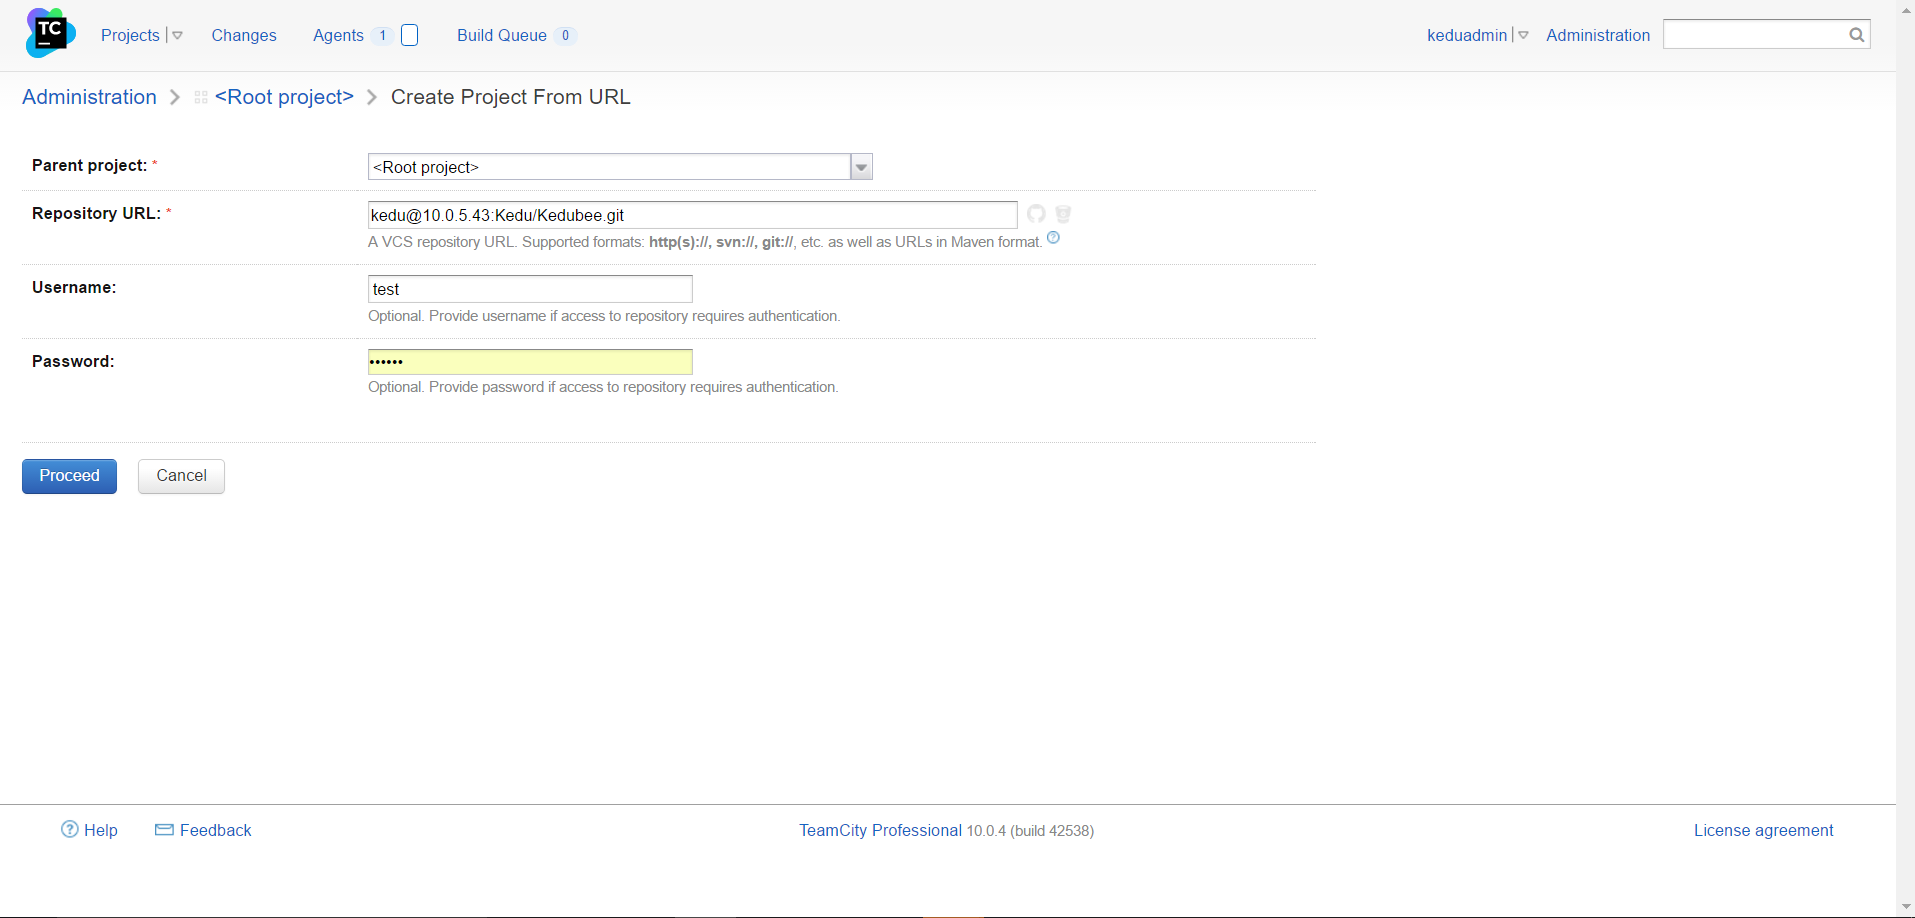
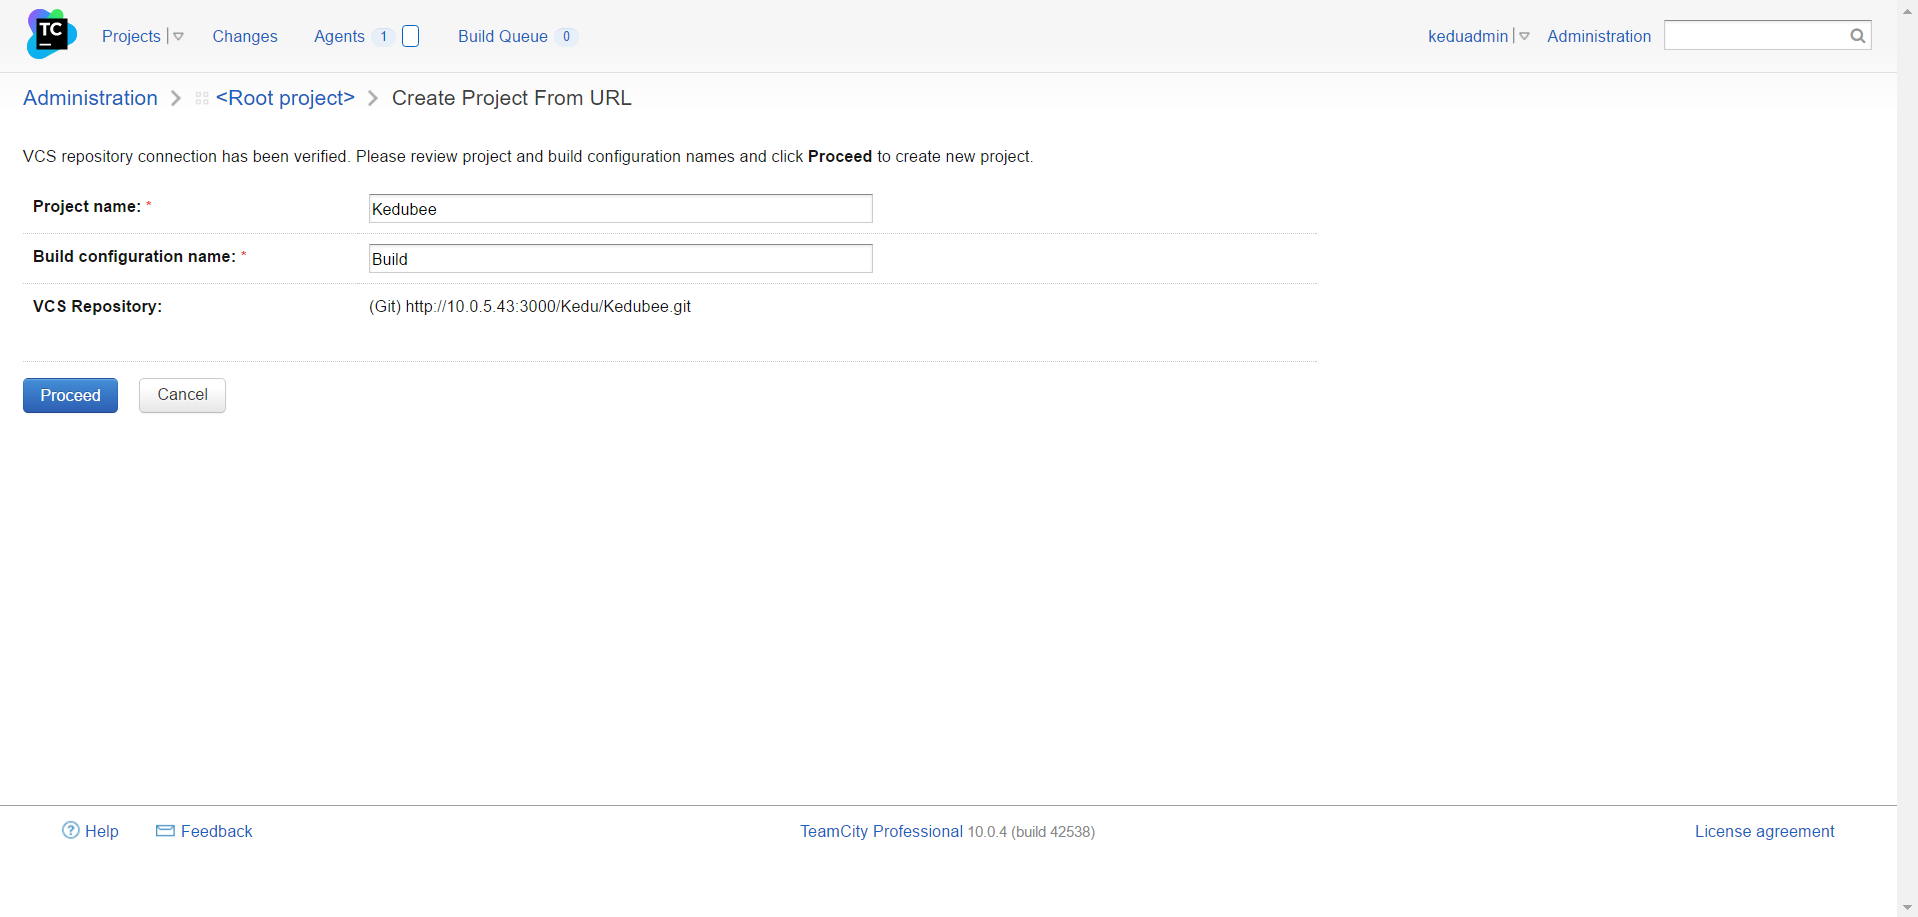
填写项目名称,Build名称
2.3 配置Build
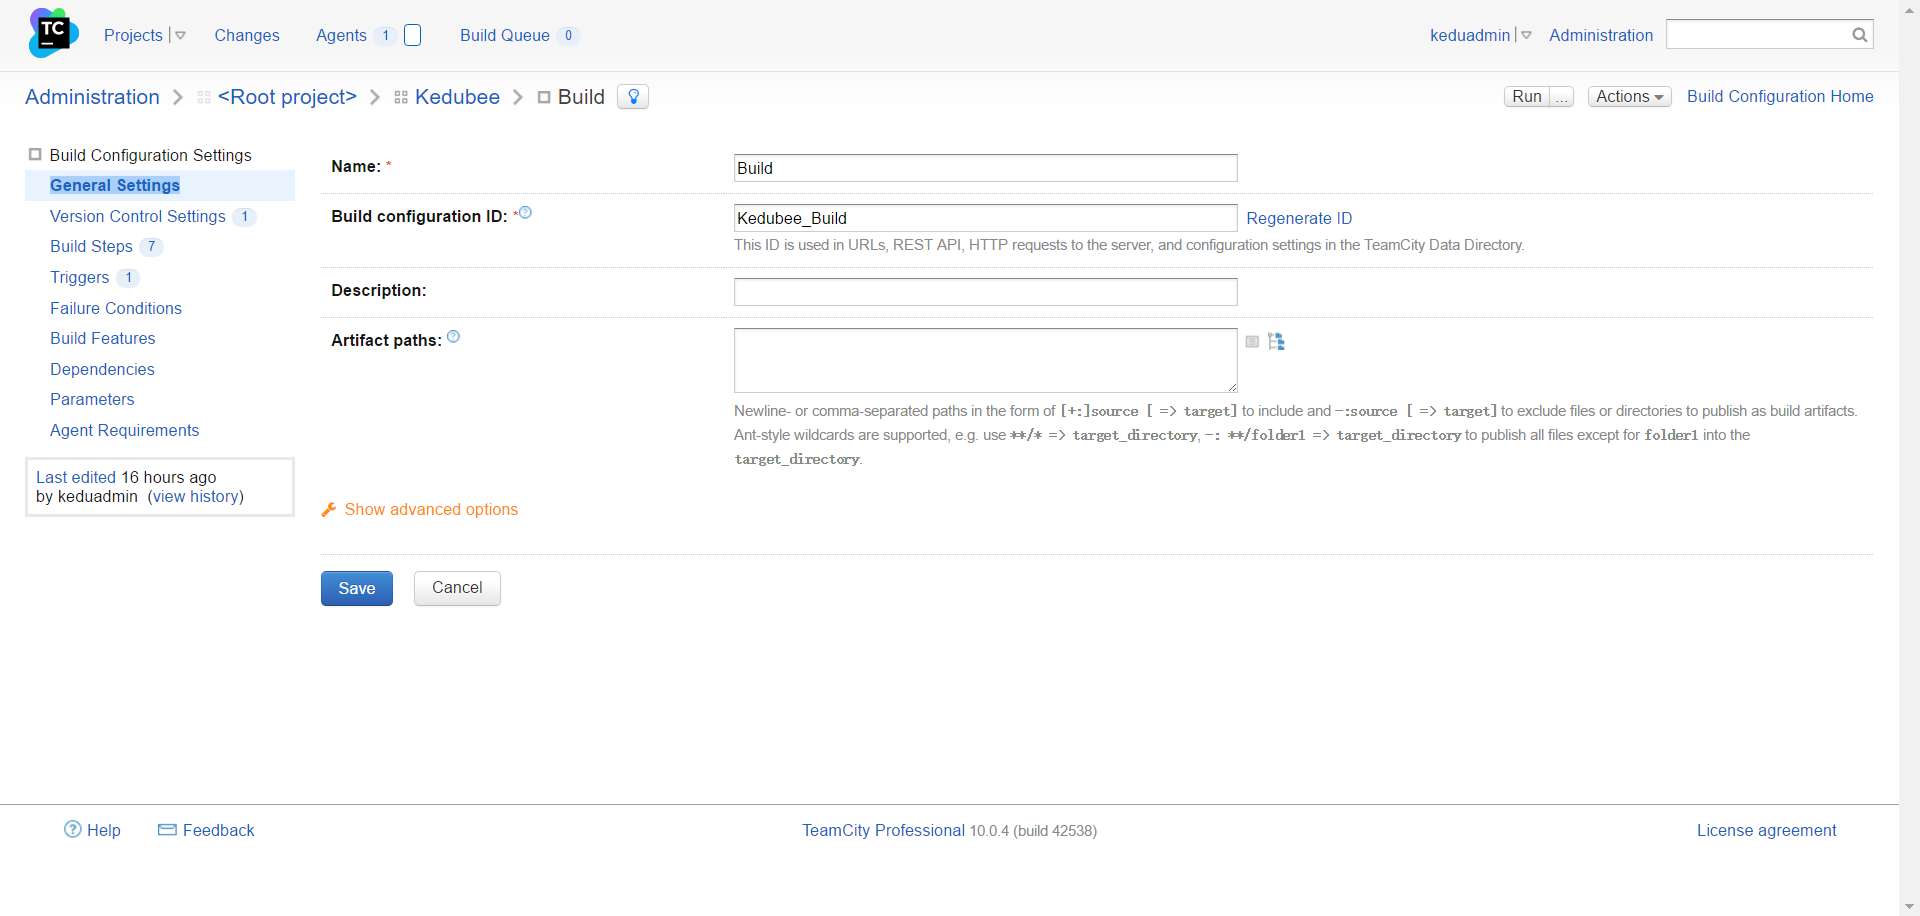
2.3.1 General Settings
这里填写名称后,点击Build configuration ID后的Regenerate ID即可。
2.3.2 Version Control Settings
这里我们创建项目的时候选择的是<Pointing to repository URL>所有这里的信息在创建项目的时候已经录入了。

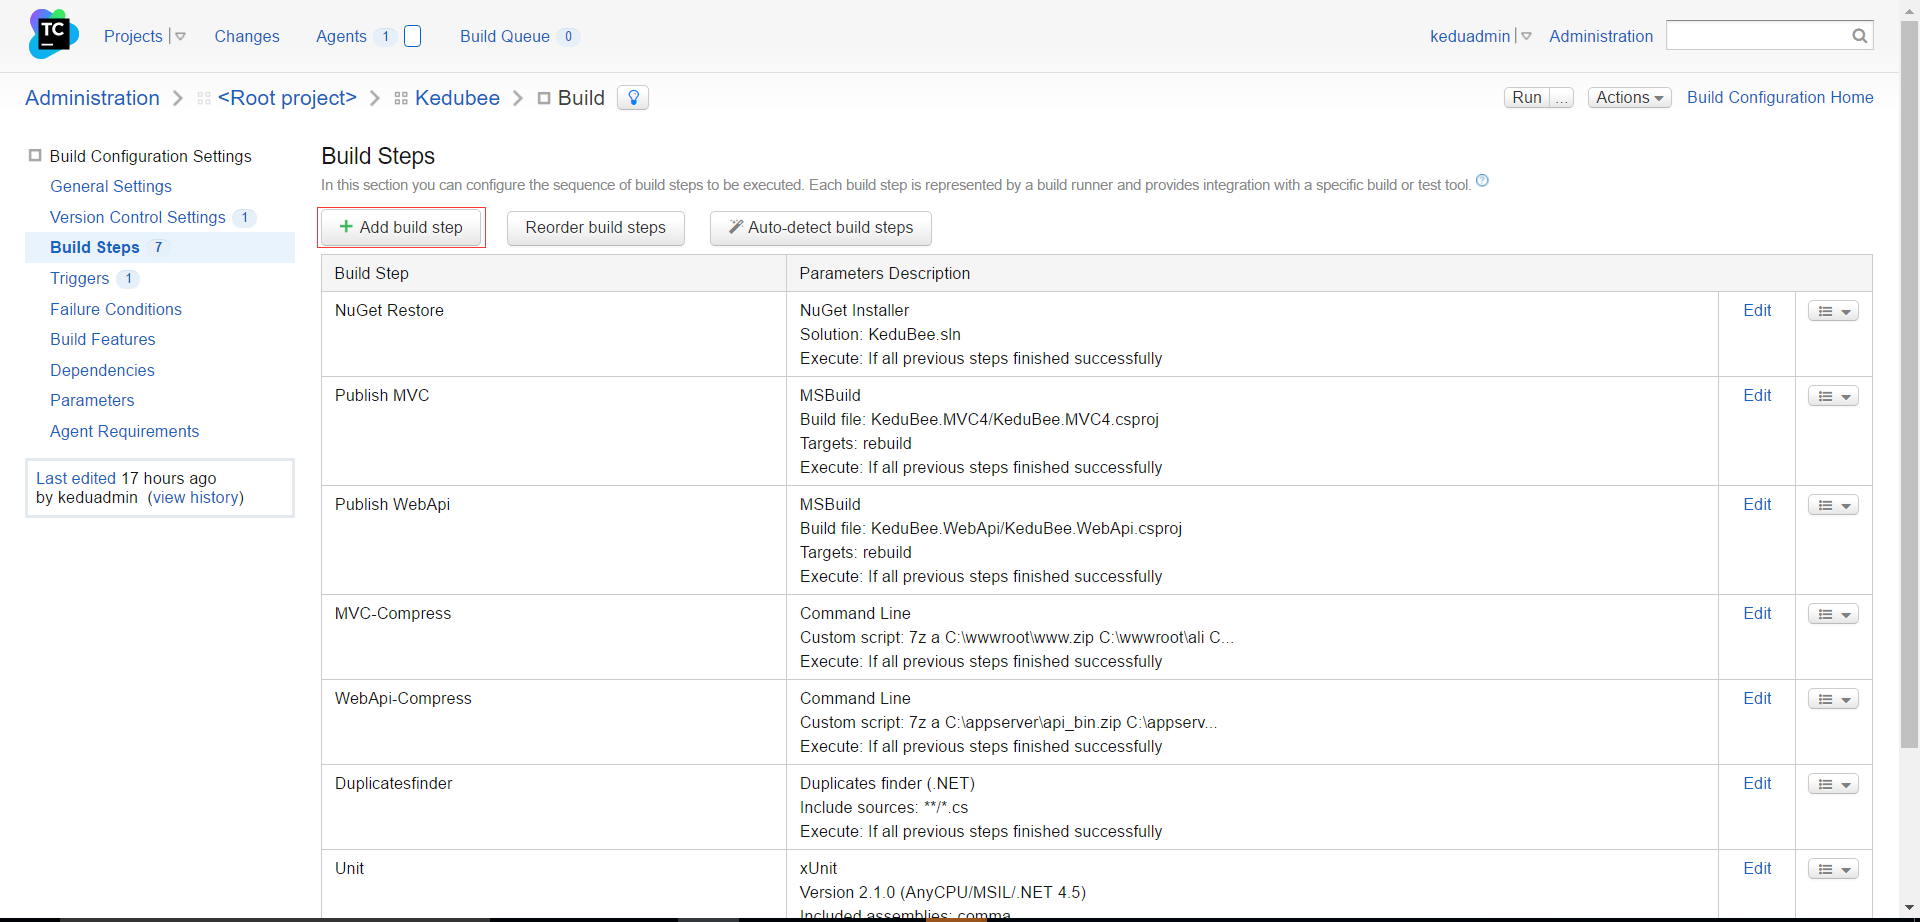
2.3.3 Build Steps
添加 Build Steps 安装添加
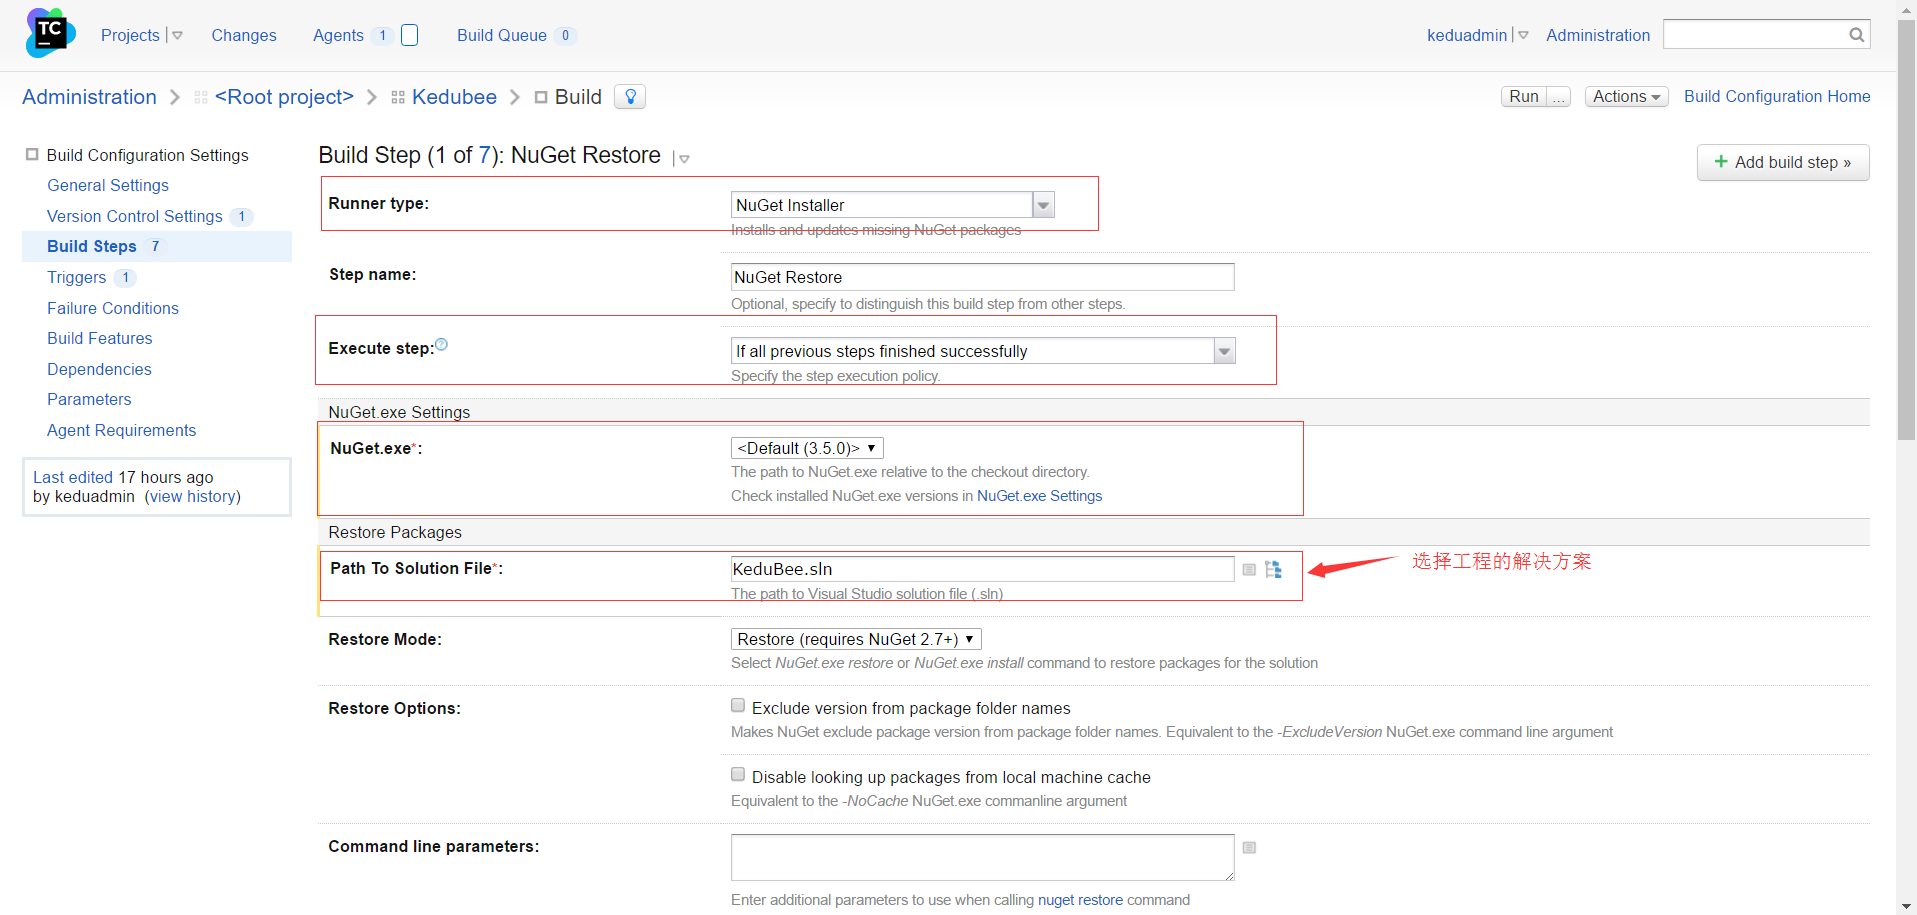
2.3.3.1 NuGet 还原
Runer Type 选择 NuGet Installer
Execute step:If all previous steps finished successfully
NuGet.exe: 默认
Path To Solution File:<选择工程的解决方案>
其他项默认
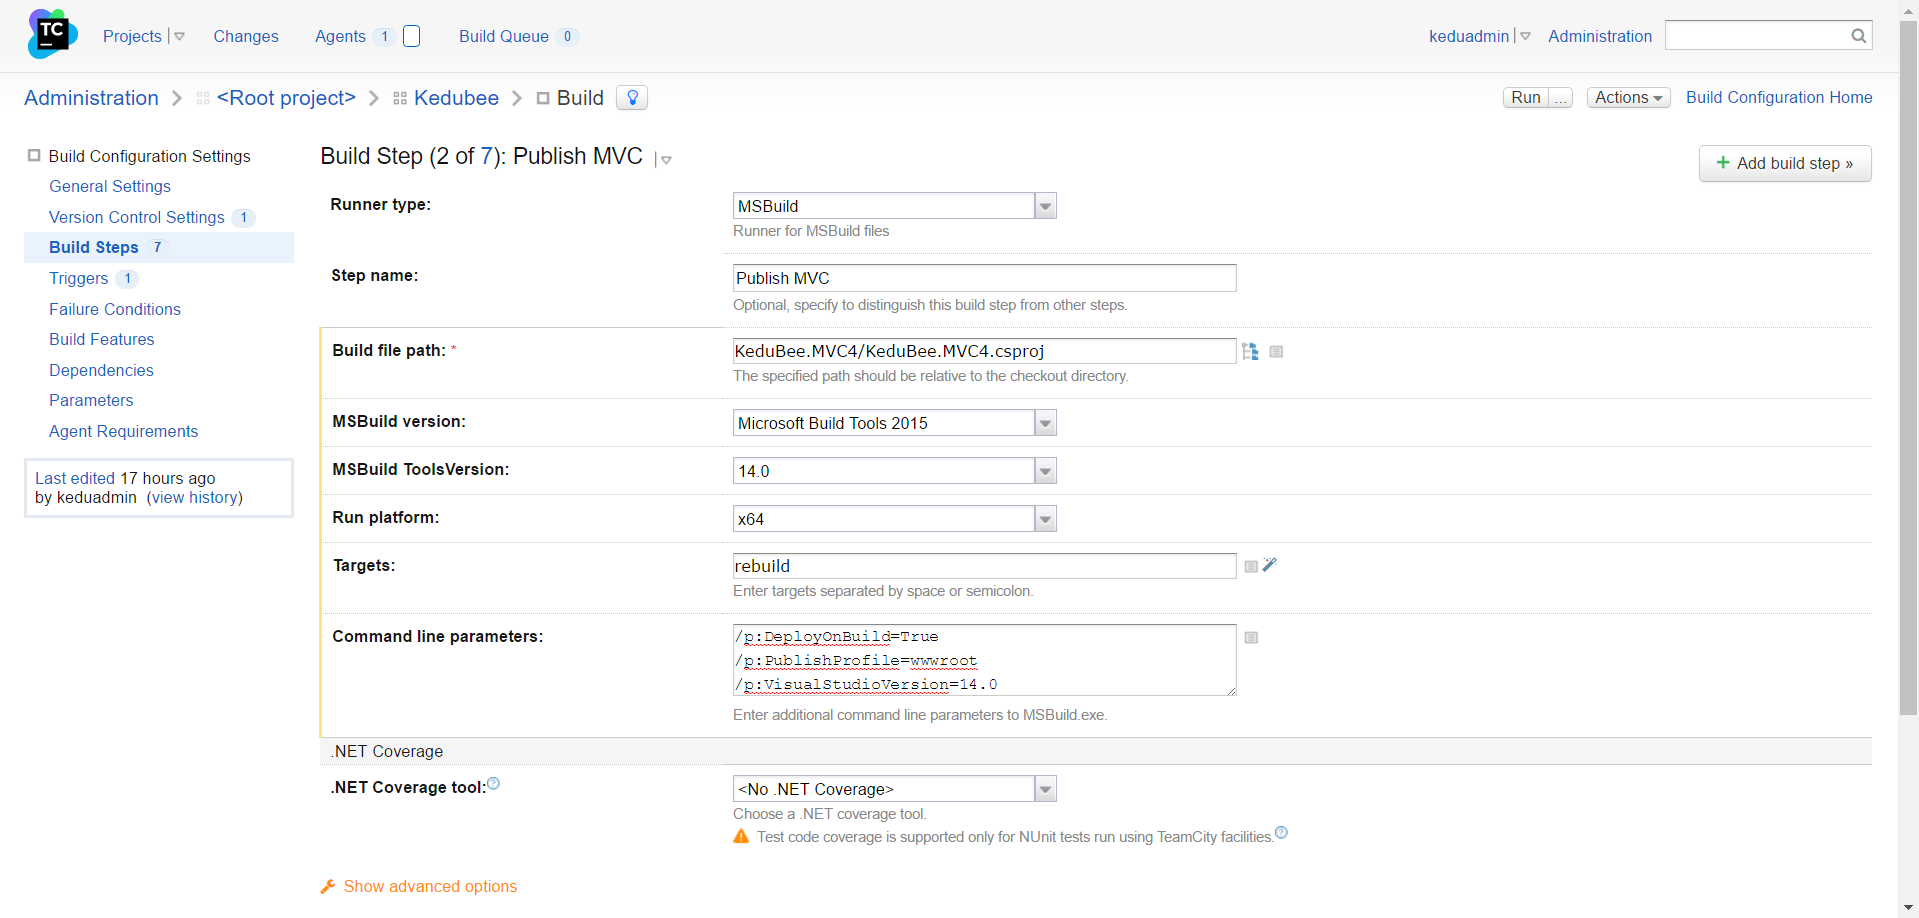
2.3.3.1 发布项目
Runner Type 选择 MSBuild
Build file path:<选择需要发布的工程文件>
MSBuild version:Microsoft Build Tools 2015
MSBuild ToolsVersion: 14.0
Run platform:x64
Targets:rebuild
Command line parameters:
/p:DeployOnBuild=True
/p:PublishProfile=<发布配置文件名称>
/p:VisualStudioVersion=14.0
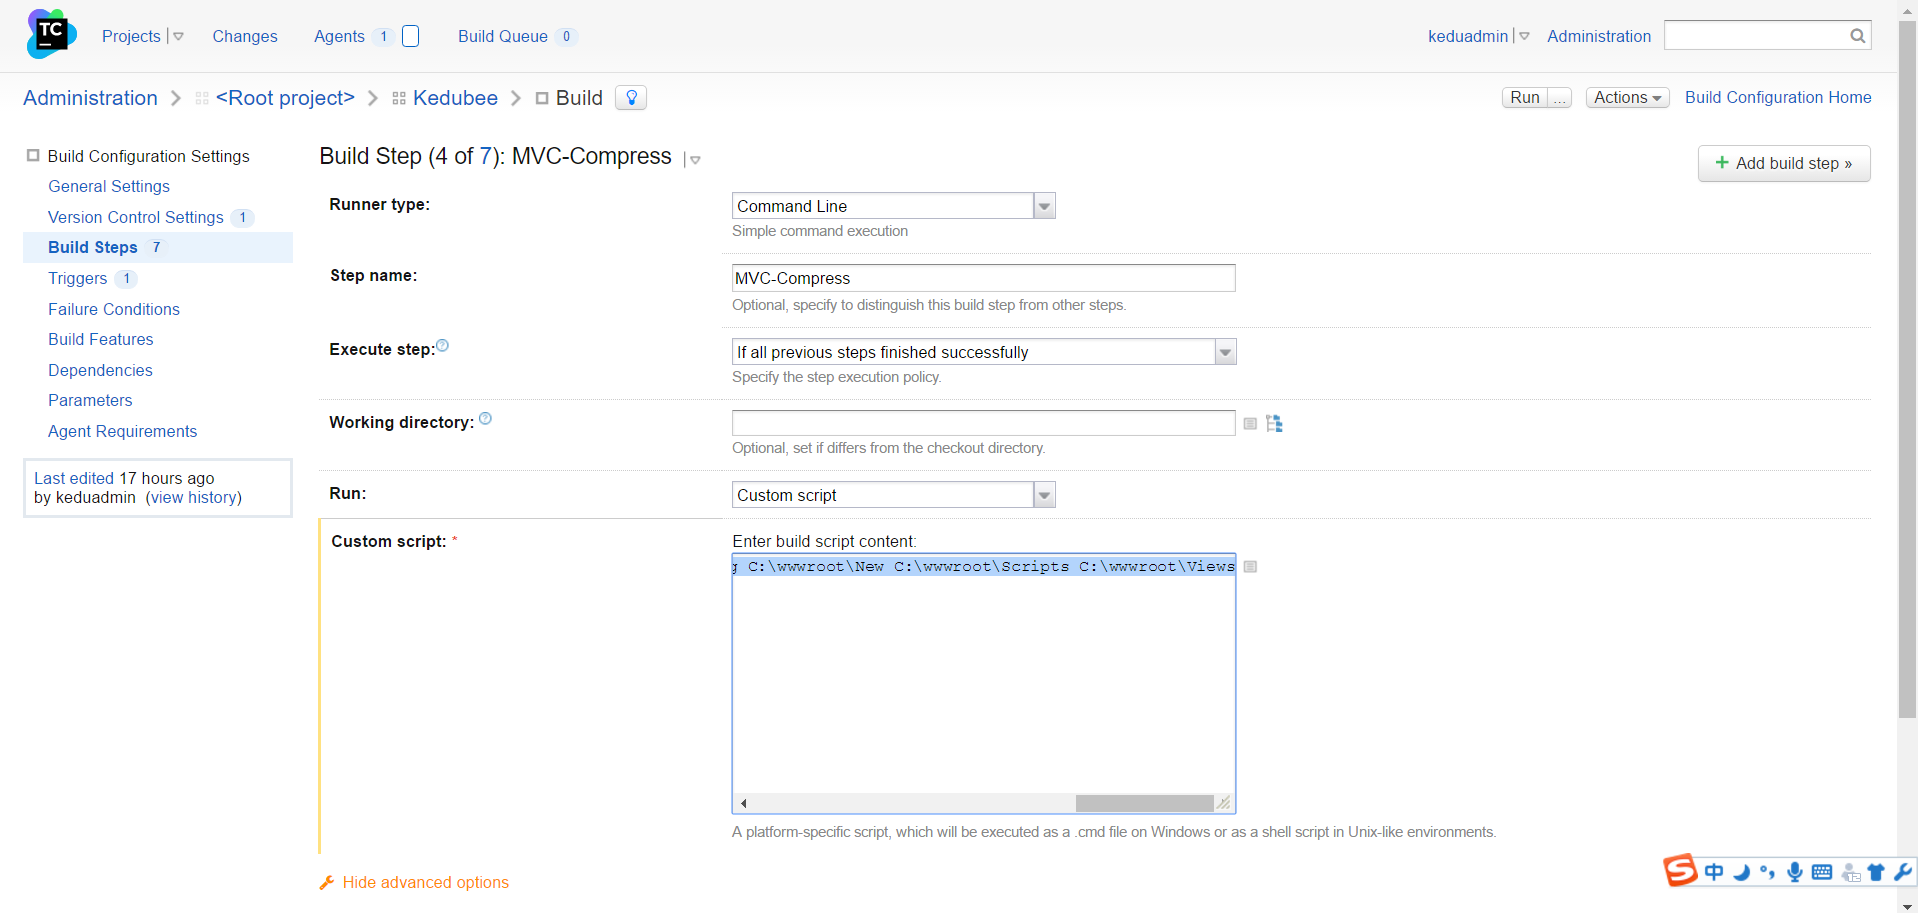
2.3.3.1 7z 打包
Runner Type 选择 Command Line
Custom script:7z a <压缩文件名> <压缩目标文件(多个空格分隔)>
2.3.1 Triggers
点击Add new Trigger按钮
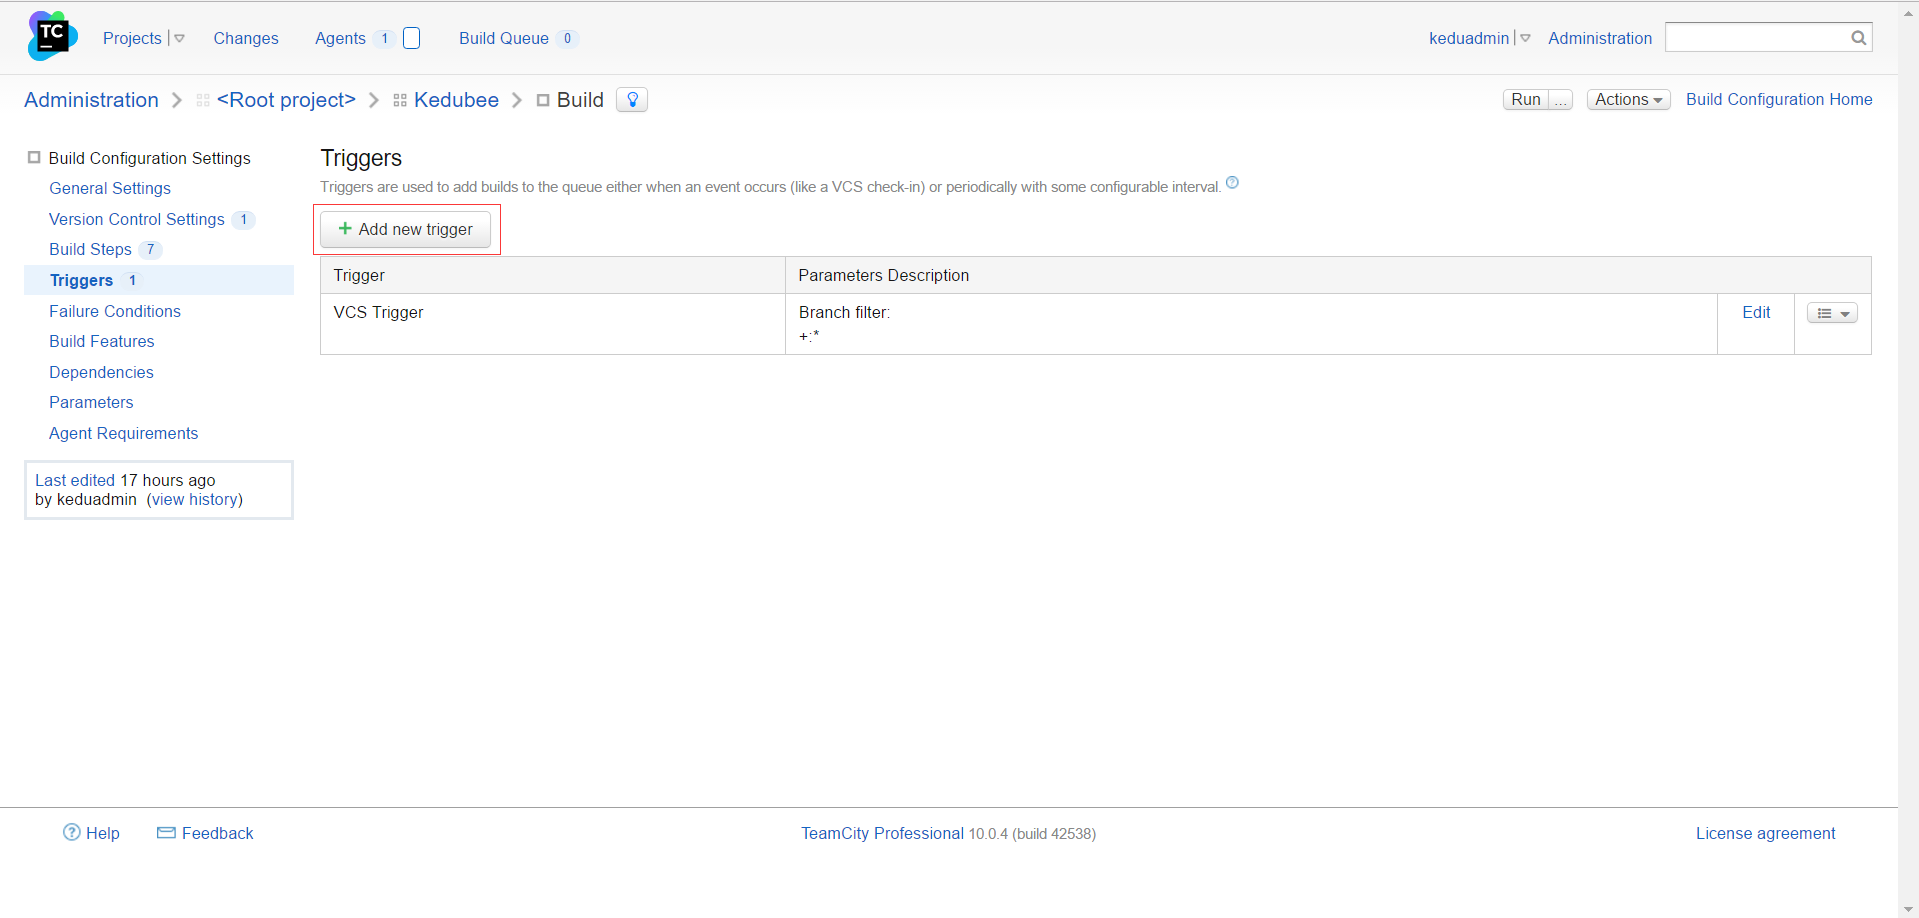
选择 VCS Trigger

 浙公网安备 33010602011771号