
SpringMVC知识盘点及总结2@RequestMapping注解功能
学习目标:@RequestMapping注解的功能


1.创建maven项目,在pom文件中引入以下依赖:
    spring-webmvc
    logback-classic
    javax.servlet-api
    thymeleaf-spring5

2.在web.xml文件中注册前端控制器DispatcherServlet

3.在web.xml中配置springMVC配置文件的位置和名称

4.将前端控制器DispatcherServlet的初始化时间提前到服务器启动时

5.设置springMVC核心控制器所能处理请求的请求路径。

web.xml完整代码:
 1 <?xml version="1.0" encoding="UTF-8"?>
 2 <web-app xmlns="http://xmlns.jcp.org/xml/ns/javaee"
 3          xmlns:xsi="http://www.w3.org/2001/XMLSchema-instance"
 4          xsi:schemaLocation="http://xmlns.jcp.org/xml/ns/javaee http://xmlns.jcp.org/xml/ns/javaee/web-app_4_0.xsd"
 5          version="4.0">
 6         <!--1.注册前端控制器DispatcherServlet-->
 7     <servlet>
 8         <servlet-name>DispatcherServlet</servlet-name>
 9         <servlet-class>org.springframework.web.servlet.DispatcherServlet</servlet-class>
10         <!--2.配置springMVC配置文件的位置和名称-->
11         <init-param>
12             <param-name>contextConfigLocation</param-name>
13             <param-value>classpath:springMVC.xml</param-value>
14         </init-param>
15         <!--3.将前端控制器DispatcherServlet的初始化时间提前到服务器启动时-->
16         <load-on-startup>1</load-on-startup>
17     </servlet>
18          <!--4.设置springMVC核心控制器所能处理请求的请求路径。 /所匹配的请求
19         可以是/login或.html或.js或.css方式的请求路径,但是/不能匹配.jsp请求路径的请求-->
20     <servlet-mapping>
21         <servlet-name>DispatcherServlet</servlet-name>
22         <url-pattern>/</url-pattern>
23     </servlet-mapping>
24 </web-app>
6.在resources下创建已经起好名字的springMVC.xml文件

7.在springMVC.xml文件中配置组件扫描器,以及视图解析器(记得加命名空间,不然会报500错误)

springMVC完整代码:
 1 <?xml version="1.0" encoding="UTF-8"?>
 2 <beans xmlns="http://www.springframework.org/schema/beans"
 3        xmlns:xsi="http://www.w3.org/2001/XMLSchema-instance"
 4        xmlns:context="http://www.springframework.org/schema/context"
 5        xsi:schemaLocation="http://www.springframework.org/schema/beans
 6        http://www.springframework.org/schema/beans/spring-beans.xsd
 7        http://www.springframework.org/schema/context
 8        http://www.springframework.org/schema/context/spring-context-4.2.xsd">
 9
10     <!--1.扫描组件-->
11     <context:component-scan base-package="com.st.springmvc.controller"></context:component-scan>
12     <!--2.配置Thymeleaf视图解析器-->
13     <bean id="viewResolver" class="org.thymeleaf.spring5.view.ThymeleafViewResolver">
14         <property name="order" value="1"/>
15         <property name="characterEncoding" value="UTF-8"/>
16         <property name="templateEngine">
17             <bean class="org.thymeleaf.spring5.SpringTemplateEngine">
18                 <property name="templateResolver">
19                     <bean class="org.thymeleaf.spring5.templateresolver.SpringResourceTemplateResolver">
20                         <!--视图前缀-->
21                         <property name="prefix" value="/WEB-INF/templates/"/>
22                         <!--视图后缀-->
23                         <property name="suffix" value=".html"/>
24                         <property name="templateMode" value="HTML5"/>
25                         <property name="characterEncoding" value="UTF-8"/>
26                     </bean>
27                 </property>
28             </bean>
29         </property>
30     </bean>
31
32
33 </beans>
8.创建TestController类:

   写一个index方法,用来访问首页
1  @RequestMapping("/")
2        public String index(){
3            return "index";
4
5        }
 创建RequestMappingController类:

 写一个success方法,用来访问success页面,同时在类上也加一个@RequestMapping("/hello")
1 @RequestMapping("/testRequestMapping")
2     public String success(){
3         return "success";
4     }
上述两个类的完整代码:
TestController类:
 1 package com.st.springmvc.controller;
 2
 3 import org.springframework.stereotype.Controller;
 4 import org.springframework.web.bind.annotation.RequestMapping;
 5
 6 /**
 7  * @Author: 尚廷
 8  * @Date: 2021/12/21/ 14:07
 9  * @Description:
10  */
11 @Controller
12 public class TestController {
13
14     @RequestMapping("/")
15     public String index(){
16         return "index";
17
18     }
19
20 }
RequestMappingController类:
 1 package com.st.springmvc.controller;
 2
 3 import org.springframework.stereotype.Controller;
 4 import org.springframework.web.bind.annotation.RequestMapping;
 5
 6 /**
 7  * @Author: 尚廷
 8  * @Date: 2021/12/21/ 14:26
 9  * @Description:
10  */
11 @Controller
12 @RequestMapping("/hello")
13 public class RequestMappingController {
14     @RequestMapping("/testRequestMapping")
15     public String success(){
16         return "success";
17     }
18
19 }
*在类上加@RequestMapping相当于有多了一层路径。大萨
因为@RequestMapping的映射请求是惟一的,所以当项目业务模块较多时,
名字有可能重复,在类上加@RequestMapping,模块重名时不需要修改,而且便于区分
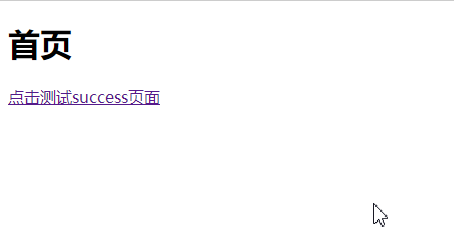
9.在webapp\WEB-INF\templates下创建index.html和success.html
index.html里面内容:<a th:href="@{/hello/testRequestMapping}">点击测试success页面</a>
success.html内容:<h1>这里是success页面!</h1>
如果不加之前在类上的映射hello将会报错,因为路径是不正确的。
*Thymeleaf自动添加上下文路径,所以不需要写。
10.启动Tomcat,点击首页中的超链接,访问成功!
总结:
1.@RequestMapping注解的功能

  单词意思见名知意即请求映射,@RequestMapping作用就是将请求与处理请求的控制器方法关联起来
 建立映射关系。
2.@RequestMapping注解的位置
@RequestMapping可以标识类和方法:
 (1).当标识一个类时:设置映射请求的请求路径的初始信息
 (2).@RequestMapping标识一个方法:设置映射请求请求路径的具体信息
      所以在路径上应该加上类上所设置的RequestMapping的value,
    即:多加一个hello   (类--->方法)
     <a th:href="@{/hello/testRequestMapping}">点击测试success页面</a>

 浙公网安备 33010602011771号