
IDEA安装_Maven配置
时间: 2021-01-15
工具:
硬件:Win10笔记本电脑
软件:IntelliJ IDEA 2020.3.1 x64, apache-maven-3.6.3, Notepad++ v7.9.2 x64
参考:
IDEA下载地址 https://www.jetbrains.com/idea/download/#section=windows
IDEA激活 https://www.jb51.net/softjc/666155_all.html
Maven下载地址 http://maven.apache.org/download.cgi
Nodepad++下载地址 https://notepad-plus-plus.org/downloads/
Maven配置 https://blog.csdn.net/weixin_43581288/article/details/106598571
前言:本贴不提供激活教程,可参考“IDEA激活”网址以及百度相关资料。
联系:QQ 1064684590
如有侵权,请联系删除。
教程开始:
一、安装IDEA
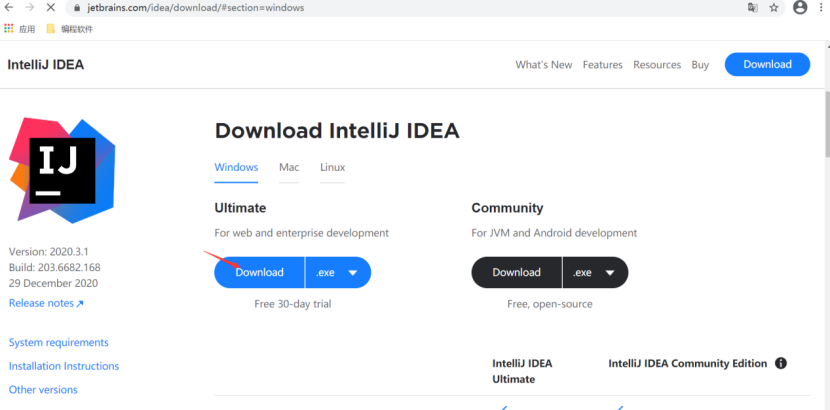
(1)从IDEA下载网址 https://www.jetbrains.com/idea/download/#section=windows下载
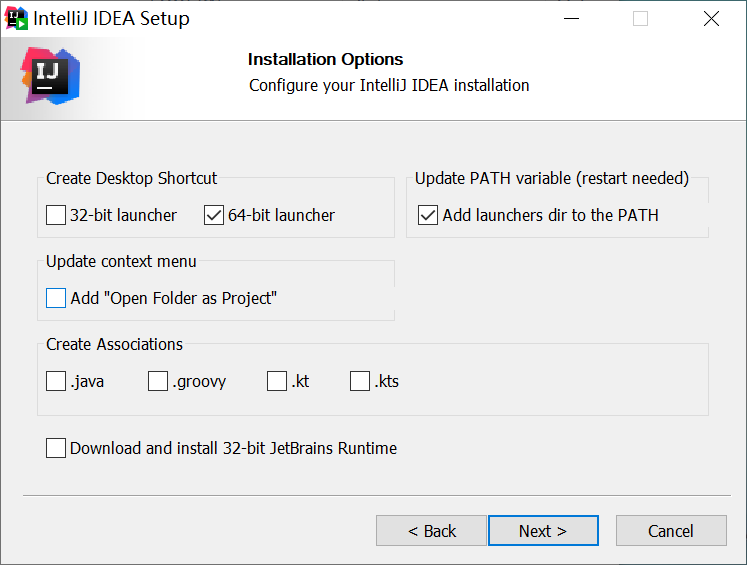
(2)安装IDEA。按照指引安装,到这一步时勾选下面两个。等待安装完成即可。
(3)激活IDEA
二、安装和配置Maven
(1)从下载地址 http://maven.apache.org/download.cgi下载Maven

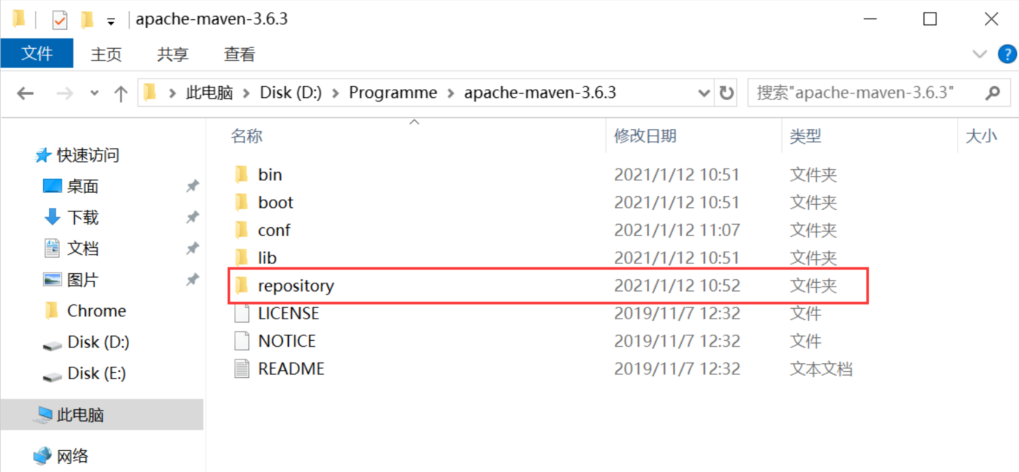
(2)解压后放在某个盘中,新建一个repository文件夹,用于存放下载的jar包
(3)在conf文件夹中将settings.xml先备份一份,我的备份为settings.Origin.xml,再将原settings.xml的内容更改,如下图所示:
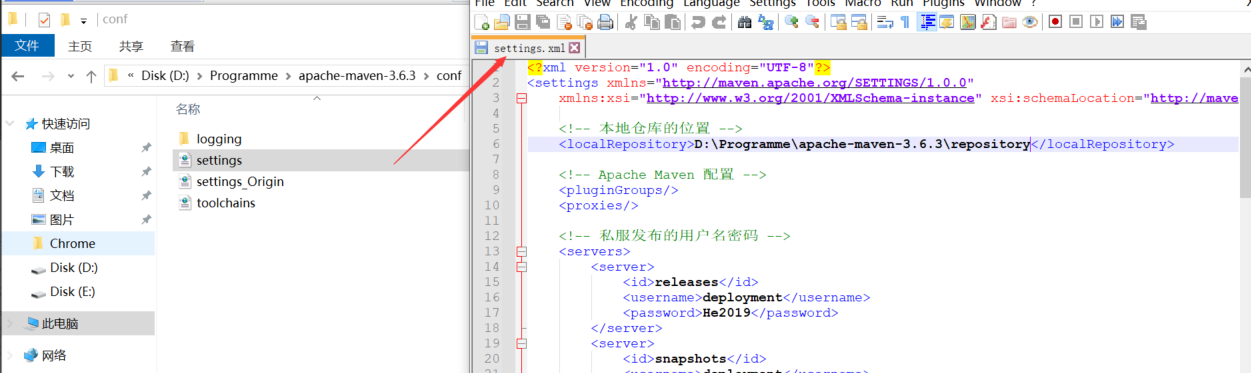
<?xml version="1.0" encoding="UTF-8"?>
<settings xmlns="http://maven.apache.org/SETTINGS/1.0.0"
    xmlns:xsi="http://www.w3.org/2001/XMLSchema-instance" xsi:schemaLocation="http://maven.apache.org/SETTINGS/1.0.0 http://maven.apache.org/xsd/settings-1.0.0.xsd">

    <!-- 本地仓库的位置 -->
    <localRepository>D:\Programme\apache-maven-3.6.3\repository</localRepository>

    <!-- Apache Maven 配置 -->
    <pluginGroups/>
    <proxies/>

    <!-- 私服发布的用户名密码 -->
    <servers>
        <server>
            <id>releases</id>
            <username>deployment</username>
            <password>He2019</password>
        </server>
        <server>
            <id>snapshots</id>
            <username>deployment</username>
            <password>He2019</password>
        </server>
    </servers>

    <!-- 阿里云镜像 -->
    <mirrors>
        <mirror>
            <id>alimaven</id>
            <name>aliyun maven</name>
            <!-- https://maven.aliyun.com/repository/public/ -->
            <url>http://maven.aliyun.com/nexus/content/groups/public/</url>
            <mirrorOf>central</mirrorOf>
        </mirror>
    </mirrors>

    <!-- 配置: java8, 先从阿里云下载, 没有再去私服下载  -->
    <profiles>
        <!-- 全局JDK1.8配置 -->
        <profile>
            <id>jdk1.8</id>
            <activation>
                <activeByDefault>true</activeByDefault>
                <jdk>1.8</jdk>
            </activation>
            <properties>
                <project.build.sourceEncoding>UTF-8</project.build.sourceEncoding>
                <maven.compiler.source>1.8</maven.compiler.source>
                <maven.compiler.target>1.8</maven.compiler.target>
                <maven.compiler.compilerVersion>1.8</maven.compiler.compilerVersion>
            </properties>
        </profile>


        <!-- Nexus私服配置: 第三方jar包下载, 比如oracle的jdbc驱动等 -->
        <profile>
            <id>dev</id>
            <repositories>
                <repository>
                    <id>nexus</id>
                    <url>http://nexus.hepengju.cn:8081/nexus/content/groups/public/</url>
                    <releases>
                        <enabled>true</enabled>
                    </releases>
                    <snapshots>
                        <enabled>true</enabled>
                    </snapshots>
                </repository>
            </repositories>
            <pluginRepositories>
                <pluginRepository>
                    <id>public</id>
                    <name>Public Repositories</name>
                    <url>http://nexus.hepengju.cn:8081/nexus/content/groups/public/</url>
                </pluginRepository>
            </pluginRepositories>
        </profile>

        <!-- 阿里云配置: 提高国内的jar包下载速度 -->
        <profile>
            <id>ali</id>
            <repositories>
                <repository>
                    <id>alimaven</id>
                    <name>aliyun maven</name>
                    <url>http://maven.aliyun.com/nexus/content/groups/public/</url>
                    <releases>
                        <enabled>true</enabled>
                    </releases>
                    <snapshots>
                        <enabled>true</enabled>
                    </snapshots>
                </repository>
            </repositories>
            <pluginRepositories>
                <pluginRepository>
                    <id>alimaven</id>
                    <name>aliyun maven</name>
                    <url>http://maven.aliyun.com/nexus/content/groups/public/</url>
                </pluginRepository>
            </pluginRepositories>
        </profile>

    </profiles>

    <!-- 激活配置 -->
    <activeProfiles>
        <activeProfile>jdk1.8</activeProfile>
        <activeProfile>dev</activeProfile>
        <activeProfile>ali</activeProfile>
    </activeProfiles>
</settings>
此处我用的Nodepad++编辑的,下载地址 https://notepad-plus-plus.org/downloads/。
(4)将<localRepository>D:\Programme\apache-maven-3.6.3\repository</localRepository>中的地址改为步骤(2)的repository地址。
(5)此电脑->(右键)->属性,添加H2_HOME,MAVEN_HOME和Path中的变量,如下图所示:
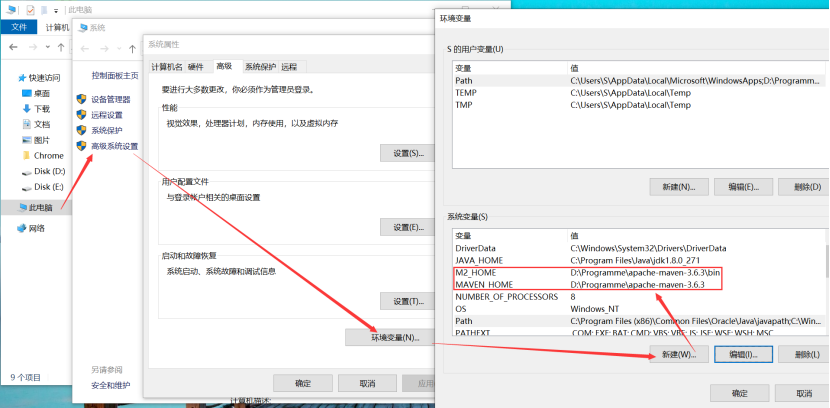
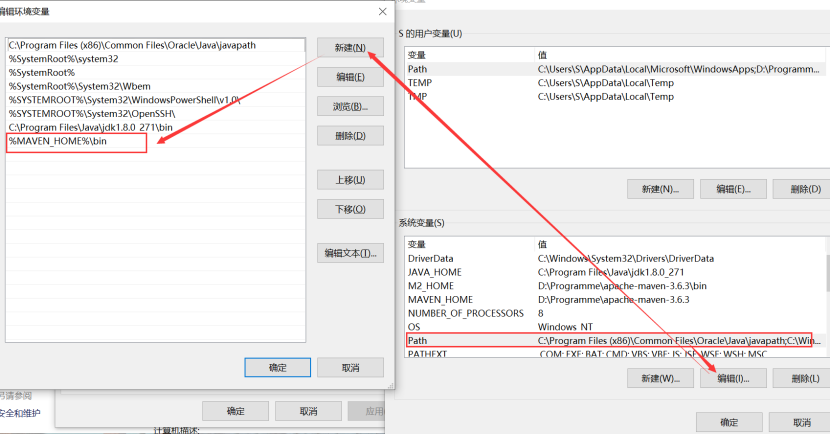
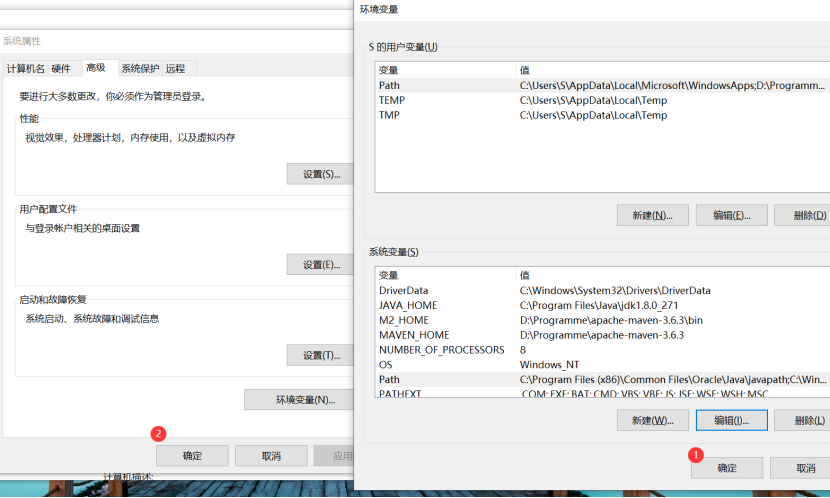
(6)按两次确定。
(7)设置默认的Maven。打开IDEA,选择如下图所示:
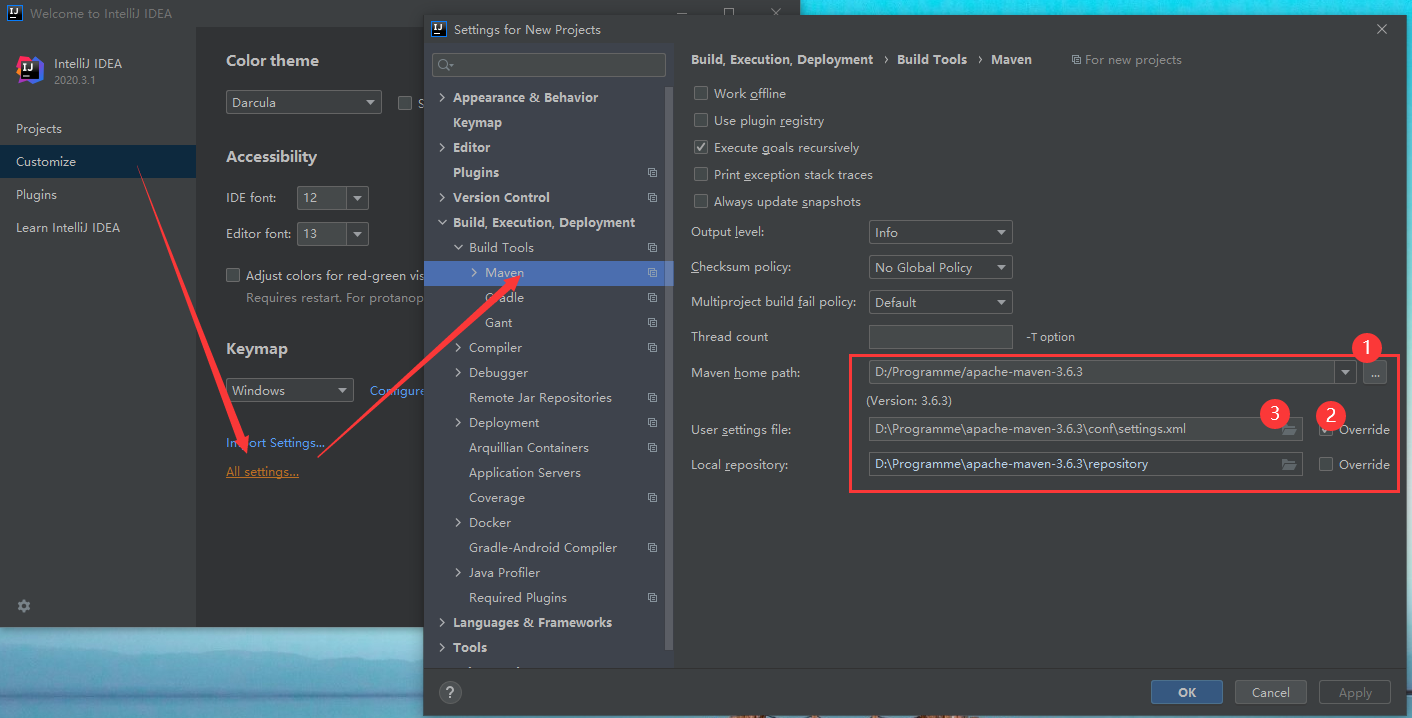
Maven home path中选择选择Maven的路径,Local repository会自动更改;勾选User settings file的override,选择步骤(3)中修改的settings.xml文件

 浙公网安备 33010602011771号