

centos5.4下postfix+extmail详细配置
参考文章地址http://dogdogcom.blog.51cto.com/2402458/522782 感谢小才的细心。
系统CENTOS5.4 ip:192.168.1.128 域名:mail.dog.com
第一步:
1、添加官方的两个yum源,这个很重要,不然那些包够你下的。
http://mirror.extmail.org/yum/misc/EMOS15-base.repo
http://mirror.extmail.org/yum/misc/EMOS15-extra.repo
如果没配置这2个源就开始装postfix,系统自带的postfix将不支持mysql。(个人配置的时候出现该情况,不排除是个别现象)
2.安装lamp
yum install httpd* php* mysql*
数据库修改密码:
mysql>use mysql
mysql> UPDATE user SET password=password('123456') WHERE user='root';
mysql> FLUSH PRIVILEGES;
3、安装并配置postfix
安装完postfix 要删掉sendmail rpm -e --nodeps sendmail
shell
# mv /etc/postfix/main.cf /etc/postfix/main.cf.old
# mv /etc/postfix/main2.cf /etc/postfix/main.cf
编辑main.cf:
shell
增加如下内容: dog.com是你自己的域名
# hostname
mynetworks = 127.0.0.1,192.168.1.0/24 //允许哪个网段
myhostname = mail.dog.com
mydestination = $mynetworks $myhostname
# banner
mail_name = Postfix - by dog.com
smtpd_banner = $myhostname ESMTP $mail_name
# response immediately
smtpd_error_sleep_time = 0s
# Message and return code control
message_size_limit = 5242880
mailbox_size_limit = 5242880
show_user_unknown_table_name = no
# Queue lifetime control
bounce_queue_lifetime = 1d
maximal_queue_lifetime = 1d
设置postfix开机自启:
shell
4、安装Courier-Authlib
安装以下软件包:
shell
# yum install courier-authlib-mysql
编辑/etc/authlib/authmysqlrc文件:
shell
并将其内容清空,然后增加如下内容:
MYSQL_SERVER localhost
MYSQL_USERNAME extmail
MYSQL_PASSWORD extmail
MYSQL_SOCKET /var/lib/mysql/mysql.sock
MYSQL_PORT 3306
MYSQL_OPT 0
MYSQL_DATABASE extmail
MYSQL_USER_TABLE mailbox
MYSQL_CRYPT_PWFIELD password
MYSQL_UID_FIELD uidnumber
MYSQL_GID_FIELD gidnumber
MYSQL_LOGIN_FIELD username
MYSQL_HOME_FIELD homedir
MYSQL_NAME_FIELD name
MYSQL_MAILDIR_FIELD maildir
MYSQL_QUOTA_FIELD quota
MYSQL_SELECT_CLAUSE SELECT username,password,"",uidnumber,gidnumber,\
CONCAT('/home/domains/',homedir), \
CONCAT('/home/domains/',maildir), \
quota, \
name \
FROM mailbox \
WHERE username = '$(local_part)@$(domain)'
修改authdaemonrc文件
shell
修改如下内容:
authmodulelist="authmysql"
authmodulelistorig="authmysql"
启动courier-authlib:
shell
如一切正常,命令行将返回如下信息:
Starting Courier authentication services: authdaemond
修改authdaemon socket目录权限
如果该目录权限不正确修改,maildrop及postfix等将无法正确获取用户的信息及密码认证:
shell
5、安装maildrop
shell
配置master.cf 为了使Postfix支持Maildrop,必须修改/etc/postfix/master.cf文件,注释掉原来的maildrop的配置内容,并改为:“十分注意:flags前面有两个空格”
maildrop unix - n n - - pipe
flags=DRhu user=vuser argv=maildrop -w 90 -d ${user}@${nexthop} ${recipient} ${user} ${extension} {nexthop}
配置main.cf 由于maildrop不支持一次接收多个收件人,因此必须在main.cf里增加如下参数:
maildrop_destination_recipient_limit = 1
测试maildrop对authlib支持
shell
看是否出现以下内容:
maildrop 2.0.4 Copyright 1998-2005 Double Precision, Inc.
GDBM extensions enabled.
Courier Authentication Library extension enabled.
Maildir quota extension enabled.
This program is distributed under the terms of the GNU General Public
License. See COPYING for additional information.
注意事项:
1、如需重新编译Maildrop软件包,必须先获得其源码rpm包,并且必须先行安装courier-authlib及其devel软件包,否则编译后的maildrop将无法打开authlib支持。
2、maildrop RPM包安装时,会自动创建vuser用户及vgroup用户组,专门用于邮件的存储,vuser:vgroup的uid/gid都是1000,这与一般的邮件文档中提及用postfix用户存邮件不一样。因为postfix用户的uid一般都低于500,而Suexec模块编译时对UID/GID的要求是要大于500,因此使用postfix用户不能满足要求。其次,如果用Maildrop作为投递代理(MDA),以postfix身份投递的话,会导致postfix MTA错误。
编辑httpd.conf文件:
shell
在最后一行加上:
NameVirtualHost *:80
Include conf/vhost_*.conf
编辑 vhost_extmail.conf
shell
里面定义虚拟主机的相关内容:
# VirtualHost for ExtMail Solution
<VirtualHost *:80>
ServerName mail.dog.com
DocumentRoot /var/www/extsuite/extmail/html/
ScriptAlias /extmail/cgi/ /var/www/extsuite/extmail/cgi/
Alias /extmail /var/www/extsuite/extmail/html/
ScriptAlias /extman/cgi/ /var/www/extsuite/extman/cgi/
Alias /extman /var/www/extsuite/extman/html/
# Suexec config
SuexecUserGroup vuser vgroup
</VirtualHost>
设置apache开机启动
shell
shell
6、编辑webmail.cf
shell
# cp webmail.cf.default webmail.cf
# vi webmail.cf
主要变动的内容见下:
SYS_MYSQL_USER = extmail
SYS_MYSQL_PASS = extmail
SYS_MYSQL_DB = extmail
更新cgi目录权限 由于SuEXEC的需要,必须将extmail的cgi目录修改成vuser:vgroup权限:
shell
shell
更新cgi目录权限 由于SuEXEC的需要,必须将extman的cgi目录修改成vuser:vgroup权限:
shell
链接基本库到Extmail
shell
注意事项:
由于RedHat发行版中包含了一个叫tmpwatch的工具,该工具会定期扫描/tmp/下的文件,如果这些文件很久都没被使用,将被删除,因此如果后台长期不使用,/tmp/extman目录有可能被tmpwatch删除,所以要么定期登陆后台,要么修改 webman.cf将临时目录修改到另一个地方。此处暂以/tmp/extman默认值为例。
7、数据库初始化
启动Mysql
shell
# chkconfig mysqld on
导入mysql数据库结构及初始化数据,root密码默认为空
shell
# mysql -u root -p < /var/www/extsuite/extman/docs/init.sql
注意事项:
上述导入初始化SQL时,默认的uidnumber/gidnumber都是1000,这和vuser:vgroup 的uid/gid一致,是因为maildrop投递时会从数据库里取uidnumber/gidnumber,而在master.cf里已经定义好了投递时的运行身份(vuser:vgroup),所以这两个字段的内容必须为1000,否则将出现投递错误,例如报0×06等错误。
8、设置虚拟域和虚拟用户的配置文件
shell
# cp mysql_virtual_alias_maps.cf /etc/postfix/
# cp mysql_virtual_domains_maps.cf /etc/postfix/
# cp mysql_virtual_mailbox_maps.cf /etc/postfix/
# cp mysql_virtual_sender_maps.cf /etc/postfix/
配置main.cf:
shell
增加以下内容:
# extmail config here
virtual_alias_maps = mysql:/etc/postfix/mysql_virtual_alias_maps.cf
virtual_mailbox_domains = mysql:/etc/postfix/mysql_virtual_domains_maps.cf
virtual_mailbox_maps = mysql:/etc/postfix/mysql_virtual_mailbox_maps.cf
virtual_transport = maildrop:
重启postfix :
shell
9、测试authlib
在命令行下执行:
shell
结果如下:
Authentication succeeded.
Authenticated: postmaster@extmail.org (uid 1000, gid 1000)
Home Directory: /home/domains/extmail.org/postmaster
Maildir: /home/domains/extmail.org/postmaster/Maildir/
Quota: 104857600S
Encrypted Password: $1$phz1mRrj$3ok6BjeaoJYWDBsEPZb5C0
Cleartext Password: extmail
Options: (none)
这样表明ExtMan的正确安装,数据库也正确导入,courier-authlib能正确连接到mysql数据库
最后访问http://192.168.68.56/extmail/,如无意外(防火墙要开放80端口),将看到webmail的登陆页,不过此时还没有加正式的用户,所以不能登陆,包括postmaster@extmail.org也不行。必须要登陆到http://192.168.68.56/extman/ 里增加一个新帐户才能登陆。
ExtMan的默认超级管理员帐户:root@extmail.org,初始密码:extmail*123*,登陆成功后,建议将密码修改,以确保安全。
注意:如果提示/tmp/extman没权限 chmod 777
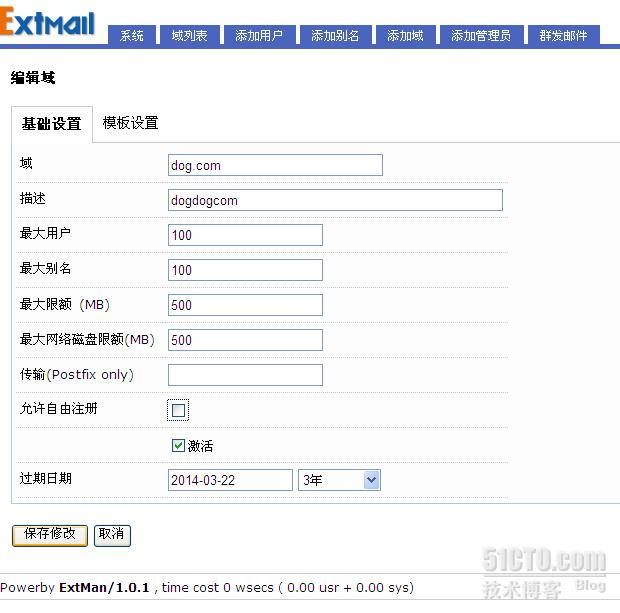
具体参考下图
10、配置图形化日志
启动mailgraph_ext
shell
启动cmdserver(在后台显示系统信息)
# /var/www/extsuite/extman/daemon/cmdserver --daemon
加入开机自启动:
shell
# echo “/var/www/extsuite/extman/daemon/cmdserver -v -d” >> /etc/rc.d/rc.local
使用方法: 等待大约15分钟左右,如果邮件系统有一定的流量,即可登陆到extman里,点“图形日志”即可看到图形化的日志。具体每天,周,月,年的则点击相应的图片进入即可。
11、安装cyrus-sasl
删除系统的cyrus-sasl:
shell
# rpm -e --nodeps cyrus-sasl-lib-2.1.22-5.el5
rpm -qa|grep cyrus-sasl\|cyrus-sasl-devel\|cyrus-sasl-lib\|cyrus-sasl-plain
一一删除 rpm -e --nodeps 有时候--nodeps都不能删除要加多个
rpm -e --allmatches --nodeps cyrus-sasl-md5-2.1.22-5.el5_4.3 这样删除
安装新的支持authdaemon的软件包
shell
12、配置main.cf文件
Postfix的SMTP认证需要透过Cyrus-SASL,连接到authdaemon获取认证信息。
编辑main.cf
shell
增加如下内容:
# smtpd related config
smtpd_recipient_restrictions =
permit_mynetworks,
permit_sasl_authenticated,
reject_non_fqdn_hostname,
reject_non_fqdn_sender,
reject_non_fqdn_recipient,
reject_unauth_destination,
reject_unauth_pipelining,
reject_invalid_hostname,
# SMTP sender login matching config
smtpd_sender_restrictions =
permit_mynetworks,
reject_sender_login_mismatch,
reject_authenticated_sender_login_mismatch,
reject_unauthenticated_sender_login_mismatch
smtpd_sender_login_maps = mysql:/etc/postfix/mysql_virtual_sender_maps.cf,
mysql:/etc/postfix/mysql_virtual_alias_maps.cf
#上面这行一定要接着逗号,不然会出错!!!!!
# SMTP AUTH config here
broken_sasl_auth_clients = yes
smtpd_sasl_auth_enable = yes
smtpd_sasl_local_domain = $myhostname
smtpd_sasl_security_options = noanonymous
13、编辑smtpd.conf文件
shell
确保其内容为:
pwcheck_method: authdaemond
log_level: 3
mech_list: PLAIN LOGIN
authdaemond_path:/var/spool/authdaemon/socket
重新启动postfix:
shell
14、测试SMTP认证
通过以下命令获得postmaster@extmail.org的用户名及密码的BASE64编码:
shell
内容如下:
cG9zdG1hc3RlckBleHRtYWlsLm9yZw==
shell
内容如下:
ZXh0bWFpbA==
然后本机测试:
shell
其过程如下:
Trying 127.0.0.1...
Connected to localhost.localdomain (127.0.0.1).
Escape character is '^]'.
220 mail.extmail.org ESMTP Postfix - by dog.com
ehlo demo.domain.tld << 输入内容
250-mail.extmail.org
250-PIPELINING
250-SIZE 10240000
250-VRFY
250-ETRN
250-AUTH LOGIN PLAIN
250-AUTH=LOGIN PLAIN
250-ENHANCEDSTATUSCODES
250-8BITMIME
250 DSN
auth login << 输入内容
334 VXNlcm5hbWU6
cG9zdG1hc3RlckBleHRtYWlsLm9yZw== << 输入内容
334 UGFzc3dvcmQ6
ZXh0bWFpbA== << 输入内容
235 2.0.0 Authentication successful
quit << 输入内容
221 2.0.0 Bye最后出现235 Authentication Successful 表明认证成功了。
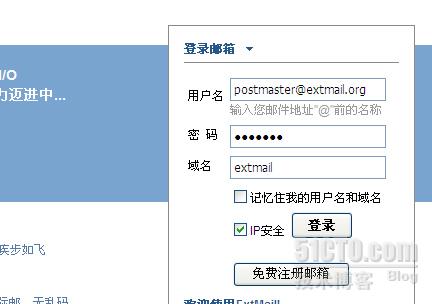
15.访问你的网址:http://192.168.68.56
输入postmaster@extmail.org 密码extmail 域名:extmail 可以测试
如果遇到找不到目录例如:/hom/...... no such...自己建立以个给个777权限调试
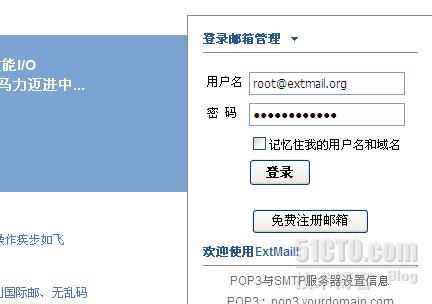
进入超级管理员模式,
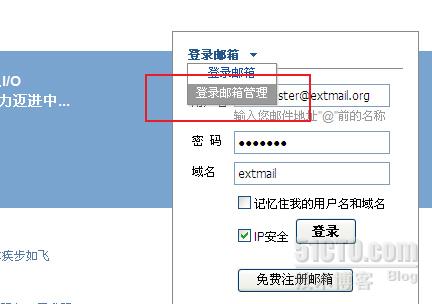
默认用户是root@extmail.org 密码 extmail*123* 这里也要注意,官方的数据库超级管理员是过期的,自己可以进mysql修改update manage set expdate
mysql> use extmail
mysql> update manager set expiredate="2012-11-08" where uid="root";
mysql> FLUSH PRIVILEGES;
要验证码
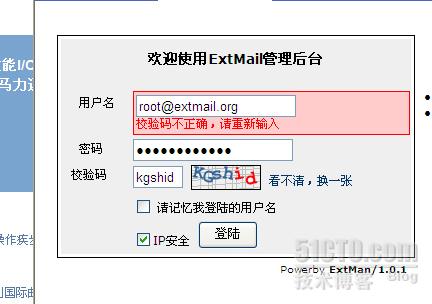
这个很重要,添加域 例如田间dog.com 然后再添加dog.com的用户名 alex,退出后就可以用alex 登陆dog.com域了!
发封邮件测试下,建议发到yeah.net的邮箱,其他邮箱很可能收不到,因为你没有真IP...现在只能发邮件不能收哦。要收邮件必须要电信的DNS解析才行,或者去3322.org申请个域名也可以。
如果本机装了rrdtool 要先删除,然后会从新安装,不然安装过程中会出错,
到此基本完成了,
如果你要使用imap 杀毒软件参考官方文档,本文基本都是官档复制过来的,只略增加了一点内容
注意: 如果装了dovecot 要先停掉,不然会冲突
这样就可以用outlook foxmail收发邮件了。
1、安装Courier-imap 用outlook foxmail收发邮件。
默认的courier-authlib及courier-imap都会增加系统自启动设置,因此下一次服务器启动将自动启动相应的authlib及POP3服务
特别特别注意:如果你是64位系统 会遇到安装不了,会提示由于courier-authlib版本》=6.0 什么lib..so
。解决方法 只能下载一个courier-authlib 重装一个新版本的。
首先要强制删除原来的courier-authlib
# rpm -qa |grep courier
#rpm -e --nodeps courier-authlib-0.57-2hzq courier-authlib-mysql-0.57-2hzq
下载
http://sourceforge.net/projects/courier/files/authlib/0.62.4/courier-authlib-0.62.4.tar.bz2/download
#rpmbuild -ta courier-authlib-0.62.4.tar.bz2
中间可能缺包 缺哪个就装哪个,有个比较麻烦的/usr/include/lbt.h的文件 忘记是yum lbthtool*还是libtool*解决的了。自己试试
#rpmbuild -ta courier-imap-4.6.0.tar.bz2
#cd /usr/src/redhat/RPMS/x86_64/
#rpm -ivh courier-authlib-0.62.4-1.x86_64.rpm courier-authlib-mysql-0.62.4-1.x86_64.rpm courier-authlib-devel-0.62.4-1.x86_64.rpm
装完后需要重新修改配置文件,和上面一样(搞了半天终于搞定 - -!)
现在可以安装了。
配置courier-imap
由于Courier-imap的IMAP目录是按UTF-7编码的,ExtMail目前还没有正式支持IMAP目录,因此需要屏蔽IMAP,只提供pop3服务。而就目前的使用情况来看,IMAP使用的非常少,绝大部分OutLook/Foxmail用户都习惯使用POP3而非IMAP。
shell
修改内容如下:
IMAPDSTART=NO
shell
修改内容如下:
IMAPDSSLSTART=NO
然后重新启动courier-imap:
shell
测试POP3 请按如下步骤输入pop3命令测试其是否正常工作,注意蓝色的信息是我们输入到POP3服务器的(请首先登录extman自行建立test@extmail.org用户,密码:extmail)
shell
其过程如下:
Trying 127.0.0.1...
Connected to localhost.localdomain (127.0.0.1).
Escape character is '^]'.
+OK Hello there.
user huang@dog.com << 输入内容
+OK Password required.
pass 123 << 输入内容
+OK logged in.
list << 输入内容
+OK POP3 clients that break here, they violate STD53.
.
quit << 输入内容
+OK Bye-bye.
Connection closed by foreign host.
重启
yum install httpd httpd-devel libdbi-dbd-mysql mysql mysql-server php php-xml php-cli php-pdo php-mbstring php-mcrypt php-gd php-common php-devel php-mysql phpmyadmin
rpm -qa|grep cyrus-sasl\|cyrus-sasl-devel\|cyrus-sasl-lib\|cyrus-sasl-plain
一一删除 rpm -e --nodeps 有时候--nodeps都不能删除要加多个
rpm -e --allmatches --nodeps cyrus-sasl-md5-2.1.22-5.el5_4.3 这样删除

 浙公网安备 33010602011771号