
Spring第一个Demo程序
第一步 创建web project
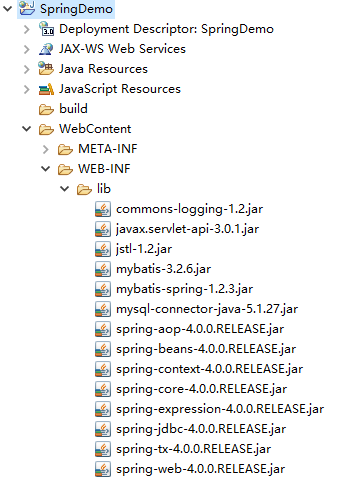
导入相关jar包 (jar如图所示)
第二步:创建student bean
package com.fd.spring.model;

public class Student {
	private int id;
	private String name;
	private String age;
	public int getId() {
		return id;
	}
	public void setId(int id) {
		this.id = id;
	}
	public String getName() {
		return name;
	}
	public void setName(String name) {
		this.name = name;
	}
	public String getAge() {
		return age;
	}
	public void setAge(String age) {
		this.age = age;
	}
	public Student(int id, String name, String age) {
		super();
		this.id = id;
		this.name = name;
		this.age = age;
	}
	public Student() {

	}
}
第三步:创建applicationContext.xml文件(放在classpath目录下),该xml文件可以参考spring帮助文档
<?xml version="1.0" encoding="UTF-8"?>
<beans xmlns="http://www.springframework.org/schema/beans"
    xmlns:xsi="http://www.w3.org/2001/XMLSchema-instance"
    xsi:schemaLocation="http://www.springframework.org/schema/beans
        http://www.springframework.org/schema/beans/spring-beans.xsd">

    <bean id="student" class="com.fd.spring.model">
        <!-- collaborators and configuration for this bean go here -->
    </bean>


</beans>
第四步:创建测试代码
package com.fd.spring.model;


import org.junit.jupiter.api.Test;
import org.springframework.context.ApplicationContext;
import org.springframework.context.support.ClassPathXmlApplicationContext;

import com.fd.spring.model.Student;

class StudentTest {

	@Test
	void test() {
		ApplicationContext ac = new ClassPathXmlApplicationContext("applicationContext.xml");
		Student student = ac.getBean("student", Student.class);
		System.out.println(student);
	}

}
最后,程序结构如下:

运行结果如下:

最简单的Demo已经成功运行
这是Spring IoC的体现, 将原先由程序员主动通过new实例化对象的事情,由Spring进行了完成

 浙公网安备 33010602011771号