SpringCloud2.0 Eureka Server 服务中心 基础教程(二)
1、创建【服务中心】,即 Eureka Server
1.1、新建 Spring Boot 工程,工程名称: springcloud-eureka-server
1.2、工程 pom.xml 文件添加如下依赖:
<dependency>
	<groupId>org.springframework.boot</groupId>
	<artifactId>spring-boot-starter-web</artifactId>
</dependency>
<dependency>
	<groupId>org.springframework.cloud</groupId>
	<artifactId>spring-cloud-starter-netflix-eureka-server</artifactId>
</dependency>
1.3、在工程启动类中,添加注解 @EnableEurekaServer
package com.miniooc.eurekaserver;

import org.springframework.boot.SpringApplication;
import org.springframework.boot.autoconfigure.SpringBootApplication;
import org.springframework.cloud.netflix.eureka.server.EnableEurekaServer;

/**
 * EurekaServerApplication
 *
 * @author 宋陆
 * @version 1.0.0
 */
@EnableEurekaServer // 启用 eureka server 相关默认配置
@SpringBootApplication // 等价于 @Configuration、@EnableAutoConfiguration、@ComponentScan
public class EurekaServerApplication {

    public static void main(String[] args) {
        SpringApplication.run(EurekaServerApplication.class, args);
    }

}
1.4、新建工程配置文件 application.yml ,配置内容:
server:
  port: 9527

spring:
  application:
    name: eureka-server

eureka:
  instance:
    hostname: localhost
  client:
    serviceUrl:
      defaultZone: http://${eureka.instance.hostname}:${server.port}/eureka/
    register-with-eureka: false #  默认为 true。设为 false,仅作为服务中心,不作为服务客户端。
    fetch-registry: false # 默认为true。设为false,不从服务中心检索注册的服务。
  server:
    eviction-interval-timer-in-ms: 5000 #清理间隔(单位毫秒,默认是60*1000)
    enable-self-preservation: true # 默认为true。设为false,关闭自我保护。
    # Eureka Server 在运行期间会去统计心跳失败比例在 15 分钟之内是否低于 85%
    renewal-percent-threshold: 0.1 # 默认是0.85
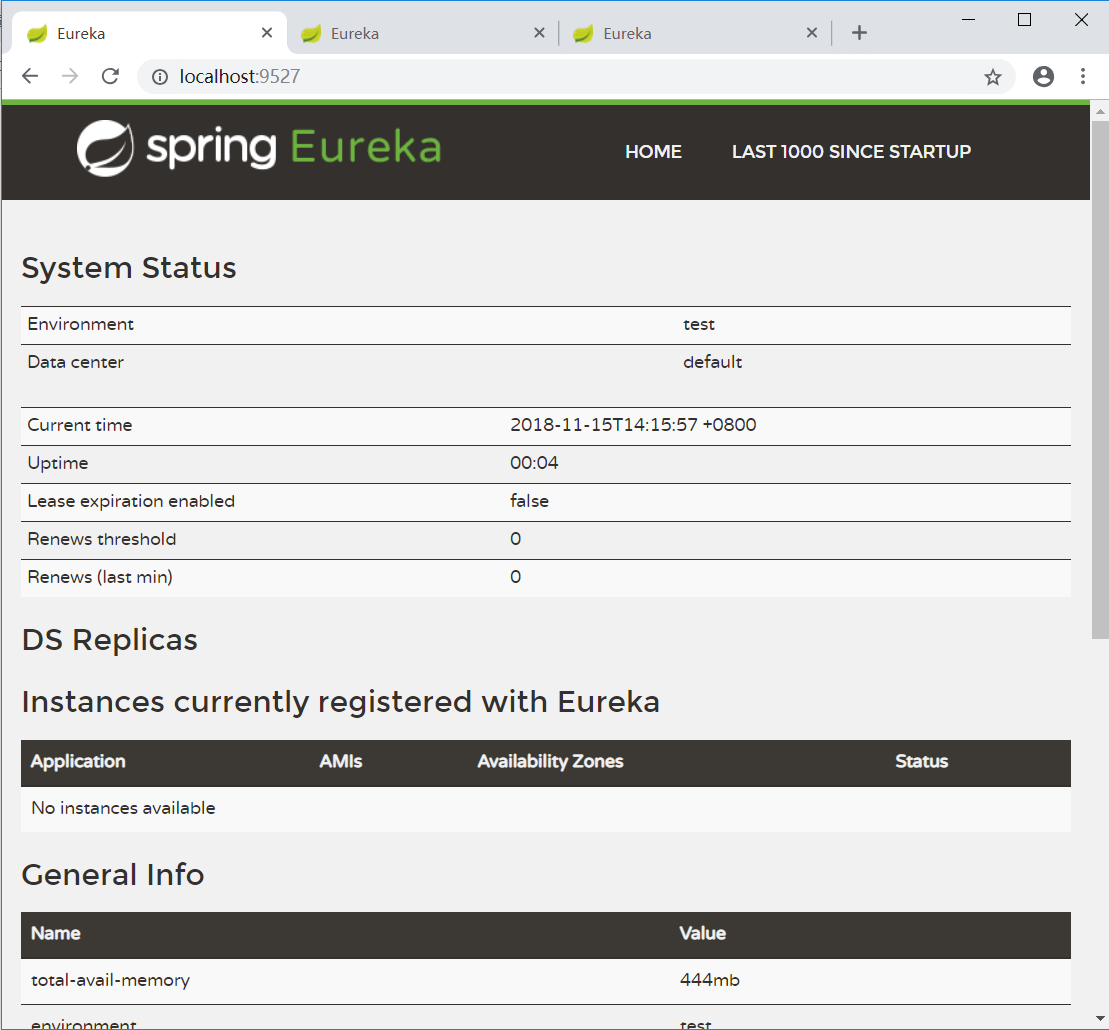
1.5、启动 服务中心 工程,打开浏览器,访问 服务中心 前台页面:http://localhost:9527

红框处 No instances available :没有可用的实例。目前还任何服务注册到服务中心。
至此,一个简单的单点服务中心搭建完成。
为了保证服务的高可用,我们需要把单点应用改成集群应用。
接下来,我们对服务中心工程做些配置修改,来完成集群部署。
2、搭建【服务中心】集群
2.1、创建工程配置文件 application-server1.yml ,配置内容:
server:
  port: 9527

spring:
  application:
    name: eureka-server

eureka:
  instance:
    hostname: localhost
  client:
    serviceUrl:
      defaultZone: http://localhost:9527/eureka/,http://localhost:9528/eureka/,http://localhost:9529/eureka/
    register-with-eureka: false #  默认为 true。设为 false,仅作为服务中心,不作为服务客户端。
    fetch-registry: false # 默认为true。设为false,不从服务中心检索注册的服务。
  server:
    eviction-interval-timer-in-ms: 5000 #清理间隔(单位毫秒,默认是60*1000)
    enable-self-preservation: true # 默认为true,设为false,关闭自我保护
    # Eureka Server 在运行期间会去统计心跳失败比例在 15 分钟之内是否低于 85%
    renewal-percent-threshold: 0.49 # 默认是0.85,本地单机测试设为0.49
参照2.1,创建工程配置文件 application-server2.yml,并修改 server.port 为 9528
参照2.1,创建工程配置文件 application-server3.yml,并修改 server.port 为 9529
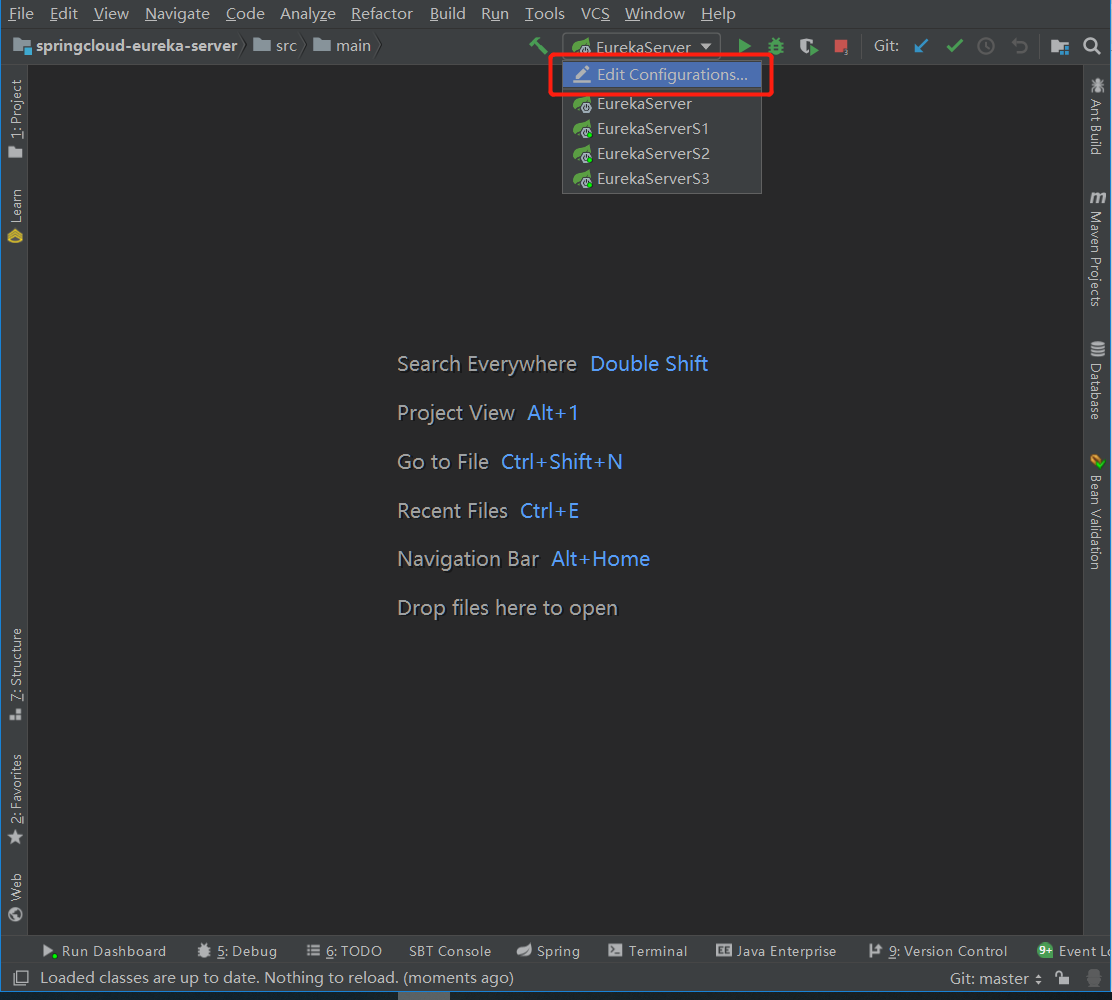
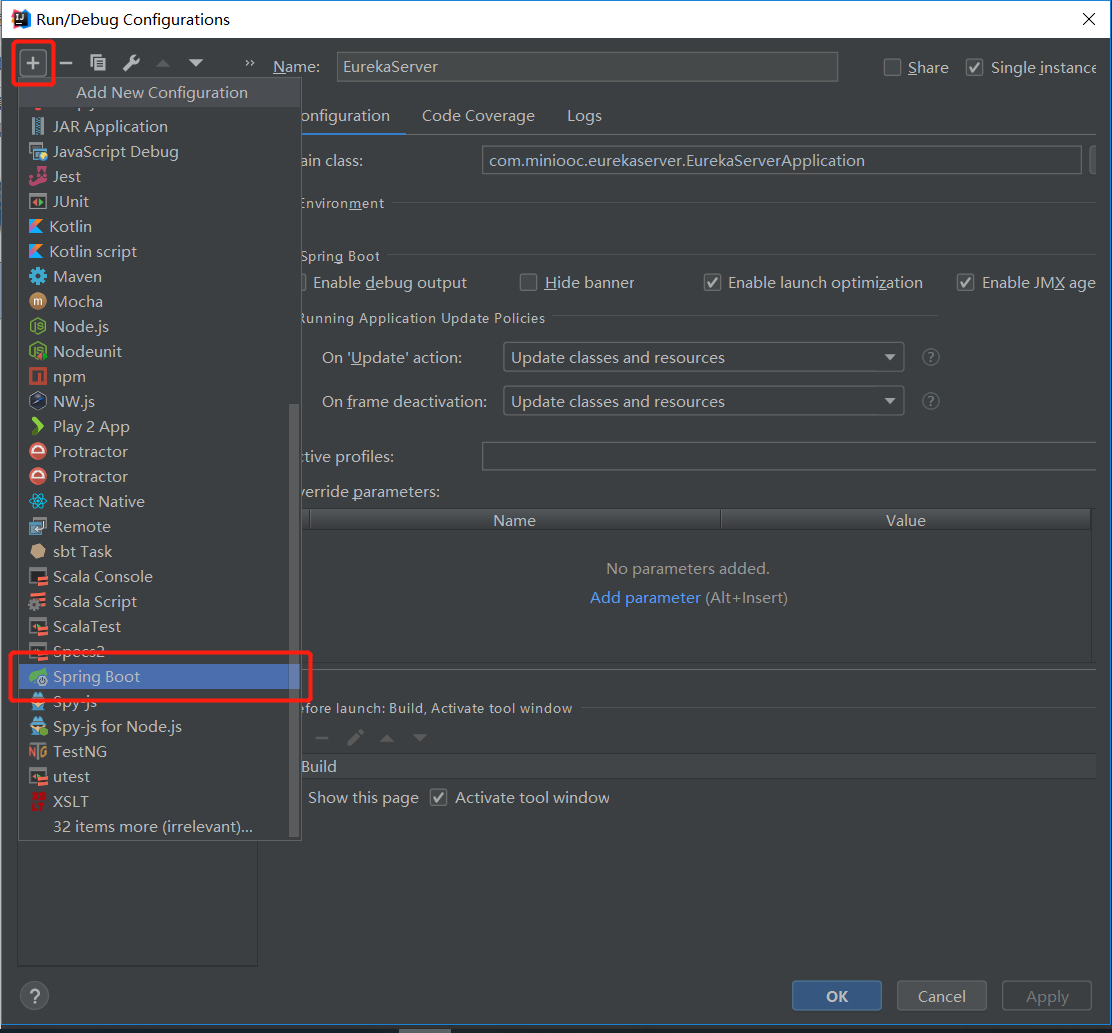
2.2、在 IntelliJ IDEA 集成开发环境中,添加 spring boot 启动配置 EurekaServerS1,修改 Active profiles 为 server1
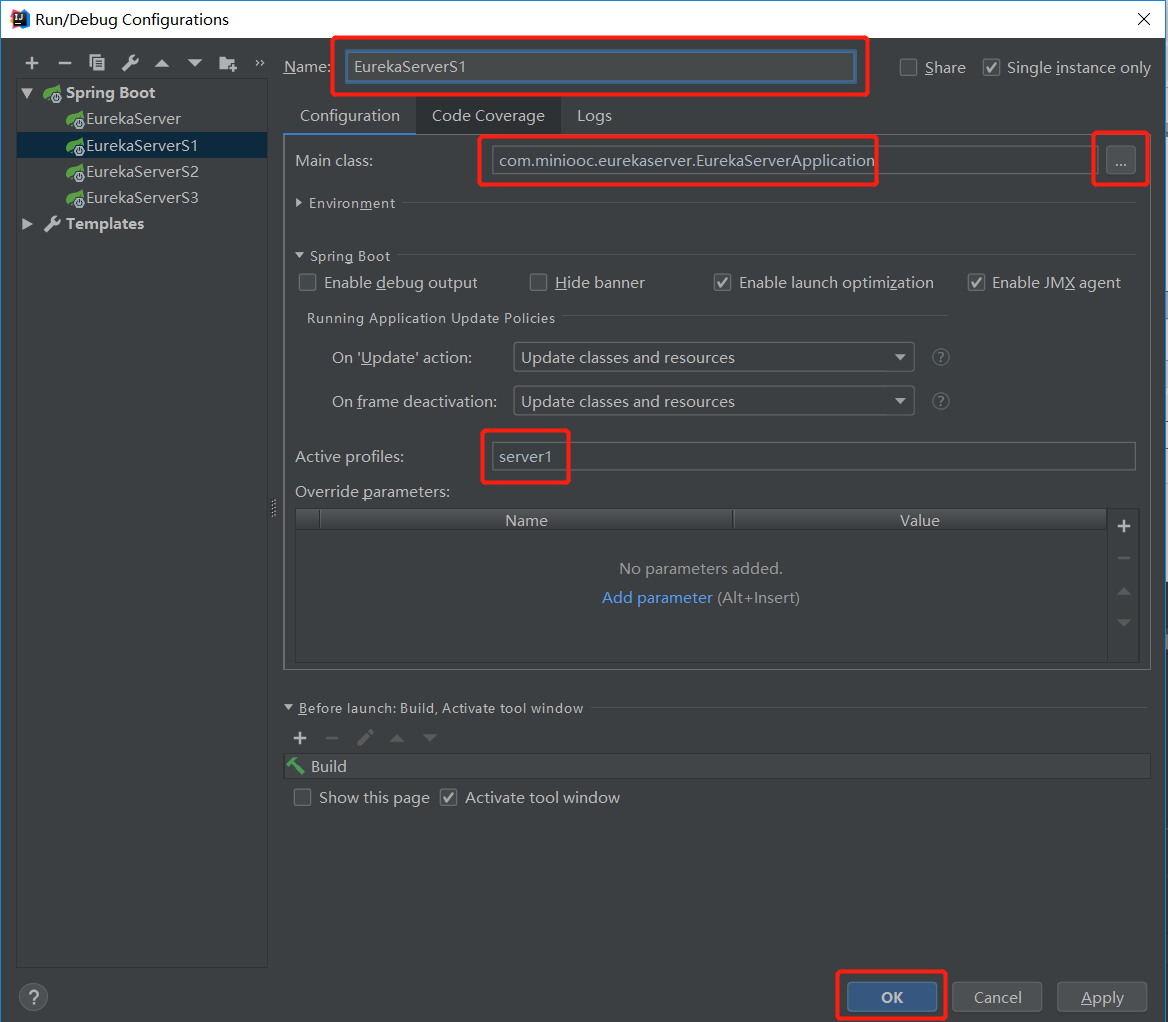
参照2.2, spring boot 启动配置 EurekaServerS2,修改 Active profiles 为 server2
参照2.2, spring boot 启动配置 EurekaServerS3,修改 Active profiles 为 server3
2.3、按照启动配置 EurekaServerS1、EurekaServerS2、EurekaServerS3 依次启动服务中心
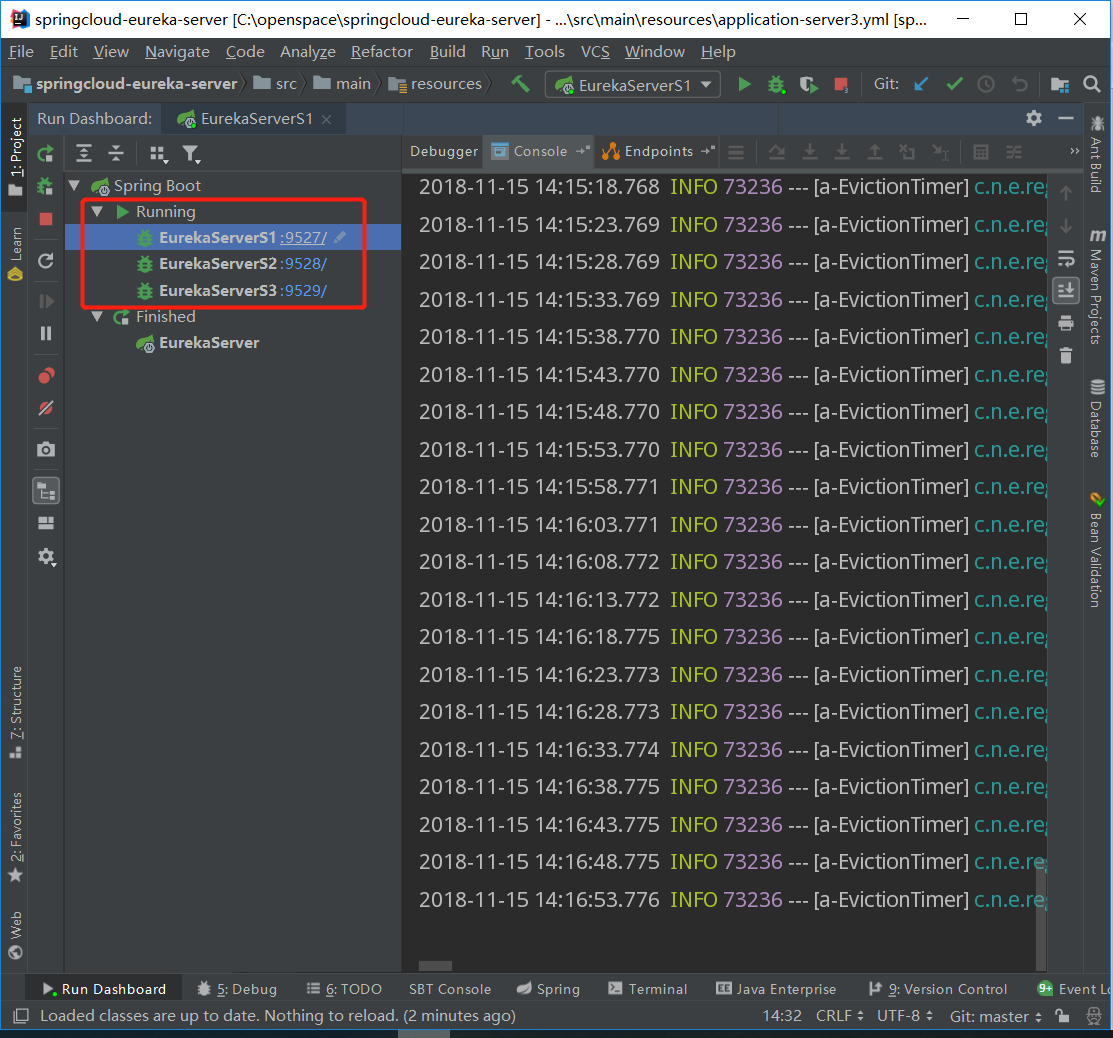
2.4、打开浏览器,访问 服务中心 前台页面:http://localhost:9527,http://localhost:9528,http://localhost:9529
如果三个服务都启动成功的话,三个页面都应该看到如上图所示。
至此,一个简单的服务中心集群搭建完成。
3、本章小结
本章主要讲解了 Eureka Server 服务中心的搭建,并讲解如果扩展为集群应用。但服务中心的使用以及集群的优点,本章并未讲解,因为这需要 Eureka Client 服务提供者和 Eureka Discovery Client 服务发现者配合使用,后续的章节我们会讲解后两者的使用。
下一章,我们将讲解,如何创建 Eureka Client 服务提供者,并把我们的服务注册到服务中心,以及如何搭建服务提供者集群。

 浙公网安备 33010602011771号