tmux使用与配置
tmux使用与配置
本机环境
$> screenfetch
                             soap@soap-pc
                             OS: NobaraLinux 40
                             Kernel: x86_64 Linux 6.10.6-200.fsync.fc40.x86_64
         #####               Uptime: 2h 43m
        #######              Packages: Unknown
        ##O#O##              Shell: zsh 5.9
        #######              Resolution: 2520x1680
      ###########            DE: KDE
     #############           WM: KWin
    ###############          GTK Theme: Breeze [GTK3]
    ################         Disk: 345G / 2.7T (13%)
   #################         CPU: 11th Gen Intel Core i5-11300H @ 8x 4.4GHz [38.0°C]
 #####################       GPU: Mesa Intel(R) Xe Graphics (TGL GT2)
 #####################       RAM: 5660MiB / 15765MiB
   #################
前言
使用tmux是为了解决多个终端切换的问题,本篇文章有三大部分
- tmux基本概念与安装
- tmux配置速查
- tmux个性配置
tmux基本概念与安装
-
tmux安装
$> yum search tmux ... $> sudo yum instsall tmux -
tmux 基本概念与使用方法
本篇内容以翻译官方文档为主
tmux 是一个能够同时跑多个终端的命令行程序.通过 tmux, 只用一个 terminal 窗口,就可管理多个程序.
tmux 分为服务器和客户端两个部分,在终端敲入 tmux 命令时,就会自动开启一个 tmux server 以及在前台呼出一个 client ,我们平时的操作都是在 client 上的
pane: 每个终端属于一个 pane
window: 多个 pane 集中在一个 window 中
session:多个 window 集中在一个 session中
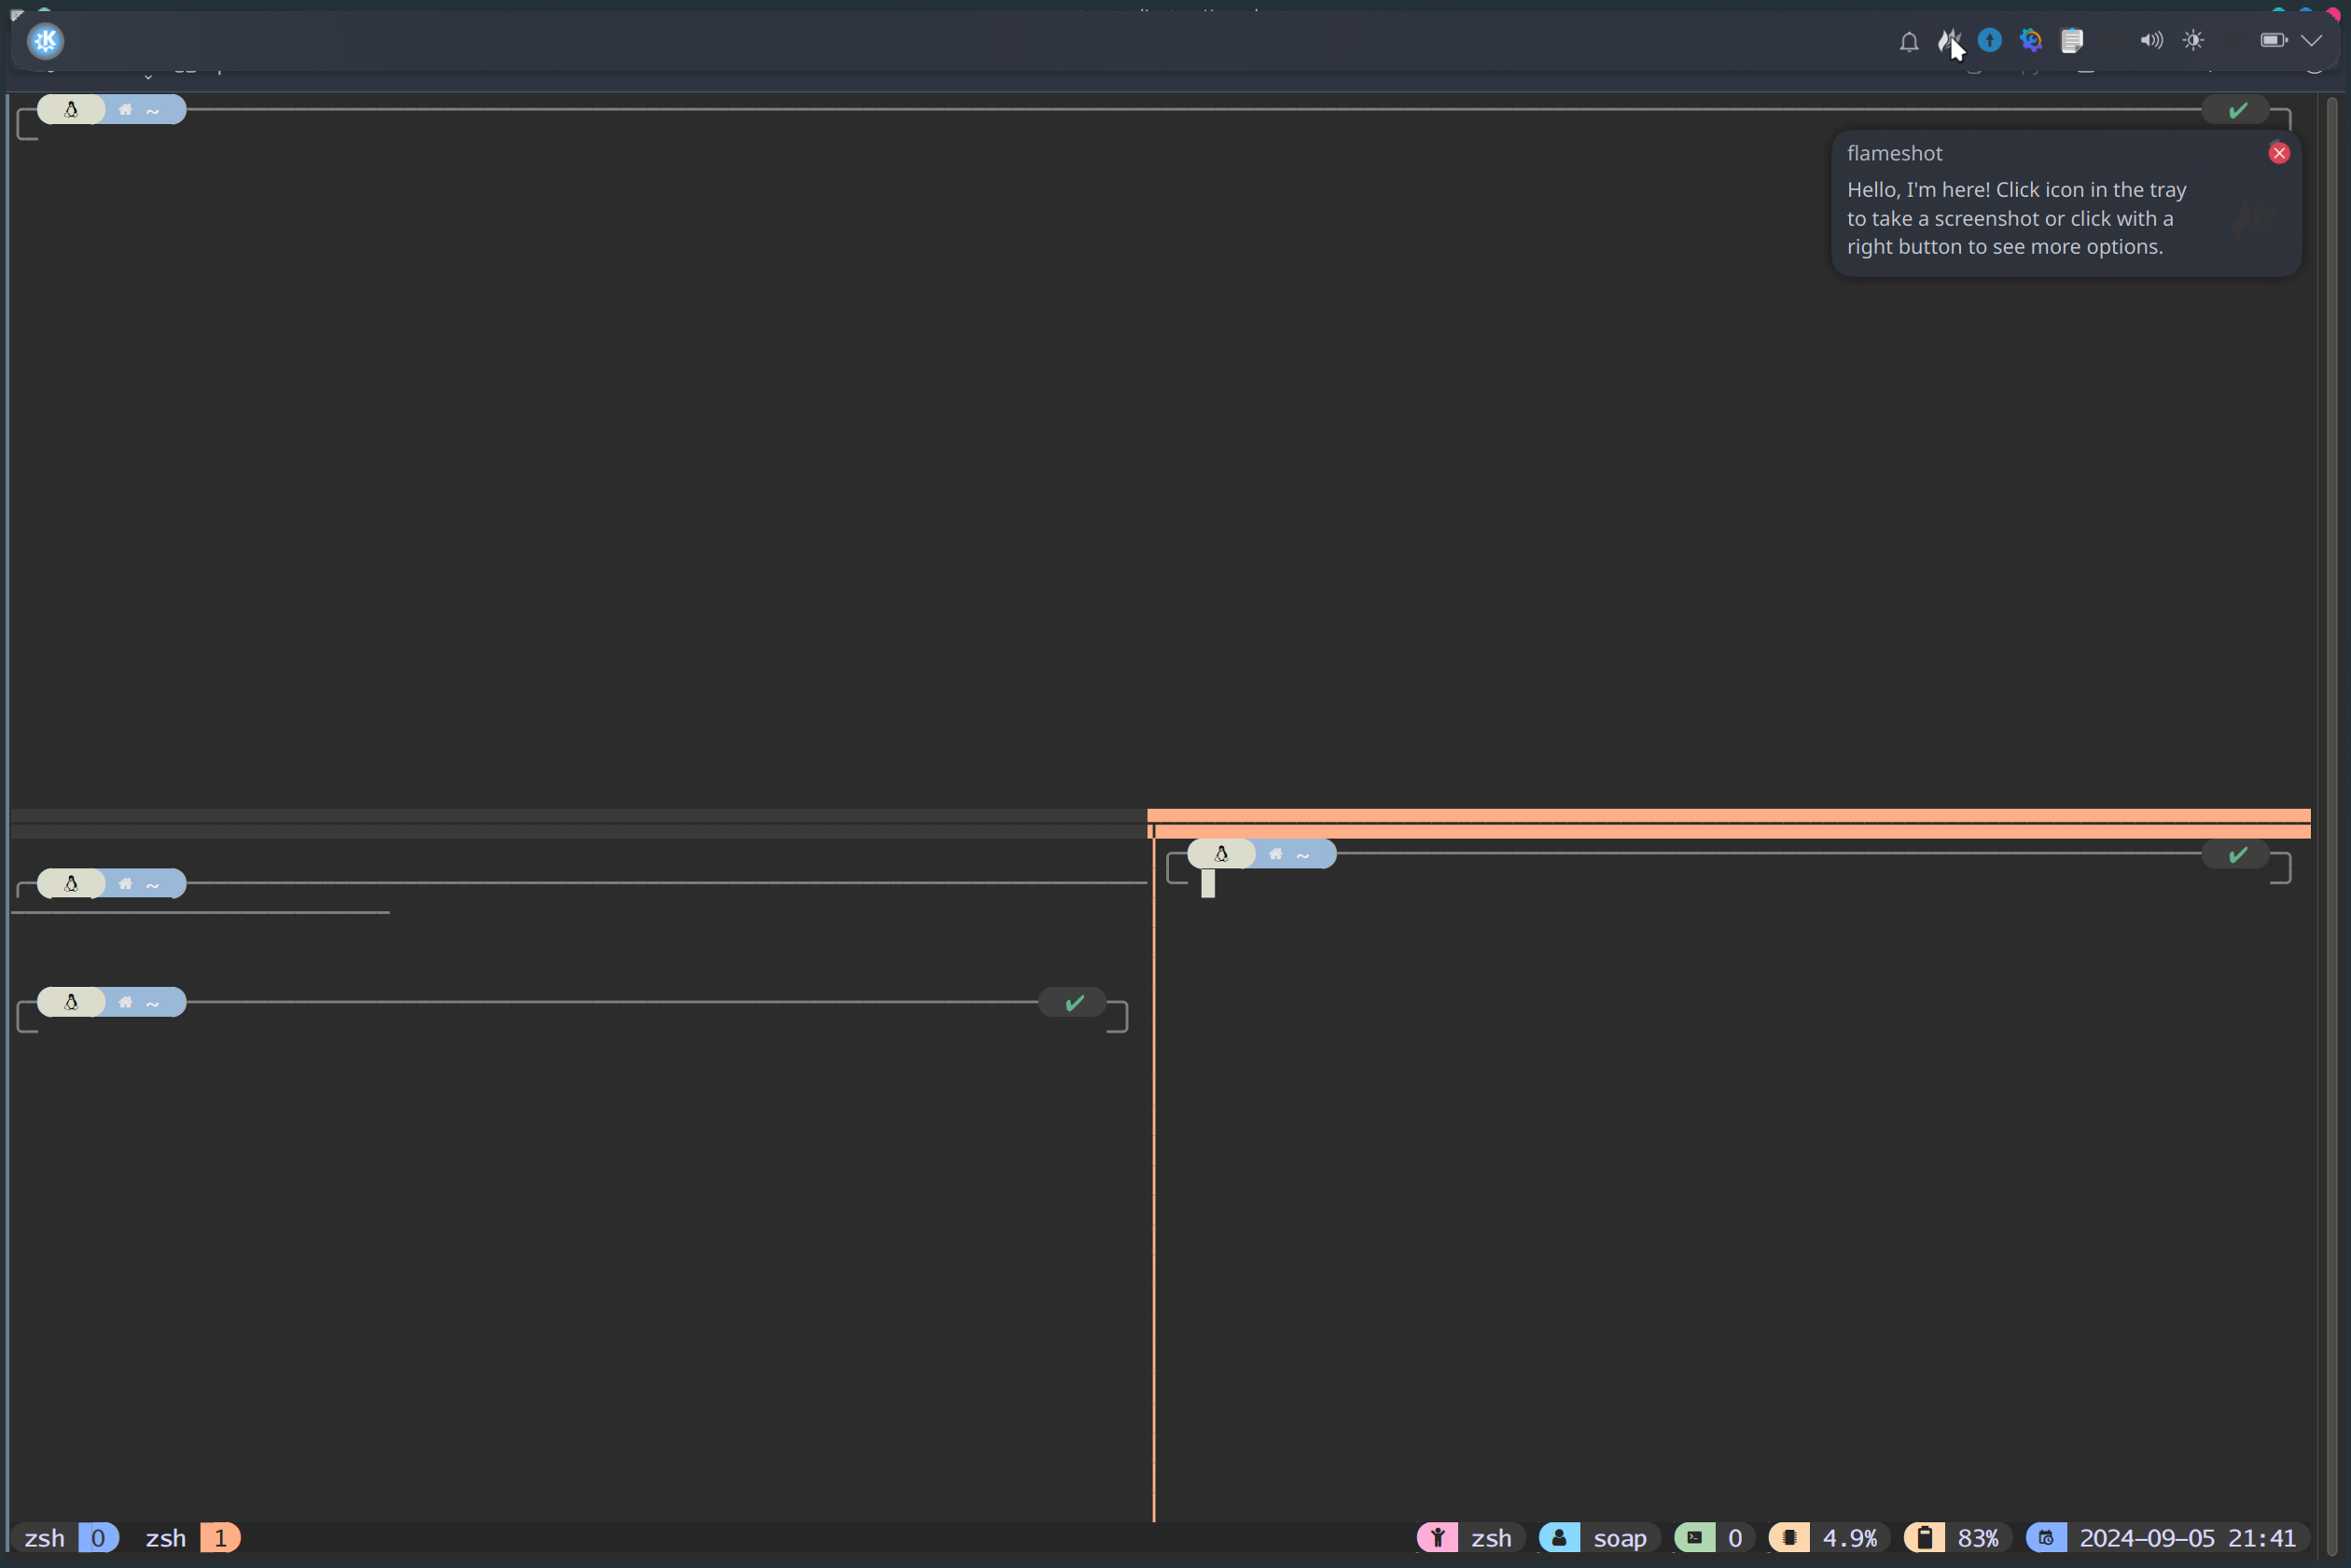
如上图所示,该图中有着三个 pane 分别集中于一个 window 中
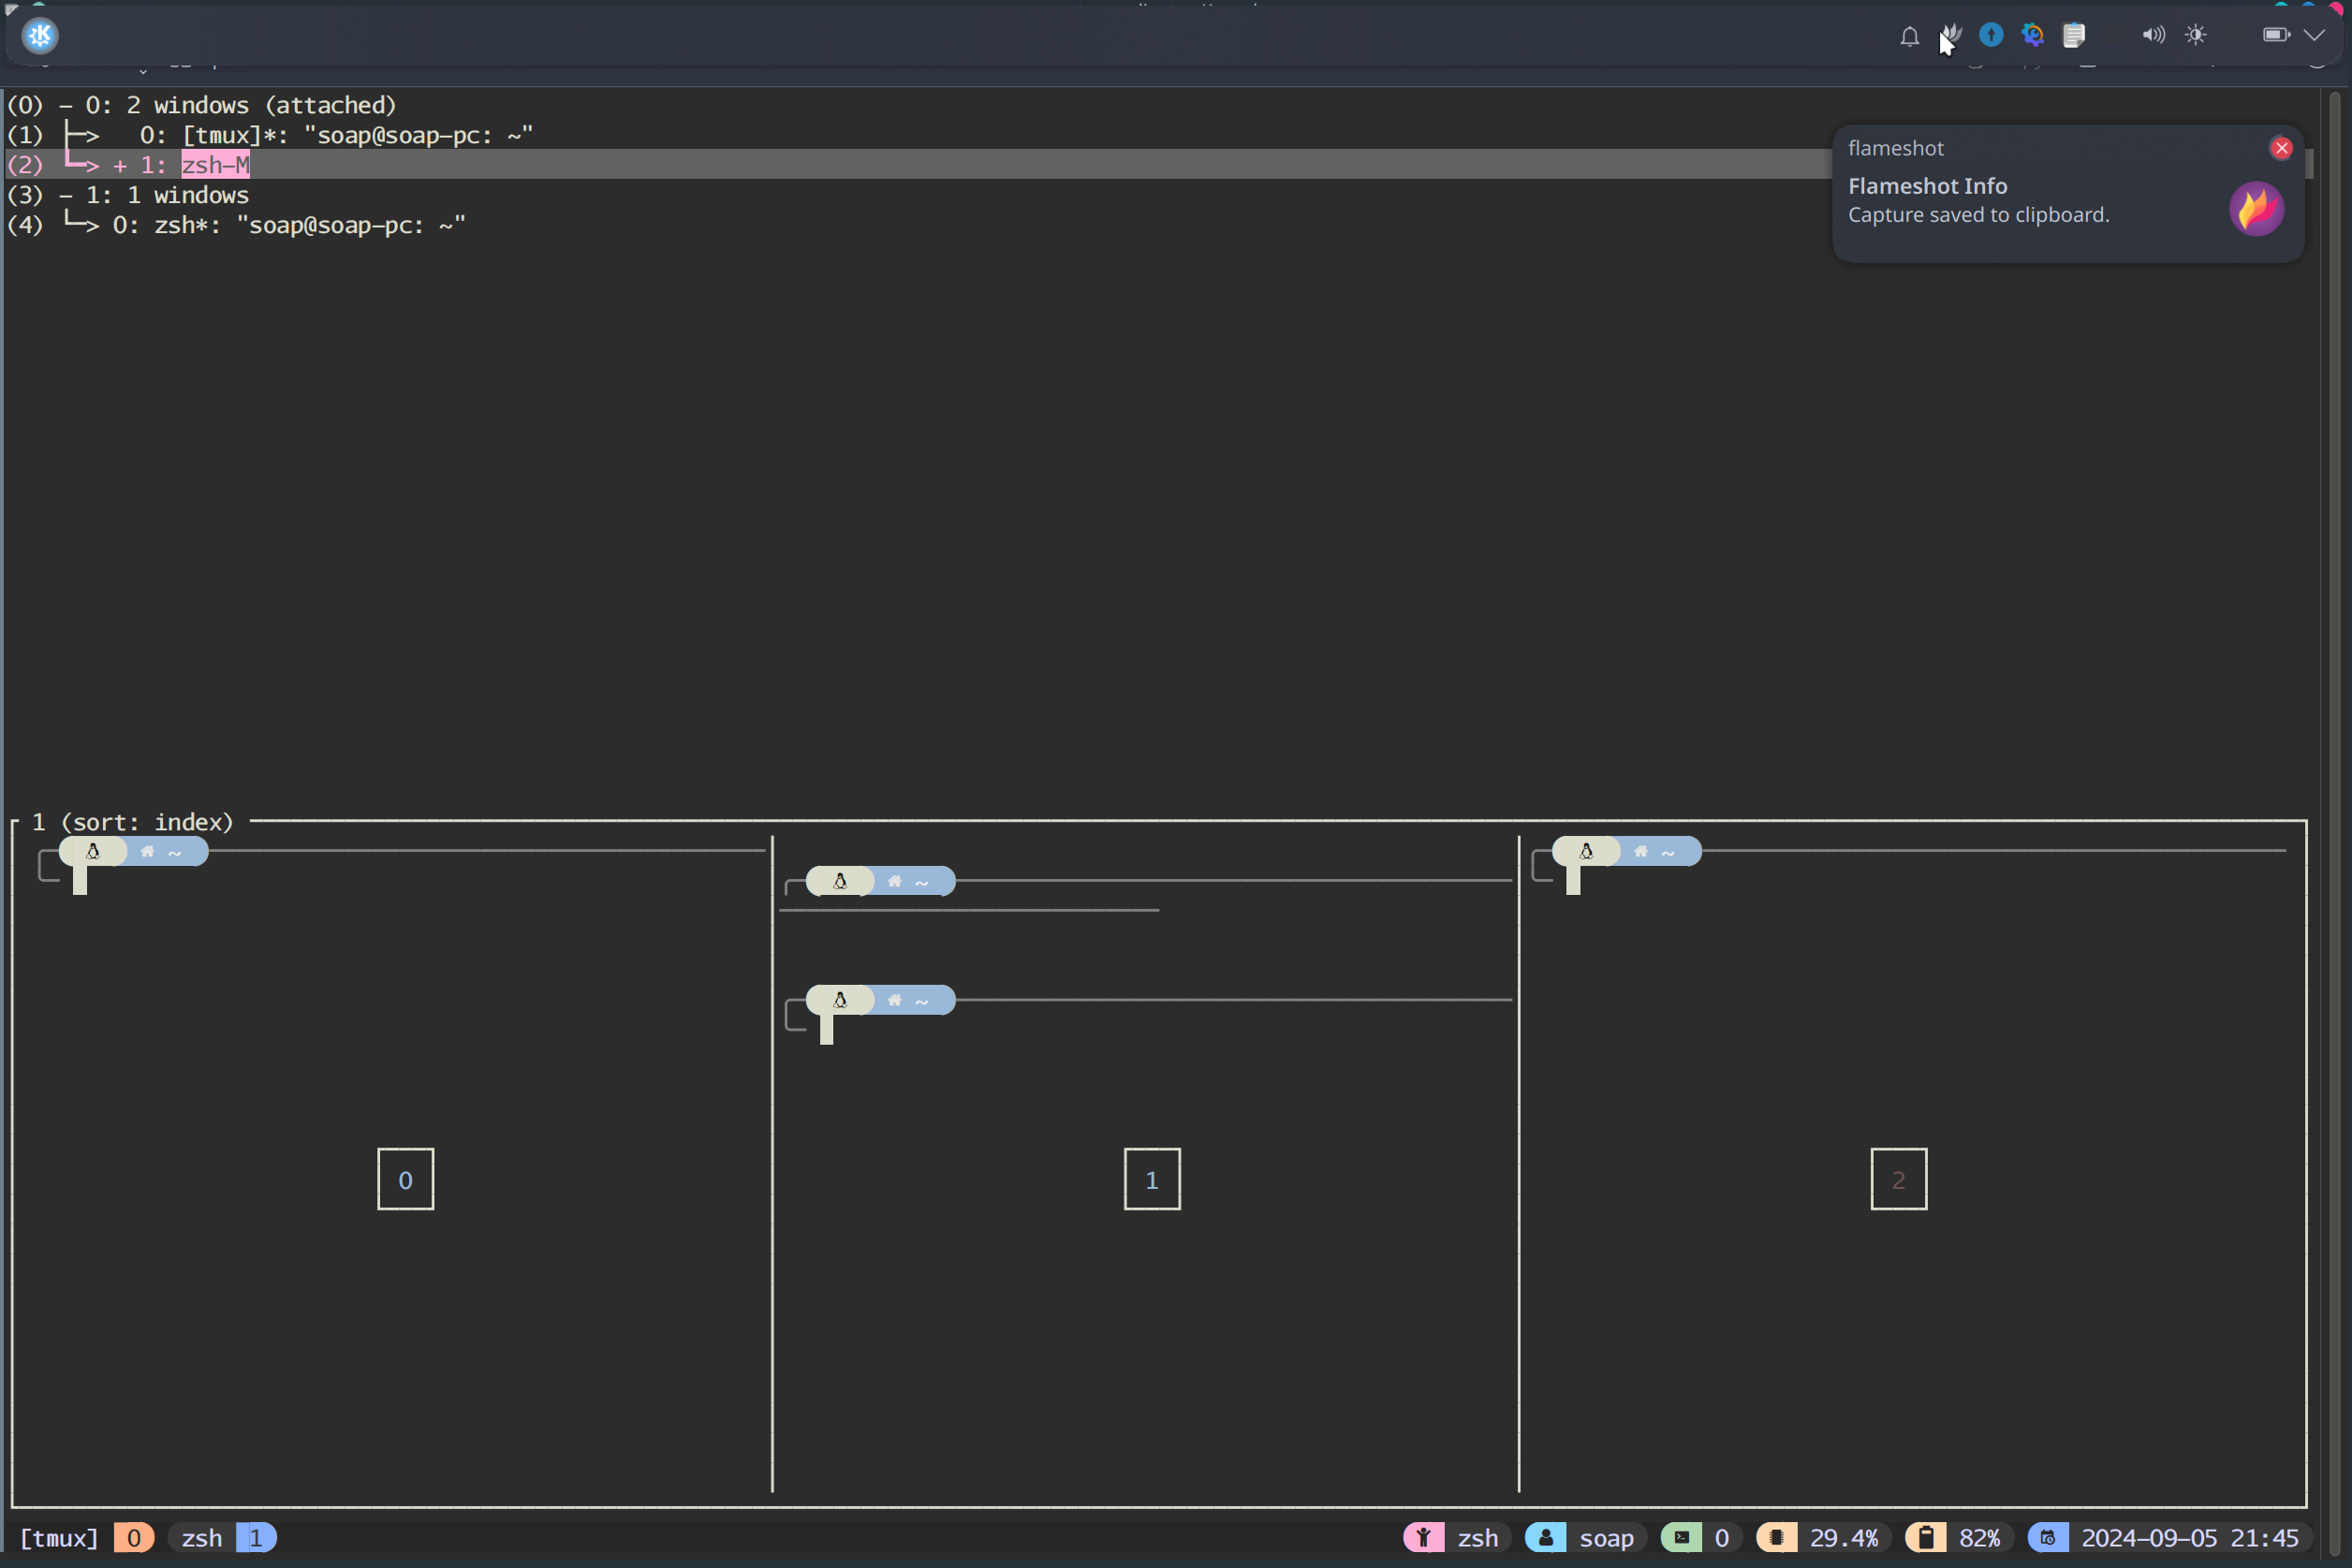
如上图所示,该图有两个 session , session 中管理着 window
从概念上来讲, pane < window < session
同时,我常用的 tmux 命令有如下:
$> tmux #开启一个 session
$> tmux ls #查看有多少个 session
$> tmux attach -t{$number} #连接序号为 number 的session
$> tmux kill-server #删除session
在 tmux 的 client 中,大部分的命令基于前缀键 prefix key 系统默认为 <C-b> 也就是 Ctrl + b,我常用的 client 命令如下表所示
| 快捷键 | 功能描述 |
|---|---|
| C-b C-z | 退出当前 session |
| C-b % | 当前 window 下垂直分屏 |
| C-b " | 当前 window 下水平分屏 |
| C-b number | 选择 window |
| C-b c | 创建新窗口 |
| C-b x | 删除当前 pane |
| C-b q number | 选择 pane |
| C-b arrow | 选择 pane |
| C-b ? | 查看 keymap |
| C-b [ | 进入复制模式 |
tmux 配置速查
在使用 tmux 的时候往往需要自行做相关配置,相关配置文件位于 ~/.tmux.conf 要让当前配置生效需敲入 tmux source ~/.tmux.conf ,依据这个文件可以做一些个性化的配置.相关的配置项在官方文档中有体现,我并没有做过多的配置,只配置了一个 vi 移动模式的配置
$> echo set -g mod-keys vi > ~/.tmux.conf
$> tmux source ~/.tmux.conf
通过配置移动模式为 vi 可以在选择文本界面以 vi 模式进行移动
tmux 个性配置
tmux 个性配置于我个人而言就是使用一些插件来优化我的 tmux 使用体验,我的 tmux 插件来源于 tmux-plugin list,我的 ~/.tmux.conf 文件如下图所示
set -g mode-keys vi # 进入复制模式的时候使用 vi 键位(默认是 EMACS)
# List of plugins
set -g @plugin 'tmux-plugins/tpm'
set -g @plugin 'tmux-plugins/tmux-sensible'
set -g @plugin 'tmux-plugins/tmux-yank'
set -g @treemux-tree-nvim-init-file '~/.tmux/plugins/treemux/configs/treemux_init.lua'
set -g @plugin 'kiyoon/treemux'
# tmux-window-name
set -g @plugin 'ofirgall/tmux-window-name'
set -g @tmux_window_name_shells "['bash', 'fish', 'sh', 'zsh']"
set -g @tmux_window_dir_programs "['nvim', 'vim', 'vi', 'git']"
set -g @tmux_window_name_ignored_programs "['sqlite3']" # Default is []
set -g @tmux_window_name_max_name_len "20"
set -g @tmux_window_name_use_tilde "False"
set -g @tmux_window_name_show_program_args "True"
# tmux-resurrect
set -g @plugin 'tmux-plugins/tmux-resurrect'
# tmux-jump
set -g @plugin 'schasse/tmux-jump'
# theme
set -g @plugin 'catppuccin/tmux#latest'
set -g @plugin 'tmux-plugins/tmux-battery'
set -g @plugin 'tmux-plugins/tmux-cpu'
set -g @catppuccin_window_left_separator ""
set -g @catppuccin_window_right_separator "+"
set -g @catppuccin_window_middle_separator " █"
set -g @catppuccin_window_number_position "right"
set -g @catppuccin_window_default_fill "number"
set -g @catppuccin_window_default_text "#W"
set -g @catppuccin_window_current_fill "number"
set -g @catppuccin_window_current_text "#W"
set -g @catppuccin_status_modules_right "application user session cpu battery date_time"
set -g @catppuccin_status_left_separator " "
set -g @catppuccin_status_right_separator ""
set -g @catppuccin_status_fill "icon"
set -g @catppuccin_status_connect_separator "no"
set -g @catppuccin_directory_text "#{pane_current_path}"
run '~/.tmux/plugins/tpm/tpm'
在编写完上述的文件后,执行以下命令
$> git clone https://github.com/tmux-plugins/tpm ~/.tmux/plugins/tpm
$> python3 -m pip install --user libtmux
$> tmux source ~/.tmux.conf
在 tmux 会话中按下 <C-b> I,即可下载相关的插件.至此 tmux 配置完成

 浙公网安备 33010602011771号