sonarQube 工具安装教程
本来看网上教程挺简单的,跟着步骤开始了sonarQube学习之旅。(记录下我安装的整个过程,详细记录)
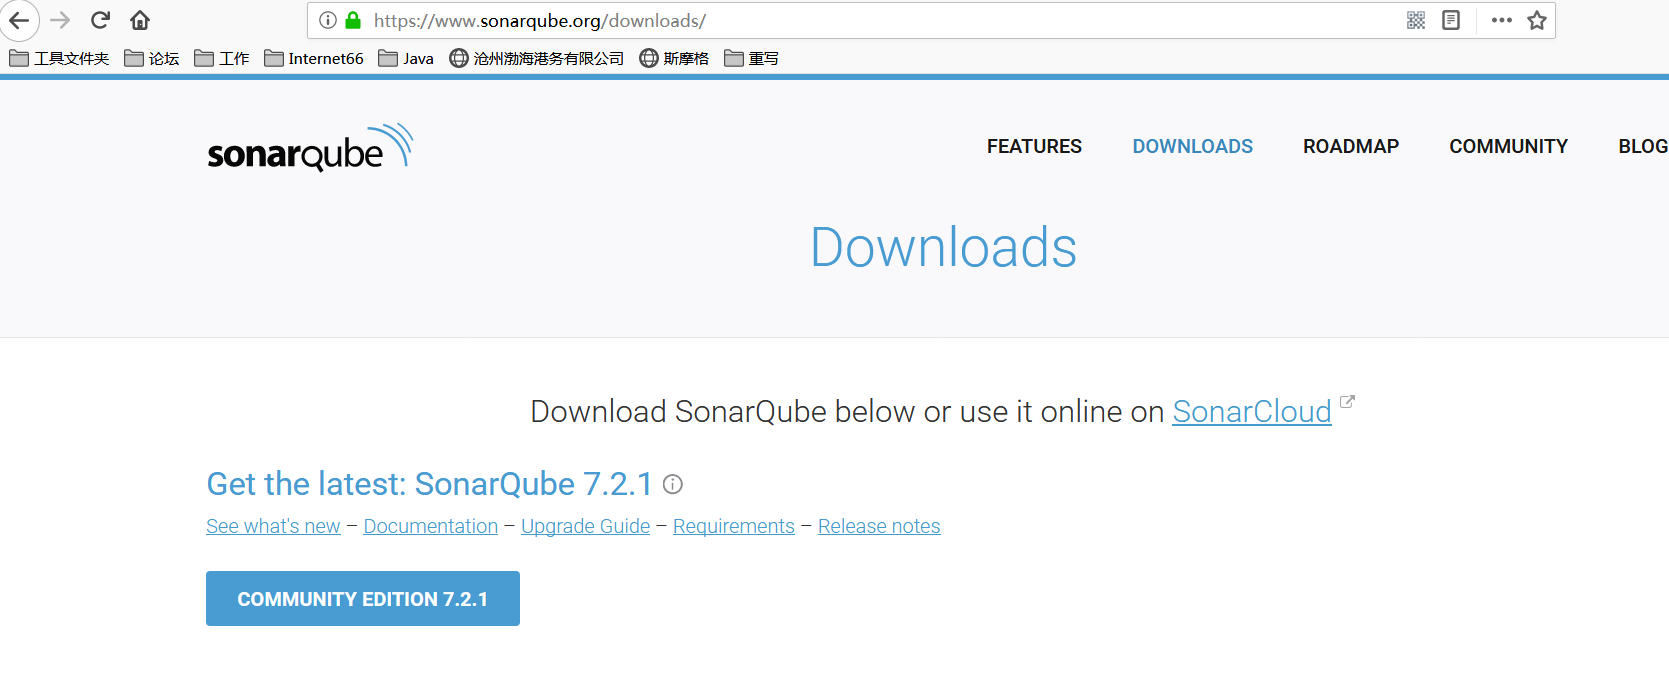
1.第一步先下载,别人的教程都会标注上自己的安装的版本号,对我没用,我就下载最新的。目前官网的版本如下:
还有一个插件sonar-scanner 这个我直接在csdn上下载的2.5版本的,导致出现这个问题
Exception in thread "main" java.lang.NoClassDefFoundError: org/sonar/batch/bootstrapper/IssueListener
后来没办法又去官网折腾了一个最新的,一定要注意版本号一定要对应,不同的版本号后边用到的命令也不一样
sonar-scanner3.2.....目前官网最新的是3.2

2.开始安装,下载压缩包都解压。
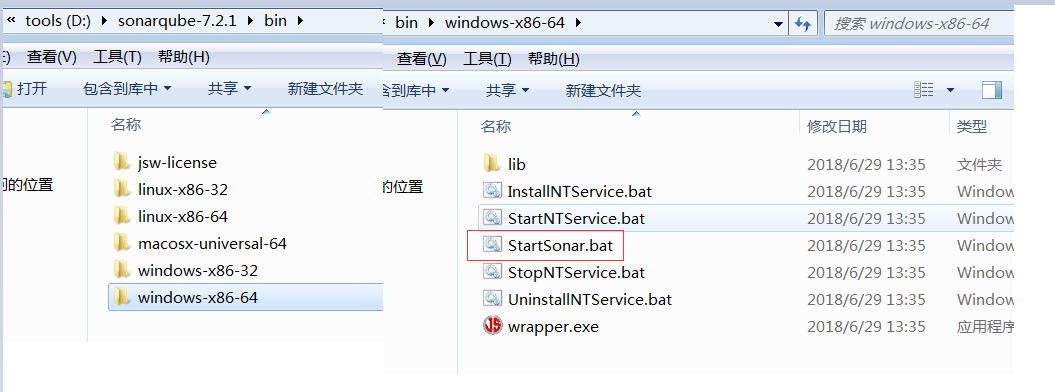
sonarqube-7.2.1解压后 在bin文件夹下选择对应系统文件夹,找到StartSonar.bat 运行
访问地址:localhost:9000 这样就可以看到登陆页面 用户名密码都是:admin
接下来需要相关完成配置:
sonarqube-7.2.1 --> conf -->sonar.properties 里边找到Mysql 的连接 配置如下(注意标明了mysql的版本号范围 我的是mysql5.7.13):
#----- DEPRECATED
#----- MySQL >=5.6 && <8.0
# Support of MySQL is dropped in Data Center Editions and deprecated in all other editions
# Only InnoDB storage engine is supported (not myISAM).
# Only the bundled driver is supported. It can not be changed.
sonar.jdbc.url=jdbc:mysql://localhost:3306/mysonar?useUnicode=true&characterEncoding=utf8&rewriteBatchedStatements=true&useConfigs=maxPerformance
sonar.jdbc.username=mysonar
sonar.jdbc.password=mysonar
sonar.sorceEncoding=UTF-8
sonar.login=admin
sonar.password=admin
配置里的数据库、用户名、密码提前配置好。
配置好之后重启sonarqube,我重启的方式:任务管理器结束掉java.exe所有的进程,重新点击StartSonar.bat 运行
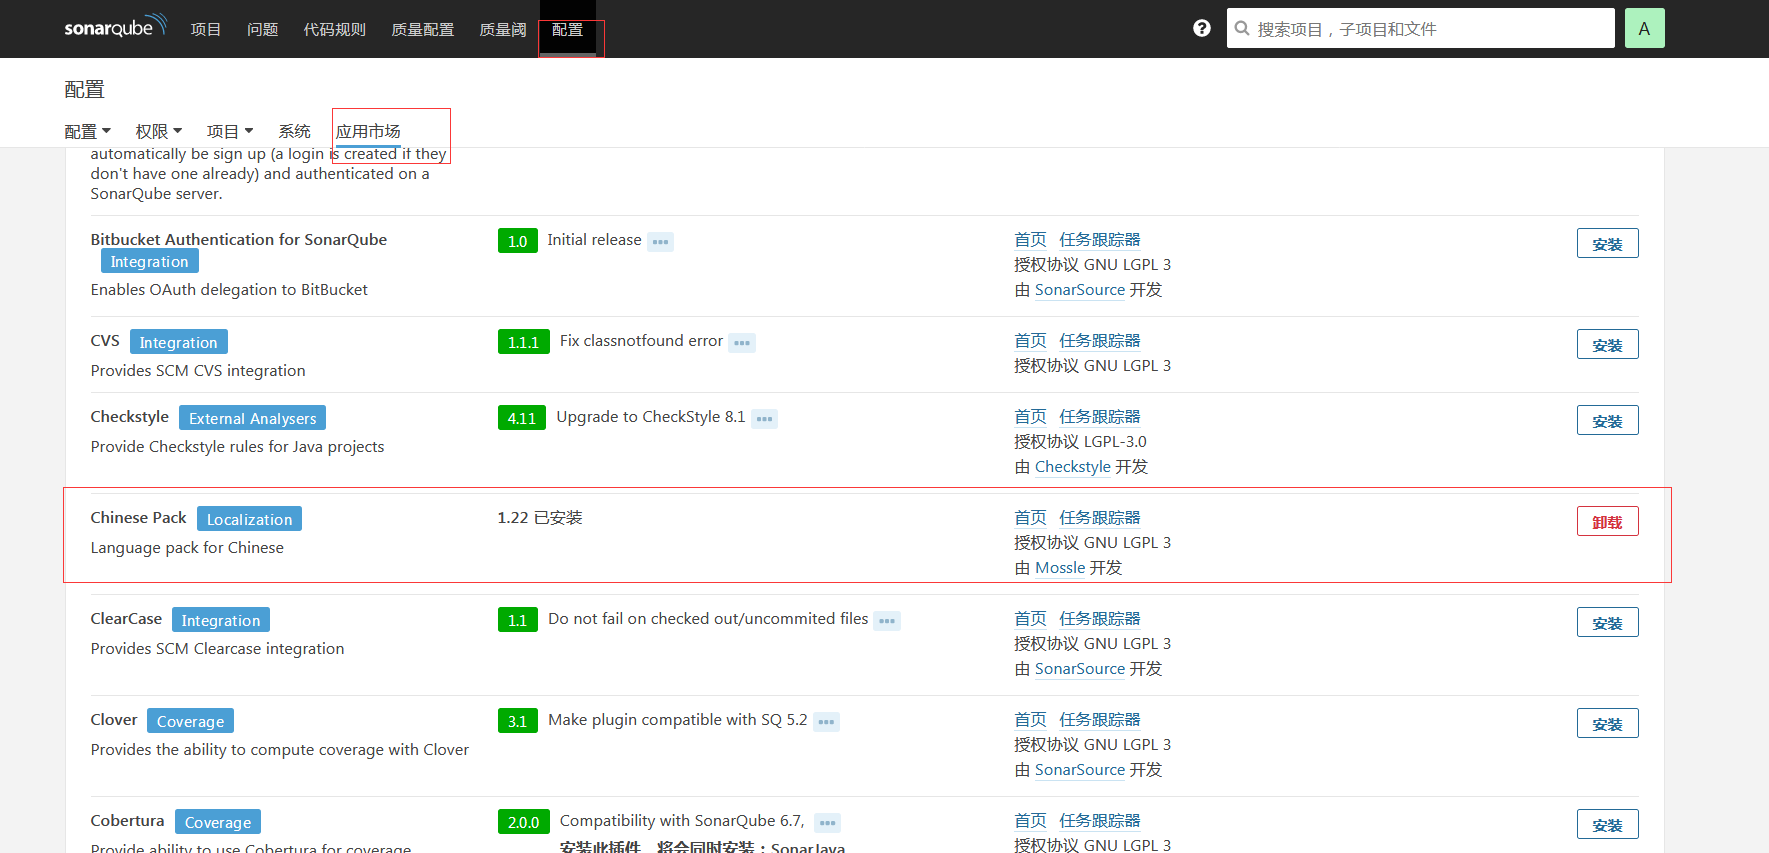
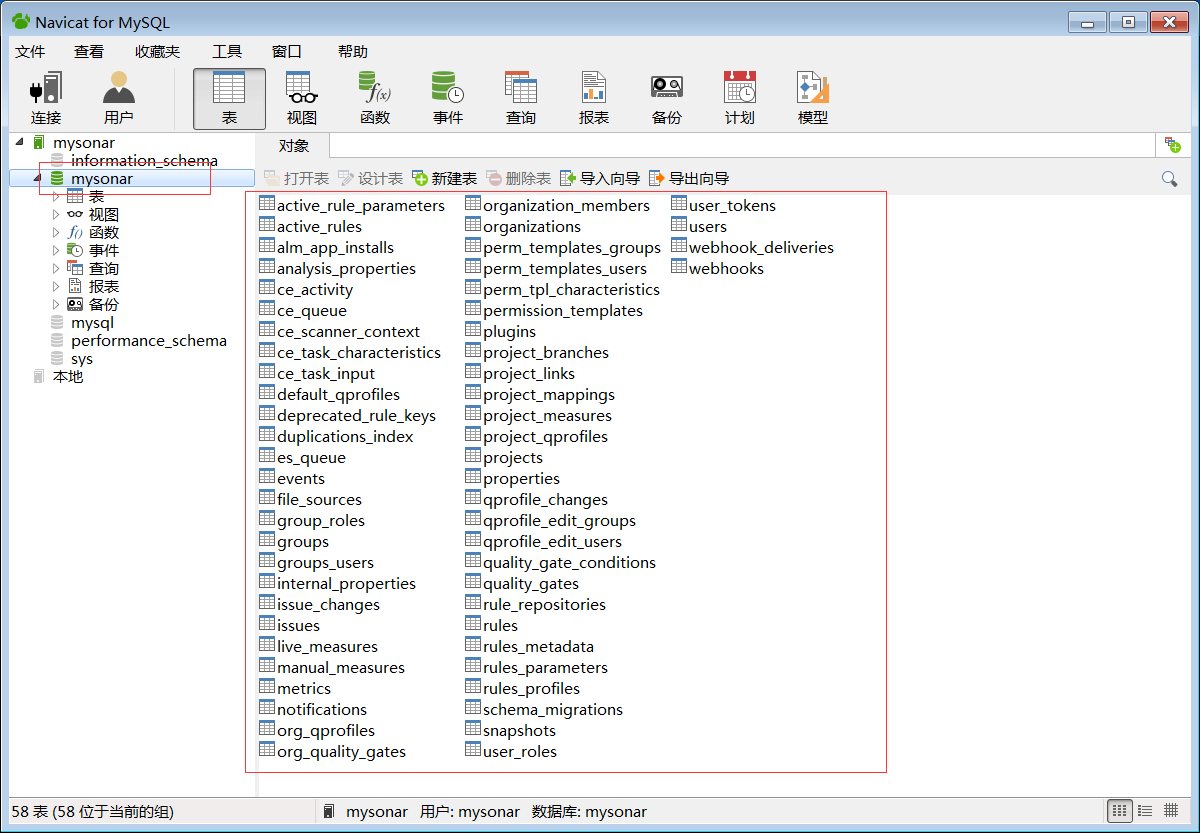
重启完登陆,查看数据库表信息初始化完成,在页面找到配置 下载中文包,我的汉化完成了,截图出来自行脑补。
到此sonarQube安装成功。
还需要装一个插件,就是sonar-scanner
sonar-scanner-3.2 --> conf -->sonar-scanner.properties 配置如下:
#Configure here general information about the environment, such as SonarQube server connection details for example
#No information about specific project should appear here
#----- Default SonarQube server
sonar.host.url=http://localhost:9000
#----- Default source code encoding
sonar.sourceEncoding=UTF-8
sonar.jdbc.url=jdbc:mysql://localhost:3306/mysonar?useUnicode=true&characterEncoding=utf8
sonar.jdbc.username=mysonar
sonar.jdbc.password=mysonar
新加环境变量:
变量名(N):SONAR_RUNNER_HOME
变量值(V):D:\sonar-scanner-3.2
Path 变量值追加:%SONAR_RUNNER_HOME%\bin;
CMD-->sonar-scanner -v
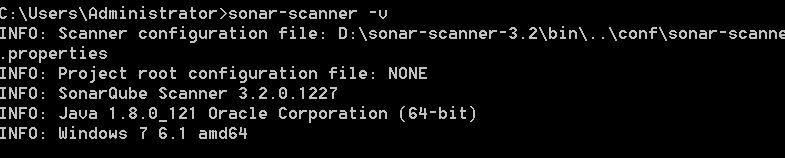
到这一步就算是安装成功了。
3.项目应用
在需要检测的项目根目录下新建一个文件sonar-project.properties 配置如下:
# must be unique in a given SonarQube instance
sonar.projectKey=my:project
# this is the name displayed in the SonarQube UI
sonar.projectName=helloworld
sonar.projectVersion=1.0

# Path is relative to the sonar-project.properties file. Replace "\" by "/" on Windows.
# Since SonarQube 4.2, this property is optional if sonar.modules is set.
# If not set, SonarQube starts looking for source code from the directory containing
# the sonar-project.properties file.
sonar.sources=src

# Encoding of the source code. Default is default system encoding
#sonar.sourceEncoding=UTF-8
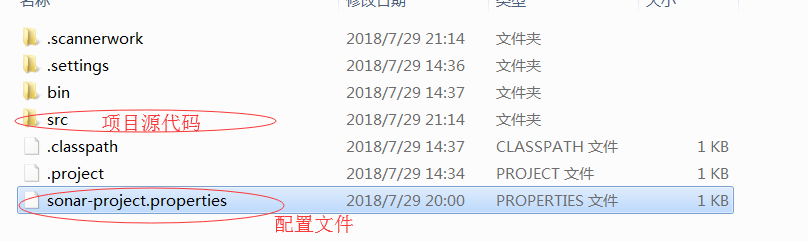
下面是我的测试项目 结构如下:
开始检测项目:
1.cmd 切换到项目根目录下,切记一定要到根目录下(我的配置必需到根目录下 source试着配路径 也是报错),命令 sonar-scanner
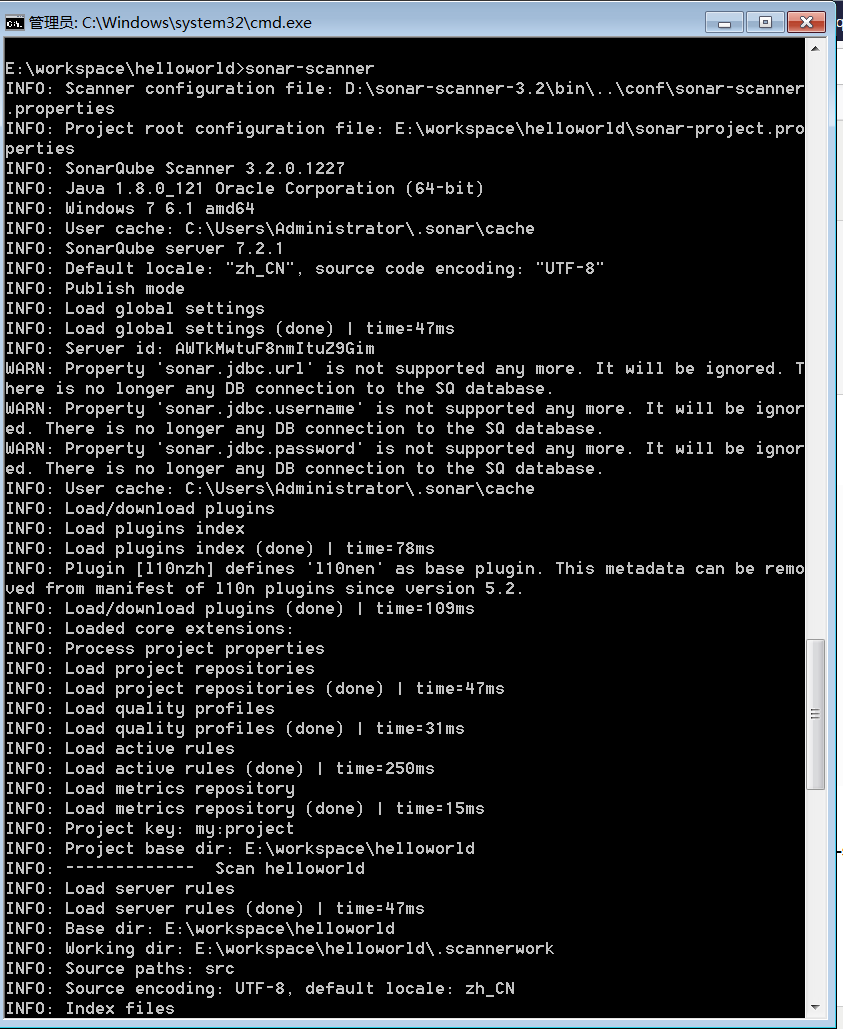
最后出现
INFO: Note that you will be able to access the updated dashboard once the server
has processed the submitted analysis report
INFO: More about the report processing at http://localhost:9000/api/ce/task?id=A
WTmLSrdOUwypWMOIuWl
INFO: Task total time: 2.901 s
INFO: ------------------------------------------------------------------------
INFO: EXECUTION SUCCESS
INFO: ------------------------------------------------------------------------
INFO: Total time: 4.056s
INFO: Final Memory: 23M/416M
INFO: ------------------------------------------------------------------------
就可以了。刷新项目如下:
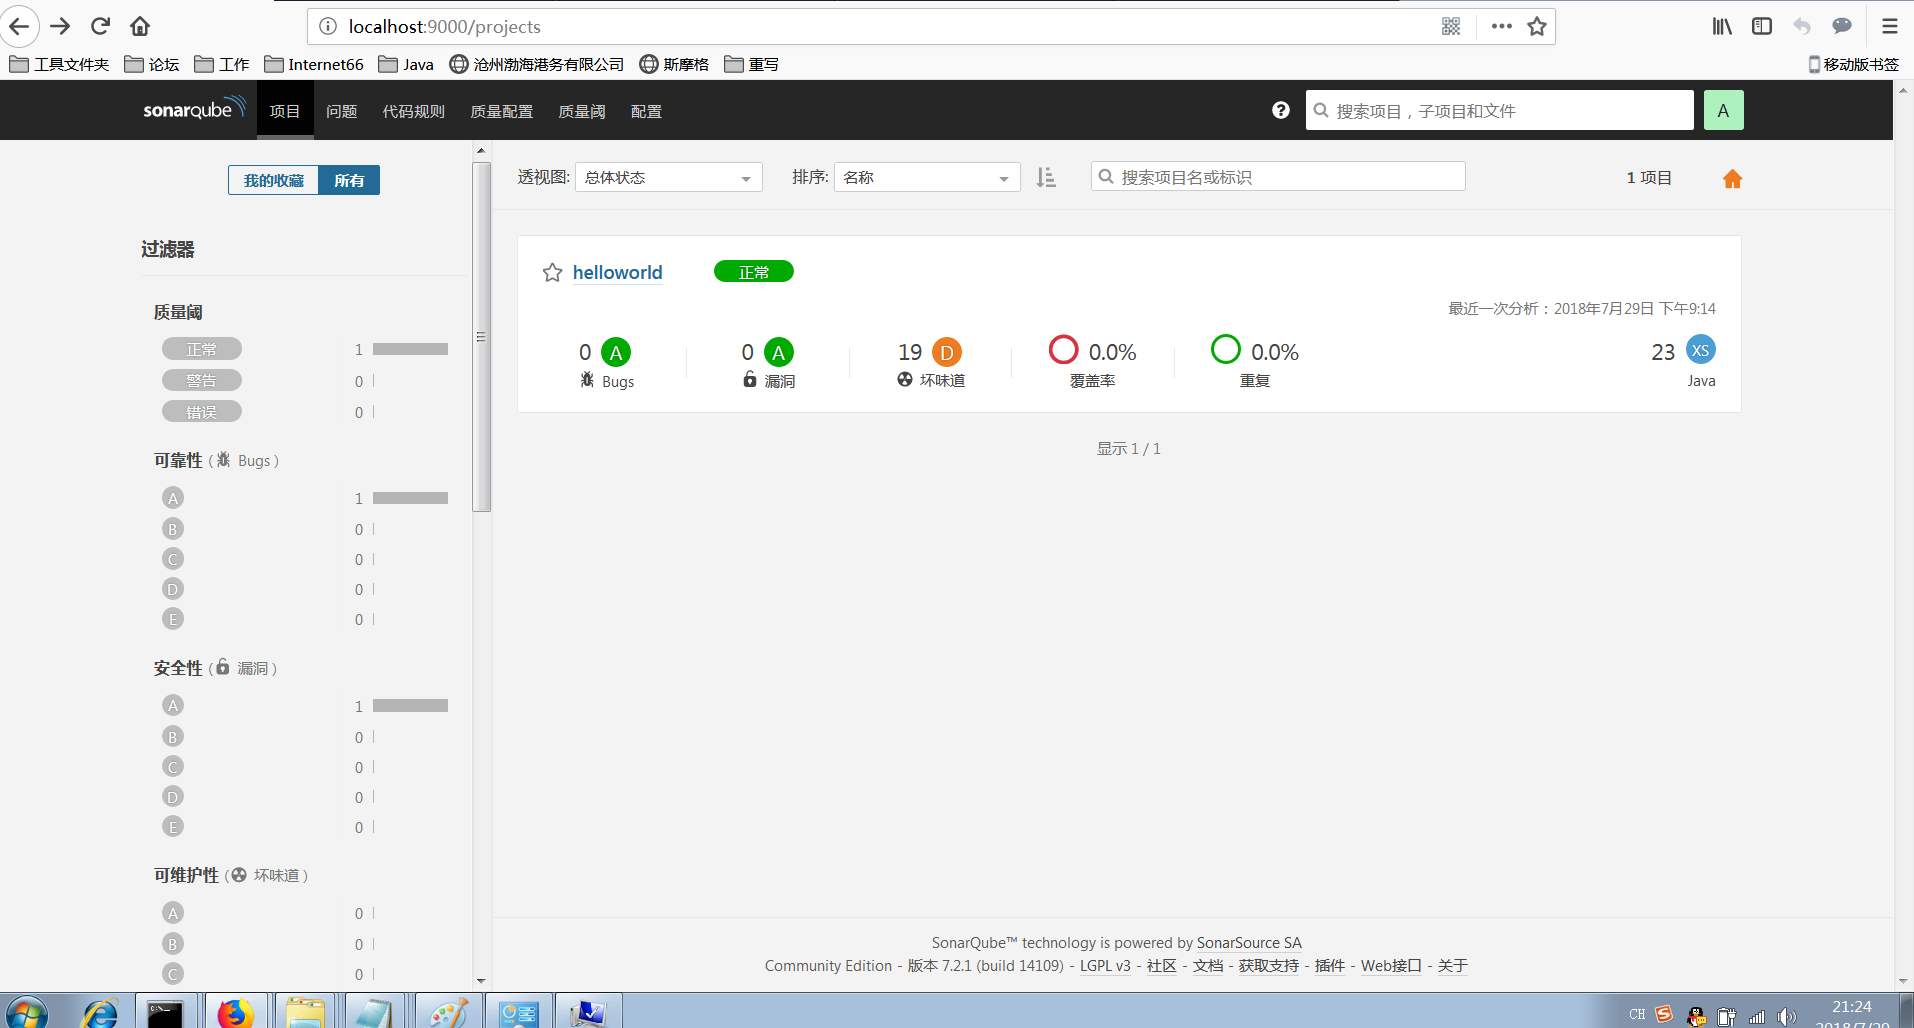
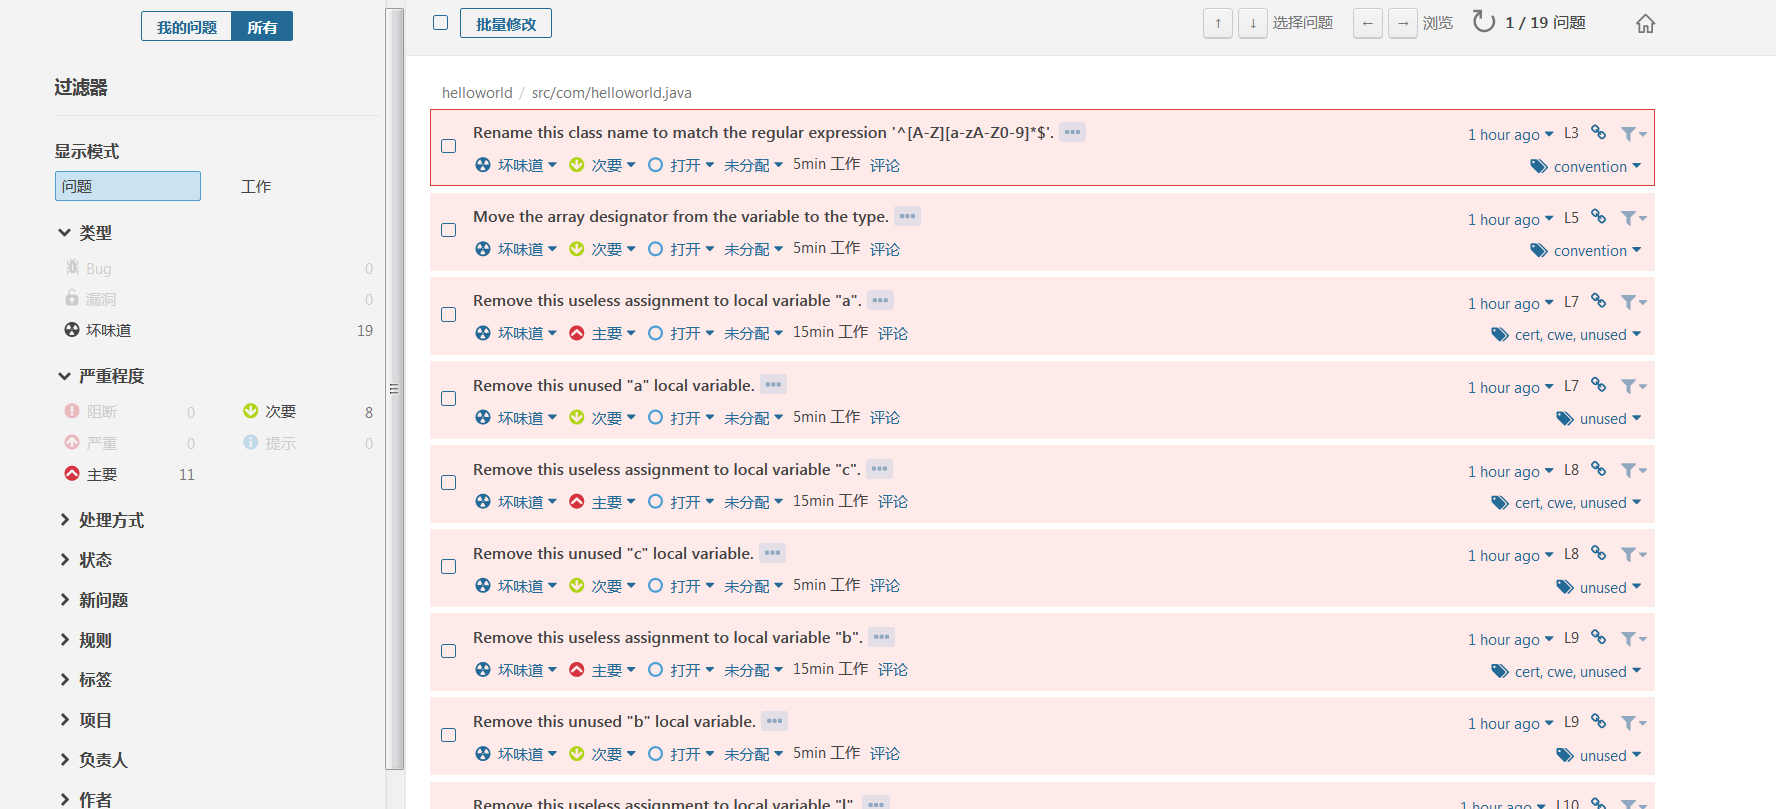
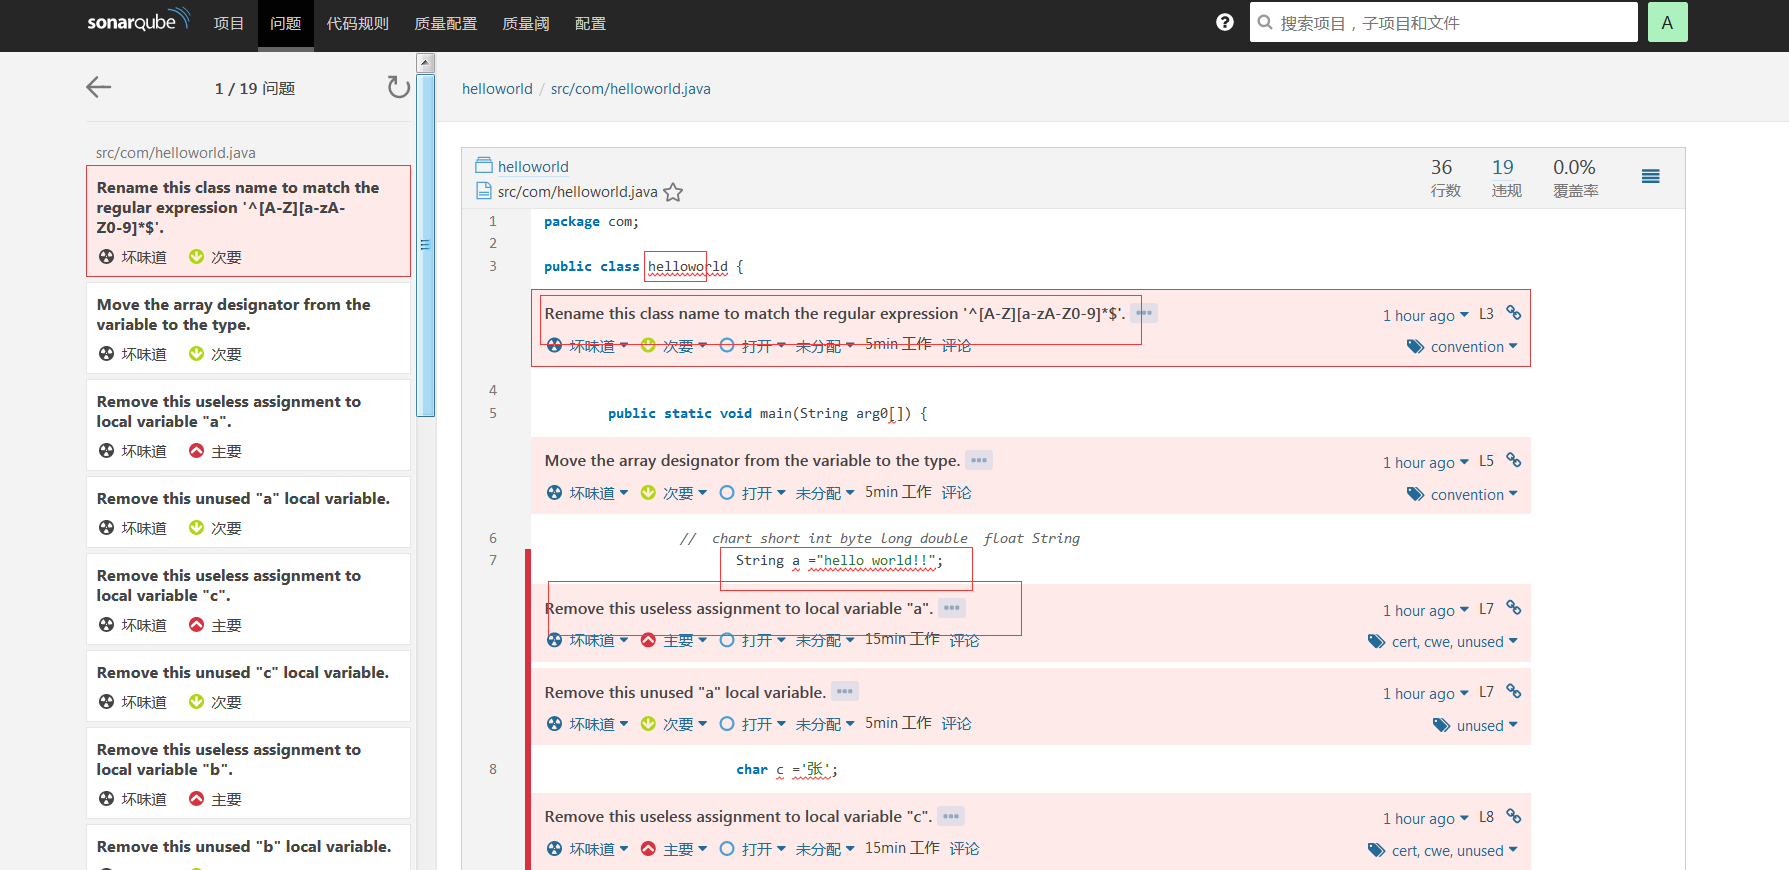
总结:真的是一个很酷的东西,最后一张图体现得很清楚,我的做的简单的例子,全是“坏味道” …………^_^捂脸

 浙公网安备 33010602011771号