

python爬虫进阶版练习(只说重点,selenium) - 指南
目录
爬虫练习-电影数据
要求获取电影信息:
- 名称
- 类型
- 所有演员
- 简介
代码
获取单个电影
import requests
from lxml import etree
# 地址
url = 'http://localhost:8000/playground/movies/2'
# 发送请求
resp = requests.get(url)
# 提取数据
e = etree.HTML(resp.text)
# 提取电影信息
# 名称
name = e.xpath('//h1/text()')
# 类型
_type = e.xpath('//div[@class="meta-item"][1]/span/text()')
# 演员
actors = e.xpath('//div[@class="actor-name"]/text()')
# 简介
intro = e.xpath('//p/text()')
print(name)
print(_type)
print(actors)
print(intro)获取电影列表
import requests
from lxml import etree
url = 'http://localhost:8000/playground/7'
resp = requests.get(url)
e = etree.HTML(resp.text)
# 提取数据
# 获取电影的id
ids = e.xpath('//div[@class="movie-item"]/@data-movie-id')
for id in ids:
# 拼写每部个电影的url
movie_url = f'http://localhost:8000/playground/movies/{id}'
movie_resp = requests.get(movie_url)
# 进入了电影详情页
et = etree.HTML(movie_resp.text)
# 提取电影信息
# 名称
name = et.xpath('//h1/text()')
# 类型
_type = et.xpath('//div[@class="meta-item"][1]/span/text()')
# 演员
actors = et.xpath('//div[@class="actor-name"]/text()')
# 简介
intro = et.xpath('//p/text()')
print(f'名称:{name[0]} 类型:{_type[0]} 演员:{actors} 简介:{intro[0]}')获取分页数据:
- 获取总页码数量,生成所需要遍历的页码
- 获取下一页按钮,需要判断是否结束
import requests
from lxml import etree
def range_page():
for i in range(1,43):
url = f'http://localhost:8000/playground/7?page={i}'
# 获取每一页的电影列表数据
get_page(url)
def get_page(url):
resp = requests.get(url)
e = etree.HTML(resp.text)
# 提取数据
# 获取电影的id
ids = e.xpath('//div[@class="movie-item"]/@data-movie-id')
# 遍历电影id
for id in ids:
# 依次获取每部电影
get_movie(id)
def get_movie(id):
# 拼写每部个电影的url
movie_url = f'http://localhost:8000/playground/movies/{id}'
movie_resp = requests.get(movie_url)
# 进入了电影详情页
et = etree.HTML(movie_resp.text)
# 提取电影信息
# 名称
name = et.xpath('//h1/text()')
# 类型
_type = et.xpath('//div[@class="meta-item"][1]/span/text()')
# 演员
actors = et.xpath('//div[@class="actor-name"]/text()')
# 简介
intro = et.xpath('//p/text()')
print(f'名称:{name[0]} 类型:{_type[0]} 演员:{actors} 简介:{intro[0]}')
if __name__ == '__main__':
range_page()import requests
from lxml import etree
def start():
url = 'http://localhost:8000/playground/7?page=41'
while True:
resp = requests.get(url)
print(f'获取页面数据:{url}')
e = etree.HTML(resp.text)
# 获取电影的id
ids = e.xpath('//div[@class="movie-item"]/@data-movie-id')
# 遍历电影id
for id in ids:
# 依次获取每部电影
get_movie(id)
# pass
# 获取下一页地址
next_page = e.xpath('//div[@class="pagination"]/a[last()-1]/@href')[0]
url = f'http://localhost:8000/playground/7{next_page}'
# 获取下一页按钮的内容
next_btn = e.xpath('//div[@class="pagination"]/a[last()-1]/text()')[0]
if next_btn != '下一页':
break
def get_movie(id):
# 拼写每部个电影的url
movie_url = f'http://localhost:8000/playground/movies/{id}'
movie_resp = requests.get(movie_url)
# 进入了电影详情页
et = etree.HTML(movie_resp.text)
# 提取电影信息
# 名称
name = et.xpath('//h1/text()')
# 类型
_type = et.xpath('//div[@class="meta-item"][1]/span/text()')
# 演员
actors = et.xpath('//div[@class="actor-name"]/text()')
# 简介
intro = et.xpath('//p/text()')
print(f'名称:{name[0]} 类型:{_type[0]} 演员:{actors} 简介:{intro[0]}')
if __name__ == '__main__':
start()批量数据的获取

面对动态加载的数据获取,判断程序的结束条件
有没有总页数
如果没有,判断有没有总条数
- 总条数/每页个数
如果还没有,就自己手动测试结束的条件
- 到最后一页,不再响应数据
- 到最后一页,响应的数据是重复
import requests
for i in range(1,12):
# 获取数据地址
url = f'http://localhost:8000/api/movies?page={i}&movie_type=&movie_time='
# url = f'http://localhost:8000/api/movies?page=12&movie_type=&movie_time='
# 发送请求
resp = requests.get(url)
# 获取数据,转成json格式
data = resp.json()
# 获取数据长度
print(len(data.get('items')))
print(data.get('items'))
# 面对动态加载的数据获取,判断程序的结束条件
# 1. 有不有总页数
# 2. 如果没有,判断有没有总条数 总条数/每页个数
# 3. 如果还没有,就自己手动测试结束的条件
# 3.1 到最后一页,不再响应数据
# 3.2 到最后一页,响应的数据是重复多线程-爬虫练习
方法版
from threading import Thread
from queue import Queue
import requests
import re
def spider():
  # 只要是队列不为空就一直循环
  while not url_list.empty():
    # 获取数据
    url = url_list.get(timeout=1)
    page = re.findall('page=(\d+)',url)
    resp = requests.get(url)
    data = resp.json()
    print(f"第{page}页数据的总数为:{len(data.get('items'))}")
if __name__ == '__main__':
  # 创建队列
  url_list = Queue()
  # 添加数据
  for i in range(1,12):
    url = f'http://localhost:8000/api/movies?page={i}&movie_type=&movie_time='
    url_list.put(url)
  for i in range(3):
    # 创建线程
    t = Thread(target=spider)
    # 开启线程
    t.start()
类版
from threading import Thread
from queue import Queue
import requests
import re
class MyThread(Thread):
  def run(self):
      # 只要是队列不为空就一直循环
    while not url_list.empty():
      # 获取数据
      url = url_list.get(timeout=1)
      page = re.findall('page=(\d+)',url)
      resp = requests.get(url)
      data = resp.json()
      print(f"第{page}页数据的总数为:{len(data.get('items'))}")
if __name__ == '__main__':
  # 创建队列
  url_list = Queue()
  # 添加数据
  for i in range(1,12):
    url = f'http://localhost:8000/api/movies?page={i}&movie_type=&movie_time='
    url_list.put(url)
  for i in range(3):
    # 创建线程
    t = MyThread()
    # 开启线程
    t.start()
爬虫之多进程-了解

multiprocessing是python的多进程管理包,和threading.Thread类似
multiprocessing模块
multiprocessing模块可以让程序员在给定的机器上充分的利用CPU
在multiprocessing中,通过创建Process对象生成进程,然后调用它的start()方法
from multiprocessing import Process
def func(name):
  print('hello', name)
if __name__ == "__main__":
  p = Process(target=func,args=('sxt',))
  p.start()
  p.join() # 等待进程执行完毕
Manager类,实现数据共享
在使用并发设计的时候最好尽可能的避免共享数据,尤其是在使用多进程的时候。 如果你真有需要 要共享数据,可以使用由Manager()返回的manager提供list, dict, Namespace, Lock, RLock, Semaphore, BoundedSemaphore, Condition, Event, Barrier, Queue, Value and Array类型的支持
from multiprocessing import Process,Manager,Lock
def print_num(info_queue,l,lo):
  with lo:
    for n in l:
      info_queue.put(n)
def updata_num(info_queue,lo):
  with lo:
    while not info_queue.empty():
      print(info_queue.get())
if __name__ == '__main__':
    manager = Manager()
    into_html = manager.Queue()
    lock = Lock()
    a = [1, 2, 3, 4, 5]
    b = [11, 12, 13, 14, 15]
    p1 = Process(target=print_num,args=(into_html,a,lock))
    p1.start()
    p2 = Process(target=print_num,args=(into_html,b,lock))
    p2.start()
    p3 = Process(target=updata_num,args=(into_html,lock))
    p3.start()
    p1.join()
    p2.join()
    p3.join()
from multiprocessing import Process
from multiprocessing import Manager
import time
from fake_useragent import UserAgent
import requests
from time import sleep
def spider(url_queue):
while not url_queue.empty():
try:
url = url_queue.get(timeout = 1)
# headers = {'User-Agent':UserAgent().chrome}
print(url)
# resp = requests.get(url,headers = headers)
# 处理响应结果
# for d in resp.json().get('data'):
# print(f'tid:{d.get("tid")} topic:{d.get("topicName")} content:{d.get("content")}')
sleep(1)
# if resp.status_code == 200:
# print(f'成功获取第{i}页数据')
except Exception as e:
print(e)
if __name__ == '__main__':
url_queue = Manager().Queue()
for i in range(1,11):
url = f'https://www.hupu.com/home/v1/news?pageNo={i}&pageSize=50'
url_queue.put(url)
all_process = []
for i in range(3):
p1 = Process(target=spider,args=(url_queue,))
p1.start()
all_process.append(p1)
[p.join() for p in all_process]from multiprocessing import Process
from multiprocessing import Manager
import time
from fake_useragent import UserAgent
import requests
from time import sleep
def spider(url_queue):
while not url_queue.empty():
try:
url = url_queue.get(timeout = 1)
# headers = {'User-Agent':UserAgent().chrome}
print(url)
# resp = requests.get(url,headers = headers)
# 处理响应结果
# for d in resp.json().get('data'):
# print(f'tid:{d.get("tid")} topic:{d.get("topicName")} content:{d.get("content")}')
sleep(1)
# if resp.status_code == 200:
# print(f'成功获取第{i}页数据')
except Exception as e:
print(e)
if __name__ == '__main__':
url_queue = Manager().Queue()
for i in range(1,11):
url = f'https://www.hupu.com/home/v1/news?pageNo={i}&pageSize=50'
url_queue.put(url)
all_process = []
for i in range(3):
p1 = Process(target=spider,args=(url_queue,))
p1.start()
all_process.append(p1)
[p.join() for p in all_process]进程池的使用
进程池内部维护一个进程序列,当使用时,则去进程池中获取一个进程,如果进程池序列中没有可供使用的进进程,那么程序就会等待,直到进程池中有可用进程为止。
进程池中有两个方法:
apply同步执行-串行
apply_async异步执行-并行
from multiprocessing import Pool,Manager
def print_num(info_queue,l):
  for n in l:
    info_queue.put(n)
def updata_num(info_queue):
  while not info_queue.empty():
    print(info_queue.get())
if __name__ == '__main__':
  html_queue =Manager().Queue()
  a=[11,12,13,14,15]
  b=[1,2,3,4,5]
  pool = Pool(3)
  pool.apply_async(func=print_num,args=(html_queue,a))
  pool.apply_async(func=print_num,args=(html_queue,b))
  pool.apply_async(func=updata_num,args=(html_queue,))
  pool.close() #这里join一定是在close之后,且必须要加join,否则主进程不等待创建的子进程执行完毕
  pool.join() # 进程池中进程执行完毕后再关闭,如果注释,那么程序直接关闭
from multiprocessing import Pool,Manager
from time import sleep
def spider(url_queue):
while not url_queue.empty():
try:
url = url_queue.get(timeout = 1)
print(url)
sleep(1)
except Exception as e:
print(e)
if __name__ == '__main__':
url_queue = Manager().Queue()
for i in range(1,11):
url = f'https://www.hupu.com/home/v1/news?pageNo={i}&pageSize=50'
url_queue.put(url)
pool = Pool(3)
pool.apply_async(func=spider,args=(url_queue,))
pool.apply_async(func=spider,args=(url_queue,))
pool.apply_async(func=spider,args=(url_queue,))
pool.close()
pool.join()多进程-爬虫练习

方法版
from multiprocessing import Manager,Process
import requests
import re
def spider(url_list):
  while not url_list.empty():
    url = url_list.get()
    # 发送请求
    resp = requests.get(url)
    page = re.findall('page=(\d+)',url)
    # 提取数据
    data = resp.json()
    print(f"第{page}页数据的总数为:{len(data.get('items'))}")
if __name__ == '__main__':
  url_list = Manager().Queue()
  for i in range(1,11):
    url = f'http://localhost:8000/api/movies?page={i}&movie_type=&movie_time='
    url_list.put(url)
  # 创建一个进程列表
  all_process = []
  for i in range(3):
    # 创建进程
    p = Process(target=spider,args=(url_list,))
    # 开启进程
    p.start()
    # 将进程添加到列表中
    all_process.append(p)
  # for p in all_process:
  #   # 等待进程运行结束
  #   p.join()
   [p.join() for p in all_process]
  '''
   主进程默认不会等待子进程运行结束后,才结束。
   因此需要阻塞主主进程,等待子进程运行结束
   p.join()
   '''
爬虫之协程

网络爬虫速度效率慢,多部分在于阻塞IO这块(网络/磁盘)。在阻塞时,CPU的中内核是可以处理别的非IO操作。因此可以考虑使用协程来提升爬虫效率,这种操作的技术就是协程
协程一种轻量级线程,拥有自己的寄存器上下文和栈,本质是一个进程
相对于多进程,无需线程上下文切换的开销,无需原子操作锁定及同步的开销
简单的说就是让阻塞的子程序让出CPU给可以执行的子程序
一个进程包含多个线程,一个线程可以包含多个协程
多个线程相对独立,线程的切换受系统控制。 多个协程也相对独立,但是其切换由程序自己控制
安装
pip install aiohttp==3.11.6官网https://docs.aiohttp.org/en/stable/
常用方法
| 属性或方法 | 功能 |
|---|---|
| aiohttp.ClientSession() | 获取客户端函数 |
| session.get(url) | 发送get请求 |
| seesion.post(url) | 发送post请求 |
| resp.status | 获取响应状态码 |
| resp.url | 获取响应url地址 |
| resp.cookies | 获取响应cookie内容 |
| resp.headers | 获取响应头信息 |
| resp.read() | 获取响应bytes类型 |
| resp.text() | 获取响应文本内容 |
代码
import aiohttp
import asyncio
async def first():
  async with aiohttp.ClientSession() as session: #  aiohttp.ClientSession() == import requests 模块
    async with session.get('http://httpbin.org/get') as resp:
      rs = await resp.text()
      print(rs)
headers = {'User-Agent':'aaaaaa123'}
async def test_header():
  async with aiohttp.ClientSession(headers= headers) as session: #  aiohttp.ClientSession() == import requests 模块
    async with session.get('http://httpbin.org/get') as resp:
      rs = await resp.text()
      print(rs)
async def test_params():
  async with aiohttp.ClientSession(headers= headers) as session: #  aiohttp.ClientSession() == import requests 模块
    async with session.get('http://httpbin.org/get',params={'name':'bjsxt'}) as resp:
      rs = await resp.text()
      print(rs)
async def test_cookie():
  async with aiohttp.ClientSession(headers= headers,cookies={'token':'sxt123id'}) as session: #  aiohttp.ClientSession() == import requests 模块
    async with session.get('http://httpbin.org/get',params={'name':'bjsxt'}) as resp:
      rs = await resp.text()
      print(rs)
async def test_proxy():
  async with aiohttp.ClientSession(headers= headers,cookies={'token':'sxt123id'}) as session: #  aiohttp.ClientSession() == import requests 模块
    async with session.get('http://httpbin.org/get',params={'name':'bjsxt'},proxy = 'http://name:pwd@ip:port' ) as resp:
      rs = await resp.text()
      print(rs)
if __name__ == '__main__':
  loop = asyncio.get_event_loop()
  loop.run_until_complete(test_cookie())
协程-爬虫练习
代码
import re
import aiohttp
import asyncio
async def spider(url,session):
async with session.get(url) as resp:
data = await resp.json()
page = re.findall('page=(\d+)',url)
print(f"第{page}页数据的总数为:{len(data.get('items'))}")
async def main():
url_list = [f'http://localhost:8000/api/movies?page={i}&movie_type=&movie_time=' for i in range(1,11)]
# 创建一个session,用于所有请求
async with aiohttp.ClientSession() as session:
# 创建所有的任务
tasks = [spider(url,session) for url in url_list]
# 并发执行所有任务
await asyncio.gather(*tasks)
if __name__ == '__main__':
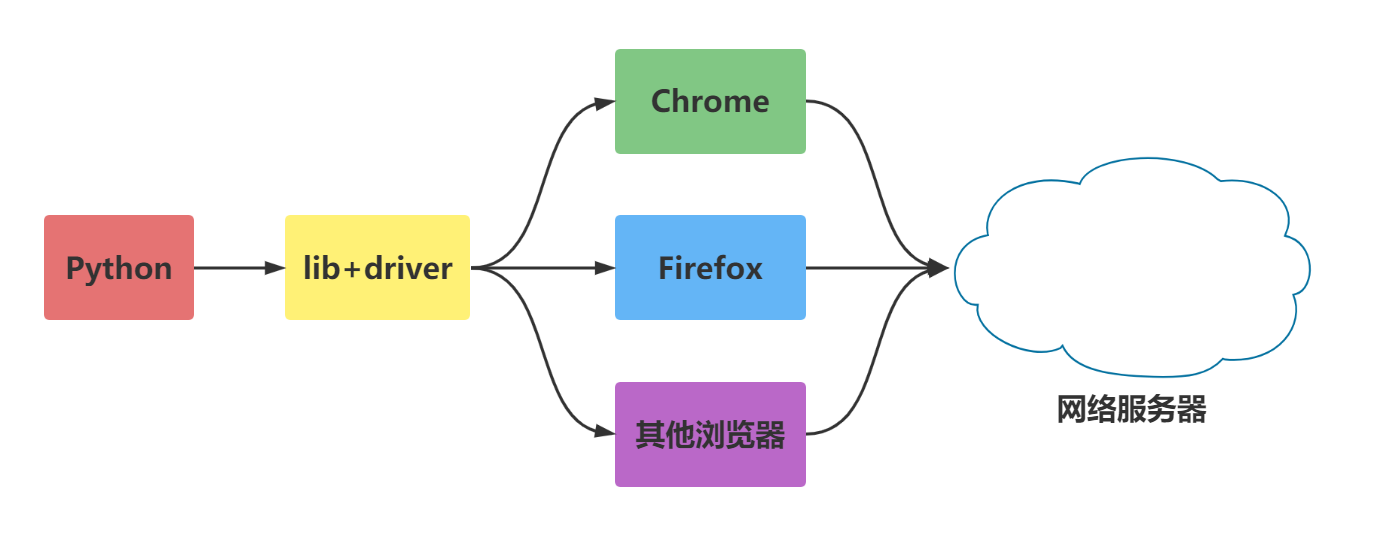
asyncio.run(main())selenium介绍与安装

Selenium是一个Web的自动化测试工具,最初是为网站自动化测试而开发的,类型像我们玩游戏用的按键精灵,可以按指定的命令自动操作,不同是Selenium 可以直接运行在浏览器上,它支持所有主流的浏览器。
Selenium 可以根据我们的指令,让浏览器自动加载页面,获取需要的数据,甚至页面截屏,或者判断网站上某些动作是否发生。
Selenium 自己不带浏览器,不支持浏览器的功能,它需要与第三方浏览器结合在一起才能使用。
Selenium 官方参考文档:http://selenium-python.readthedocs.io/index.html
安装
pip install selenium==4.26.1注意
selenium操作浏览器需要驱动(driver)
selenium版本是4.6.0以上,会自动下载
selenium版本是4.6.0以前,需要手动下载
测试代码
# pip install selenium
from selenium import webdriver
# 创建一个浏览器
chrome = webdriver.Edge()
# 发送请求
chrome.get('http://localhost:8000/')
# 获取HTML
page = chrome.page_source
# 打印
print(page)
# 关闭浏览器
chrome.quit()
selenium 控制浏览器
最大化窗口
我们知道调用启动的浏览器不是全屏的,这样不会影响脚本的执行,但是有时候会影响我们“观看”脚本的执行。
browser = webdriver.Chrome()
url= 'http://localhost:8000/'
browser.get(url)
borwser.maximize_window()
设置宽与高
最大化还是不够灵活,能不能随意的设置浏览的宽、高显示?当然是可以的。
browser = webdriver.Chrome()
url= 'http://localhost:8000/'
browser.get(url)
borwser.set_window_size(500,600)
浏览器前进、后退
浏览器上有一个后退、前进按钮,对于浏览网页的人是比较方便的;对于做web自动化测试的同学来说应该算是一个比较难模拟的问题
其实很简单,下面看看python的实现方式
browser = webdriver.Chrome()
first_url= 'http://localhost:8000/'
browser.get(first_url)
time.sleep(2)
second_url='http://localhost:8000/playground'
browser.get(second_url)
time.sleep(2)
browser.back()
time.sleep(1)
browser.forward()
time.sleep(2)
browser.quit()
selenium元素定位

对象的定位应该是自动化的核心,要想操作一个对象,首先应该识别这个对象。 一个对象就是一个人一样,他会有各种的特征(属性),如比我们可以通过一个人的身份证号,姓名,或者他住在哪个街道、楼层、门牌找到这个人。
对象定位
webdriver提供了对象定位方法
find_element(type,value)
find_elements(type,value)
利用 By 类来确定哪种选择方式
from selenium.webdriver.common.by import By
chrome.find_element(by=By.ID,value='su')
By 类的一些属性如下
ID = "id"
NAME = "name"
XPATH = "xpath"
LINK_TEXT = "link text"
PARTIAL_LINK_TEXT = "partial link text"
TAG_NAME = "tag name"
CLASS_NAME = "class name"
CSS_SELECTOR = "css selector"
操作元素
前面讲到了不少知识都是定位元素,定位只是第一步,定位之后需要对这个原素进行操作。
鼠标点击呢还是键盘输入,这要取决于我们定位的是按钮还输入框。
一般来说,webdriver中比较常用的操作对象的方法有下面几个
click 点击对象
send_keys 在对象上模拟按键输入
clear 清除对象的内容,如果可以的话
from selenium import webdriver
from selenium.webdriver.common.by import By
# 打开一个浏览器
browser = webdriver.Chrome()
# 访问链接
browser.get('http://localhost:8000/playground/4')
# 获取内容-表单上面的
p = browser.find_element(By.XPATH,'//p')
print(p.text)
# p2 = browser.find_element_by_id('//p')  # 旧版本的selenium有,新的没有
# 获取用户名输入框
user_input = browser.find_element(By.ID,'name')
# 在输入框输入内容
user_input.send_keys('鸣人')
# 获取出处输入框
book_input = browser.find_element(By.ID,'book')
book_input.send_keys('火影')
# 获取提交按钮
submit_btn = browser.find_element(By.XPATH,'//form/button')
# 点击提交按钮
submit_btn.click()
# 关闭浏览器
browser.quit()
selenium 处理下拉框

在爬取数据时,有时数据太多,而官网提供了筛选功能select标签,像这样的数据,我们只需要定位元素,点击即可
from selenium import webdriver
from selenium.webdriver.common.by import By
from time import sleep
def test_select():
  driver = webdriver.Chrome()
  driver.get('http://localhost:8000/playground/11')
  # 获取第一个菜单按钮并点击
  driver.find_element(By.XPATH,'//select[@id="MovieTime"]/option[@value="28"]').click()
  sleep(1)
  driver.find_element(By.XPATH,'//select[@id="SeatType"]/option[@value="25"]').click()
  total = driver.find_element(By.XPATH,'//div[@class="result-info"][3]/span[@class="price-tag"]')
  print(total.text)
  # 关闭浏览器
  driver.quit()
if __name__ == '__main__':
  test_select()
selenium定位下拉菜单

选中元素
from selenium import webdriver
from selenium.webdriver.common.by import By
from time import sleep
def test_dropdowns():
  driver = webdriver.Chrome()
  driver.get('http://localhost:8000/playground/10')
  sleep(1)
  driver.find_element(By.ID,'dropdownMenu1').click()
  sleep(1)
  action2 = driver.find_element(By.ID,'action2')
  print(f'点击{action2.text}按钮')
  action2.click()
  sleep(6)
  driver.quit()
if __name__ == '__main__':
  test_dropdowns()
selenium 层级定位

窗口的定位
对于一个现代的web应用,经常会出现框架(frame) 或窗口(window)的应用,这也就给我们的定位带来了一个难题。
有时候我们定位一个元素,定位器没有问题,但一直定位不了,这时候就要检查这个元素是否在一个frame中,seelnium webdriver 提供了一个switch_to_frame方法,可以很轻松的来解决这个问题
多层框架或窗口的定位:
driver.switch_to.frame()
switch_to_frame()
from selenium import webdriver
from selenium.webdriver.common.by import By
def select_frame():
  # 创建浏览器
  driver = webdriver.Chrome()
  # 打开网页
  driver.get('http://localhost:8000/playground/12')
  # 切换iframe
  driver.switch_to.frame('f1')
  # 定位元素
  div = driver.find_element(By.CLASS_NAME, 'stat-number')
  print(div.text)
  driver.quit()
if __name__ =='__main__':
  select_frame()
selenium处理弹窗

有时,页面可能要弹窗口。只需要去定位弹窗上的“确定”按钮即可
switch_to
焦点集中到页面上的一个警告(提示)
accept( )
确认弹出窗
dismiss( )
取消弹出窗
切换至弹窗
chrome.switch_to
代码
####
from time import sleep
from selenium import webdriver
from selenium.webdriver.common.by import By
def test_alert():
  # 创建一个浏览器
  driver = webdriver.Chrome()
  # 访问页面
  driver.get('http://localhost:8000/playground/13')
  sleep(2)
  # 处理弹窗
  alert = driver.switch_to.alert
  # 获取弹窗的内容
  print(f'页面加载弹窗内容为:{alert.text}')
  # 点击确定
  alert.accept()
  # 获取按钮
  btns = driver.find_elements(By.CLASS_NAME, 'popup-btn')
  # 点击第2个按钮
  btns[1].click()
  confirm = driver.switch_to.alert
  print(f'弹窗内容为:{confirm.text}')
  # 点击取消
  confirm.dismiss()
  # 点击第3个按钮 弹出输入框
  btns[2].click()
  prompt = driver.switch_to.alert
  print(f'输入框内容为:{prompt.text}')
  prompt.send_keys('hello')
  prompt.accept()
  # 点击第4个按钮 弹出模态框
  btns[3].click()
  # 获取模态框确认按钮
  btn = driver.find_element(By.XPATH,'//div[@id="customModal"]/div/button')
  btn.click()
  # 点击第6个按钮 弹出多个弹窗
  btns[5].click()
  # 消掉第1个弹窗
  driver.switch_to.alert.accept()
  # 消掉第2个弹窗
  driver.switch_to.alert.accept()
  # 在第3个窗口中输入内容
  driver.switch_to.alert.send_keys("你好")
  # 消掉第3个弹窗
  driver.switch_to.alert.accept()
  # 关闭浏览器
  driver.quit()
if __name__ == '__main__':
  test_alert()
selenium拖拽元素

要完成元素的拖拽,首先需要指定被拖动的元素和拖动目标元素,然后利用 ActionChains 类来实现,ActionChains用于定制动作。通过ActionChains对象中的perform()执行动作
代码
from time import sleep
from selenium import webdriver
from selenium.webdriver.common.by import By
def test_drop():
  # 创建一个浏览器
  driver = webdriver.Chrome()
  # 访问页面
  driver.get('http://localhost:8000/playground/14')
  # 获取元素
  draggable = driver.find_element(By.ID, 'draggable')
  draggable2 = driver.find_element(By.ID, 'draggable2')
  draggable3 = driver.find_element(By.ID, 'draggable3')
  # 拖拽元素-1次到位
  actions = webdriver.ActionChains(driver).drag_and_drop(draggable, draggable2)
  actions.perform()
  # 拖拽元素-慢慢拖动
  for i in range(10):
    webdriver.ActionChains(driver).drag_and_drop_by_offset(draggable3, 10,0).perform()
    sleep(0.5)
  sleep(2)
  driver.quit()
if __name__ == '__main__':
  test_drop()
selenium调用js方法

有时候我们需要控制页面滚动条上的滚动条,但滚动条并非页面上的元素,这个时候就需要借助js是来进行操作
一般用到操作滚动条的会两个场景:
要操作的页面元素不在当前页面范围,无法进行操作,需要拖动滚动条
注册时的法律条文需要阅读,判断用户是否阅读的标准是:滚动条是否拉到最下方
调用js的方法
execute_script(script, *args)JS代码功能
// 拉动滚动条
document.元素.scrollTop=高度
document.元素.scrollTo(宽度,高度)
window.scrollTo(宽度,高度)
// 获取页面高度
document.body.scrollHeight
// 获取元素高度
document.getElementById('scrollContent').scrollHeight
from selenium import webdriver
from selenium.webdriver.common.by import By
def test_js():
# 创建一个浏览器
driver = webdriver.Chrome()
# 访问地址
driver.get('http://localhost:8000/playground/15')
# 拉动正页面滚动条
js = 'document.documentElement.scrollTop=10000'
js2 = 'document.getElementById("scrollContent").scrollTop=100'
js3 ='window.scrollTo(0,1000)'
js4= '''
const bar = document.getElementById('progressBar');
let width = 0;
clearInterval(progressInterval);
progressInterval = setInterval(() => {
if (width >= 100) {
clearInterval(progressInterval);
updateStatus('进度完成');
return;
}
width++;
bar.style.width = width + '%';
updateStatus(`进度: ${width}%`);
}, 50);
'''
driver.execute_script(js2)
# 关闭浏览器
sleep(2)
driver.quit()
if __name__ == '__main__':
test_js()selenium 等待元素

网速慢
AJAX请求数据
调试
强制等待
使用 time.sleep
作用:当代码运行到强制等待这一行的时候,无论出于什么原因,都强制等待指定的时间,需要通过time模块实现
优点:简单
缺点:无法做有效的判断,会浪费时间
import time
from selenium import webdriver
from selenium.webdriver.common.by import By
def test_with_sleep():
  ''' 使用 sleep 进行测试 '''
  print("=== 使用 sleep 测试 ===")
  # 记录开始时间
  start_time = time.time()
  # 打开浏览器
  driver = webdriver.Chrome()
  # 访问页面
  driver.get("http://localhost:8000/playground/16")
  time.sleep(1)
  # 定位元素
  # 定位按钮
  btn = driver.find_element(By.ID, 'loadContentBtn')
  # 模拟点击
  btn.click()
  time.sleep(5)
  # 获取延迟加载的数据
  div = driver.find_element(By.ID, 'delayedContent')
  # 打印数据
  print(div.text)
  # 获取结束时间
  end_time = time.time()
  print(f'用时:{end_time - start_time}')
  # 关闭浏览器
  driver.quit()
if __name__ == '__main__':
  test_with_sleep()
隐式等待
chrome.implicitly_wait(time_num)
到了一定的时间发现元素还没有加载,则继续等待我们指定的时间,如果超过了我们指定的时间还没有加载就会抛出异常,如果没有需要等待的时候就已经加载完毕就会立即执行
优点: 设置一次即可
缺点:必须等待加载完成才能到后续的操作,或者等待超时才能进入后续的操作
注意:只能等待元素出现在 DOM 中
from selenium import webdriver
from selenium.webdriver.common.by import By
def test_with_implicit_wait1():
  ''' 使用隐式等待进行测试  这个案例不行,因为文档已经加载了,所以隐示不等'''
  print("=== 使用隐式等待测试 ===")
  # 打开浏览器
  driver = webdriver.Chrome()
  # 设置隐式等待时间
  driver.implicitly_wait(5)
  # 访问页面
  driver.get("http://localhost:8000/playground/16")
  # 定位按钮
  btn = driver.find_element(By.ID, "loadContentBtn")
  btn.click()
  # 获取延迟加载的数据
  div = driver.find_element(By.ID, 'delayedContent')
  # 打印数据
  print(div.text)
  # 关闭浏览器
  driver.quit()
def test_with_implicit_wait2():
  ''' 使用隐式等待进行测试 '''
  print("=== 使用隐式等待测试 ===")
  # 打开浏览器
  driver = webdriver.Chrome()
  # 设置隐式等待时间
  driver.implicitly_wait(10)
  # 访问页面
  driver.get("http://localhost:8000/playground/16")
  # 定位按钮
  btn = driver.find_element(By.ID, "gridBtn")
  btn.click()
  # 获取延迟加载的数据
  div = driver.find_element(By.XPATH, '//div[@class="grid-item visible"][5]')
  # 打印数据
  print(div.text)
  # 关闭浏览器
  driver.quit()
from time import sleep
def test_with_implicit_wait3():
  ''' 使用隐式等待进行测试 '''
  print("=== 使用隐式等待测试 ===")
  # 打开浏览器
  driver = webdriver.Chrome()
  # 设置隐式等待时间
  driver.implicitly_wait(10)
  # 访问页面
  driver.get("http://localhost:8000/playground/16")
  # 定位按钮
  btn = driver.find_element(By.ID, "loadElementsBtn")
  btn.click()
  # 获取延迟加载的数据
  div = driver.find_element(By.ID, 'element-3')
  sleep(0.2)
  # 打印数据
  print(div.text)
  # 关闭浏览器
  driver.quit()
if __name__ =='__main__':
  # test_with_implicit_wait1()
  # test_with_implicit_wait2()
  test_with_implicit_wait3()
显示等待
from selenium.webdriver.support.wait import WebDriverWait
指定一个等待条件,并且指定一个最长等待时间,会在这个时间内进行判断是否满足等待条件,如果成立就会立即返回,如果不成立,就会一直等待,直到等待你指定的最长等待时间,如果还是不满足,就会抛出异常,如果满足了就会正常返回
优点:专门用于对指定一个元素等待,加载完即可运行后续代码
缺点:多个元素都需要要单独设置等待
常见的等待条件
EC.presence_of_element_located() 元素存在
EC.visibility_of_element_located() 元素可见
EC.element_to_be_clickable() 元素可点击
EC.presence_of_all_elements_located() 所有元素存在
from selenium import webdriver
from selenium.webdriver.common.by import By
from selenium.webdriver.support.ui import WebDriverWait
from selenium.webdriver.support import expected_conditions as EC
def test_presence_of_element_located():
  ''' 使用 WebDriverWait 进行测试 '''
  print("=== 使用 WebDriverWait 测试 ===")
  # 打开浏览器
  driver = webdriver.Chrome()
  wait = WebDriverWait(driver, 10) # 设置显式等待时间为10秒
  # 访问页面
  driver.get("http://localhost:8000/playground/16")
  # 定位按钮
  btn = driver.find_element(By.ID, "loadContentBtn")
  btn.click()
  # 2. 等待延迟内容元素在DOM中存在
  div = wait.until(
    EC.presence_of_element_located((By.ID, "delayedContent"))
   )
  print(f"元素标签名: {div.tag_name}")
  print(f"元素文本: {div.text}")
def test_visibility_of_element_located():
  ''' 使用 WebDriverWait 进行测试 '''
  print("=== 使用 WebDriverWait 测试 ===")
  # 打开浏览器
  driver = webdriver.Chrome()
  wait = WebDriverWait(driver, 10) # 设置显式等待时间为10秒
  # 访问页面
  driver.get("http://localhost:8000/playground/16")
  # 定位按钮
  btn = driver.find_element(By.ID, "loadContentBtn")
  btn.click()
  # 2. 等待延迟内容元素在DOM中存在
  div = wait.until(
    EC.visibility_of_element_located((By.ID, "delayedContent"))
   )
  print(f"元素标签名: {div.tag_name}")
  print(f"元素文本: {div.text}")
def test_presence_of_all_elements_located1():
  """
   测试所有元素存在 - EC.presence_of_all_elements_located()
   这个条件用于等待多个元素都在DOM中出现
   """
  # 打开浏览器
  driver = webdriver.Chrome()
  wait = WebDriverWait(driver, 10) # 设置显式等待时间为10秒
  # 访问页面
  driver.get("http://localhost:8000/playground/16")
  # 1. 点击加载网格元素按钮
  grid_button = driver.find_element(By.ID, "gridBtn")
  grid_button.click()
  # 2. 等待所有网格元素加载完成
  grid_items = wait.until(
    EC.presence_of_all_elements_located((By.CLASS_NAME, "grid-item"))
   )
  print(f"加载的元素总数: {len(grid_items)}")
def test_presence_of_all_elements_located2():
  """
   测试所有元素存在 - EC.presence_of_all_elements_located()
   这个条件用于等待多个元素都在DOM中出现
   """
  # 打开浏览器
  driver = webdriver.Chrome()
  wait = WebDriverWait(driver, 10) # 设置显式等待时间为10秒
  # 访问页面
  driver.get("http://localhost:8000/playground/16")
  # 1. 点击加载网格元素按钮
  grid_button = driver.find_element(By.ID, "gridBtn")
  grid_button.click()
  # 2. 等待所有网格元素加载完成
  wait.until(element_loads)
  items = driver.find_elements(By.CLASS_NAME, "grid-item")
  print(f"加载的元素总数: {len(items)}")
def element_loads(driver):
  items = driver.find_elements(By.CLASS_NAME, "grid-item")
  return True if len(items) ==6 else False
if __name__ == "__main__":
  test_presence_of_element_located()
  # test_visibility_of_element_located()
  # test_presence_of_all_elements_located1()
  # test_presence_of_all_elements_located2()
selenium 参数使用

chrome59版本以后可以变成无头的浏览器,加以下参数
from selenium import webdriver
from selenium.webdriver.chrome.options import Options
from selenium.webdriver.common.by import By
def test_headless():
  """使用无头模式进行测试"""
  print("=== 使用无头模式测试 ===")
  # 创建参数对象
  options = Options()
  options.add_argument('--headless')
  # options.add_argument('--headless=new') # 需要 Chrome 109 或更高版本
  # 创建一个浏览器
  driver = webdriver.Chrome(options=options)
  # 访问页面
  driver.get('http://localhost:8000/playground/17')
  # 获取元素
  div = driver.find_element(By.TAG_NAME, 'h3')
  print(div.text)
  driver.quit()
代理模式
def test_proxy():
  """使用代理进行测试"""
  print("=== 使用代理测试 ===")
  options = Options()
  options.add_argument('--proxy-server=http://127.0.0.1:7890')
  driver = webdriver.Chrome(options=options)
  driver.get('http://localhost:8000/tool/request_content')
  proxy =driver.find_element(By.XPATH,'//div[@class="info-card"][1]/div[@class="data-row"][2]/div[@class="data-value"]')
  print(proxy.text)
  driver.quit()
防检测设置
def test_check():
  # 创建参数对象
  options = Options()
  # 禁用自动化控制检测
  options.add_argument('--disable-blink-features=AutomationControlled')
  # 禁用网页安全策略
  # options.add_argument('--disable-web-security')
  # 排除自动化开关
  # options.add_experimental_option('excludeSwitches', ['enable-automation'])
  # 禁用自动化扩展
  # options.add_experimental_option('useAutomationExtension', False)
  # 创建一个浏览器
  driver = webdriver.Chrome(options=options)
  driver.execute_cdp_cmd("Page.addScriptToEvaluateOnNewDocument", {
  "source": "Object.defineProperty(navigator, 'webdriver', {get: () => false})"
   })
  # 访问页面
  driver.get('http://localhost:8000/playground/17')
  # 获取有有没有自动化
  print(driver.execute_script("return window.navigator.webdriver"))
  driver.quit()
使用 window.navigator.webdriver 检测
Selenium 提升效率

提升效率方案
解析方面
参数设置
并发编程
解析提速
selenium本身提取数据,会比使用XPath、BS4、re这种提取方式要慢。因为每一个selenium的操作,都需要和浏览器通信
# 先用Selenium获取动态内容
driver.get(url)
# 然后用XPath解析,这样更快
e = etree.HTML(driver.page_source)
data = e.xpath('//div')
通过参数
开启无头
关闭图片
from selenium import webdriver
from selenium.webdriver.chrome.options import Options
chrome_options = Options()
chrome_options.add_argument('--headless') # 无头模式
chrome_options.add_argument('--disable-images') # 禁用图片
chrome_options.add_argument('--disable-javascript') # 如果不需要JS
driver = webdriver.Chrome(options=chrome_options)
并发编程
使用多进程
from multiprocessing import Pool
def scrape_url(url):
  driver = setup_driver() # 每个进程创建独立的driver
  # 爬取逻辑
  driver.quit()
if __name__ == '__main__':
  urls = ['url1', 'url2', 'url3']
  with Pool(processes=4) as pool:
    results = pool.map(scrape_url, urls)
使用协程
注意:
Selenium本身支持异步操作,但实现方式比较特殊。它使用了一种特殊的机制来模拟同步操作,但实际上在底层是异步执行的
在JavaScript中使用Selenium时,所有的WebDriver操作都会返回Promise,这使得可以使用async/await来处理异步操作
然而,这种异步机制并不是真正意义上的异步并发,如果需要真正的异步并发爬虫,建议使用:
Playwright
Pyppeteer
aiohttp
# 安装
pip install playwright==1.49.0
代码案例
import asyncio
from playwright.async_api import async_playwright
async def scrape_url(url):
  async with async_playwright() as p:
    browser = await p.chromium.launch()
    page = await browser.new_page()
    await page.goto(url)
    # 爬取逻辑
    await browser.close()
async def main():
  urls = ['url1', 'url2', 'url3']
  tasks = [scrape_url(url) for url in urls]
  await asyncio.gather(*tasks)
asyncio.run(main())

 浙公网安备 33010602011771号