基于Spring Boot 2.6.13搭建Spring Boot Admin的Client和Server端
前言
Spring Boot Admin是一个精简的Spring Boot应用集中管理监控组件,通过部署单独的Spring Boot Admin Server和嵌入应用中的Spring Boot Admin Client实现应用的纳管,下面是详细的Server端部署、Client端接入、基础的安全配置过程。
组件版本
| 组件 | 版本 |
|---|---|
| JDK | 11 |
| Spring Boot | 2.6.13 |
| Spring Boot Admin | 2.6.11 |
| Gradle | 7.5.1 |
部署Server端
Server端一般单独部署一个应用,下面是其build.gradle:
plugins {
    id 'org.springframework.boot' version '2.6.13'
    id 'io.spring.dependency-management' version '1.0.15.RELEASE'
    id 'java'
}

group = 'com.zhongpengcheng'
version = '0.0.1-SNAPSHOT'
sourceCompatibility = '11'

repositories {
    // 阿里云镜像
    maven { url "https://maven.aliyun.com/repository/public/" }
}

ext {
    set('springBootAdminVersion', "2.6.11")
}

dependencies {
    implementation 'org.springframework.boot:spring-boot-starter-security'
    implementation 'org.springframework.boot:spring-boot-starter-web'
    implementation 'de.codecentric:spring-boot-admin-starter-server'
}

dependencyManagement {
    imports {
        mavenBom "de.codecentric:spring-boot-admin-dependencies:${springBootAdminVersion}"
    }
}
Server端默认是不需要账号密码就能访问后台页面的:
引入Spring Security后可以简单配置一个BasicAuth,最终应用的配置application.yml如下:
server:
  port: 9080
spring:
  security:
    user:
      name: admin
      password: admin
接下来需要在应用入口加上@EnableAdminServer注解启用Spring Boot Admin Server:
@EnableAdminServer
@SpringBootApplication
public class SbaServerDemoApplication {

    public static void main(String[] args) {
        SpringApplication.run(SbaServerDemoApplication.class, args);
    }

}
最后是最重要的,配置一下Spring Security的一些行为,放行一些公共端口和静态资源:
@Configuration(proxyBeanMethods = false)
public class SecuritySecureConfig extends WebSecurityConfigurerAdapter {

    private final AdminServerProperties adminServer;

    private final SecurityProperties security;

    public SecuritySecureConfig(AdminServerProperties adminServer, SecurityProperties security) {
        this.adminServer = adminServer;
        this.security = security;
    }

    @Override
    protected void configure(HttpSecurity http) throws Exception {
        SavedRequestAwareAuthenticationSuccessHandler successHandler = new SavedRequestAwareAuthenticationSuccessHandler();
        successHandler.setTargetUrlParameter("redirectTo");
        successHandler.setDefaultTargetUrl(this.adminServer.path("/"));

        http.authorizeRequests(
                        (authorizeRequests) -> authorizeRequests.antMatchers(this.adminServer.path("/assets/**")).permitAll()
                                .antMatchers(this.adminServer.path("/actuator/info")).permitAll()
                                .antMatchers(this.adminServer.path("/actuator/health")).permitAll()
                                .antMatchers(this.adminServer.path("/login")).permitAll().anyRequest().authenticated()
                ).formLogin(
                        (formLogin) -> formLogin.loginPage(this.adminServer.path("/login")).successHandler(successHandler).and()
                ).logout((logout) -> logout.logoutUrl(this.adminServer.path("/logout"))).httpBasic(Customizer.withDefaults())
                .csrf((csrf) -> csrf.csrfTokenRepository(CookieCsrfTokenRepository.withHttpOnlyFalse())
                        .ignoringRequestMatchers(
                                new AntPathRequestMatcher(this.adminServer.path("/instances"),
                                        HttpMethod.POST.toString()),
                                new AntPathRequestMatcher(this.adminServer.path("/instances/*"),
                                        HttpMethod.DELETE.toString()),
                                new AntPathRequestMatcher(this.adminServer.path("/actuator/**"))
                        ))
                .rememberMe((rememberMe) -> rememberMe.key(UUID.randomUUID().toString()).tokenValiditySeconds(1209600));
    }

    // Required to provide UserDetailsService for "remember functionality"
    @Override
    protected void configure(AuthenticationManagerBuilder auth) throws Exception {
        auth.inMemoryAuthentication().withUser(security.getUser().getName())
                .password("{noop}" + security.getUser().getPassword()).roles("USER");
    }

}
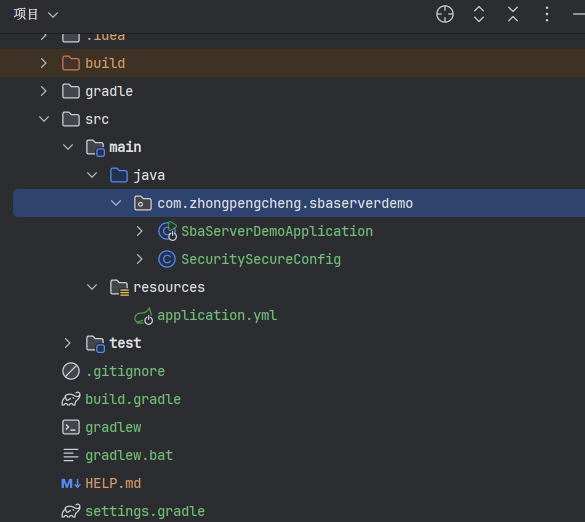
这段代码是直接从官方文档Copy下来的,上面都配置完之后Server端工程目录结构如下:
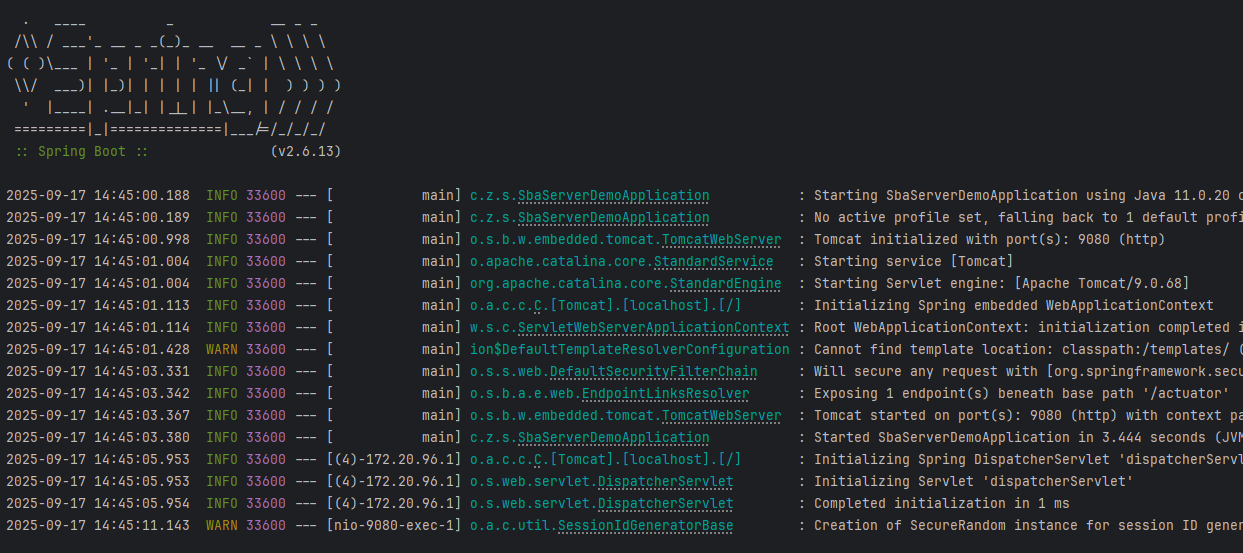
然后直接启动Server端即可:
配置Client端
Client端需要引入如下依赖:
implementation 'de.codecentric:spring-boot-admin-starter-client:2.6.11'
// 暴露更多指标
implementation 'org.springframework.boot:spring-boot-starter-actuator'
这里我搭建了一个空白的web应用,完整build.gradle如下:
plugins {
    id 'org.springframework.boot' version '2.6.13'
    id 'io.spring.dependency-management' version '1.0.15.RELEASE'
    id 'java'
}

group = 'com.zhongpengcheng'
version = '0.0.1-SNAPSHOT'
sourceCompatibility = '11'

repositories {
    // 阿里云镜像
    maven { url "https://maven.aliyun.com/repository/public/" }
}

ext {
    set('springBootAdminVersion', "2.6.11")
}

dependencies {
    // 暴露更多指标
    implementation 'org.springframework.boot:spring-boot-starter-actuator'
    implementation 'org.springframework.boot:spring-boot-starter-web'
    implementation 'de.codecentric:spring-boot-admin-starter-client'
}

dependencyManagement {
    imports {
        mavenBom "de.codecentric:spring-boot-admin-dependencies:${springBootAdminVersion}"
    }
}
接下来编写应用配置,内容如下:
server:
  port: 8080
management:
  server:
    port: 8081
  endpoints:
    jmx:
      exposure:
        include: "*"
    web:
      exposure:
        include: "*"
  endpoint:
    health:
      show-details: always
spring:
  boot:
    admin:
      client:
        url: http://localhost:9080
        username: admin
        password: admin
        instance:
          service-host-type: ip
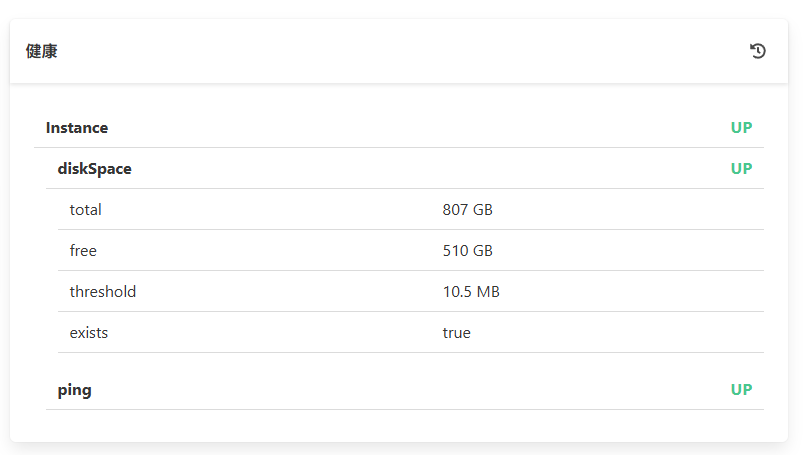
server.port和management.server.port和Server端不同即可(便于本地启动),management.endpoint.health.show-details这里配置为always以暴露健康监控指标:
spring.boot.admin.client下的几个配置含义为:
| 配置 | 含义 |
|---|---|
| url | Server端的地址 |
| username | Server端的BasicAuth用户名,和前面配置的一致 |
| password | Server端的BasicAuth密码,和前面配置的一致 |
| instance.service-host-type | 以IP的形式上报元数据,避免上报一些奇怪的本地host导致Server端DNS解析失败 |
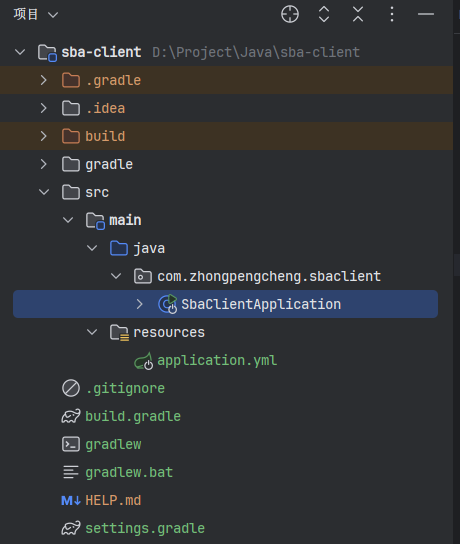
配置完成后Client端工程目录结构如下:
最后直接启动即可:
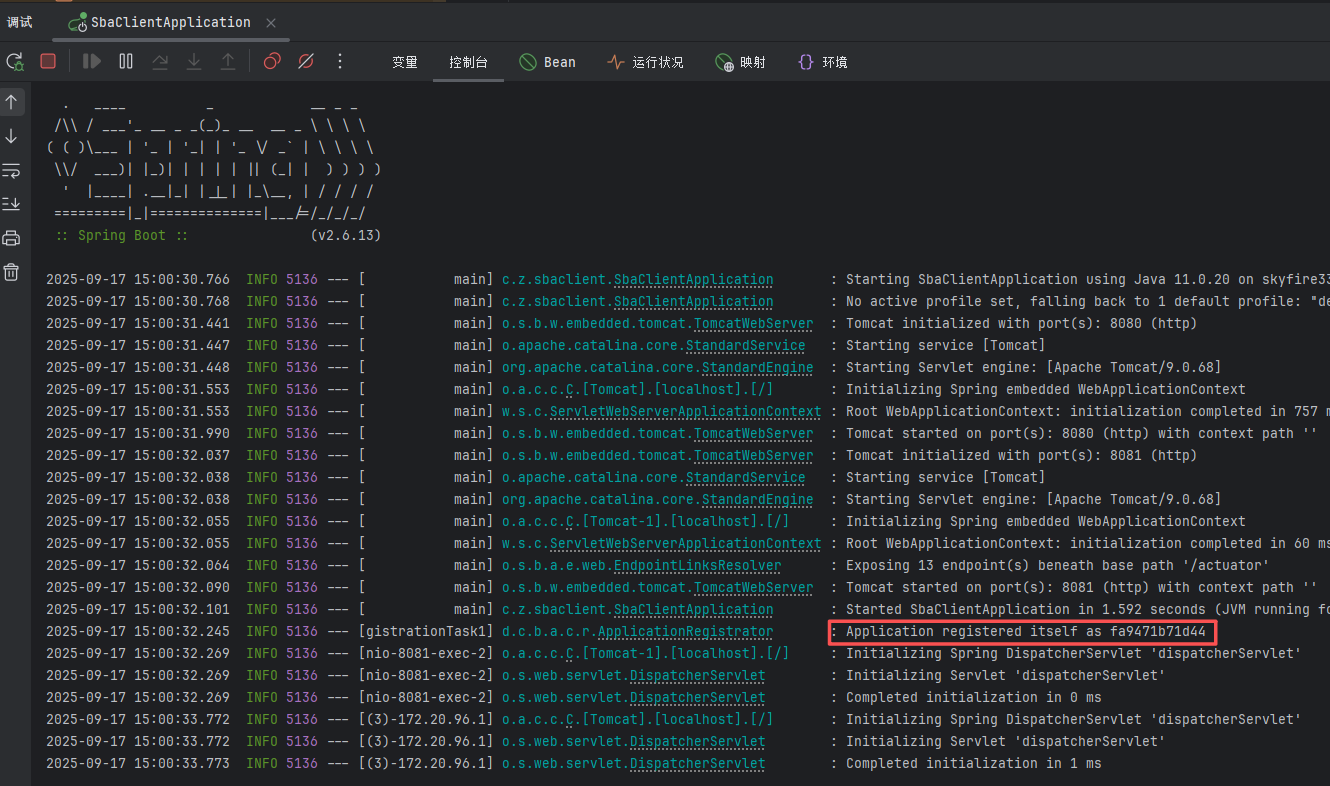
观察启动日志发现打印Application registered itself as xxxx文本即代表Client注册成功。
最终效果
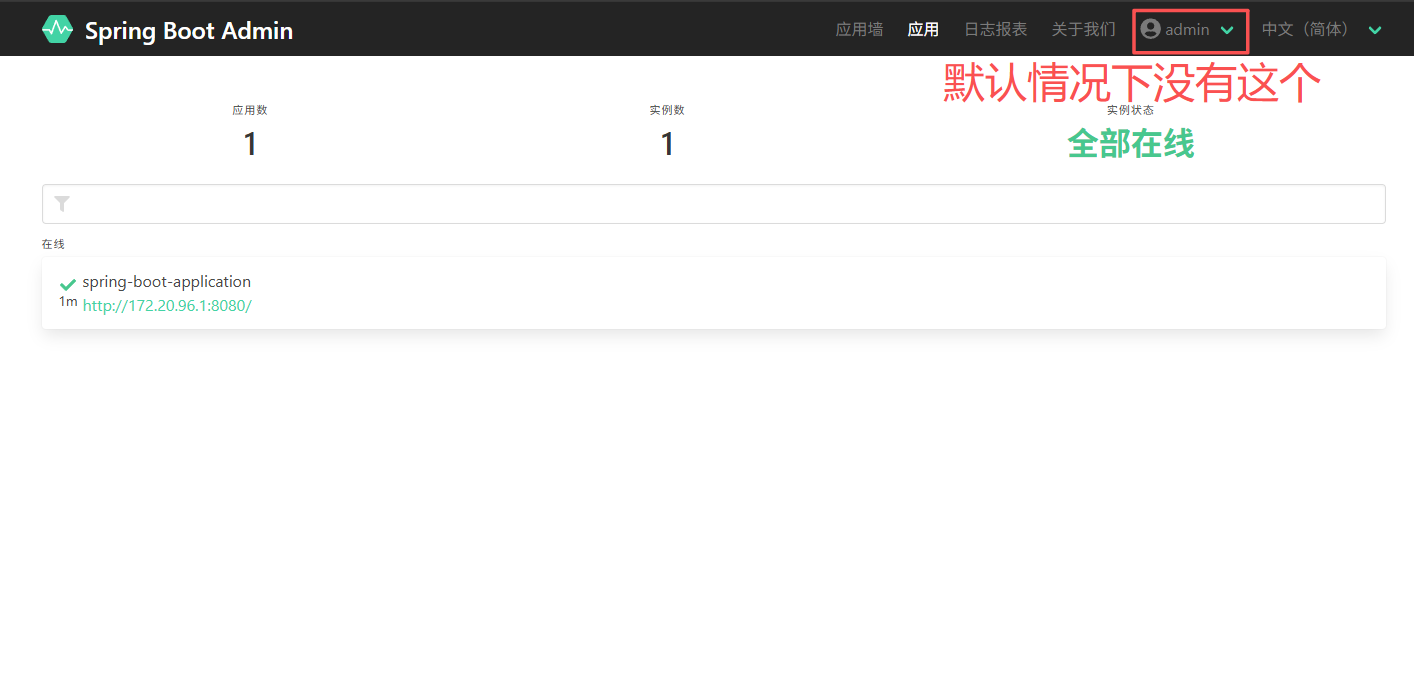
访问 http://localhost:9080 查看Server端页面:

输入前面配置的账号密码admin/admin登录:
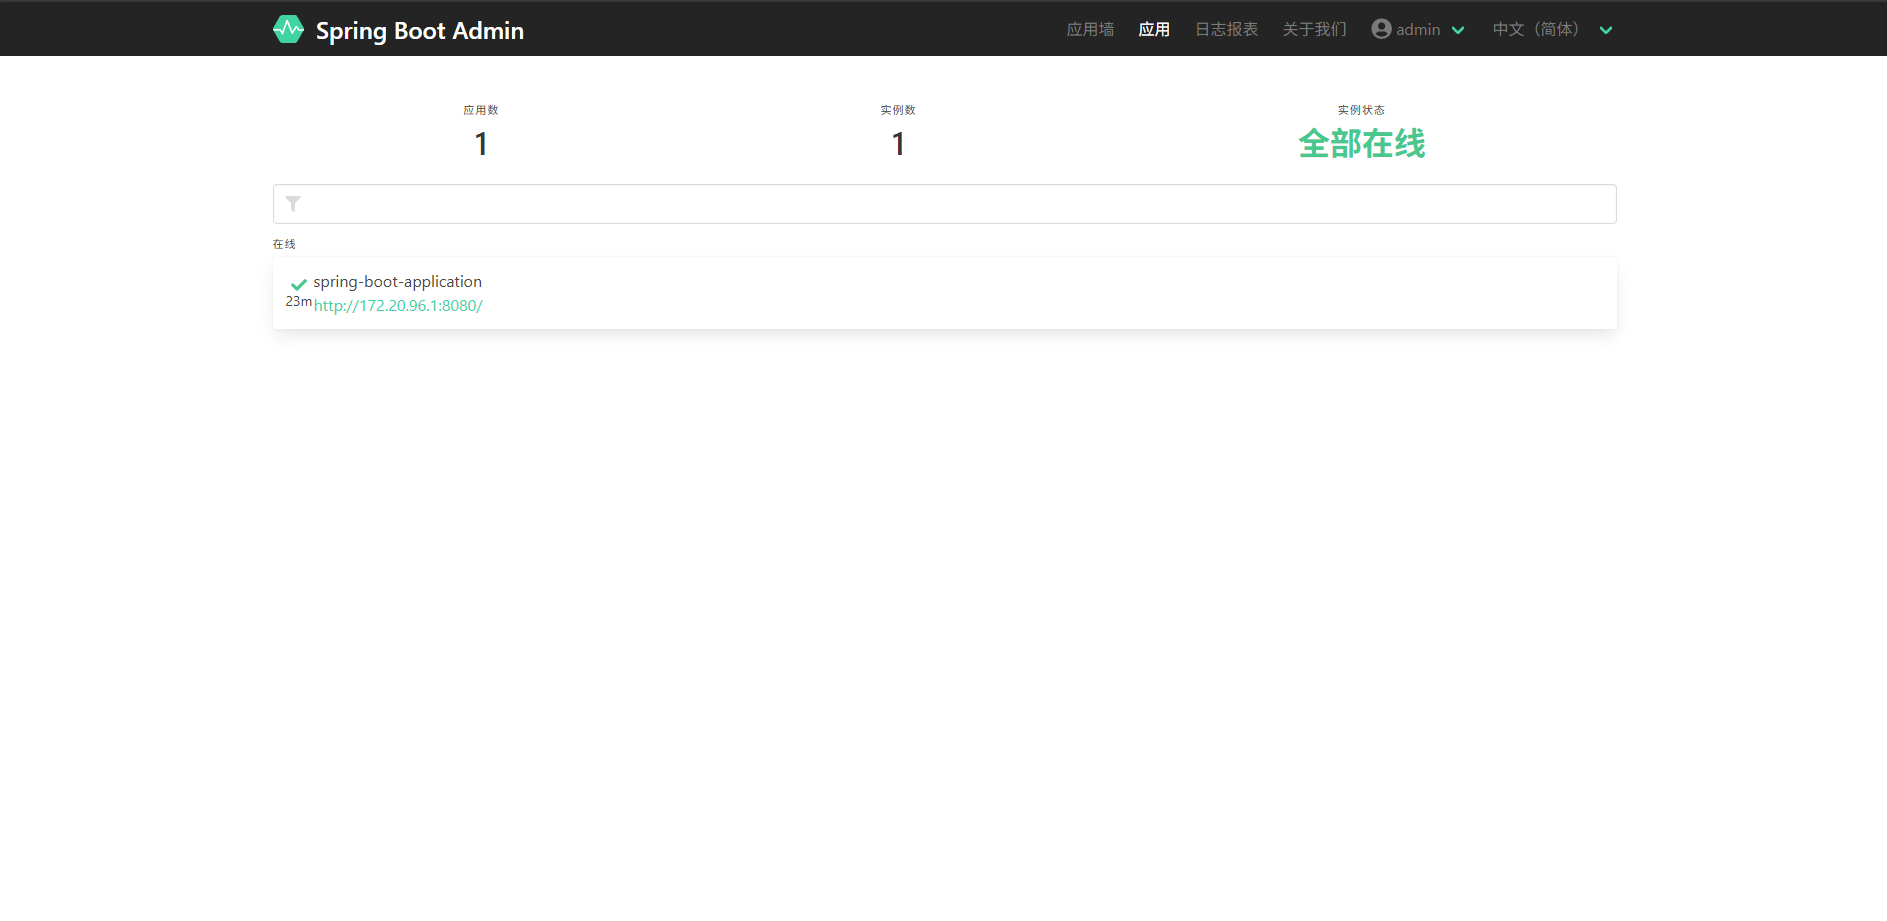
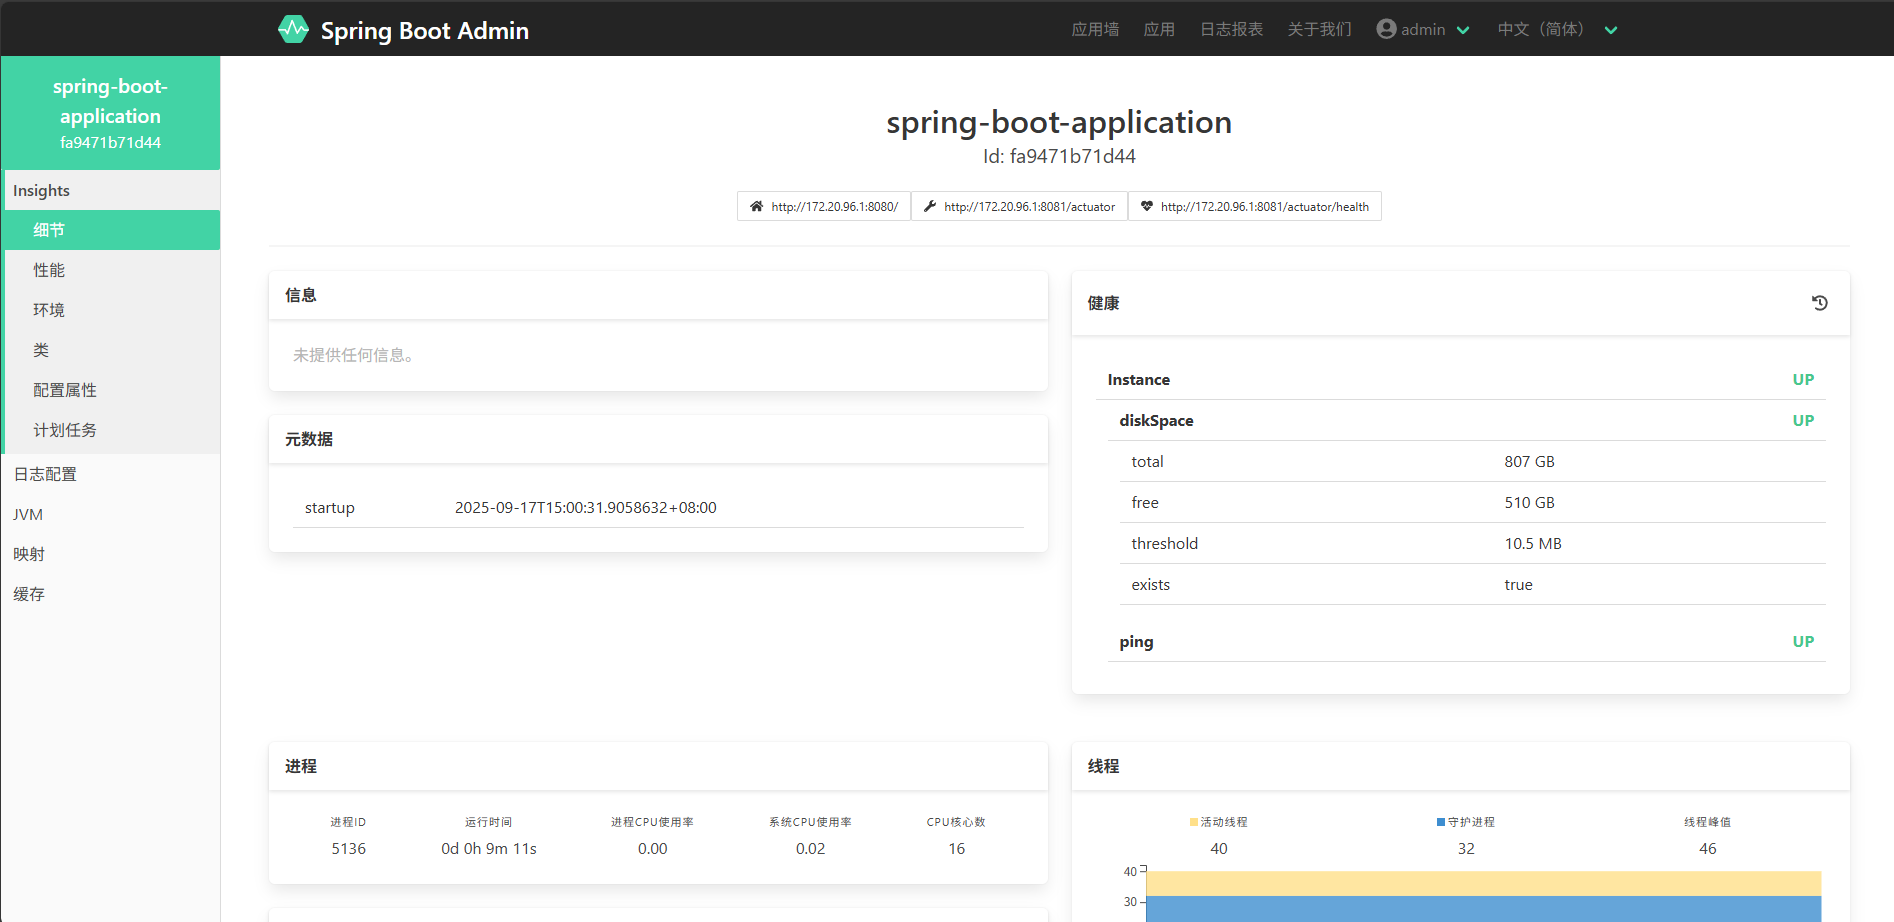
可以看到Client端已经注册到Server端了,点击应用墙可以查看实例具体情况,包含健康状态、线程、堆/非堆内存占用等信息:

 浙公网安备 33010602011771号