
手工搭建基于ABP的框架(3) - 登录,权限控制与日志
为了防止不提供原网址的转载,特在这里加上原文链接:
http://www.cnblogs.com/skabyy/p/7695258.html
本篇将实现登录、权限控制、日志配置与审计日志的功能。首先我们先实现登录功能,在登录的基础上,通过控权使得只有ID为1988的用户才能创建tweet。最后配置Log4Net日志,并开启审计日志,记录所有Web请求。
简单的界面
为了测试方便,在实现登录功能之前,先简单实现了几个页面:
-
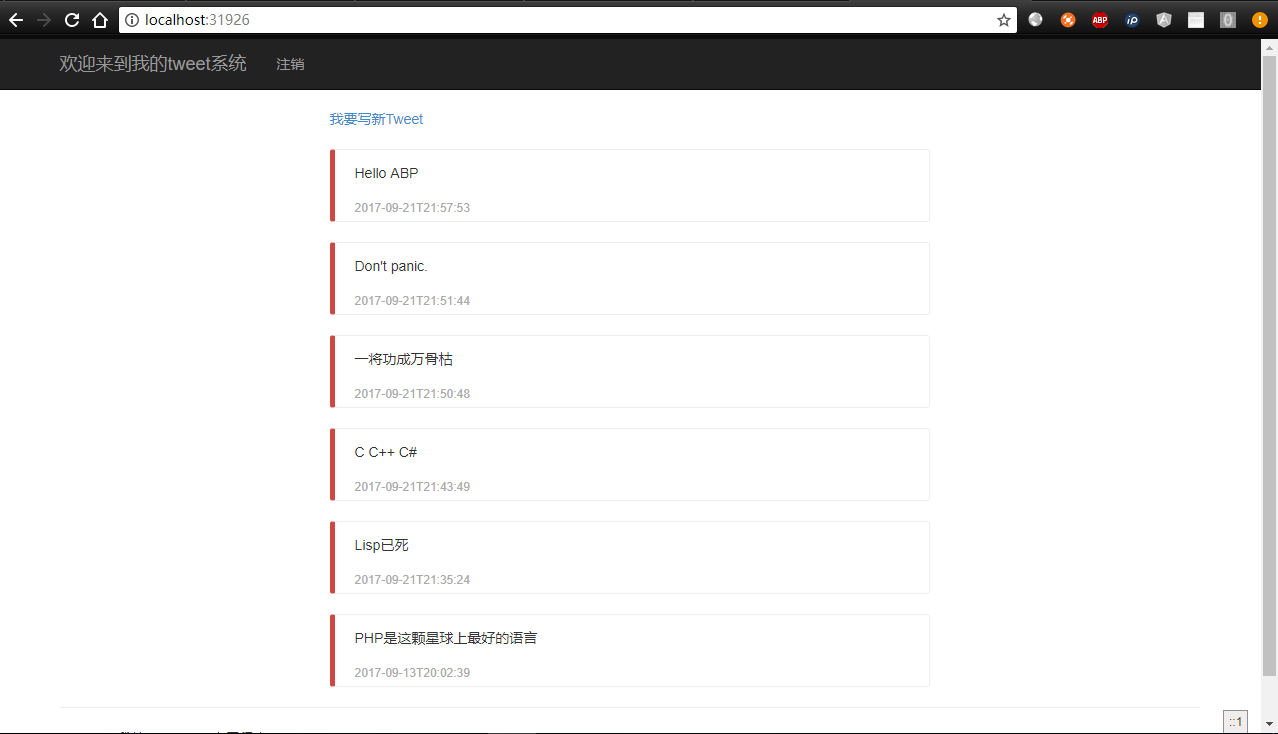
Tweets列表页面
-
创建tweet页面

-
登录页面
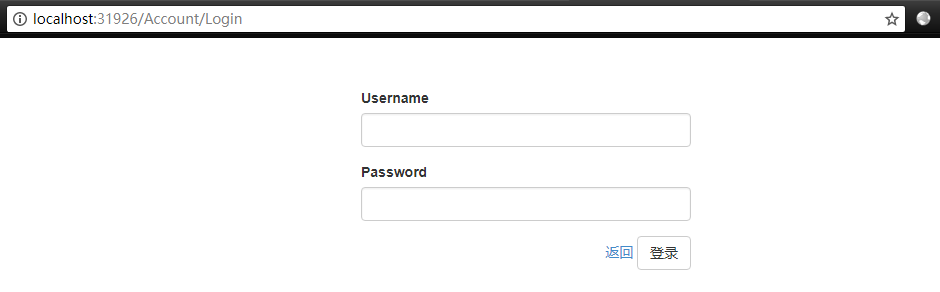
页面代码没有什么特别的,这里就不赘述了。
登录
我们不希望所有人都能创建tweet,而是只有已登录的用户才能创建。本小节将实现登录功能,限制创建tweet页面只有已登陆用户才能访问。
首先在Web.config的system.web里加上这段配置:
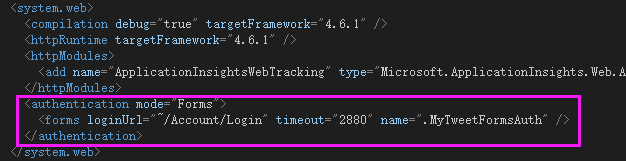
然后设置首页和登录页面可以匿名访问。给Home/Index和Account/Login这两个Action加上AllowAnonymous特性。
[AllowAnonymous]
public ActionResult Index()

[AllowAnonymous]
public ActionResult Login(string returnUrl)
接下来实现登录功能。登录功能的实现有两步:
-
用户发起登录请求后,验证完用户名密码,生成cookie,然后把cookie返回给前端。
[HttpPost]
[AllowAnonymous]
public ActionResult LoginAjax(LoginInput input)
{
    // 这里应该放验证用户名密码是否正确的代码。
    // 为了测试方便,这里跳过验证,使用任意用户名任意密码都能登录。
    var username = input.Username;
    var ticket = new FormsAuthenticationTicket(
        1 /* version */,
        username,
        DateTime.Now,
        DateTime.Now.Add(FormsAuthentication.Timeout),
        false /* persistCookie */,
        "" /* userData */);
    var userCookie = new HttpCookie(
        FormsAuthentication.FormsCookieName,
        FormsAuthentication.Encrypt(ticket));
    HttpContext.Response.Cookies.Add(userCookie);
    return Json("OK");
}
注意
LoginAjax接口要加上AllowAnonymous特性允许匿名访问。为了测试方便,这里没有对用户名密码进行验证,使用任意用户名任意密码都能登录。 -
用户每次访问时,根据
userId创建claim、identity和principal,并把principal赋值给HttpContext.Current.User。这部分代码实现在过滤器。新建过滤器类MvcAuthorizeAttribute:public class MvcAuthorizeAttribute : AuthorizeAttribute { public override void OnAuthorization(AuthorizationContext filterContext) { // IIS会从cookie解析出userId并生成一个principal赋值给Thread.CurrentPrincipal var userId = Thread.CurrentPrincipal?.Identity?.Name; if (!string.IsNullOrEmpty(userId)) { // 创建identity var identity = new GenericIdentity(userId); // 添加Type为AbpClaimTypes.UserId使userId能注入到AbpSession identity.AddClaim(new Claim(AbpClaimTypes.UserId, userId)); // 创建principal var principal = new GenericPrincipal(identity, null); // 同步Thread.CurrentPrincipal Thread.CurrentPrincipal = principal; if (HttpContext.Current != null) { // 将principal赋值给HttpContext.Current.User,用户就登录进去了。 HttpContext.Current.User = principal; } } base.OnAuthorization(filterContext); } }关于claim、identity和principal这三个概念的详细解释可以看这位哥们的博客。然后将过滤器
MvcAuthorizeAttribute加到全局过滤器配置:filters.Add(new MvcAuthorizeAttribute());注意到过滤器
MvcAuthorizeAttribute继承了AuthorizeAttribute。因而将这个过滤器加到全局过滤后,除了带AllowAnonymous特性的Action外,其他Action被未登录用户访问时就会跳转到登录页面。另外为了让ABP能够使用登录用户信息,要将
Type为AbpClaimTypes.UserId,值为userId的Claim添加到Identity里,这样userId会自动注入到AbpSession中。我们在后续代码中也可以通过AbpSession.UserId.HasValue来判断用户是否已登陆。需要注意的一点是ABP只支持数字类型的
userId。所以要确保userId是一个能转成整数的字符串。如果需要其他类型的userId(比如字符串类型)则需要对AbpSession进行扩展。
权限控制
本小节将对创建tweet的权限做进一步的限制,让只有ID为1988的用户才可以创建tweet。为了实现权限控制,我们需要实现三个部分:
-
定义权限。
新建类
MyTweetAuthorizationProvider,在SetPermissions方法中定义创建tweet的权限。MyTweetAuthorizationProvider要继承AuthorizationProvider。public static class MyTweetPermission { public const string CreateTweet = "CreateTweet"; } public class MyTweetAuthorizationProvider : AuthorizationProvider { public override void SetPermissions(IPermissionDefinitionContext context) { context.CreatePermission(MyTweetPermission.CreateTweet); } } -
权限判断逻辑。即哪些用户拥有哪些权限的逻辑。
通过实现接口
IPermissionChecker来实现自定义的权限判断逻辑。新建类MyTweetPermissionChecker,并将逻辑写在方法IsGrantedAsync中。我们只允许ID为“1988”的用户创建tweet。public class MyTweetPermissionChecker : IPermissionChecker, ITransientDependency { public IAbpSession AbpSession { get; set; } public Task<bool> IsGrantedAsync(string permissionName) { var userId = AbpSession.GetUserId(); return IsGrantedAsync(new UserIdentifier(null, userId), permissionName); } public Task<bool> IsGrantedAsync(UserIdentifier user, string permissionName) { var userId = user.UserId; var t = new Task<bool>(() => { if (permissionName == MyTweetPermission.CreateTweet) { return userId == 1988; } return true; }); t.Start(); return t; } }这里有两个地方要注意。一个是类
MyTweetPermissionChecker同时要实现ITransientDependency,才能被自动注入(IPermissionChecker并没有继承ITransientDependency)。另一个地方是方法IsGrantedAsync是异步方法,要返回Task<bool>类型,并且确保返回的task已经Start了。 -
标记哪些方法(一般是Action或
AppService的方法)属于哪些权限。使用
AbpMvcAuthorize将创建tweet的权限标记在Action/Home/CreateTweet上:[AbpMvcAuthorize(MyTweetPermission.CreateTweet)] public ActionResult CreateTweet()为了让
AbpMvcAuthorize能生效,我们还需要让HomeController继承AbpController(在实践中,一般要在AbpController上再封装一个BaseController)。public class HomeController : AbpController并且
MyTweetWebModule要依赖AbpWebMvcModule。[DependsOn( typeof(AbpWebMvcModule), typeof(AbpWebApiModule), typeof(MyTweetApplicationModule))] public class MyTweetWebModule : AbpModule另外,创建tweet的POST接口也要控权。由于WebAPI是取不到AbpSession的(如果一定要用WebAPI只能用其它方法控权),因此我们需要另外做一个MVC版本的接口来控权(然后前端也做相应的修改):
public class TweetController : AbpController { private IMyTweetAppService _myTweetAppService; public TweetController(IMyTweetAppService appSvc) { _myTweetAppService = appSvc; } [HttpPost] [AbpMvcAuthorize(MyTweetPermission.CreateTweet)] public ActionResult Create(CreateTweetInput input) { var tweet = _myTweetAppService.CreateTweet(input); return Json(tweet); } }另外,你也可以在应用层上标记权限(前提是你是用MVC接口调用应用层的方法,而非WebAPI)。Controller用
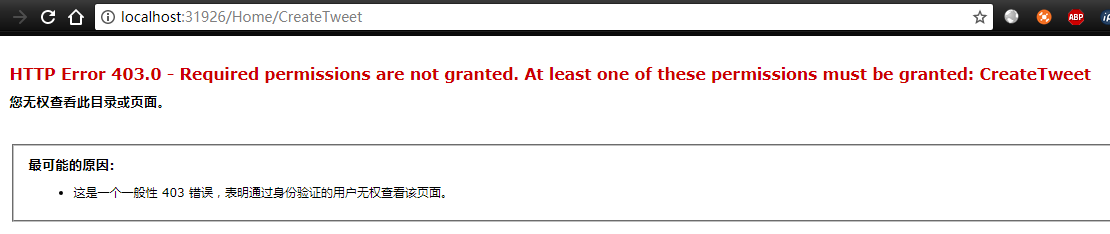
AbpMvcAuthorize标记权限,而AppService用AbpAuthorize标记权限。[AbpAuthorize(MyTweetPermission.CreateTweet)] public object CreateTweet(CreateTweetInput input)测试一下,用“1988”登录可以正常访问(正常访问的不截图了)。而其他用户则提示无访问权限:
日志配置与审计日志
日志配置
ABP框架使用Log4Net来进行日志管理,并且在Log4Net基础上封装了个Abp.Castle.Log4Net包。首先将NuGet包Abp.Castle.Log4Net安装到MyTweet.Web项目。
然后在MyTweet.Web根目录下创建Log4Net的配置文件(你也可以在其他你喜欢的位置创建,只要后面代码里写对路径就行),文件名为log4net.config。下面是我用的配置文件,基本上用的Log4Net默认的配置内容,只是日志存放文件修改到了Logs/Logs.txt。
<?xml version="1.0" encoding="utf-8" ?>
<log4net>
  <appender name="RollingFileAppender" type="log4net.Appender.RollingFileAppender" >
    <file value="Logs/Logs.txt" />
    <appendToFile value="true" />
    <rollingStyle value="Size" />
    <maxSizeRollBackups value="10" />
    <maximumFileSize value="10000KB" />
    <staticLogFileName value="true" />
    <layout type="log4net.Layout.PatternLayout">
        <conversionPattern value="%-5level %date [%-5.5thread] %-40.40logger - %message%newline" />
    </layout>
  </appender>
  <root>
    <appender-ref ref="RollingFileAppender" />
    <level value="DEBUG" />
  </root>
  <logger name="NHibernate">
    <level value="WARN" />
  </logger>
</log4net>
创建好配置文件后,到MvcApplication的Application_Start方法里加上下面这行代码,开启日志功能。
IocManager.Instance.IocContainer.AddFacility<LoggingFacility>(
    f => f.UseAbpLog4Net().WithConfig("log4net.config"));
有个要注意的地方是需要在文件开头加上下面这行using语句,不然f.UseAbpLog4Net会报错。
using Abp.Castle.Logging.Log4Net;
配置好后,我们可以使用依赖注入注入到ILogger接口的Logger对象来写日志。在首页的Action方法中加上几行写日志的代码:
[AllowAnonymous]
public ActionResult Index()
{
    if (AbpSession.UserId.HasValue)
    {
        Logger.Info(string.Format("用户{0}访问了首页!", AbpSession.UserId));
    }
    else
    {
        Logger.Info("匿名用户访问了首页!");
    }
    return View();
}
分别用匿名身份和登录用户身份访问一下首页,然后到MyTweet.Web的根目录下查看Logs/Logs.txt文件:

审计日志
维基百科说: “审计跟踪(也叫审计日志)是与安全相关的按照时间顺序的记录,记录集或者记录源,它们提供了活动序列的文档证据,这些活动序列可以在任何时间影响一个特定的操作,步骤或其他”。
对于我们Web应用来说,审计日志负责记录所有用户的请求。如果是硬编码实现的话,我们需要在所有的Action方法里加上记录日志的代码。这显然是既耗时又不科学的。幸运的是我们不需要这么做,ABP框架自带审计日志的功能。只要我们配置好日志功能(前面已经做了),ABP会默认记录所有已登陆用户(通过AbpSession.UserId.HasValue判断是否已登陆)的访问。查看Logs/Logs.txt文件会发现刚才我们访问首页的行为已经被记录到日志里了。
INFO 2017-11-02 15:39:23,055 [29 ] Abp.Auditing.SimpleLogAuditingStore - AUDIT LOG: MyTweet.Web.Controllers.HomeController.Index is executed by user 1988 in 1 ms from 10.211.55.3 IP address with succeed.
这行日志记录了这些信息:用户名、用户IP地址、访问的方法、响应耗时以及访问结果。另外,在这行日志的开头有这个字段:Abp.Auditing.SimpleLogAuditingStore。这个表示该日志内容是由类Abp.Auditing.SimpleLogAuditingStore处理记录的。该类实现了IAuditingStore接口。如果我们要自定义审计日志的内容,我们需要自己实现这个接口。下面我们实现一个输出中文的审计日志。在MyTweet.Web项目下新建类MyTweetLogAuditingStore:
public class MyTweetLogAuditingStore : IAuditingStore, ITransientDependency
{
    public ILogger Logger { get; set; }

    public MyTweetLogAuditingStore()
    {
        Logger = NullLogger.Instance;
    }

    public Task SaveAsync(AuditInfo auditInfo)
    {
        var userId = auditInfo.UserId;
        var userIp = auditInfo.ClientIpAddress;
        var browserInfo = auditInfo.BrowserInfo;
        var action = $"{auditInfo.ServiceName}.{auditInfo.MethodName}";
        var ms = auditInfo.ExecutionDuration;
        var msg = $"用户{userId}(坐标{userIp})使用{browserInfo}访问了方法{action},该方法在{ms}毫秒内进行了回击,回击结果:";
        if (auditInfo.Exception == null)
        {
            Logger.Info(msg + "成功!");
        }
        else
        {
            Logger.Warn(msg + "出错了:" + auditInfo.Exception.Message);
        }
        return Task.FromResult(0);
    }
}
再访问首页,然后看看日志记了啥:
INFO 2017-11-02 16:45:53,374 [35 ] et.Web.App_Start.MyTweetLogAuditingStore - 用户1988(坐标10.211.55.3)使用Chrome / 61.0 / WinNT访问了方法MyTweet.Web.Controllers.HomeController.Index,该方法在77毫秒内进行了回击,回击结果:成功!
关于审计日志的其他配置这里不再多说,有需要的同学可以看这篇博客。
总结
我们已经使用ABP搭建了一个相对完整的tweet应用。它虽然十分简陋,但也是五脏俱全。它能够进行数据库访问,拥有登录、控权、日志等功能。后面会再添加UoW、单元测试等内容。
关于ABP后续的学习和使用,除了查看官方文档外,强烈建议直接阅读ABP的源码。为了弄清楚一些犄角旮旯的细节,在文档里翻找半天往往不如直接查阅代码来得效率高。

 浙公网安备 33010602011771号