
升级mac os moterey 12 过程-时间机器备份读不出来,提示备注文件中找不到卷宗
Posted on 2023-02-09 09:30 Showker 阅读(1435) 评论(0) 收藏 举报试了各种方法最后都提示 迁移用户数据失败,最后还是 磁盘工具里抹掉盘,重新安装系统,终于安装好
安装好后,再用迁移助理恢复TimeMachine里的数据。开始还是好的,正常迁移,但是看到传输数据太慢,我就中断里
再迁移时,就提升找不到备份中的卷宗里,怀疑数据损坏里。
从损坏的TimeMachine备份(.sparsebundle)中恢复数据
一步一步讲解如何从损坏的TimeMachine备份中尽可能的修复和恢复数据
TOC
前言
最近用了4年的MBP的主板突然嗝屁了,大概可能应该是因为使用的第三方电源突然坏了。更惨的是遇上了苹果TimeMachine的备份缺陷/Bug导致几乎所有重要数据都无法恢复,300G的备份中恢复的系统只有几十G的数据,整个Documents文件夹是空空的,包括图片文件夹也是缺失很多数据。 在经历了一个星期的不断爬坑、尝试、重装N次系统等过程后最终找回了我想要找回的大部分数据,这篇文章把相关过程和经验简单整理一下,希望遇到同样问题的时候能给到一些帮助。
开始前准备
这篇文章里讨论的所有操作都是基于你手上有TimeMachine功能所生成的备份包,大部分系统上都是用 .sparsebundle 后缀来进行存储的,不管是备份到移动硬盘还是NAS上都会有这个包,先把这个备份包找出来。
在正式开始尝试恢复之前有几个注意点需要罗列一下:
- 不要盲目的去点击重新备份这个选项,甚至是覆盖原有备份等操作。网上有一类解决方案提到当发现丢失一些文件或文件夹后可以先在TimeMachine设置中进行过滤这些文件 -> 进行新的备份 -> 取消过滤操作 -> 再进行新的备份方式来触发恢复操作。我自己的血的教训就是原先300G的备份包经过这个操作后变成了180G左右,应该是彻底丢失了那些想要的数据。但是这个操作肯定也是能适用于一些场景的,如果想尝试可以先把原始备份包复制一份出来再尝试。
- 任何的修复、恢复、重新备份等操作前一定要确保,确保,确保永远都存在着一份原始备份包,以免各类操作导致原始备份包彻底变成垃圾。
- 可以考虑使用容量大一点的移动硬盘(1T及以上)来把备份包拷贝出来进行各类修复、恢复等操作。因为一般备份包都是几百G以上的大小,各类操作都是几个小时起步,基于稳定的物理连接进行各类操作还是有必要的,如果想通过WIFI来进行数据传输和修复那这个耗时可能是按天来算了。
- 进行任何操作时尽可能的把设备放在不容易动到的地方,以免误触导致断开链接,可能N个小时的操作需要从头再来。
- 恢复目标不要设定成完整的系统级别的恢复,我自己实际尝试结果来看的话几乎是不可能恢复100%。可以把目标设定成我只需要恢复重要的Documtents、重要的图片、重要的其他文件等,剩下的系统的东西我完全可以重新配置,一旦恢复到一些数据后一定要及时拷贝出来。
如果你觉得你的备份包损坏不严重,同时只是需要其中的一小部分文档,可以直接跳到最后的 恢复 那一节先进行尝试,如果失败责回到第一步重新开始。
准备备份包
苹果的TimeMachine备份包有两种后缀,分别是 .sparsebundle 和 .backupbundle。.backupbundle 后缀是在 Catalina OS 中临时引入的,目前的系统中又恢复成了 .sparsebundle,这一系列骚操作应该也是导致各种数据丢失的原因之一。同时我也发现苹果的不同系统之间( Big sur 和 Catalina 或更早的系统)的备份包是无法100%互通的,比如你的最新备份是在 Big Sur 里面生成的,你想恢复数据最好是先把系统升级上来再用迁移助手进行恢复,在其他版本系统里是无法识别这个备份包的,这时候千万不要误认为这个备份包已经损坏而进行删除。
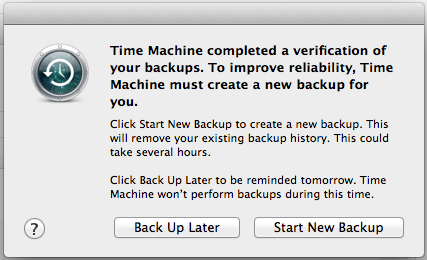
苹果还有一个骚操作就是有时会生成 .purgeable.sparsebundle,名称上也可以想到这个是废弃的备份包,产生的时机是苹果的TimeMachine提示原有备份已损坏是否要生成一个新备份时你点击了确认按钮,大概长这样:
这个包代表着苹果自己的问题或者用户使用异常导致备份包部分损坏,无法直接使用于TimeMachine功能中。但是不代表一无用处,我自己的话就是从这个垃圾备份包中恢复了我所有的重要数据(因为原始的那个300G备份包之前被一系列骚操作彻底变垃圾了)。
所以你需要准备的是 .sparsebundle 或 .purgeable.sparsebundle 两者其一,然后将其复制到移动硬盘中。
注意移动硬盘里面除了备份包以外不要放其他文件或者文件夹,混搭的时候发现有时候苹果会无法正常挂载
修复
修复过程网上搜一搜的话大体都差不多,主要有如下过程:
修改访问权限
每次重新挂载以后都需要进行一下权限更改,以免在修复过程中出现访问权限问题,此过程不会耗时太久,顶多几分钟就结束。
chflags -R nouchg "/Volumes/<TM backup name>/<mybackupname>.sparsebundle"
装载 .sparsebundle
装载命令如下:
hdiutil attach -nomount -readwrite -noverify -noautofsck "/Volumes/<TM backup name>/<mybackupname>.sparsebundle"
成功后将会打印出这类信息:
/dev/disk5 GUID_partition_scheme
/dev/disk5s1 EFI
/dev/disk5s2 Apple_HFS     <Your Volume name>
这里面有用的是第三行盘符,格式标记为 Apple_HFS,也就是备份包里面主要存储内容的地方,记住这个盘符名称 /dev/disk5s2,里面的 disk5s2 中数字5是每次装载的时候都有可能在变的。
重整文件系统
//           -p      Preen the specified file systems.

fsck_hfs -p /dev/disk5s2
网上的有些方案中没有这一步,但是针对有损坏的备份包的话最好还是执行这一步。实际执行过程中可以观察到这一步是在不断循环的检测,修复大小错误,修复索引错误,会一直循环到没有发现问题为止。我自己的 .purgeable.sparsebundle 大小是700G左右,完整执行完这个命令大概花了7,8个小时,也是整个过程中耗时最长的一段。
因为耗时比较长,一定要保证过程中不会出现中断行为,一旦中断了有可能要从头再来。除了连接不稳定以外通常遇到的问题是访问权限问题,每次重新装载时都进行第一步的权限更改即可。
正式修复
//           -d      Display debugging information.  This option may provide useful information when fsck_hfs cannot repair a damaged file system.
//           -r      Rebuild the catalog btree.  This is synonymous with -Rc.
//           -f      When used with the -p option, force fsck_hfs to check `clean` file systems, otherwise it means force fsck_hfs to check and repair journaled HFS+ file systems.
//           -y      Always attempt to repair any damage that is found.

fsck_hfs -drfy /dev/diskxs2
上一步重整文件系统步骤执行完以后这一步会执行的更快一些,实际执行的话也会循环的修复到没有发现问题为止,完整执行完这个命令大概花了1,2个小时。
如果一切顺利的话最终会自动结束并打印出修复成功等字样,接下来就可以修改备份包里的配置文件,把它标记为可用状态。
修改配置
每个备份包里面都会有几个配置文件,其中我们需要修改的是 com.apple.TimeMachine.MachineID.plist ,文件位置如下:
/Volumes/<TM backup name>/<mybackupname>.sparsebundle/com.apple.TimeMachine.MachineID.plist
可以使用 vi 命令或者直接使用文本编辑器找到如下地方并修改:
<key>VerificationState</key>
<integer>0</integer>
这样整个修复过程都结束,但是现不要着急拿着去恢复系统,先继续看下节 恢复。
恢复
在恢复这个过程中我自己着实走了非常多的误区,因为网络上搜到的所有恢复方案无非就是两种,一个是使用迁移助手来恢复数据或者系统,一个是从TimeMachine菜单中进入时间机器然后从酷炫的文档界面中选择以前的日期进行恢复。
实测中会发现要么迁移助手里面识别不到备份,要么是时间机器中压根没有以前日期可选。这直接导致不断怀疑备份包是否还是有问题,但实际上有更直接的方式可以从备份包中获取数据。
// 装载正常的TimeMachine的.sparsebundle
hdiutil attach /Volumes/<TM backup name>/<mybackupname>.sparsebundle -readonly
然后就可以在终端或者Finder中直接访问到装载的备份包(在Finder中的话会显示在左侧中间 位置 那一块,就像挂载的移动硬盘一样,针对备份包可以右键显示包内容来查看里面内容),不断剥开文件夹,层层进入到里面就会发现备份包里的数据都按照之前备份过的日期为名称一个个的躺在那里,你需要的做的就是进入到需要的文件夹进行需要的拷贝。
我想不明白为什么苹果的时间机器恢复界面做的那么酷炫那么难用,却只字不提如此简单便捷的操作方式,可能是这个操作太简单了当做所有人都能自己意识到?
总结
至此整个过程都已结束,你可能意识到为什么没有重装系统的部分呢?我自己的踩坑经历来看不管如何修复有问题的备份包也无法做到系统的完全还原,我尝试了3-4次的重装系统,也尝试了不同系统版本的恢复(因为我的备份包里面分别有Catalina和Big Sur的备份),虽然最终恢复过程会走完,但是系统启动时会遇到各类缺失项的问题。
实际上我觉得也不需要系统的完全还原,因为重要的是我们的文档数据,配置类的东西还是可以花点时间重新弄一遍,相比于重装系统上所浪费的时间和精力来说这点时间不算什么。
这一次还得到的一个教训就是不要太相信或者太确信一些事情,比如这次的过于相信苹果的TimeMachine功能而完全忽视可能的其他备份方案。如果不是从最后的一线希望 .purgeable.sparsebundle 中恢复到了数据,那就是直接导致我这些积累的重要文档全部丢失。
最后再总结一下在TimeMachine使用过程中应该注意的点:
- 每次开始备份尽量让这个过程跑完,不要频繁的去中断它,这可能会加大文档丢失的可能性
- 跨系统版本的备份恢复通常兼容性很差,在不同系统中初次备份时尽可能确保之前的备份有拷贝出来,这样在出现异常的时候还可以恢复到旧备份中
- 在TimeMachine容量设定的不够大时可以考虑关闭自动备份,改成手动触发加上固定周期去备份,因为容量不够大同时每次需要同步的内容比较大时经常出现备份失败的情况
- 当出现系统提示以前的备份出现损坏的时候及时把当前的备份包以及重要数据拷贝出来,以免后患
- 重要的数据多一份备份方案永远是值得的
==========
https://expobrain.net/2016/12/10/fix-corrupted-time-machine-spase-bundles/
Fix corrupted Time Machine sparse bundles
Daniele Esposti's Blog, in 10 December 2016
I know that on the Internet there is an unlimited amout of articles and posts about how to solve the issue about corrupted Time Machine backups on our NASs. I have tried a lot of them when my backup has been corrupted but even following religiously their steps I didn’t get back a working backup.
This probably because Mac OS X introduced some changes during every release on how Time Machine works, making some repair process obsolete or not effective anymore. In this post I’ll describe the steps I took to fix my backup, bare in mind that it worked for me with Mac OS X 10.12.1 Sierra and I cannot guarantee that it’ll work with the previous and future versions of the OS.
Note: Before proceeding further please make a backup of your sparsebundle just in case something goes wrong and you can revert back to the original state
First become root to speed up the next steps:
sudo su -then reset the immutable flags in your sparsebundle, replacing network_share with where your sparsebundle resides and backup_name with the name of the spasebundle to fix:
chflags -R nouchg /Volumes/<network_share>/<backup_name>.sparsebundleNow, this step is the one missing in the most on the solutions I found and only in some posts they suggest is, in my case this was the key step of the whole recovering process.
Edit the com.apple.TimeMachine.MachineID.plist file:
vim /Volumes/<network_share>/<backup_name>.sparsbundle/com.apple.TimeMachine.MachineID.plistset the value of the key VerificationState to 0:
<key>VerificationState</key>
<integer>0</integer>
and delete the RecoveryBackupDeclinedDate key:
<key>RecoveryBackupDeclinedDate</key>
<date>2012-09-16T01:38:43Z</date>
We are at the final stage when we first mount the sparse bundle:
hdiutil attach -nomount -noverify -noautofsck /Volumes/<network_share>/<backup_name>.sparsebundlethen looking at the output search for the Apple_HFSX entry:
/dev/diskx Apple_partition_scheme
/dev/diskXs1 Apple_partition_map
/dev/diskXs2 Apple_HFSX
and launch the filesystem recovery tool against /dev/diskXs2, note that this step will take hours to complete so it’s better to let it run overnight:
fsck_hfs -drfy /dev/diskXs2Once the verification is complete and the filesystem is fixed unmount the sparse bundle:
hdiutil detach /dev/diskXs2At this point the Time Machine backup should be repaired and if you run the backup it will complete without issues.
I hope this will help and if you have any questions or updates please leave a comment to this post.
-
-
![Avatar]()
-
![Avatar]()
-
JL

====
台湾朋友的文章,跟我的很像,过程也很像,也是恢复的途中,嫌弃速度太慢,更换恢复方式(我是想切换网络),结果,就出现 备份文件中找不到卷宗的提示了
mac的sparsebundle格式映像檔損毀拯救經驗
先前把一顆快要掛掉的外借硬碟用carbon copy cloner做成硬碟映像檔
(sparsebundle非sparseimage, 跟time machine同一格式),然後正努力
把檔案都集中放入NAS主機裡面, 也不確定怎麼發生的,本來是覺得直接
插到NAS主機複製(速度比插mac經由網路上傳較快
許多),複製到一半想要改變方式(把映像檔解開直接複製檔案內容),
結果按了暫停之後連接mac就發現映像檔案掛掉,無法開啟,整個嚇到滿頭大汗,囧~~~

因為sparsebundle在外接非mac的主機會變成一個資料夾不像
spareimage是一個單一檔案,所以一直都忘記把這個sparsebunble
映像檔備份,所以掛掉的就是這份唯一的備份,2004~2013長達九年
的照片就這樣直接say byebye(好不容易救回來難道又要消失了)
原本想像如果可以掛載映像檔,還可以用掃瞄程式把檔案掃出來,
但最慘的就是連掛載映像檔都沒辦法,欲哭無淚......
上網查了資料,發現相關的資訊非常少,後來往英文論壇查資料,
發現可以用指令列(前往-->工具程式-->終端機)掛載映像檔
指令為hdiutil attach -nomount -noverify -noautofsck
/Volumes/{name of your disk}/{name of}.sparsebundle

掛載後理論上會出現 /dev/disk1(或其他數字) 映像檔的名稱,
但映像檔掛掉所以出現訊息是/dev/disk4 後面沒有名稱
掛載上去後就可以嘗試用指令修復
指令為fsck_hfs -drfy /dev/disk4(看顯示的磁碟代號是什麼,最後就照著輸入)

但輸入後發生B-tree node錯誤,又開始下一輪google,發現是
檔案位址參照錯誤(硬碟界的門牌號碼),用diskwarrior應該有
機會修復,跑完之後就看到檔案回來了,差點都要落淚了


整理檔案搞到mac也在用指令列,真心覺得資管網管真不是人幹的,
以後一定要對他們多幾分敬意

 浙公网安备 33010602011771号