一、Ribbon介绍
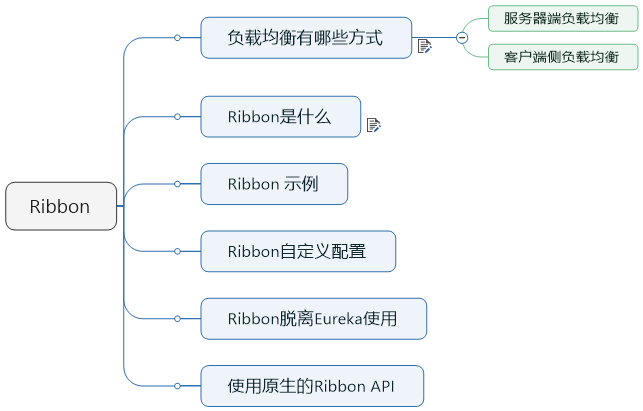
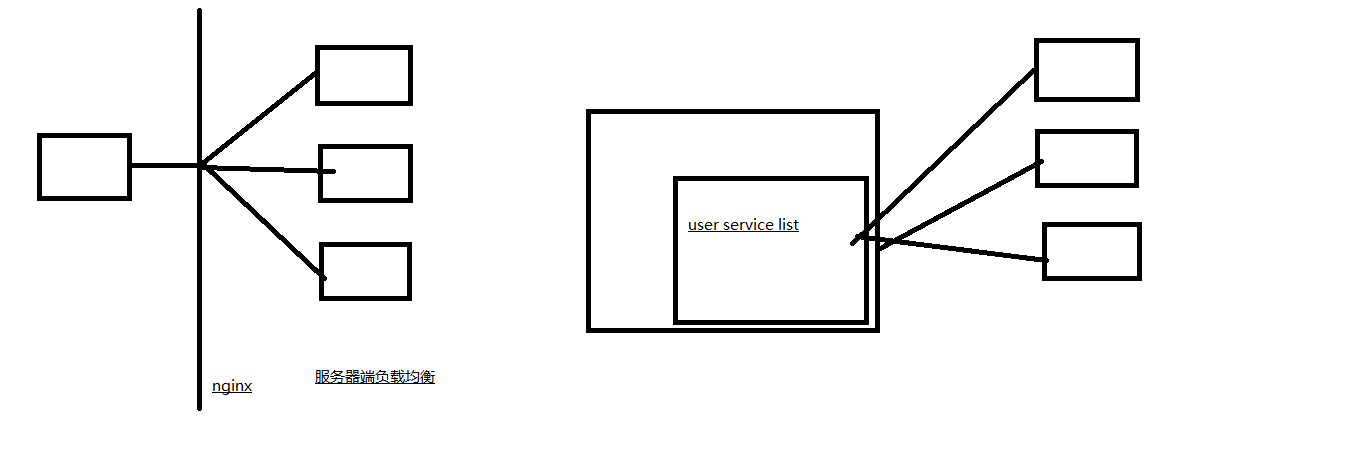
Ribbon就是客户端侧负责均衡实现的一种方式,那么Ribbon是什么呢?
Ribbon是Netflix发布的云中间层服务开源项目,其主要功能是提供客户端侧负载均衡算法。Ribbon客户端组件提供一系列完善的配置项如连接超时,重试等。简单的说,Ribbon是一个客户端负载均衡器,我们可以在配置文件中列出Load Balancer后面所有的机器,Ribbon会自动的帮助你基于某种规则(如简单轮询,随机连接等)去连接这些机器,我们也很容易使用Ribbon实现自定义的负载均衡算法。
下图展示了Eureka使用Ribbon时候的大致架构:
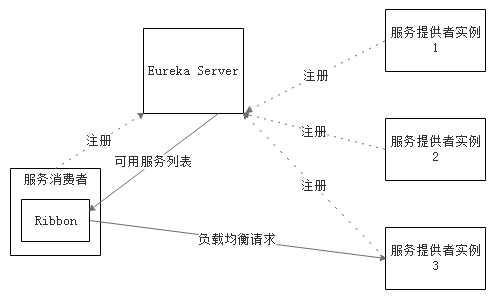
Ribbon工作时分为两步:第一步先选择 Eureka Server, 它优先选择在同一个Zone且负载较少的Server;第二步再根据用户指定的策略,在从Server取到的服务注册列表中选择一个地址。其中Ribbon提供了多种策略,例如轮询round robin、随机Random、根据响应时间加权等。
二、Ribbon示例
查看官方接口文档:https://cloud.spring.io/spring-cloud-static/spring-cloud-netflix/2.1.0.RELEASE/single/spring-cloud-netflix.html#netflix-ribbon-starter
To include Ribbon in your project, use the starter with a group ID of org.springframework.cloud and an artifact ID of spring-cloud-starter-netflix-ribbon. See the Spring Cloud Project page for details on setting up your build system with the current Spring Cloud Release Train.
我们现在MOVIE的微服务中,添加相应的依赖
        <dependency>
            <groupId>org.springframework.cloud</groupId>
            <artifactId>spring-cloud-starter-netflix-ribbon</artifactId>
        </dependency>
然后,我们只需要在启动类的中有个bean上面,增加一个@LoadBalanced,就可以实现客户端侧的负载均衡
 1 package com.zwjk.cloud;
 2
 3 import org.springframework.boot.SpringApplication;
 4 import org.springframework.boot.autoconfigure.SpringBootApplication;
 5 import org.springframework.cloud.client.loadbalancer.LoadBalanced;
 6 import org.springframework.context.annotation.Bean;
 7 import org.springframework.web.client.RestTemplate;
 8
 9 @SpringBootApplication
10 public class MovieRibbonApplication {
11
12     @Bean
13     @LoadBalanced
14     public RestTemplate restTemplate() {
15         return new RestTemplate();
16     }
17
18     public static void main(String[] args) {
19         SpringApplication.run(MovieRibbonApplication.class, args);
20     }
21
22 }
下面。我们启动两个user服务,端口分别是7901,7902,然后通过movie服务进行访问,通过查看两个的user的日志,展示请求的分发。这里我们需要修改一下配置文件,将原先的
userServicePath: http://localhost:7900/simple/
修改成:
userServicePath: http://microservice-provider-user/simple/
这是通过一个虚拟的host进行访问,这样,就能随机的访问两个user服务了
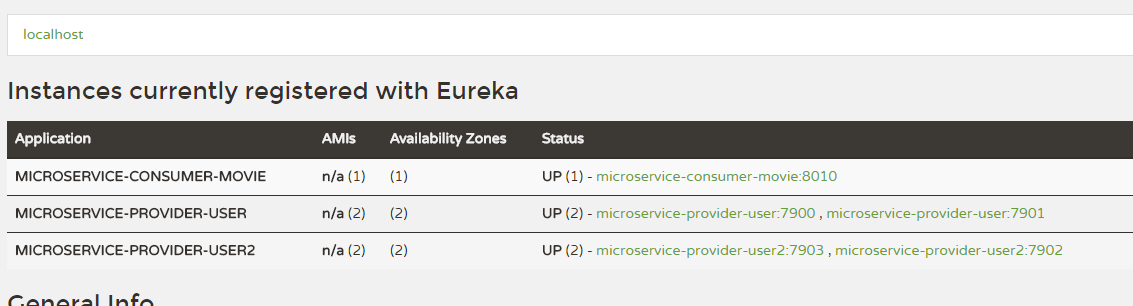
启动后,查看一下Eureka的控制台,可以看到一个服务的两个实例运行着

请求了4次后,发现,7901和7900各自获得两次请求。这是因为Ribbon默认的负载均衡的策略是轮询。
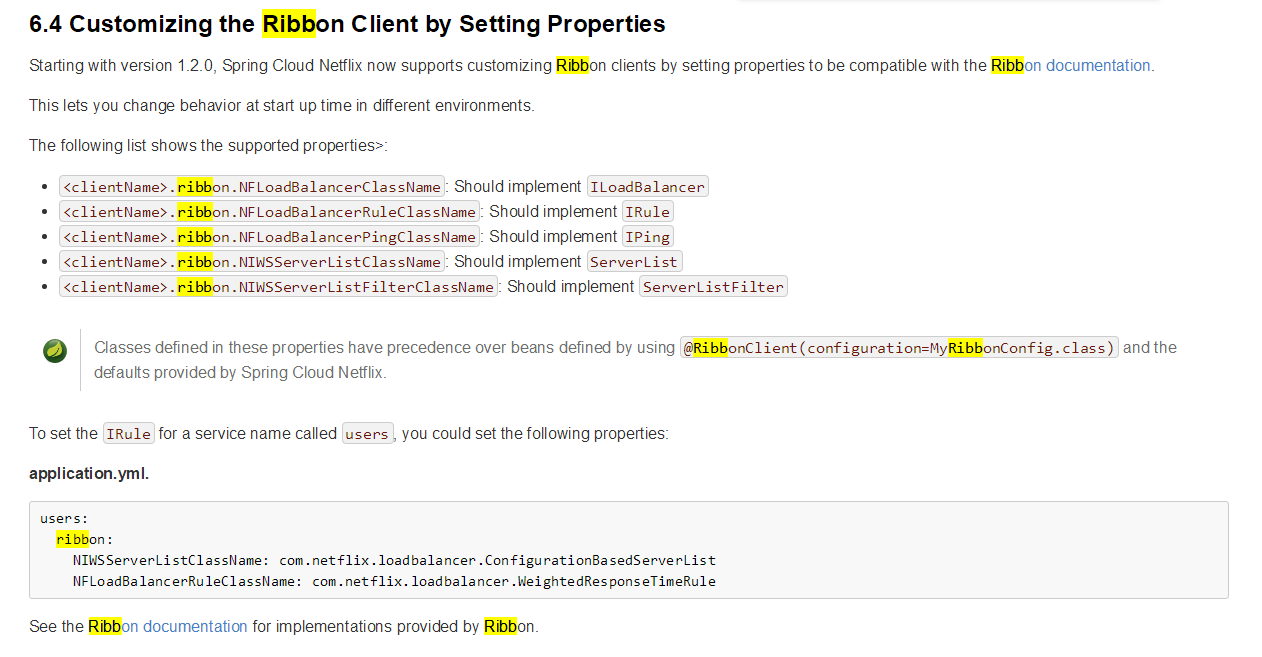
下面,我们看一下,如何来定制Ribbon的负载均衡策略,
You can configure some bits of a Ribbon client by using external properties in <client>.ribbon.*, which is similar to using the Netflix APIs natively, except that you can use Spring Boot configuration files. The native options can be inspected as static fields in CommonClientConfigKey (part of ribbon-core).
Spring Cloud also lets you take full control of the client by declaring additional configuration (on top of the RibbonClientConfiguration) using @RibbonClient, as shown in the following example:
您可以使用<client> .ribbon。*中的外部属性配置Ribbon客户端的某些位,这类似于本机使用Netflix API,但您可以使用Spring Boot配置文件。 可以在CommonClientConfigKey(ribbon-core的一部分)中将本机选项作为静态字段进行检查。
Spring Cloud还允许您通过使用@RibbonClient声明其他配置(在RibbonClientConfiguration之上)来完全控制客户端,如以下示例所示:

需要注意的是,这个有一个警告,说,@Confiuration 不能放在@ComponentScan和SpringBootApplication扫描的路径下,那就把这个配置文件,放在扫描的包的外面。
官方文档说,我们可以自定义配置,来实现自己的负载均衡的策略,我们在代码中来实现一下;
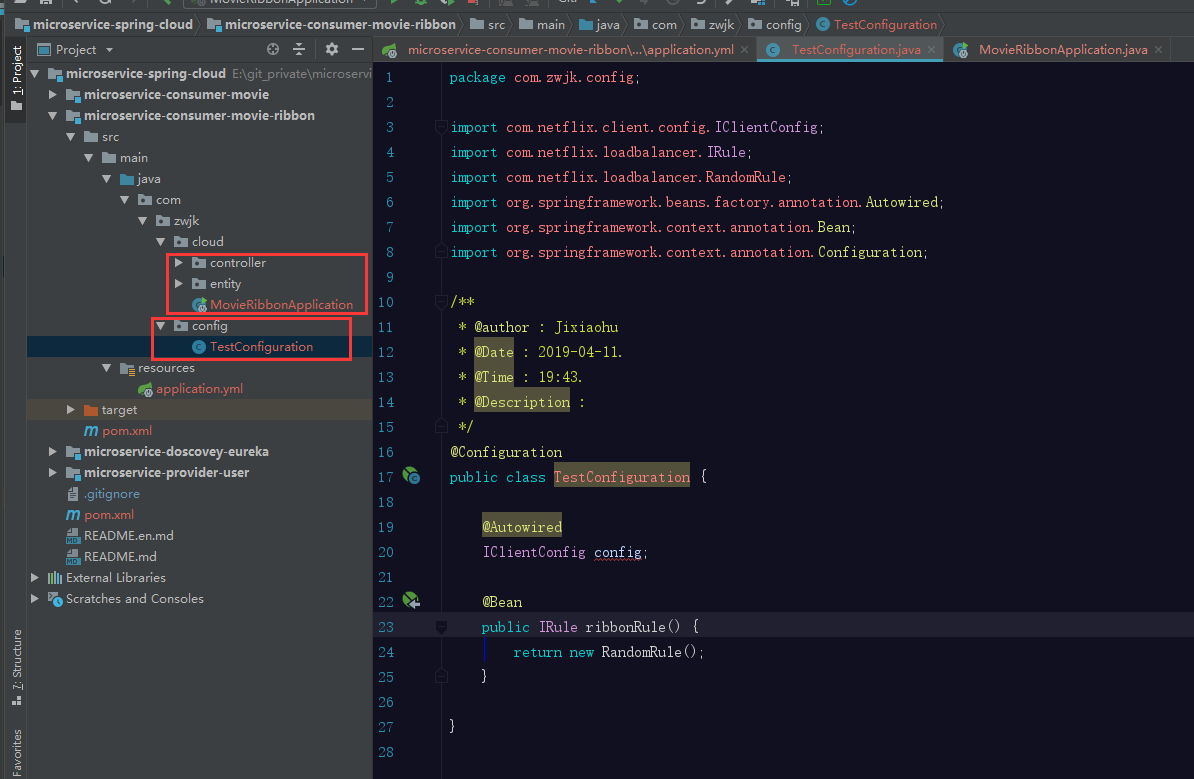
通过在外部,增加一个自定义的配置文件,要实现自定义的规则,规则设置为随机,启动Movie,并进行访问,查看user响应是否随机,
通过测试,可以发现,请求是随机的。
假设,我有多个ribbonClient,那么该怎么实现呢?(上述的方式,其实已经实现了这种方式,下面看一下多个ribbon的实现示例)
现在,我们在启动两个user,用两个新的服务名称
现在修改movie,使用两个不同的策略,访问两个不同的服务,
 1 package com.zwjk.cloud.controller;
 2
 3 import com.zwjk.cloud.entity.User;
 4 import org.springframework.beans.factory.annotation.Autowired;
 5 import org.springframework.beans.factory.annotation.Value;
 6 import org.springframework.cloud.client.ServiceInstance;
 7 import org.springframework.cloud.client.loadbalancer.LoadBalancerClient;
 8 import org.springframework.web.bind.annotation.GetMapping;
 9 import org.springframework.web.bind.annotation.PathVariable;
10 import org.springframework.web.bind.annotation.RestController;
11 import org.springframework.web.client.RestTemplate;
12
13 /**
14  * @author : Jixiaohu
15  * @Date : 2019-04-11.
16  * @Time : 9:38.
17  * @Description :
18  */
19 @RestController
20 public class MovieController {
21
22     @Autowired
23     private RestTemplate restTemplate;
24
25     @Value("${user.userServicePath}")
26     private String userServicePath;
27
28     @Autowired
29     private LoadBalancerClient loadBalancerClient;
30
31     @GetMapping("/movie/{id}")
32     public User findById(@PathVariable Long id) {
33         return this.restTemplate.getForObject(this.userServicePath + id, User.class);
34     }
35
36     @GetMapping("/test")
37     public String test() {
38         ServiceInstance serviceInstance = this.loadBalancerClient.choose("microservice-provider-user");
39         System.out.println("111" + ":" + serviceInstance.getServiceId() + ":" + serviceInstance.getHost() + ":" + serviceInstance.getPort());
40
41         ServiceInstance serviceInstance2 = this.loadBalancerClient.choose("microservice-provider-user2");
42         System.out.println("222" + ":" + serviceInstance2.getServiceId() + ":" + serviceInstance2.getHost() + ":" + serviceInstance2.getPort());
43
44         return "1";
45     }
46
47 }
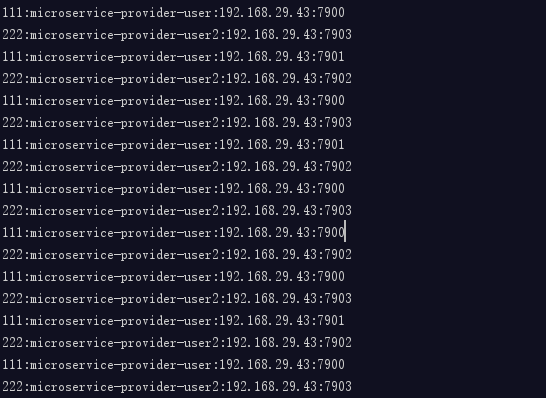
启动项目,然后访问,并查看控制台日志:
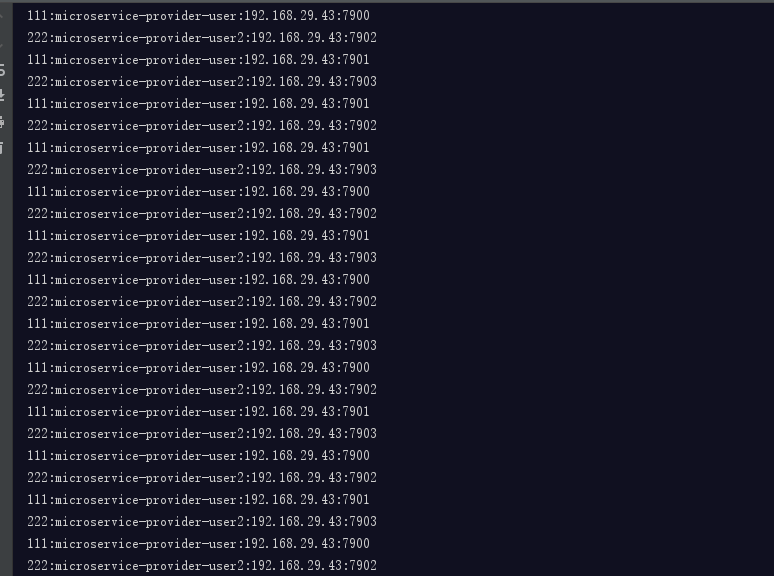
可以看出来,访问user服务是随机的,访问user2服务,是轮询的。
下面我们看一下,当我们把配置文件放在扫描包下的情况:
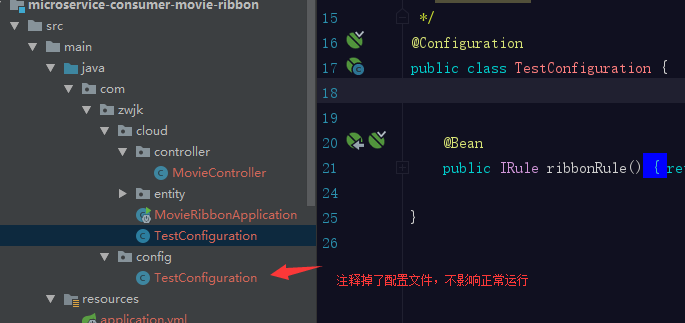
查看结果,发现,随机的策略对两个服务都产生了影响
假设,就是想要放在这里呢?当然可以,可以通过编写注解,在扫描包的时候,排除配置文件
我们编写一个空的注解
 1 package com.zwjk.cloud.exclude;
 2
 3 /**
 4  * @author : Jixiaohu
 5  * @Date : 2019-04-11.
 6  * @Time : 20:11.
 7  * @Description :
 8  */
 9 public @interface ExcludeFromComponentScan {
10 }
同时在Configuration类上增加该注解 @ExcludeFromComponentScan ,最后,在启动类上,使用@ComponentScan 注解扫描时,排除被@ExcludeFromComponentScan修饰的类
看一下启动类的注解:
 1 package com.itmuch.cloud;
 2
 3 import org.springframework.boot.SpringApplication;
 4 import org.springframework.boot.autoconfigure.SpringBootApplication;
 5 import org.springframework.cloud.client.loadbalancer.LoadBalanced;
 6 import org.springframework.cloud.netflix.eureka.EnableEurekaClient;
 7 import org.springframework.cloud.netflix.ribbon.RibbonClient;
 8 import org.springframework.context.annotation.Bean;
 9 import org.springframework.context.annotation.ComponentScan;
10 import org.springframework.context.annotation.FilterType;
11 import org.springframework.web.client.RestTemplate;
12
13 @SpringBootApplication
14 @EnableEurekaClient
15 @RibbonClient(name = "microservice-provider-user", configuration = TestConfiguration.class)
16 @ComponentScan(excludeFilters = { @ComponentScan.Filter(type = FilterType.ANNOTATION, value = ExcludeFromComponentScan.class) })
17 public class ConsumerMovieRibbonApplication {
18
19   @Bean
20   @LoadBalanced
21   public RestTemplate restTemplate() {
22     return new RestTemplate();
23   }
24
25   public static void main(String[] args) {
26     SpringApplication.run(ConsumerMovieRibbonApplication.class, args);
27   }
28 }
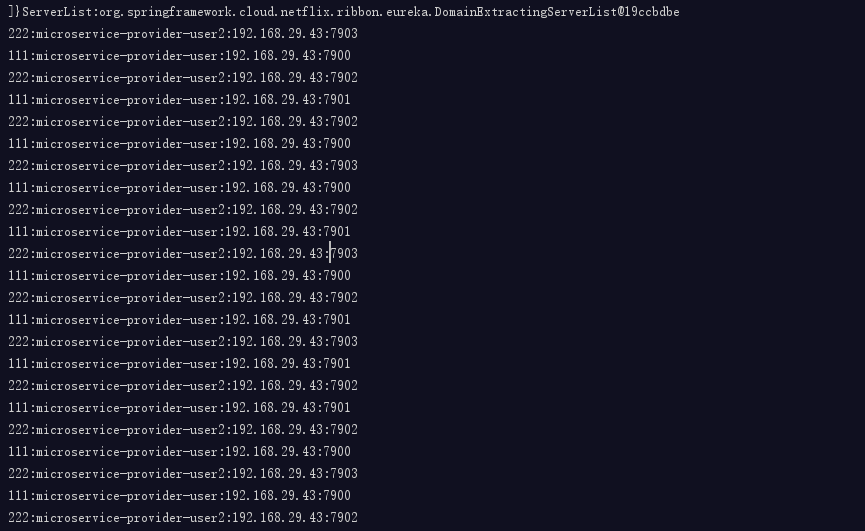
我们同样来启动一下代码,并测试一下效果:
user遵循的random的机制,user2遵循着round robin机制
负载均衡的机制,同样可以通过配置文件进行修改,通过配置文件配置的,优先级是最高的。
下面将通过配置文件,来修改负责均衡机制
在配置文件中,增加<服务名>.ribbon.NFLoadBalancerRuleClassName,
spring:
  application:
    name: microservice-consumer-movie-ribbon-properties
server:
  port: 8010
eureka:
  client:
    healthcheck:
      enabled: true
    serviceUrl:
      defaultZone: http://user:password123@localhost:8761/eureka
  instance:
    prefer-ip-address: true
microservice-provider-user:
  ribbon:
    NFLoadBalancerRuleClassName: com.netflix.loadbalancer.RandomRule

查看结果,microservice-provider-user遵循着随机的原则,microservice-provider-user2 遵循着默认的轮询机制
Ribbon,可以脱离eureka使用,只要增加一个配置文件即可:
microservice-provider-user:
  ribbon:
    listOfServers: localhost:7900
ribbon:
  eureka:
    enabled: false
然后把controller中的 microservice-provider-user2请求删除,
 1 package com.zwjk.cloud.controller;
 2
 3 import com.zwjk.cloud.entity.User;
 4 import org.springframework.beans.factory.annotation.Autowired;
 5 import org.springframework.beans.factory.annotation.Value;
 6 import org.springframework.cloud.client.ServiceInstance;
 7 import org.springframework.cloud.client.loadbalancer.LoadBalancerClient;
 8 import org.springframework.web.bind.annotation.GetMapping;
 9 import org.springframework.web.bind.annotation.PathVariable;
10 import org.springframework.web.bind.annotation.RestController;
11 import org.springframework.web.client.RestTemplate;
12
13 /**
14  * @author : Jixiaohu
15  * @Date : 2019-04-11.
16  * @Time : 9:38.
17  * @Description :
18  */
19 @RestController
20 public class MovieController {
21
22     @Autowired
23     private RestTemplate restTemplate;
24
25     @Value("${user.userServicePath}")
26     private String userServicePath;
27
28     @Autowired
29     private LoadBalancerClient loadBalancerClient;
30
31     @GetMapping("/movie/{id}")
32     public User findById(@PathVariable Long id) {
33         return this.restTemplate.getForObject(this.userServicePath + id, User.class);
34     }
35
36     @GetMapping("/test")
37     public String test() {
38         ServiceInstance serviceInstance = this.loadBalancerClient.choose("microservice-provider-user");
39         System.out.println("111" + ":" + serviceInstance.getServiceId() + ":" + serviceInstance.getHost() + ":" + serviceInstance.getPort());
40         return "1";
41     }
42
43 }
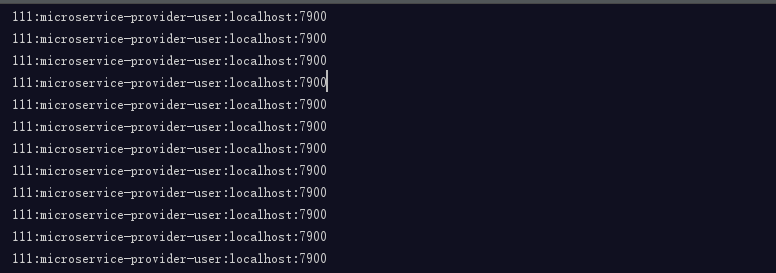
启动项目,请求http://localhost:8010/test,
查看控制台,会发现,请求全部按照配置文件配置的一样,全部发送给7900,

 浙公网安备 33010602011771号