

学习三层结构心得(二)
今天在MSDN上看到一篇文章,具体在:掌握 ASP.NET 之路:自定义实体类简介,文章本身着重不是介绍三层结构,而是介绍DataSet,自定义实体类,自定义集合等等,但里面有一句话,道出了三层结构中比较重点的设计问题,这句话是这样的:
理想情况下,您的业务层不需要知道有关基础数据库、数据库架构或 SQL 的任何内容。
于是,又翻开微软的例子程序PetShop,看看它是怎么实现:如何让业务层与界面层脱离数据库的操作,而直接转交与数据层来打交道。
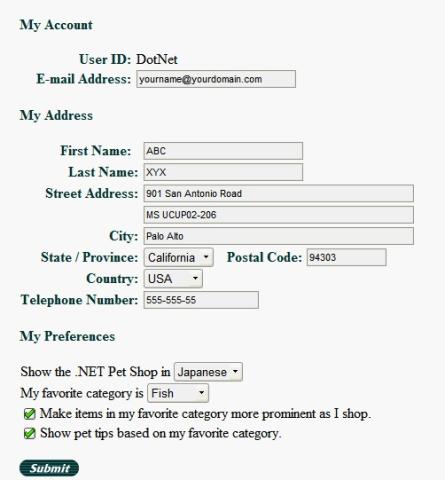
不必什么代码都看,就抽取一段,看看Account信息是怎么提交的。Account信息包含了:用户的ID,Password,Address信息,一些个人的设置。截图如下:
在Web层:Address和Preferences都是做成了用户自定义控件AddressUi.ascx。在ascx文件的代码中,以Address为例,有一个公有的AddressInfo变量Address(AddressInfo类型是在数据实体层中定义的一个包含Address必要字段的类)。可以对它存取之:
 public AddressInfo Address {

 get {
get {
 // Make sure we clean the input string firstName = WebComponents.CleanString.InputText(txtFirstName.Text, 50); string lastName = WebComponents.CleanString.InputText(txtLastName.Text, 50); string address1 = WebComponents.CleanString.InputText(txtAddress1.Text, 50); string address2 = WebComponents.CleanString.InputText(txtAddress2.Text, 50); string city = WebComponents.CleanString.InputText(txtCity.Text, 50); string state = WebComponents.CleanString.InputText(listState.SelectedItem.Text, 2); string zip = WebComponents.CleanString.InputText(txtZip.Text, 10); string country = WebComponents.CleanString.InputText(listCountry.SelectedItem.Text, 50); string phone = WebComponents.CleanString.InputText(txtPhone.Text, 10); return new AddressInfo(firstName, lastName, address1, address2, city, state, zip, country, phone);
 } set { txtFirstName.Text = value.FirstName; txtLastName.Text = value.LastName; txtAddress1.Text = value.Address1; txtAddress2.Text = value.Address2; txtCity.Text = value.City; txtZip.Text = value.Zip; txtPhone.Text = value.Phone; listState.SelectedItem.Value = value.State; listCountry.SelectedItem.Value = value.Country; }
Preferences类型亦同上。
然后,把这些控件导入进EditAccount页面中来,在EditAccount页面中就可以对他们进行值的存取了。首先是获得当前登录的AccountInfo的对象,获得与设置AccountInfo的设置放在了ProcessFlow/AccountController.cs类中,有空可以看一下这个类是怎么管理登录用户的。
获得AccountInfo对象后,在这个页面的作用就是填入到各个TextBox等控件中。代码如下:
override protected void OnLoad(EventArgs e) { if (!IsPostBack) { ProcessFlow.AccountController accountController = new ProcessFlow.AccountController(); // Retrieve the account information from the account controller AccountInfo myAccount = accountController.GetAccountInfo(true); lblUserId.Text = myAccount.UserId; txtEmail.Text = myAccount.Email; addr.Address = myAccount.Address; prefs.Language = myAccount.Language; prefs.Category = myAccount.Category; prefs.IsShowBanners = myAccount.IsShowBanners; prefs.IsShowFavorites = myAccount.IsShowFavorites; } }
}可以看出,他是重载了OnLoad函数来设置各个控件的值,但为什么不用Page_Load函数呢?还有一个要注意的是addr.Address,因为addr是用户控件AddressUi的对象,且在代码中公布了成员AddressInfo类型的Address对象。所以,可以直接设置其值。
点击“修改”按纽后,需要把这些值写入数据库,看看它是怎么做的?怎么在一个个层之间传递的:
protected void SubmitClicked(object sender, ImageClickEventArgs e) { if (Page.IsValid) { ProcessFlow.AccountController accountController = new ProcessFlow.AccountController(); // Retrieve the account information from the account controller AccountInfo myAccount = accountController.GetAccountInfo(true); // Merge in the changes string email = WebComponents.CleanString.InputText(txtEmail.Text, 50); AddressInfo address = addr.Address; string language = prefs.Language; string favCategory = prefs.Category; bool showFavorites = prefs.IsShowFavorites; bool showBanners = prefs.IsShowBanners; AccountInfo updatedAccountInfo = new AccountInfo(myAccount.UserId, myAccount.Password, email, address, language, favCategory, showFavorites, showBanners); // Submit the changes back to the controller accountController.UpdateAccount(updatedAccountInfo); } }代码就这么长,可以看出,在Web层上,根本没有与涉及任何与数据库相关的东西。没有数据库字段,没有Connection,没有Command等等。他的作用就是生成一个AccountInfo对象,然后交与ProcessFlow/AccountController.cs类处理,上面讲过这个类的作用,看看这个类对象的UpdateAccount究竟作了什么动作后,再传递到业务层。
public void UpdateAccount(AccountInfo updatedAccountInfo){ // Create the business logic tier Account account = new Account(); // Call the udpate method account.Update(updatedAccountInfo); //Store the update info back in session state HttpContext.Current.Session[ACCOUNT_KEY] = updatedAccountInfo; //Redirect the user to the my account page HttpContext.Current.Response.Redirect(URL_ACCOUNTUPDATE, true); }可以看到,在这个类中已经调用了业务层Account类了。并且把AccountInfo对象传递到了业务层。下面跟踪代码就进入了业务层。
业务层:在这一层还是不需要与数据库等相关的东西进行接触。上面Account的对象account是属于业务层的,看看它的Update函数作了什么动作:
public void Update(AccountInfo account) { // Validate input if (account.UserId.Trim() == string.Empty) return; // Get an instance of the account DAL using the DALFactory IAccount dal = PetShop.DALFactory.Account.Create(); // Send the udpated account information to the DAL dal.Update(account); }
第一步,检验数据有效性,如果有效,则交与一个工厂类来处理,工厂类的作用就是创建一个数据层对象。(因为PetShop是可以根据设置来选择是Sql Server数据库还是Oracle数据库),dal是一个接口类对象,在这儿,该接口的实例是创建SQLServerDAL项目中的Account对象,在此,已经转交到了数据层。
(如果用得是Oracle数据库,则接口创建的实例就是OracleDAL项目中的Account对象,这就是工厂类在此起到的作用,注:SQLServerDAL与OracleDAL中的Account类都是继承了IAccount接口)
看看工厂类中的代码就知道了:
 public static PetShop.IDAL.IAccount Create() { /// Look up the DAL implementation we should be using string path = System.Configuration.ConfigurationSettings.AppSettings["WebDAL"]; string className = path + ".Account"; // Using the evidence given in the config file load the appropriate assembly and class return (PetShop.IDAL.IAccount) Assembly.Load(path).CreateInstance(className); }
数据层:到了数据层之后,就开始真正的与数据库打交道了,可以看到Connection,Command,Adapter诸如此类的对象。我们的AccountInfo对象自Web层创建,层层下递,已经到了数据层。看看它怎么把这个对象放进数据库中去:
public void Update(AccountInfo myAccount) { SqlParameter[] accountParms = GetAccountParameters(); SqlParameter[] profileParms = GetProfileParameters(); SetAccountParameters(accountParms, myAccount); SetProfileParameters(profileParms, myAccount); using (SqlConnection conn = new SqlConnection(SQLHelper.CONN_STRING_NON_DTC)) //SqlHelper.CONN_STRING_NON_DTC就是Connection的连接参数。 { conn.Open(); using (SqlTransaction trans = conn.BeginTransaction()) { try { SQLHelper.ExecuteNonQuery(trans, CommandType.Text, SQL_UPDATE_ACCOUNT, accountParms); //private const string SQL_UPDATE_ACCOUNT = "UPDATE Account SET Email = @Email, FirstName = @FirstName, LastName = @LastName, Addr1 = @Address1, Addr2 = @Address2, City = @City, State = @State, Zip = @Zip, Country = @Country, Phone = @Phone WHERE UserId = @UserId"; SQLHelper.ExecuteNonQuery(trans, CommandType.Text, SQL_UPDATE_PROFILE, profileParms); trans.Commit(); }catch { trans.Rollback(); throw; } } } }
SqlParameter[] accountParms = GetAccountParameters();
SqlParameter[] profileParms = GetProfileParameters();
SetAccountParameters(accountParms, myAccount);
SetProfileParameters(profileParms, myAccount);
这四句代码是把AccountInfo对象myAccount折分开来,然后设置成一个个字段,放入accountParams与profileParams参数数组中去。
下面就是设置Sql语句,并且与参数表一一对应,执行之,即可插入数据库。执行的语句是在这个函数里面:
SQLHelper.ExecuteNonQuery(trans, CommandType.Text, SQL_UPDATE_ACCOUNT, accountParms);
跟踪,看看ExecuteNonQuery做了什么?
public static int ExecuteNonQuery(string connString, CommandType cmdType, string cmdText, params SqlParameter[] cmdParms) { SqlCommand cmd = new SqlCommand(); using (SqlConnection conn = new SqlConnection(connString)) { PrepareCommand(cmd, conn, null, cmdType, cmdText, cmdParms); int val = cmd.ExecuteNonQuery(); cmd.Parameters.Clear(); return val; } }呵呵,不说自明!可以看出,在PetShop中,Web层,业务层都没有涉及到数据库,数据架构或Sql的任何东西,而是在他们上面对数据实体对象进行某种操作,最后,在数据层上面才真正的操作了数据库。可见,在三层结构中,数据实体对象是层与层之间传递的一种媒介。

 浙公网安备 33010602011771号