nacos 的服务注册与发现
nacos的服务注册于发现。
这个要求服务统一注册到注册中心,然后调用的时候就不需要通过ip来调用,直接通过服务名即可。
服务提供者
-
pom.xml配置,需要
spring-cloud-starter-alibaba-nacos-discovery依赖<dependencies> <dependency> <groupId>org.springframework.boot</groupId> <artifactId>spring-boot-starter-web</artifactId> </dependency> <dependency> <groupId>org.springframework.cloud</groupId> <artifactId>spring-cloud-starter-alibaba-nacos-discovery</artifactId> </dependency> </dependencies> -
指定一下
EnableDiscoveryClient注解@SpringBootApplication @EnableDiscoveryClient public class ProviderApplication { public static void main(String[] args) { SpringApplication.run(ProviderApplication.class,args); } } -
application.yaml配置如下,这里需要指定spring.application.namespring: application: name: lou-nacos-service-provider cloud: nacos: discovery: server-addr: 127.0.0.1:8848 server: port: 8080 -
写个controller,用于测试
@RestController public class TestController { @GetMapping("hello/{name}") public String sayHello(@PathVariable(value = "name") String name) { return "hello " + name; } } -
启动application,可以在nacos后台的服务列表里面看到注册的服务。
![pic]()

服务消费者---基于RestTemplate
-
pom.xml配置和provider一样。
<dependencies> <dependency> <groupId>org.springframework.boot</groupId> <artifactId>spring-boot-starter-web</artifactId> </dependency> <dependency> <groupId>org.springframework.cloud</groupId> <artifactId>spring-cloud-starter-alibaba-nacos-discovery</artifactId> </dependency> </dependencies> -
指定一下@EnableDiscoveryClient注解
@SpringBootApplication @EnableDiscoveryClient public class ConsumerApplication { public static void main(String[] args) { SpringApplication.run(ConsumerApplication.class,args); } } -
application.yaml配置和provider的基本一样,除了spring.application.name
spring: application: name: lou-nacos-service-consumer cloud: nacos: discovery: server-addr: 127.0.0.1:8848 server: port: 8070 -
consumer去调用provider,这里用基于HttpClient的RestTemplate,所以需要先定义个RestTemplate Bean。需要指定
@LoadBalanced。@Configuration public class ConsumerConfiguration { @Bean @LoadBalanced public RestTemplate restTemplate(){ return new RestTemplate(); } } -
写controller。方法没有写具体ip,而是用了服务名
lou-nacos-service-provider来访问。@RestController public class TestController { private final RestTemplate restTemplate; @Autowired public TestController(RestTemplate restTemplate) { this.restTemplate = restTemplate; } @GetMapping("hello/{name}") public String hello(@PathVariable("name") String name) { return restTemplate.getForObject("http://lou-nacos-service-provider/hello/" + name, String.class); } } -
启动,同理,可以在服务列表看到注册进去的服务。
-
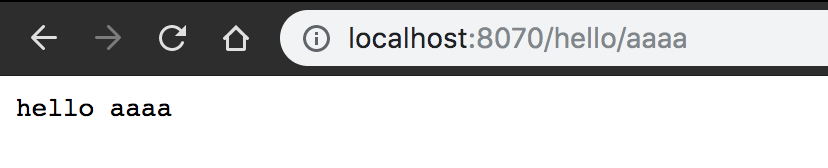
测试。通过调用consumer的rest api接口就能获取到数据。
![pic]()
服务消费者---基于OpenFeign
-
pom里面添加
spring-cloud-starter-openfeign依赖<dependency> <groupId>org.springframework.cloud</groupId> <artifactId>spring-cloud-starter-openfeign</artifactId> </dependency> -
添加注解
EnableFeignClients@SpringBootApplication @EnableDiscoveryClient @EnableFeignClients//启用 public class ConsumerApplication { public static void main(String[] args) { SpringApplication.run(ConsumerApplication.class,args); } } -
定义接口UserService
@FeignClient(name = "lou-nacos-service-provider")//服务名。
public interface UserService {

    @GetMapping("/hello/{name}")//这里表示请求lou-nacos-service-provider的/hello/{name}地址
    String hello(@PathVariable(value = "name") String name);
}
不需要实现。
-
通过定义的UserService接口调用服务,还是原先的TestController
@RestController public class TestController { @Autowired//启用了FeignClient,所以可以Autowired private UserService userService; @GetMapping("hello2/{name}") public String hello2(@PathVariable("name") String name) { return userService.hello(name);//直接调用了方法。 } } -
测试一下。访问hello2/feign,成功。
![pic]()

服务提供者的负责均衡
nacos为服务提供了自动的负载均衡,默认使用轮询的策略。

 浙公网安备 33010602011771号