
redhat5下安装Oracle 11gR2单实例+ASM
一、环境:
主机:redhat5
数据库:Oracle 11gR2
硬盘:一个100G+八个2G
内存:4g
二、搭建yum仓库
[root@oracle ~]# mkdir /mnt/cdrom
[root@oracle ~]# mount /dev/hdc /mnt/cdrom
#查看挂载
[root@oracle ~]# df -h
Filesystem            Size  Used Avail Use% Mounted on
...省略输出
/dev/hdc              2.8G  2.8G     0 100% /mnt/cdrom
#添加repo配置
[root@oracle ~]# vi /etc/yum.repos.d/server.repo
[server]
name=Red Hat Enterprise Linux
baseurl=file:///mnt/cdrom/Server
enabled=1
gpgcheck=0
三、安装依赖包
yum install binutils* -y
yum install compat* -y
yum install elfutils* -y
yum install gcc* -y
yum install glibc* -y
yum install kernel* -y
yum install ksh* -y
yum install libaio* -y
yum install libgcc* -y
yum install libgomp* -y
yum install libstdc* -y
yum install make* -y
yum install sysstat* -y
四、创建分区


[root@localhost ~]# fdisk  /dev/sdb
Device contains neither a valid DOS partition table, nor Sun, SGI or OSF disklabel
Building a new DOS disklabel. Changes will remain in memory only,
until you decide to write them. After that, of course, the previous
content won't be recoverable.

Warning: invalid flag 0x0000 of partition table 4 will be corrected by w(rite)

Command (m for help): n
Command action
   e   extended
   p   primary partition (1-4)
p

Partition number (1-4): 1
First cylinder (1-261, default 1):
Using default value 1
Last cylinder or +size or +sizeM or +sizeK (1-261, default 261):
Using default value 261

Command (m for help): w
The partition table has been altered!

Calling ioctl() to re-read partition table.
Syncing disks.
查看分区后的信息
[root@oracle ~]# fdisk -l

Disk /dev/sda: 107.3 GB, 107374182400 bytes
255 heads, 63 sectors/track, 13054 cylinders
Units = cylinders of 16065 * 512 = 8225280 bytes

   Device Boot      Start         End      Blocks   Id  System
/dev/sda1   *           1          13      104391   83  Linux
/dev/sda2              14       13054   104751832+  8e  Linux LVM

Disk /dev/sdb: 2147 MB, 2147483648 bytes
255 heads, 63 sectors/track, 261 cylinders
Units = cylinders of 16065 * 512 = 8225280 bytes

   Device Boot      Start         End      Blocks   Id  System
/dev/sdb1               1         261     2096451   83  Linux

Disk /dev/sdc: 2147 MB, 2147483648 bytes
255 heads, 63 sectors/track, 261 cylinders
Units = cylinders of 16065 * 512 = 8225280 bytes

   Device Boot      Start         End      Blocks   Id  System
/dev/sdc1               1         261     2096451   83  Linux

Disk /dev/sdd: 2147 MB, 2147483648 bytes
255 heads, 63 sectors/track, 261 cylinders
Units = cylinders of 16065 * 512 = 8225280 bytes

   Device Boot      Start         End      Blocks   Id  System
/dev/sdd1               1         261     2096451   83  Linux

Disk /dev/sde: 2147 MB, 2147483648 bytes
255 heads, 63 sectors/track, 261 cylinders
Units = cylinders of 16065 * 512 = 8225280 bytes

   Device Boot      Start         End      Blocks   Id  System
/dev/sde1               1         261     2096451   83  Linux

Disk /dev/sdf: 2147 MB, 2147483648 bytes
255 heads, 63 sectors/track, 261 cylinders
Units = cylinders of 16065 * 512 = 8225280 bytes

   Device Boot      Start         End      Blocks   Id  System
/dev/sdf1               1         261     2096451   83  Linux

Disk /dev/sdg: 2147 MB, 2147483648 bytes
255 heads, 63 sectors/track, 261 cylinders
Units = cylinders of 16065 * 512 = 8225280 bytes

   Device Boot      Start         End      Blocks   Id  System
/dev/sdg1               1         261     2096451   83  Linux

Disk /dev/sdh: 2147 MB, 2147483648 bytes
255 heads, 63 sectors/track, 261 cylinders
Units = cylinders of 16065 * 512 = 8225280 bytes

   Device Boot      Start         End      Blocks   Id  System
/dev/sdh1               1         261     2096451   83  Linux

Disk /dev/sdi: 2147 MB, 2147483648 bytes
255 heads, 63 sectors/track, 261 cylinders
Units = cylinders of 16065 * 512 = 8225280 bytes

   Device Boot      Start         End      Blocks   Id  System
/dev/sdi1               1         261     2096451   83  Linux
五、创建Oracle、grid用户和组
groupadd -g 500 dba
groupadd -g 501 oinstall
groupadd -g 1002 oper
groupadd -g 1003 backupdba
groupadd -g 1004 dgdba
groupadd -g 1005 kmdba
groupadd -g 1006 asmdba
groupadd -g 1007 asmoper
groupadd -g 1008 asmadmin
useradd -u 1101 -g oinstall -G dba,asmadmin,asmdba,asmoper grid
useradd -u 1100 -g oinstall -G dba,oper,backupdba,dgdba,kmdba,asmdba,asmadmin oracle
设置密码
echo 123456|passwd oracle --stdin
echo 123456|passwd grid --stdin
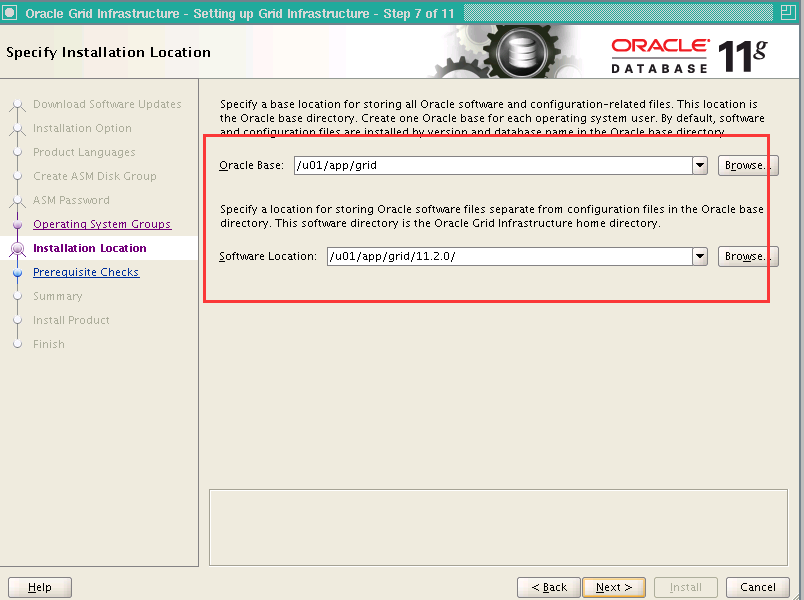
六、创建目录以及设置权限
mkdir -p /u01/app/grid/11.2.0/
mkdir -p /u01/app/grid
mkdir -p /u01/app/oracle/product/11.2.0/db_1
chown -R grid:oinstall /u01
chmod -R 775 /u01/
chown -R oracle:oinstall /u01/app/oracle
七、设置内核参数
[root@localhost Software]# vi /etc/sysctl.conf
#把已存在的内容删除(用dd命令)后添加以下内容:
fs.aio-max-nr = 1048576
fs.file-max = 6815744
kernel.shmall = 2097152
kernel.shmmax = 4294967295
kernel.shmmni = 4096
kernel.sem = 250 32000 100 128
net.ipv4.ip_local_port_range = 9000 65500
net.core.rmem_default = 262144
net.core.rmem_max = 4194304
net.core.wmem_default = 262144
net.core.wmem_max = 1048576
#修改后让内核参数生效
[root@localhost ~]# sysctl -p
八、修改操作系统对oracle、grid用户资源的限制
[root@localhost Software]# vi /etc/security/limits.conf
#在末尾添加以下内容(G后按o)
oracle soft nproc 2047
oracle hard nproc 16384
oracle soft nofile 1024
oracle hard nofile 65536
oracle soft stack 10240

grid soft nproc 16384
grid hard nproc 16384
grid soft nofile 65536
grid hard nofile 65536
grid soft stack 10240
grid hard stack 10240
九、设置Oracle、grid用户的环境变量
su - oracle
vi ~/.bash_profile
#Oracle用户增加以下内容

export ORACLE_SID=orcl
export ORACLE_BASE=/u01/app/oracle
export ORACLE_HOME=/u01/app/oracle/product/11.2.0/db_1
export ORACLE_TERM=xterm
export PATH=/usr/sbin:$PATH
export PATH=$ORACLE_HOME/bin:$PATH
export LD_LIBRARY_PATH=$ORACLE_HOME/lib:/lib:/usr/lib
export CLASSPATH=$ORACLE_HOME/JRE:$ORACLE_HOME/jlib:$ORACLE_HOME/rdbms/jlib
ulimit -u 16384 -n 65536
umask 022


su - grid
vi ~/.bash_profile
#grid用户的profile内容如下

export ORACLE_SID=+ASM
export ORACLE_BASE=/u01/app/grid
export ORACLE_HOME=/u01/app/grid/11.2.0
PATH=$PATH:$HOME/bin
export PATH=/usr/sbin:$PATH:$ORACLE_HOME/bin:$PATH
export LD_LIBRARY_PATH=$ORACLE_HOME/lib:/lib:/usr/lib
export CLASSPATH=$ORACLE_HOME/JRE:$ORACLE_HOME/jlib:$ORACLE_HOME/rdbms/jlib
export TEMP=/tmp
export TMP=/tmp
export TMPDIR=/tmp
umask 022
十、绑定裸设备
[root@localhost ~]#

raw /dev/raw/raw1  /dev/sdb1
raw /dev/raw/raw2  /dev/sdc1
raw /dev/raw/raw3  /dev/sdd1
raw /dev/raw/raw4  /dev/sde1
raw /dev/raw/raw5  /dev/sdf1
raw /dev/raw/raw6  /dev/sdg1
raw /dev/raw/raw7  /dev/sdh1
raw /dev/raw/raw8  /dev/sdi1

chown grid:asmadmin /dev/raw/raw1
chown grid:asmadmin /dev/raw/raw2
chown grid:asmadmin /dev/raw/raw3
chown grid:asmadmin /dev/raw/raw4
chown grid:asmadmin /dev/raw/raw5
chown grid:asmadmin /dev/raw/raw6
chown grid:asmadmin /dev/raw/raw7
chown grid:asmadmin /dev/raw/raw8

chmod 660 /dev/raw/raw1
chmod 660 /dev/raw/raw2
chmod 660 /dev/raw/raw3
chmod 660 /dev/raw/raw4
chmod 660 /dev/raw/raw5
chmod 660 /dev/raw/raw6
chmod 660 /dev/raw/raw7
chmod 660 /dev/raw/raw8

#命令方式绑定裸设备在系统重启后会失效,在/etc/rc.local添加以上内容,开机时会自动执行
十一、解压安装文件
su - grid
unzip  p10404530_112030_LINUX_3of7.zip

su - oracle
unzip p10404530_112030_LINUX_1of7.zip
unzip  p10404530_112030_LINUX_2of7.zip

su -
cd /tmp/grid/rpm
[root@localhost rpm]# rpm -ivh cvuqdisk-1.0.9-1.rpm
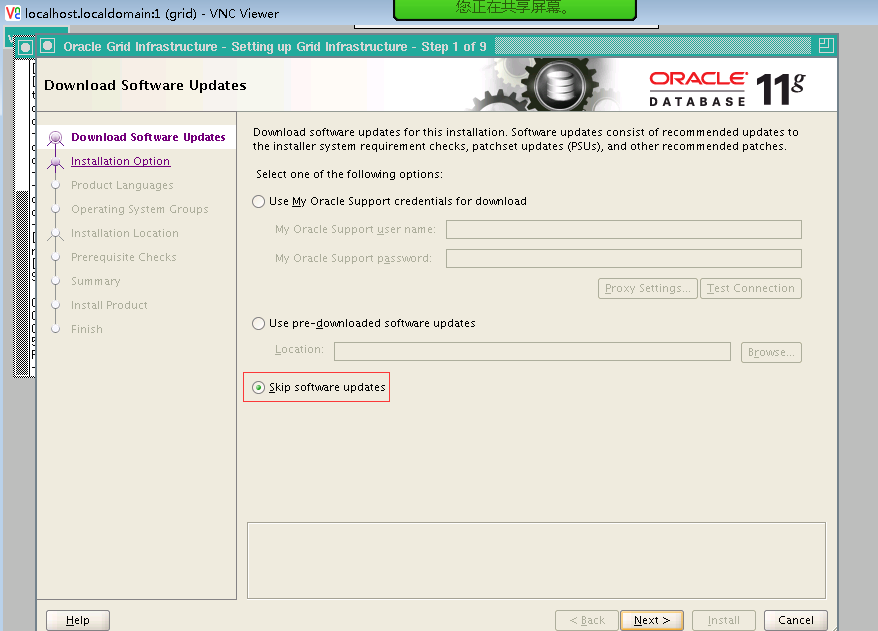
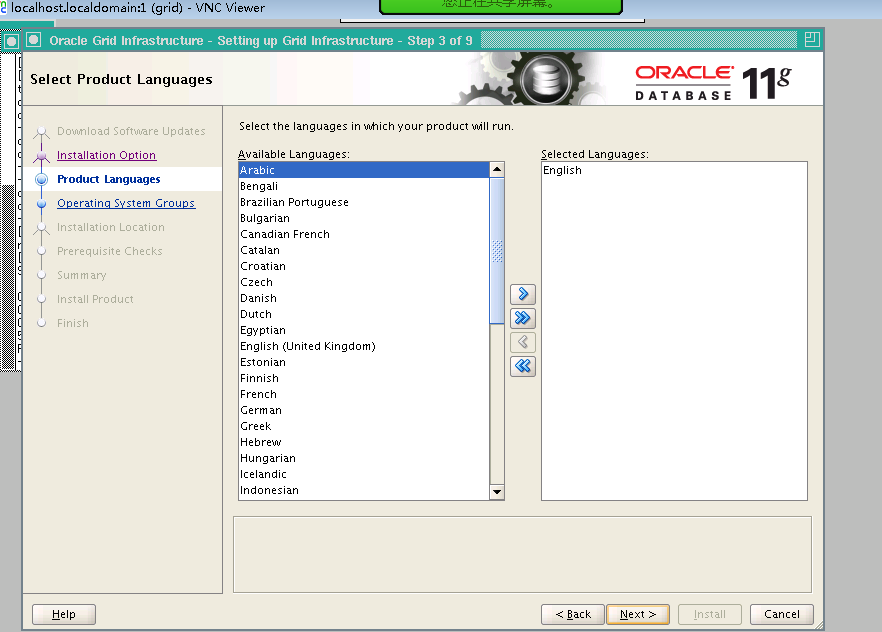
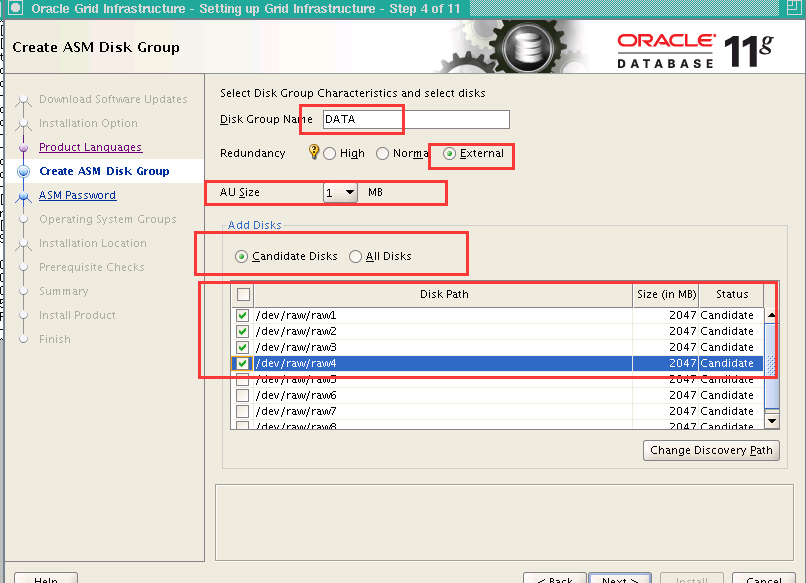
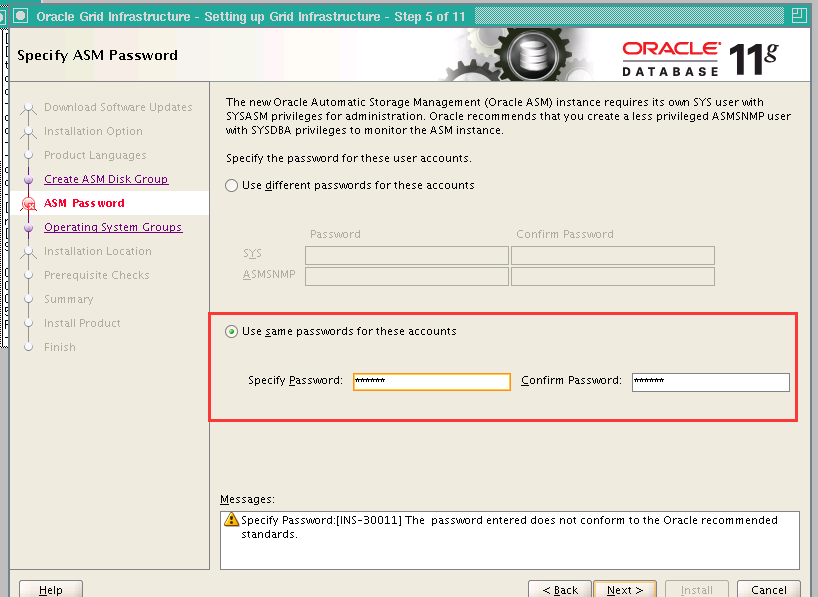
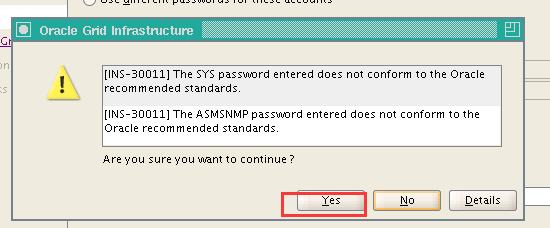
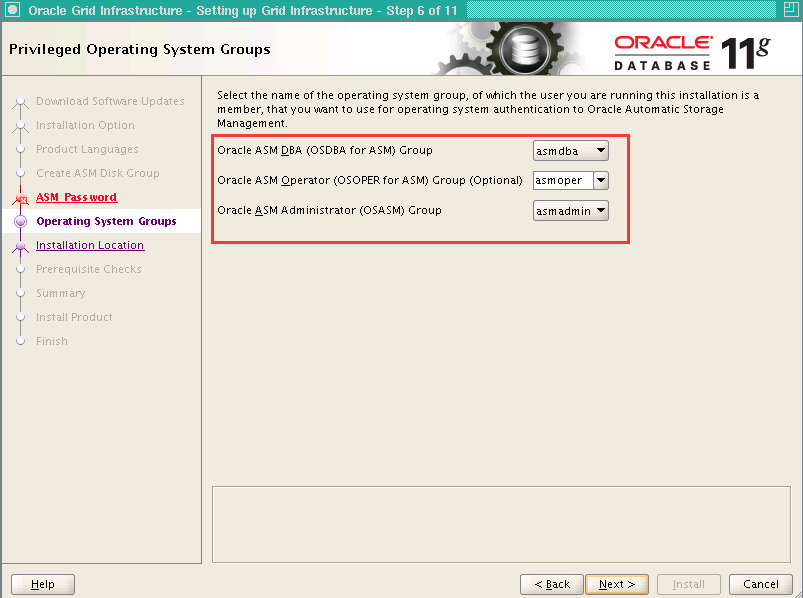
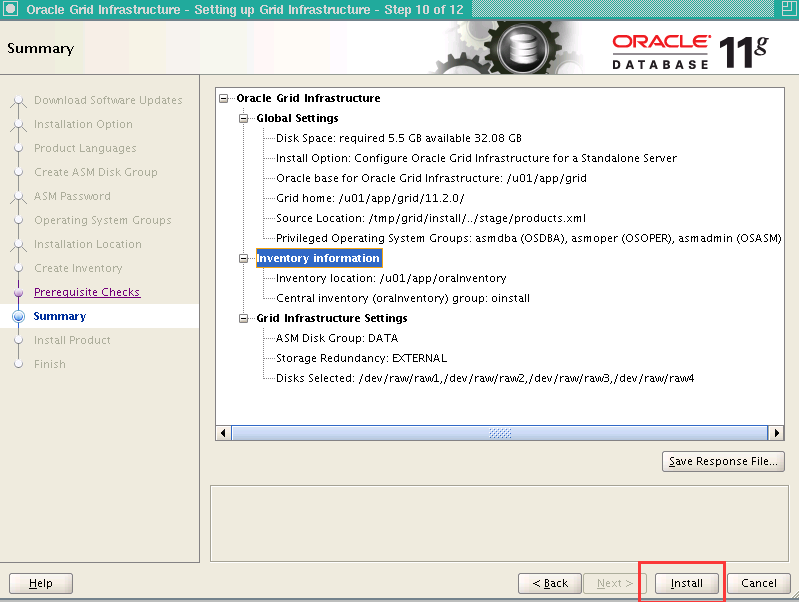
十二、使用VNC图形安装ASM软件
su – grid
vncserver
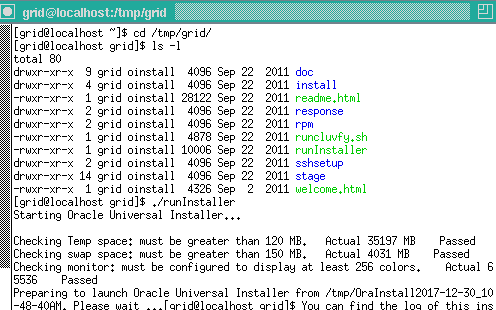
到解压的grid目录下执行./runInstaller


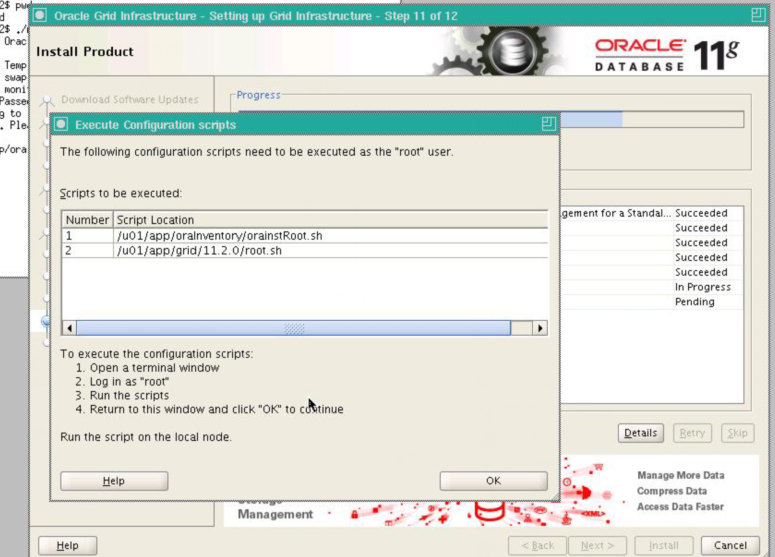
用root执行上图的两个脚本,执行后点OK
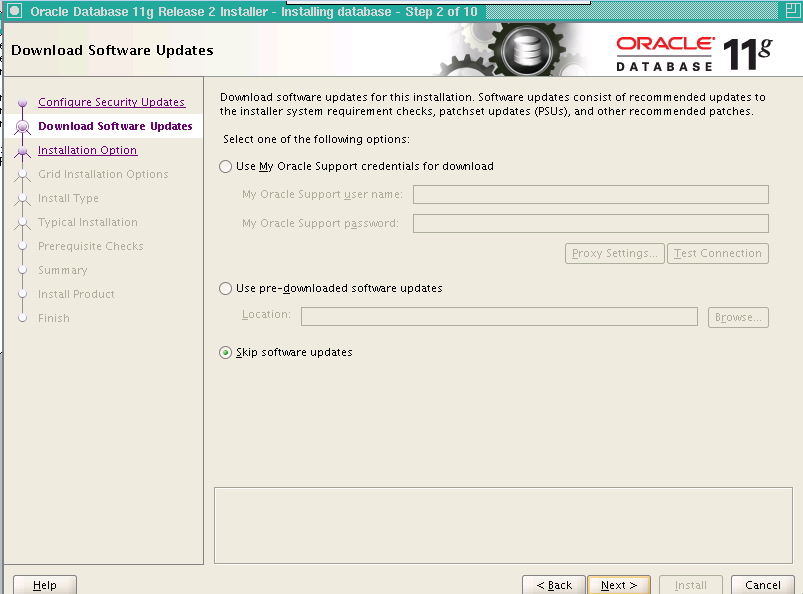
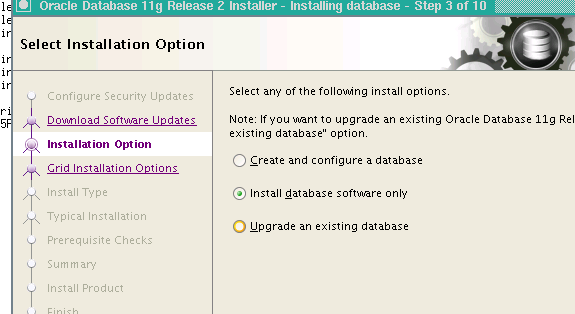
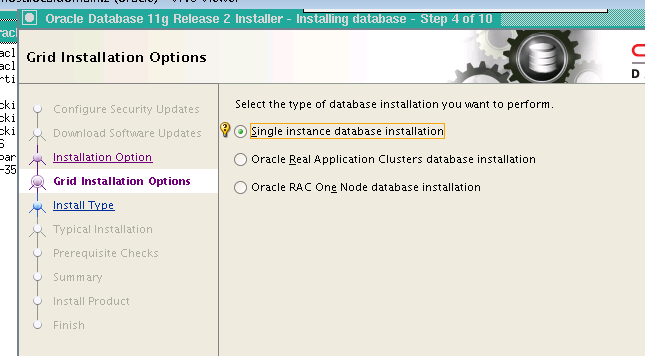
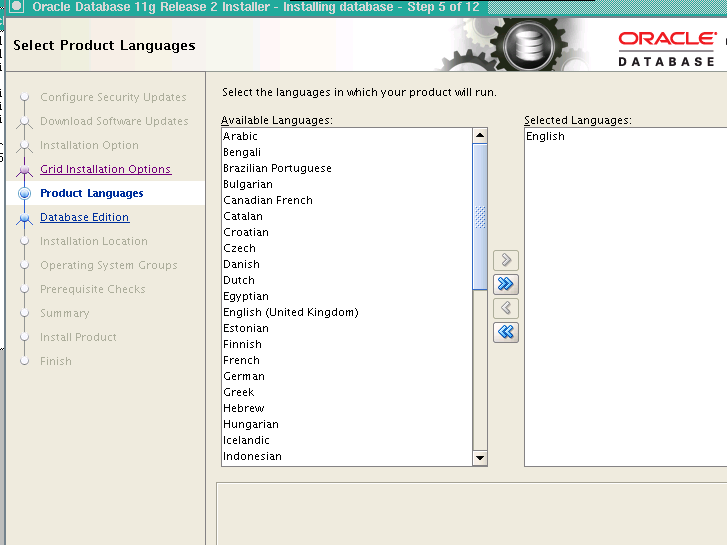
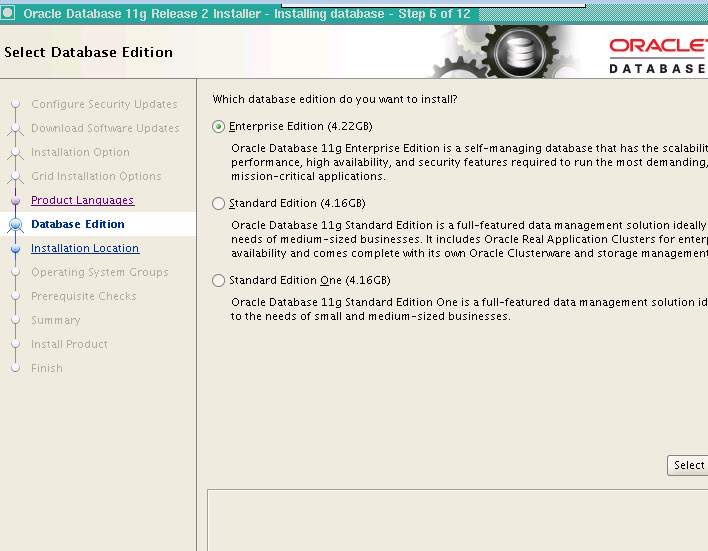
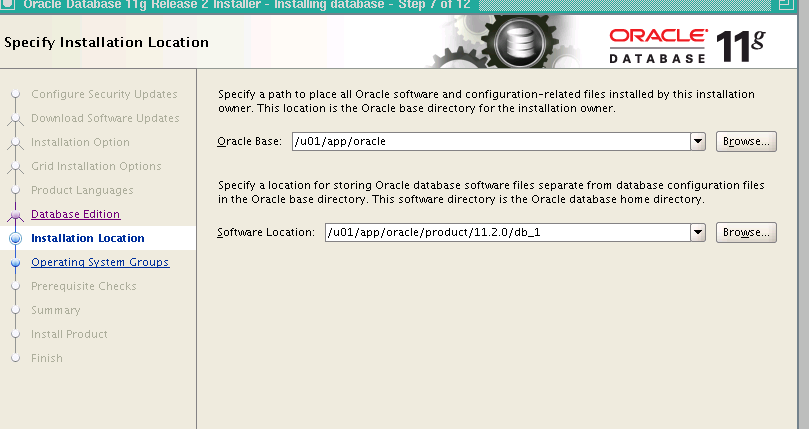
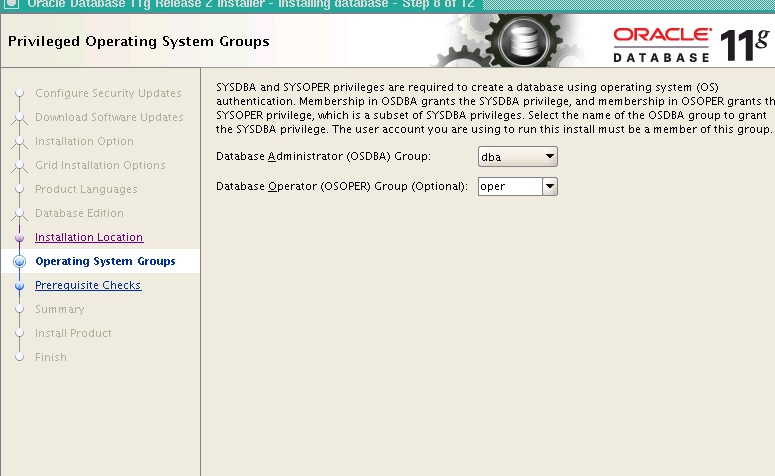
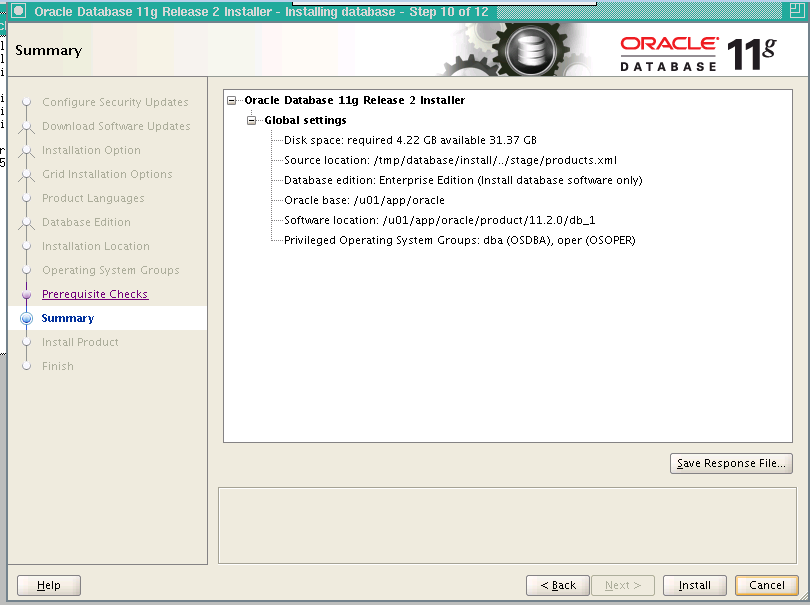
十三、使用VNC图形安装Oracle软件
su - oracle
vncserver
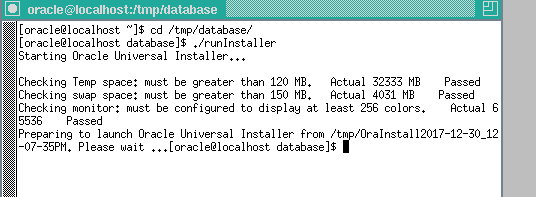
到解压的database目录下执行./runInstaller
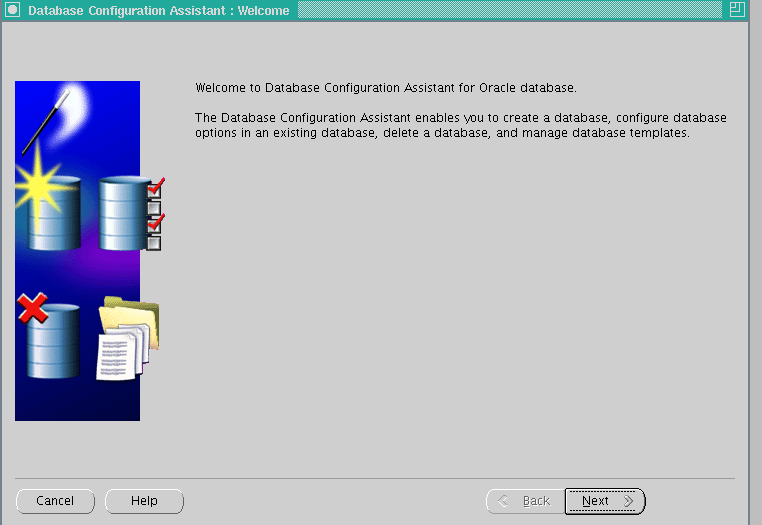
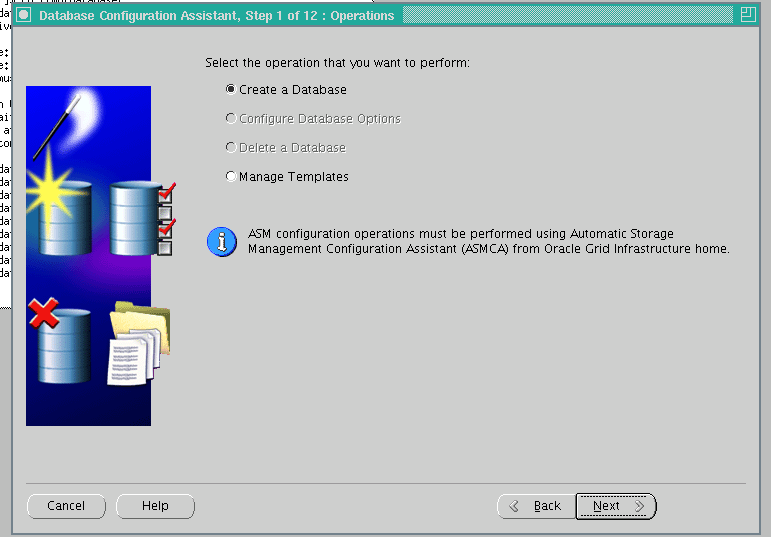
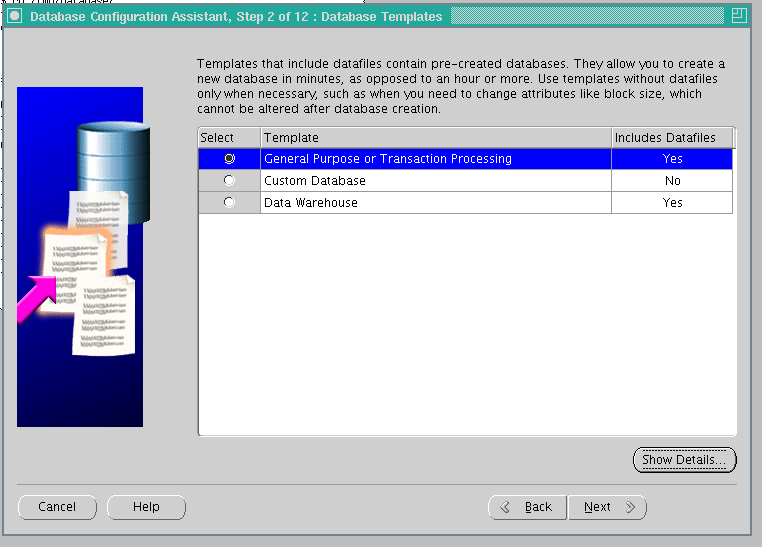
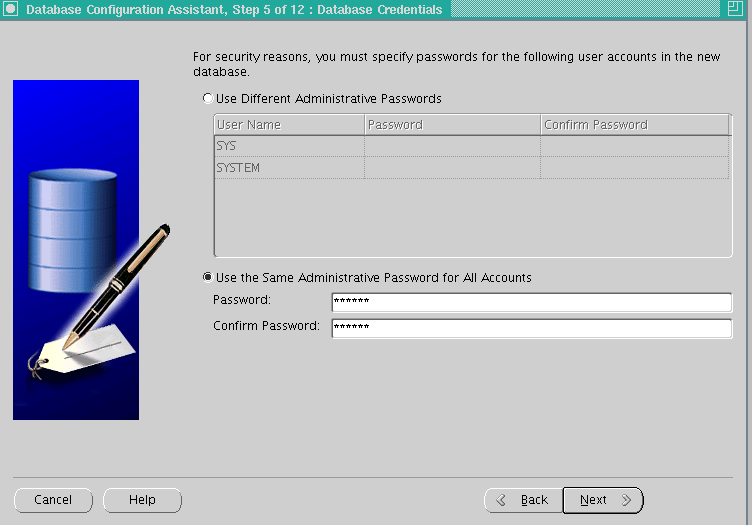
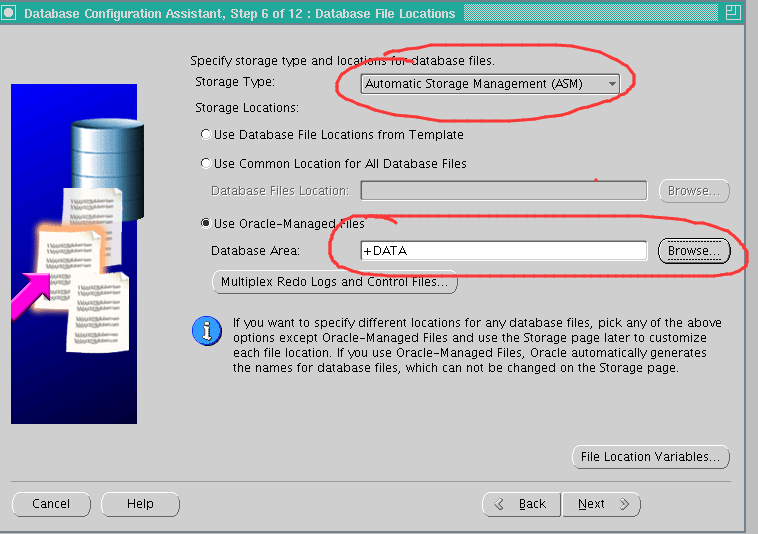
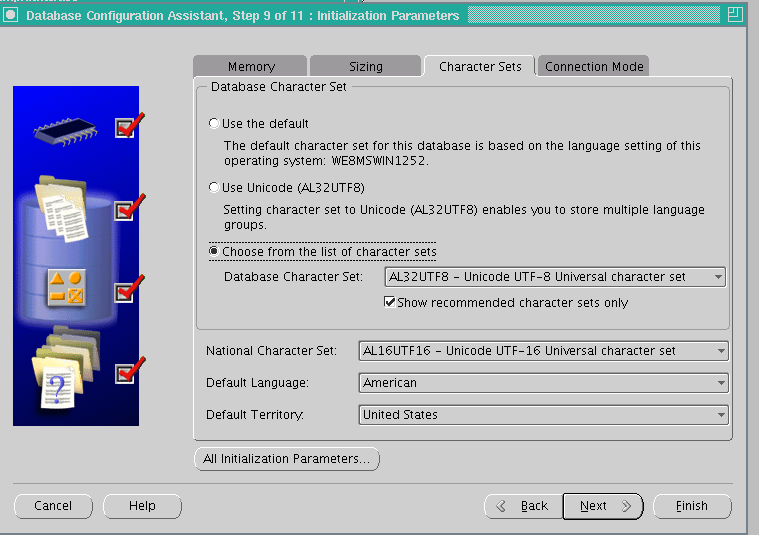
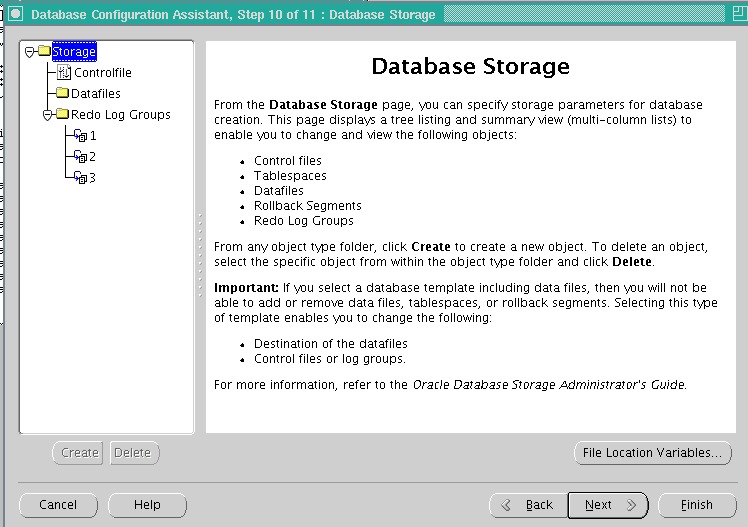
十四、使用VNC图形安装数据库
su - oracle
vncserver
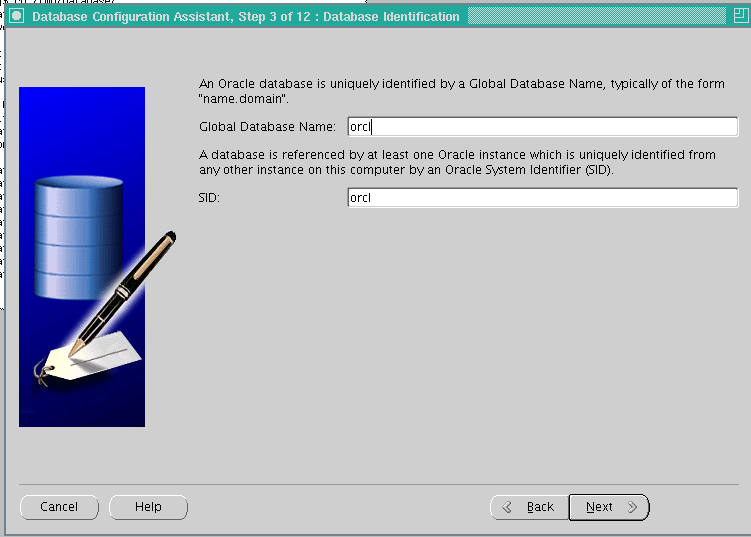
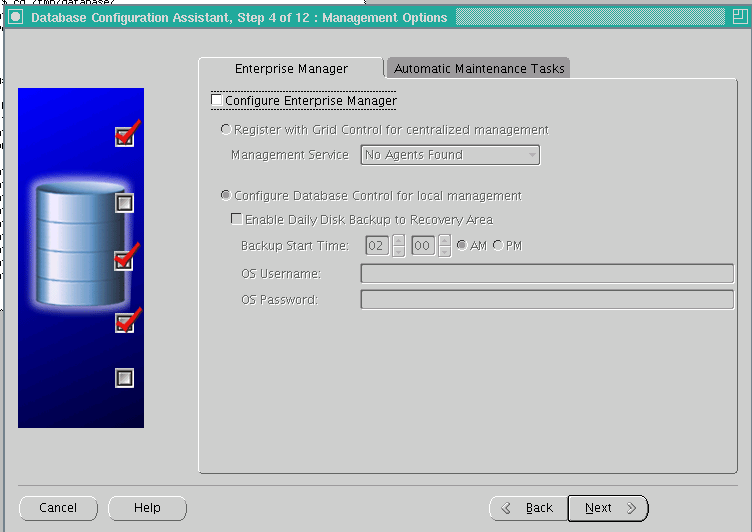
到解压的database目录下运行dbca


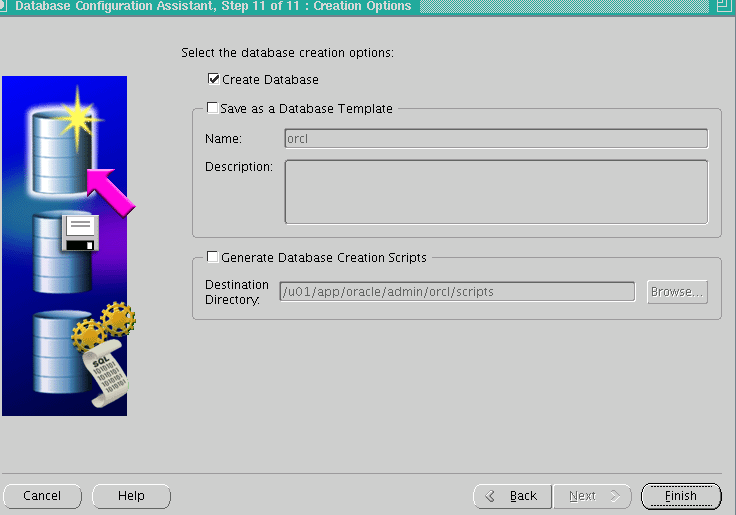
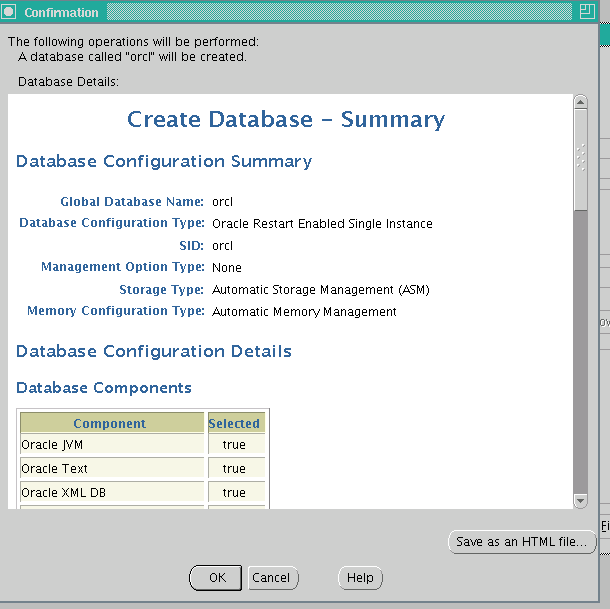
所有部署已经完成。

 浙公网安备 33010602011771号