
Angular2入门系列教程6-路由(二)-使用多层级路由并在在路由中传递复杂参数
上一篇:Angular2入门系列教程5-路由(一)-使用简单的路由并在在路由中传递参数
之前介绍了简单的路由以及传参,这篇文章我们将要学习复杂一些的路由以及传递其他附加参数。一个好的路由系统可以使我们的程序更好的工作。
假设你已经跟上了我们的进度。
我们来为我们的文章明细新增一个评论框;当我们在明细中点击评论的时候,在我们的明细页面显示评论,这里,我们就可以完全把明细页面看成一个独立的路由,可以建立自己的子路由页面,做一些评论,分享等操作。
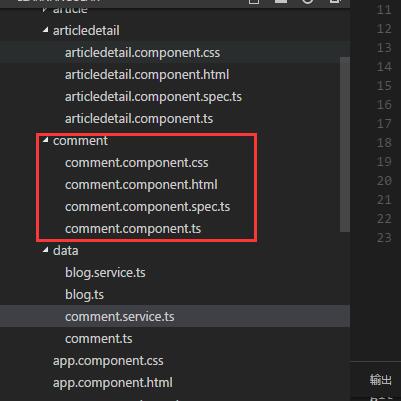
那,首先在data目录下建立我们的评论实体Commen和评论服务Comment.service


1 export class Comment{
2     id:number;
3     userName:string;
4     content:string;
5     blogId:number;
6 }
 1 import {Comment} from './comment'
 2 export let Comments:Comment[]=[];
 3 export class CommentService
 4 {
 5     public AddComment(com:Comment)
 6     {
 7         com.id=this.GetMaxId();
 8         Comments.push(com);
 9     }
10     public GetBlogComments(blogId:number):Comment[]
11     {
12         return Comments.filter(x=>x.blogId==blogId);
13     }
14     private GetMaxId():number
15     {
16         var maxId=1;
17         Comments.forEach(x=>{
18             if(x.id>maxId)
19               maxId=x.id;
20          });
21          return maxId;
22     }
23 }
作为服务,我们的commen.service提供了获取相应博客的评论以及添加评论的功能!然后我们在app.module.ts中的provider数组中添加我们的CommnetService服务类
那么,数据准备好了,现在我们来建立我们的评论页面
在App文件夹下建立以下东西(希望你是用插件直接生成,这样可以节约很多时间,插件可以帮我们直接初始化这些组件,这样我们可以直接使用而不报错),但是我们先去处理路由问题,让我们可以在articleDetai中直接导航到这个组件
之前我们谈到的路由是要用<router-outlet></router-outlet>去显示组件,我们自然要在article.detail.html中添加这么一句话
然后为了我们能找文章明细中进行,导航,我们需要配置一下路由文件。这次,我们新建一个路由配置文件,我推荐这样做,因为,我们的程序始终是分模块的,不同模块用自己的路由就行了,而不是所有的路由都配置在一个文件中
我们在根目录(app.routing同级)下面建立articleDetail.routing.ts,键入一下代码
 1 import { NgModule }             from '@angular/core';
 2 import { RouterModule, Routes } from '@angular/router';
 3
 4 import { CommentComponent }   from './comment/comment.component';
 5 import { ArticledetailComponent }   from './articledetail/articledetail.component';
 6
 7 const articleDetailRoutes: Routes = [
 8   {
 9     path: 'articledetail/:id',
10     component: ArticledetailComponent,
11     children: [
12       {
13         path: 'comment',
14         component: CommentComponent
15       }
16     ]
17   }
18 ];
19 @NgModule({
20   imports: [
21     RouterModule.forChild(articleDetailRoutes)
22   ],
23   exports: [
24     RouterModule
25   ]
26 })
27 export class ArticleDetailRoutingModule { }
我们看到有个children的节点,这个就是我们配置路由子节点的地方
然后我们将app.routing.ts中关于articledetail的路由删掉
1 const routes:Routes=[
2 { path: 'article',component: ArticleComponent},
3 { path: '',redirectTo:"/article",pathMatch: 'full'}
4 ];
然后,我们在app.moudule.ts中添加本次路由相关的信息
 1 import { BrowserModule } from '@angular/platform-browser';
 2 import { NgModule } from '@angular/core';
 3 import { FormsModule } from '@angular/forms';
 4 import { HttpModule } from '@angular/http';
 5 import { AppRoutingModule } from './app.routing';
 6 import { ArticleDetailRoutingModule } from './articledetail.routing';
 7
 8 import {BlogService} from './data/blog.service';
 9 import {CommentService} from './data/comment.service';
10
11 import { AppComponent } from './app.component';
12 import { ArticleComponent } from './article/article.component';
13 import { ArticledetailComponent } from './articledetail/articledetail.component';
14 import { CommentComponent } from './comment/comment.component';
15
16
17 @NgModule({
18   declarations: [
19     AppComponent,
20     ArticleComponent,
21     ArticledetailComponent,
22     CommentComponent
23
24   ],
25   imports: [
26     BrowserModule,
27     FormsModule,
28     HttpModule,
29     ArticleDetailRoutingModule,
30     AppRoutingModule
31
32   ],
33   providers: [BlogService,CommentService],
34   bootstrap: [AppComponent]
35 })
36 export class AppModule { }
路由可以用了,我们现在来到articleDetail组件,具体编写一下怎么路由
在html中添加代码
<button class="btn" (click)="doComment()">评论</button>
然后在ts中编写事件
doComment()
   {
      this.router.navigate(["comment"],{relativeTo:this.aRoute});
   }
好了,一切准备就绪,现在,我们的子路由可以用了,如果不出意外,点击评论按钮,你可以看到以下内容

到此,我们实现了多级路由,那么,现在来看看传递复杂参数,那,我们就把我们的博客的标题和id传过去吧
在articleDetail组件中的doComment编写
 doComment()
   {
      this.router.navigate(["comment",{id:this.blog.id,title:this.blog.title}],{relativeTo:this.aRoute})
   }
我们这里处理了两个参数,[]中"comment"表示要导航到的路由,{}里面的内容是我们传递的参数;relativeTo表示相对与aRoute的路径,我们先来看看这样做的效果
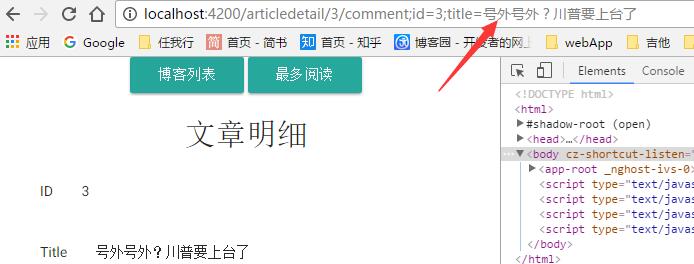
我们看到,在我们的地址栏,路由之外,用分号分割了我们传递的参数,这就是Angular2路由中传递参数的方式,之后我们要做的就是在我们的Comment里面接收这些参数,这里直接贴出我们的Comment组件的完整代码
comment.component.ts
 1 import { Component, OnInit,Input } from '@angular/core';
 2 import {ActivatedRoute,Params,Router} from '@angular/router';
 3 import { Location }     from '@angular/common';
 4
 5 import {Comment} from '../data/comment';
 6 import {CommentService} from '../data/comment.service';
 7
 8 import 'rxjs/add/operator/switchMap';
 9
10 @Component({
11     selector: 'comment',
12     templateUrl: './comment.component.html'
13 })
14
15 export class CommentComponent implements OnInit {
16     BlogTitle:string;
17     private comments:Comment[];
18     private com:Comment=new Comment();
19     private blogId:number;
20     constructor(
21         private cService: CommentService,
22         private aRoute: ActivatedRoute,
23         private router: Router,
24         private location: Location
25     ){}
26     ngOnInit() {
27             let id=this.aRoute.params
28         .subscribe(params=>{
29             this.comments=this.cService.GetBlogComments(+params["id"]);
30             this.blogId=+params["id"];
31             this.BlogTitle=params["title"];
32         })
33     }
34     sumComment()
35     {
36         if(this.com.userName&&this.com.content)
37         {
38             this.com.blogId=this.blogId;
39             this.cService.AddComment(this.com);
40             this.comments=this.cService.GetBlogComments(this.blogId);
41             console.log(this.comments);
42             this.com=new Comment();
43         }
44     }
45 }
html
 1 <div class="container">
 2     <h2>Blog: {{BlogTitle}}</h2>
 3 <div class="comment">
 4     <div class="section">
 5         <div *ngFor="let com of comments">
 6             <div>
 7                 <span>名字:</span>
 8                 <span>{{com.userName}}</span>
 9             </div>
10             <div >
11                 <span>评论内容:</span>
12                 <span>{{com.content}}</span>
13             </div>
14             <div class="divider"></div>
15         </div>
16     </div>
17 </div>
18 <div class="divider red"></div>
19 <div>
20     <div class="section">
21         <div class="">
22         来,评论一下
23         </div>
24         <div>
25             <input type="text" placeholder="你的名字" [(ngModel)]="com.userName" class="">
26             <input type="text" placeholder="说点儿什么" [(ngModel)]="com.content" class="">
27         </div>
28         <div>
29             <button class="btn" (click)="sumComment()">提交</button>
30         </div>
31     </div>
32 </div>
33 </div>
我们直接在代码里面通过route的params属性获取了路由参数,然后处理它;这里的params是一个Observable类型的,我们直接调用它的Subscribe方法(以后再介绍),获取到params,通过一些操作,将这些数据获取出来,显示在页面上,我们来看看我们做的效果
这就是我们本篇文章的内容!
也许,许多人会问了,我们可以直接在这里传递一个类的数据么,比如我们就直接传递blog:this.blog ,把整个Blog传递过去,那我只能告诉不可以,为什么?我们来看看Angular2路由参数的定义吧

这里的定义是key:string,也就是,我们的参数只能传递string类型的过去
我们并不推荐用这种方式传递很多参数到子组件中去,我们可以采用其他方式,比如localStorage;如果你非要这么做,也有解决方法,用JSON.stringify将你的类变成json字符串,到子组件接收之后,再用JSON.parse重新变成一个Object!(很蠢不是么?)
关于路由暂时就介绍这么多,Angular2有更多关于路由的知识,有兴趣的同学可以直接到官网去看,或者,我把这个系列写完了再回头写一个!在我看来,我们日常开发用不到那么多东西,就不在这里介绍了
更新ing。。。
项目已经放到了gitbub上,地址 https://github.com/SeeSharply/LearnAngular
本文章的提交 https://github.com/SeeSharply/LearnAngular/tree/8021af04eb463c31c110e058753ab19d918391af

