SpringBoot、Mybatis、mysql 实现用户的增删改查
本文主要是搭建了一个SpringBoot 的框架,集成Mybatis、MySql、Pagehelper来实现用户表的增删(单条、多条)改查(单条、列表、分页)等功能
一、环境配置、导入依赖
1、新建一个SpringBoot项目,写入依赖
<!--MySQL JDBC驱动-->
        <dependency>
            <groupId>mysql</groupId>
            <artifactId>mysql-connector-java</artifactId>
        </dependency>
<!--MySQL JDBC驱动-->
        <dependency>
            <groupId>mysql</groupId>
            <artifactId>mysql-connector-java</artifactId>
        </dependency>
<!--集成MyBatis-->
        <dependency>
            <groupId>org.mybatis.spring.boot</groupId>
            <artifactId>mybatis-spring-boot-starter</artifactId>
            <version>2.1.3</version>
        </dependency>
<!--引入分页插件-->
        <dependency>
            <groupId>com.github.pagehelper</groupId>
            <artifactId>pagehelper-spring-boot-starter</artifactId>
            <version>1.2.12</version>
        </dependency>
2、写 application.properties配置文件
application.properties 文件配置
#指定当前环境
spring.profiles.active=dev

#mysql 驱动
spring.datasource.driver-class-name=com.mysql.cj.jdbc.Driver

#mybatis映射配置
#mapper接口对应的xml文件(sql语句)位置
mybatis.mapper-locations=classpath:mapper/*.xml
#对应的实体类的位置
mybatis.type-aliases-package=com.example.userstartercore.system.dto
mybatis.configuration.map-underscore-to-camel-case=true

#分页插件配置
pagehelper.helper-dialect=mysql
#当该参数设置为true时,pageNum<=0 时会查询第一页,pageNum>pages(超过总数时),会查询最后一页
pagehelper.reasonable=true
pagehelper.support-methods-arguments=true
pagehelper.params=count=countSql
application-dev.properties 文件配置
#tomcat
server.port=8080

#数据源配置
spring.datasource.url=jdbc:mysql://localhost:3306/springboot?useUnicode=true&characterEncoding=utf-8&useSSL=false&serverTimezone=UTC
spring.datasource.username=username
spring.datasource.password=password

#分页插件配置
pagehelper.helper-dialect=mysql
pagehelper.params=count=countSql
pagehelper.reasonable=true
pagehelper.support-methods-arguments=true
3、数据库建表
CREATE TABLE `user` (
  `USER_ID` bigint(20) NOT NULL AUTO_INCREMENT COMMENT '表ID,主键,供其他表做外键',
  `USERNAME` varchar(30) NOT NULL COMMENT '用户名',
  `PASSWORD` varchar(100) NOT NULL COMMENT '密码',
  `NICKNAME` varchar(30) NOT NULL COMMENT '用户名称',
  `BIRTHDAY` date DEFAULT NULL COMMENT '生日',
  `SEX` int(1) DEFAULT NULL COMMENT '性别:1-男;0-女',
  PRIMARY KEY (`USER_ID`),
  UNIQUE KEY `USERNAME` (`USERNAME`)
) ENGINE=InnoDB AUTO_INCREMENT=3 DEFAULT CHARSET=utf8 COMMENT='用户';
二、功能实现
1、实现添加一个用户和多个用户
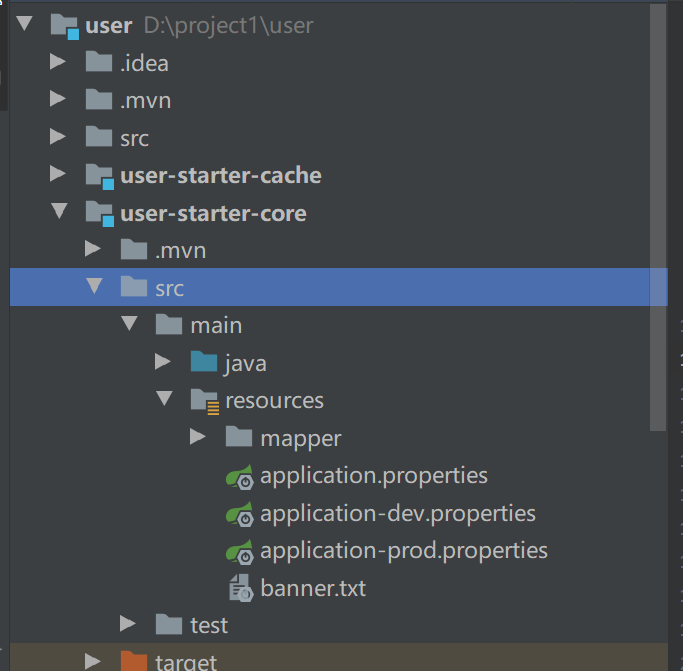
先贴一张具体项目结构图

(1)先建一张和数据库表对应的实体类 User1
@JsonInclude(JsonInclude.Include.NON_NULL)
@Table(name = "USER")
public class User1 extends BsaeDTO{
/**
     * 用户ID
     */
    @Id
    @GeneratedValue(strategy = GenerationType.IDENTITY)
    @OrderBy("DESC")
    private Long userId;
    /**
     * 用户名
     */
    private String username;
    /**
     * 密码
     */
    private String password;
    /**
     * 昵称
     */
    private String nickname;
    /**
     * 生日
     */
    @JsonFormat(pattern = Dates.Pattern.DATE)
    private Date birthday;
    /**
     * 性别:1-男/0-女
     */
    private Integer sex;

    getter 和 setter 方法
(2) 写操作数据库的mapper接口
package com.example.userstartercore.system.dao;

import com.example.userstartercore.system.dto.User1;
import org.apache.ibatis.annotations.Mapper;
import org.springframework.stereotype.Repository;
import java.util.List;
/**
 * @author chenhong
 * @create 2021/1/11
 * @desc  用户持久层接口
 */
@Mapper
@Repository
public interface UserMapper {
    //添加一个用户
    User1 addUser (User1 user);

    //添加多个用户
    int addUser1List (List<User1> user1);
}
(3) 写对应的 xml文件,sql 语句去操作数据库
<?xml version="1.0" encoding="utf-8" ?>
<!DOCTYPE mapper PUBLIC "-//mybatis.org//DTD Mapper 3.0//EN" "http://mybatis.org/dtd/mybatis-3-mapper.dtd" >
<mapper namespace="com.example.userstartercore.system.dao.UserMapper">

    <!--添加一个用户-->
    <select id="addUser" resultType="com.example.userstartercore.system.dto.User1">
        insert into springboot.user (username,password,nickname,birthday,sex)
        values (#{username},#{password},#{nickname},#{birthday},#{sex})
    </select>

    <!--添加多个用户-->
    <insert id="addUser1List" parameterType="java.util.List">
        insert into springboot.user
        (username, password,nickname,birthday,sex )
        values
        <foreach collection="list" item="user" index= "index" separator =",">
            (#{user.username},#{user.password}, #{user.nickname}, #{user.birthday}, #{user.sex})
        </foreach>

    </insert>
</mapper>
(4)在UserService 接口中 定义 添加一个用户和多个用户的方法,,,以及在impl中实现接口中定义的方法
public interface UserService {

    /**
     * 添加一个用户
     * @param user
     * @return User1
     */
    User1 addUser (User1 user);

    /**
     * 添加多个用户
     * @param  user1
     * @return List<User1>
     */
    int addUser1List (List<User1> user1);
}
@Service
public class UserServiceImpl  implements UserService{

    @Autowired
    private UserMapper userMapper;

    //添加一个用户
    @Override
    public User1 addUser(User1 user) {
        return userMapper.addUser(user);
    }

    //添加多个用户
    @Override
    public int addUser1List(List<User1> user1) {
        return userMapper.addUser1List(user1);
    }
}
(5)写controller 接收前端的访问
@RequestMapping
@RestController
public class UserController  {
    @Autowired
    private UserService  userService;
     /**
      * 添加一个用户,,,自己写的SQL
      */
     @PostMapping("/sys/user/addOne")
     public Result addUser(@Valid @RequestBody User1 user) {
         user = userService.addUser(user);
         System.out.println(user);
         return null;
     }
    /**
     * 添加多个用户
     */
    @PostMapping("/sys/user/addList")
    public Result addUsers(@Valid @RequestBody List<User1> user) {
        System.out.println("打印出来了嘛"+user);
        userService.addUser1List(user);
        System.out.println(user);
        return null;
    }
}
(6) 用PostMan 进行接口测试

数据插入成功

2、修改用户密码
用户需要往后端传 userId 、之前的密码oldpassword 、新设置的密码newpassword1、确认的密码newpassword 2,这个时候我们的cotroller 需要有对象来接收这四个数据,用User1 表去继承一个父类实体 BaseDTO
在Base中添加扩展字段 Attribute ,具体代码如下
/**
 * @author chenhong
 * @create 2021/1/7
 * @desc 基础实体类
 */
public class BsaeDTO implements Serializable {
  /**
       * 操作类型,add/update/delete 参考
       */
    @Transient
    private String _operate;

    /**
     * 数据版本号,每发生update则自增,用于实现乐观锁.
     */

    private Long versionNumber;

    /**
     * 创建人用户名
     */
    @JsonInclude(JsonInclude.Include.NON_NULL)
    private Long createBy;

    /**
     * 创建人名称
     */
    @JsonInclude(JsonInclude.Include.NON_NULL)
    @Transient
    private String creator;

    /**
     * 创建时间
     */
     @JsonInclude(JsonInclude.Include.NON_NULL)
     @JsonFormat(pattern = Dates.DEFAULT_PATTERN)
     private Date createDate;

    /**
     * 更新人用户名
     */
     @JsonInclude(JsonInclude.Include.NON_NULL)
     private Long updateBy;

     /**
      * 更新人名称
      */
      @JsonInclude(JsonInclude.Include.NON_NULL)
      @Transient
      private String updater;

      /**
       * 更新时间
       */
       @JsonInclude(JsonInclude.Include.NON_NULL)
       @JsonFormat(pattern = Dates.DEFAULT_PATTERN)
       private Date updateDate;

       /**
        * 其它属性
        */
        @JsonIgnore
        @Transient
        protected Map<String, Object> innerMap = new HashMap<>();


         //
         // 下面是扩展属性字段
         // ----------------------------------------------------------------------------------------------------
         @JsonInclude(JsonInclude.Include.NON_NULL)
         private String attribute1;

        @JsonInclude(JsonInclude.Include.NON_NULL)
        private String attribute2;

        @JsonInclude(JsonInclude.Include.NON_NULL)
        private String attribute3;

        @JsonInclude(JsonInclude.Include.NON_NULL)
        private String attribute4;

        @JsonInclude(JsonInclude.Include.NON_NULL)
        private String attribute5;

        @JsonInclude(JsonInclude.Include.NON_NULL)
        private String attribute6;

        @JsonInclude(JsonInclude.Include.NON_NULL)
        private String attribute7;

        @JsonInclude(JsonInclude.Include.NON_NULL)
        private String attribute8;

        @JsonInclude(JsonInclude.Include.NON_NULL)
        private String attribute9;

        @JsonInclude(JsonInclude.Include.NON_NULL)
        private String attribute10;

        getter 和 setter 方法
controller 写法:
  @PostMapping("/sys/user/updateUserPassword")
     public int updateUserPassword (@Valid @RequestBody User1 user) {
         return userService.updateUserPassword(user.getUserId(),user.getPassword(),user.getAttribute1(),user.getAttribute2());
     }
service 和 serviceimpl
/**
     * 修改用户密码
     */
    int updateUserPassword(Long userId, String oldpassword, String password1, String password2);
  //修改用户密码
    @Override
    public int updateUserPassword(Long userId, String oldpassword, String password1, String password2) {
        if (password1.equals(password2)) {
            return userMapper.updateUserPassword(userId,oldpassword,password1);
        }
        else return 0;
    }
对应的 UserMapper 接口
  //改修改用户密码
    int updateUserPassword (Long userId, String oldpassword, String password1);
对应的xml 文件
 <!--修改用户的密码-->
    <update id="updateUserPassword">
        update springboot.user set password = #{password1}
        where user_Id = #{userId} and password = #{oldpassword}
    </update>
PostMan 测试

3、分页查询
Contrller,网上教程很多
   @GetMapping("/sys/user/queryAll")
    public Result queryAll(Model model, @RequestParam(defaultValue = "1",value="pageNum") Integer pageNum) {
        PageHelper.startPage(pageNum,5);
        List<User1> user = userService.findAllUser();
        PageInfo<User1> pageInfo = new PageInfo<User1>(user);
        model.addAttribute("pageInfo",pageInfo);
        return null;
    }
新手入门的博客,,,请多多指教

 浙公网安备 33010602011771号