kvm命令行安装
1、配置环境
| 主机名 | 外网ip | 内网ip |
| c7-81 | 10.0.0.81 | 172.16.1.81 |
2、查看是否支持虚拟化
[root@ c7-81 ~]# dmesg |grep kvm
[root@ c7-81 ~]# egrep -o '(vmx|svm)' /proc/cpuinfo
3、安装kvm用户模块
[root@ c7-81 ~]# yum install qemu-kvm qemu-kvm-tools libvirt -y
3.1、启动libvirt
[root@ c7-81 ~]# systemctl enable libvirtd
[root@ c7-81 ~]# systemctl start libvirtd
4、上传镜像
[root@ c7-81 ~]# cd /opt/

[root@ c7-81 opt]# ll
total 940032
-rw-r--r-- 1 root root 962592768 May 13 15:16 CentOS-7-x86_64-Minimal-1810.iso
[root@ c7-81 opt]# dd if=/dev/cdrom of=/opt/CentOS-7-x86_64-Minimal-1810.iso
4.1、创建磁盘
[root@ c7-81 opt]# qemu-img create -f qcow2 /opt/c73.qcow2 6G
[root@ c7-81 opt]# ll
total 4554948
-rw-r--r-- 1 root root     197120 May 13 15:20 c73.qcow2
-rw-r--r-- 1 root root 4664066048 May 13 15:18 CentOS-7-x86_64-Minimal-1810.iso
-f 制定虚拟机格式
/opt/ 存放路径
6G 镜像大小
raw 裸磁盘不支持快照
qcow2 支持快照
qemu-img软件包是quem-kvm-tools依赖安装的
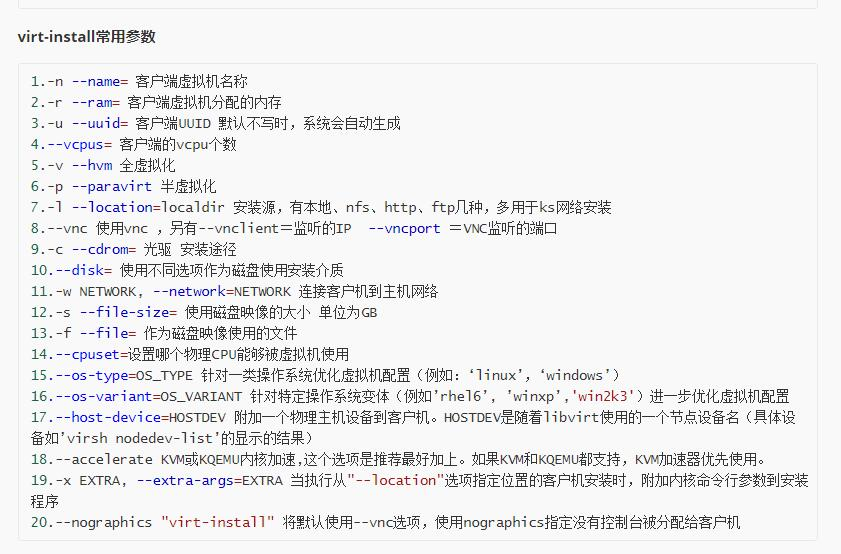
5、安装虚拟机
[root@ c7-81 opt]# yum -y install virt-install
[root@ c7-81 opt]# virt-install --virt-type=kvm --name=c73 --vcpus=1 -r 1024 --cdrom=/opt/CentOS-7-x86_64-Minimal-1810.iso--network network=default --graphics vnc,listen=0.0.0.0 --noautoconsole --os-type=linux --os-variant=rhel7 --disk path=/opt/c73.qcow2,size=6,format=qcow2
[root@ c7-81 opt]# virsh list --all
 Id    Name                           State
----------------------------------------------------
 1     c73                            running

[root@ c7-81 opt]# netstat -lntup | grep 5900
tcp        0      0 0.0.0.0:5900            0.0.0.0:*               LISTEN      2733/qemu-kvm
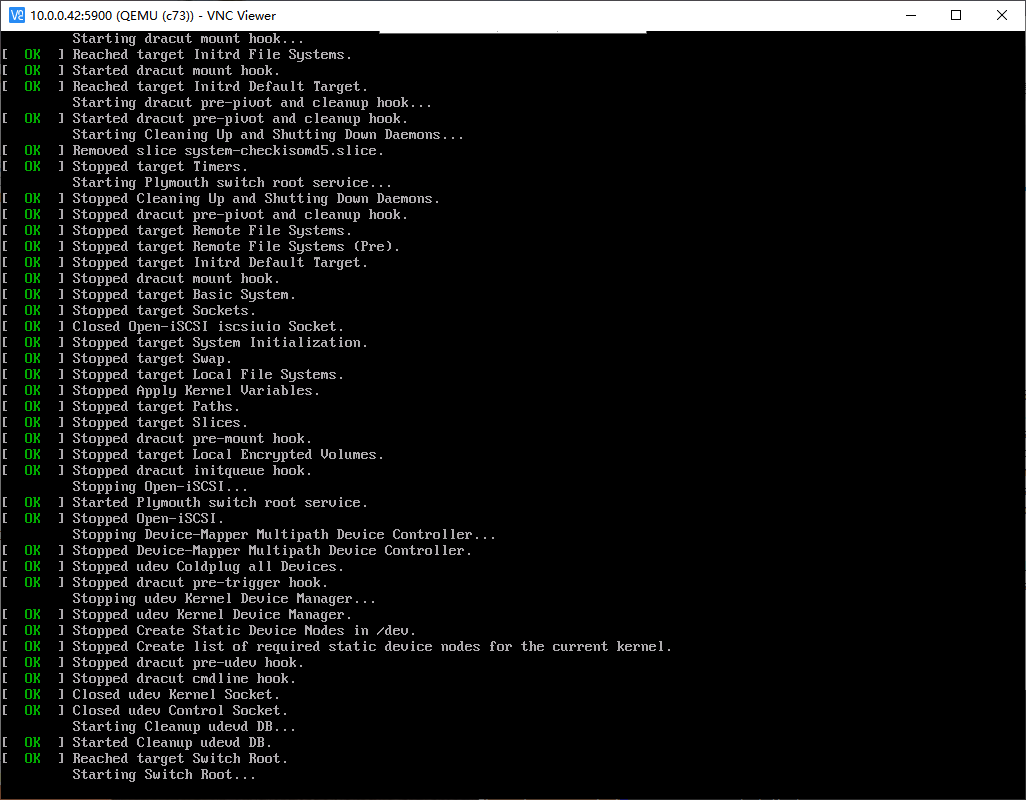
5.1、开始安装

如果重启之后没有了,到xshell查看
[root@ c7-81 opt]# virsh list --all
 Id    Name                           State
----------------------------------------------------
 -     c73                            shut off
之后启动机器
[root@ c7-81 opt]# virsh start c73
Domain c73 started

[root@ c7-81 opt]# virsh list --all
 Id    Name                           State
----------------------------------------------------
 2     c73                            running
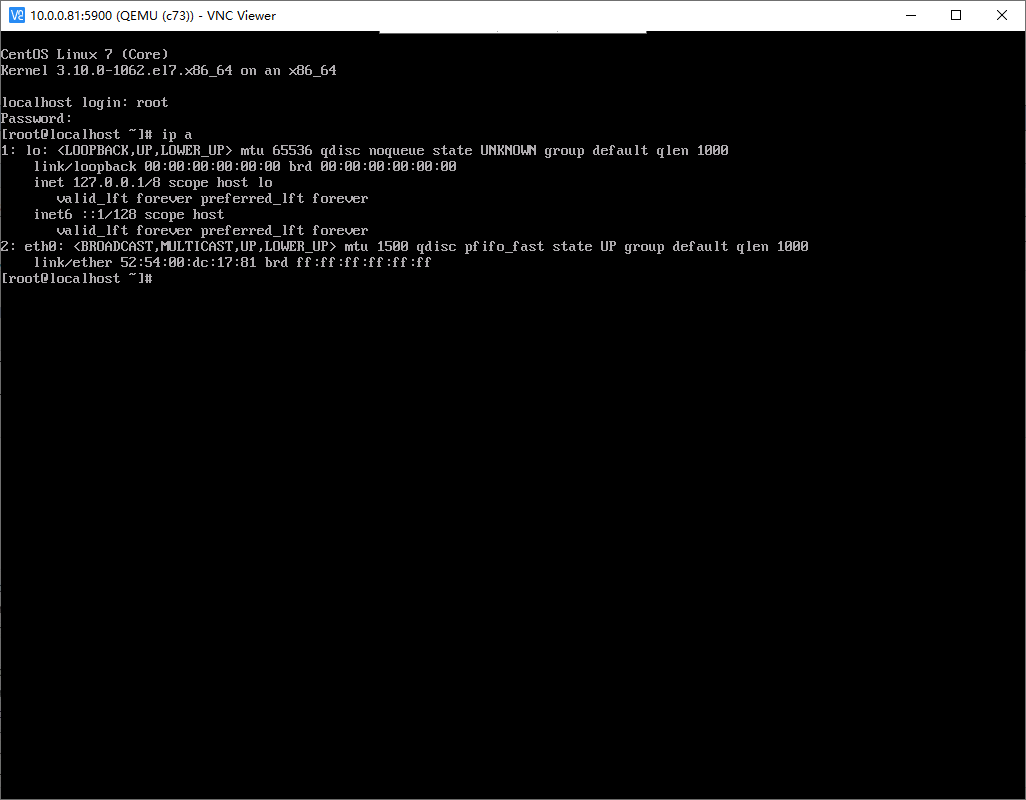
登录虚拟机
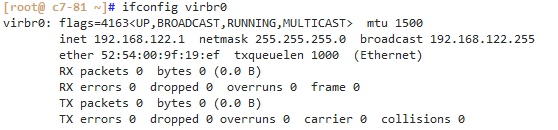
6、查看物理机网卡
[root@ c7-81 ~]# ifconfig virbr0
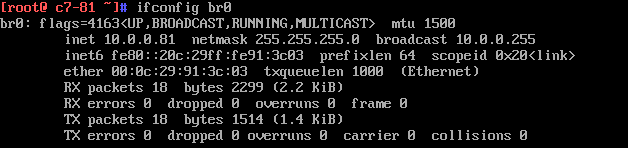
7、配置桥接br0
[root@ c7-81 ~]# yum -y install bridge-utils
7.1、配置临时的
[root@ c7-81 ~]# brctl addbr br0
[root@ c7-81 ~]# brctl show
bridge name    bridge id        STP enabled    interfaces
br0        8000.000000000000    no
virbr0        8000.5254009f19ef    yes        virbr0-nic
                            vnet0

敲完这个命令之后xshell会断开
[root@ c7-81 ~]# brctl addif br0 ens33

这个不会断
[root@ c7-82 ~]# virsh iface-bridge ens33 br0

[root@ c7-81 ~]# ip addr del dev ens33 10.0.0.81/24 //删除ens33上的ip地址
[root@ c7-81 ~]# ifconfig br0 10.0.0.81/24 up  //配置br0的ip地址并启动设备
[root@ c7-81 ~]# route add default gw 10.0.0.254  //重新加入默认网关
[root@ c7-81 ~]# route -n

因为这个br0是临时的,所以重启之后就没了
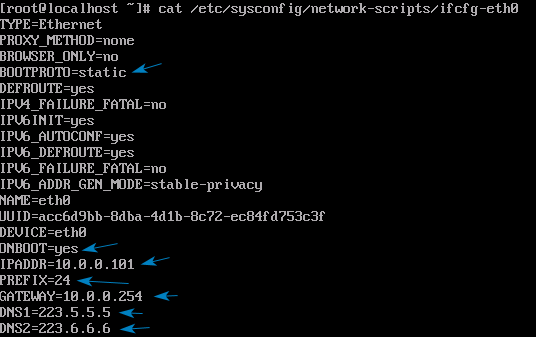
7.2、永久配置
[root@ c7-81 ~]# cp /etc/sysconfig/network-scripts/ifcfg-ens33 .
[root@ c7-81 ~]# vim /etc/sysconfig/network-scripts/ifcfg-ens33

[root@ c7-81 ~]# cat /etc/sysconfig/network-scripts/ifcfg-ens33
DEVICE=ens33
TYPE=Ethernet
ONBOOT=yes
BRIDGE=br0
NM_CONTROLLED=no

[root@ c7-81 ~]# vim /etc/sysconfig/network-scripts/ifcfg-br0

[root@ c7-81 ~]# cat /etc/sysconfig/network-scripts/ifcfg-br0
DEVICE=br0
TYPE=Bridge
ONBOOT=yes
BOOTPROTO=static
IPADDR=10.0.0.81
NETMASK=255.255.255.0
GATEWAY=10.0.0.254
NM_CONTROLLED=no

[root@ c7-81 ~]# systemctl restart network
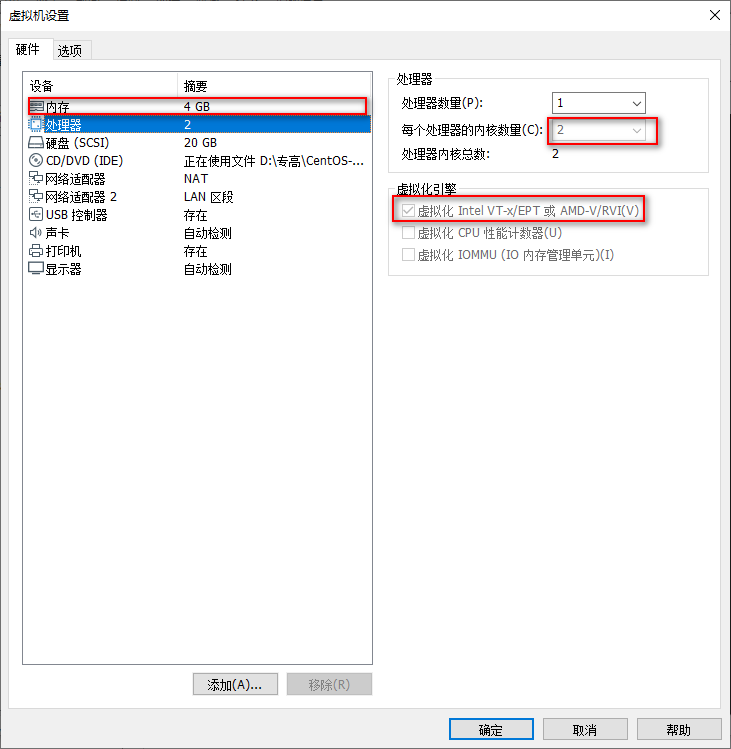
8、编辑kvm虚拟化的机器
8.1、必须写,不然xshell连不上

8.2、查看sshd是否开启X11转发

8.3、在物理机安装xorg-x11
[root@ c7-81 ~]# yum install -y xorg-x11-font-utils.x86_64 xorg-x11-server-utils.x86_64 xorg-x11-utils.x86_64 xorg-x11-xauth.x86_64 xorg-x11-xinit.x86_64 xorg-x11-drv-ati-firmware
8.4、物理机安装libvirt
libvirt是管理虚拟机的APL库,不仅支持KVM虚拟机,也可以管理Xen等方案下的虚拟机。
[root@ c7-81 ~]# yum -y install virt-manager libvirt libvirt-Python python-virtinst libvirt-client virt-viewer qemu-kvm mesa-libglapi
因为我的主机是服务器,没有图形化界面,想要用virt-manager图形化安装虚拟机,还需要安装X-window。
[root@ c7-81 ~]# yum -y install libXdmcp libXmu libxkbfile xkeyboard-config xorg-x11-xauth xorg-x11-xkb-utils
开启libvirt服务
[root@ c7-81 ~]# systemctl restart libvirtd.service
[root@ c7-81 ~]# systemctl enable libvirtd.service
9、配置xshell


9.1、先打开 软件,断开这个会话,重新连上,输入命令:virt-manager
[root@ c7-81 ~]# virt-manager
如果出现乱码,请安装以下包
yum -y install dejavu-sans-mono-fonts

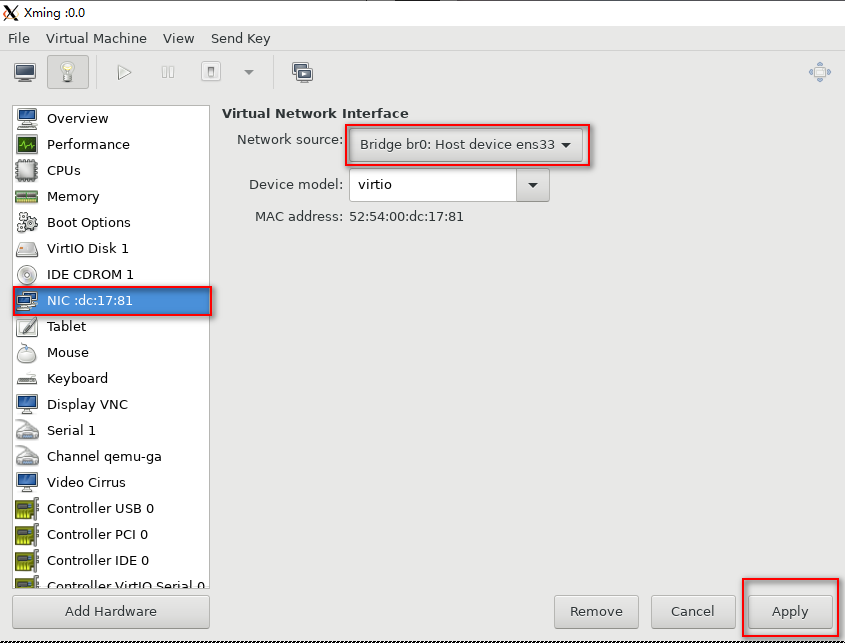
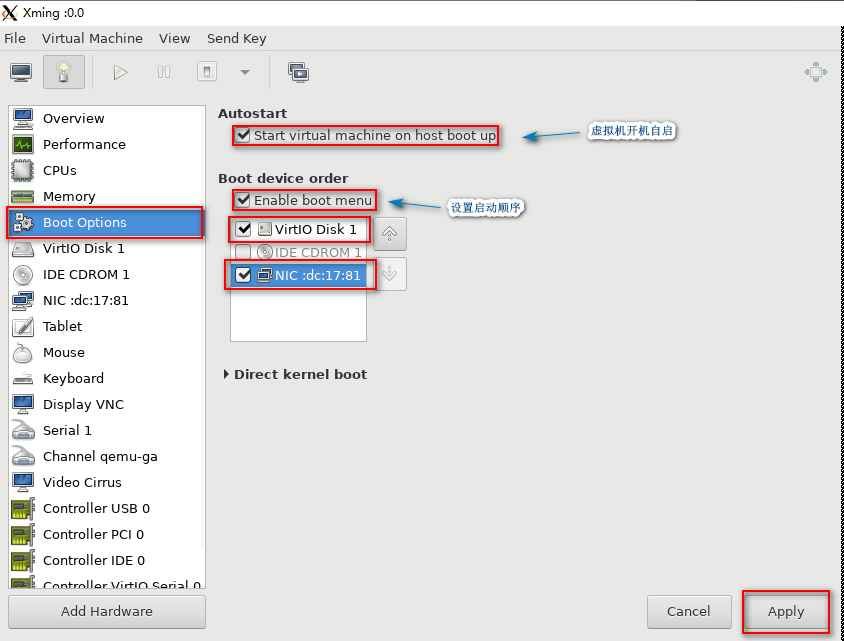
9.2、设置为桥接模式
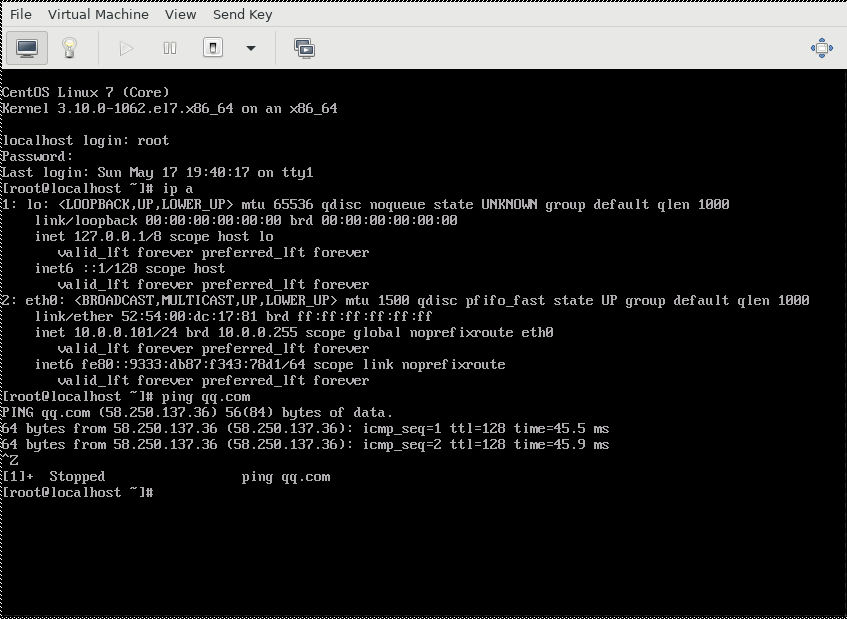
测试网络
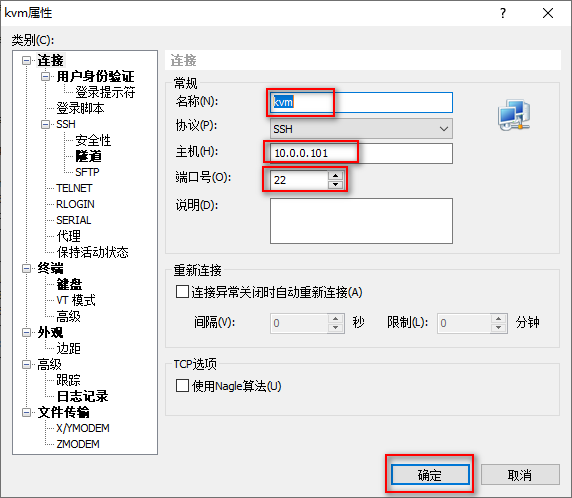
连接xshell

 浙公网安备 33010602011771号