创建基于harbor的docker仓库
1.升级系统并重启
yum update -y && reboot
# 安装docker最新版
yum install -y yum-utils
yum-config-manager --add-repo https://mirrors.aliyun.com/docker-ce/linux/centos/docker-ce.repo
yum install -y docker-ce
网络环境的配置(docker,yum和/etc/profile)
/etc/yum.conf
proxy=http://10.11.0.148:808
/etc/profile
export ftp_proxy=http://10.11.0.148:808
export socks_proxy="socks://10.11.0.148:808/"
export http_proxy=http://10.11.0.148:808
export https_proxy=https://10.11.0.148:808
# 添加docker下载软件的代理
mkdir /etc/systemd/system/docker.service.d
vim /etc/systemd/system/docker.service.d/http-proxy.conf
[Service]
Environment="HTTP_PROXY=http://10.11.0.148:808"
# 设置统一时间
timedatectl set-ntp no
timedatectl set-time '2020-08-05 11:58:08'
# docker基础配置
mkdir /data/docker
10.11.0.208
[root@server03 ~]# cat /etc/docker/daemon.json
{
"graph": "/data/docker",
"storage-driver": "overlay2",
"insecure-registries": ["registry.access.redhat.com","quay.io","harbor.chinasoft.com"],
"registry-mirrors": ["https://q2gr04ke.mirror.aliyuncs.com"],
"bip": "172.7.208.1/24",
"exec-opts": ["native.cgroupdriver=systemd"],
"live-restore": true
}
10.11.0.209
[root@server04 ~]# cat /etc/docker/daemon.json
{
"graph": "/data/docker",
"storage-driver": "overlay2",
"insecure-registries": ["registry.access.redhat.com","quay.io","harbor.chinasoft.com"],
"registry-mirrors": ["https://q2gr04ke.mirror.aliyuncs.com"],
"bip": "172.7.209.1/24",
"exec-opts": ["native.cgroupdriver=systemd"],
"live-restore": true
}
10.11.0.210
[root@server05 ~]# cat /etc/docker/daemon.json
{
"graph": "/data/docker",
"storage-driver": "overlay2",
"insecure-registries": ["registry.access.redhat.com","quay.io","harbor.chinasoft.com"],
"registry-mirrors": ["https://q2gr04ke.mirror.aliyuncs.com"],
"bip": "172.7.210.1/24",
"exec-opts": ["native.cgroupdriver=systemd"],
"live-restore": true
}
镜像存储的地方也可以这么配置
# more /etc/docker/daemon.json
{
"data-root": "/data/docker",
"log-driver": "json-file",
"log-opts": {"max-size": "100m", "max-file": "3"}
}
私有镜像仓库部署
https://github.com/goharbor/harbor/releases/v1.8.3
wget https://storage.googleapis.com/harbor-releases/release-1.8.0/harbor-offline-installer-v1.8.3.tgz
tar xf harbor-offline-installer-v1.8.3.tgz -C /usr/local/
cd /usr/local/
mv harbor harbor-v1.8.3
# 生成软连接,方便升级
ln -s harbor-v1.8.3 harbor
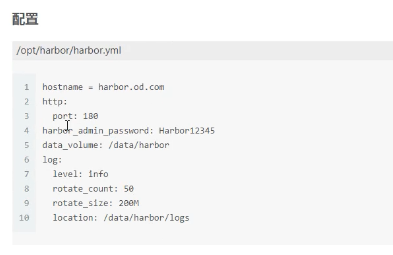
配置
安装依赖
# yum install docker-compose -y
修改配置
# vim /usr/local/harbor/harbor.yml
hostname: harbor.chinasoft.com
http:
port: 180
harbor_admin_password: harbor123456
database:
password: root123
data_volume: /data/harbor
log:
location: /data/harbor/log
_version: 1.8.0
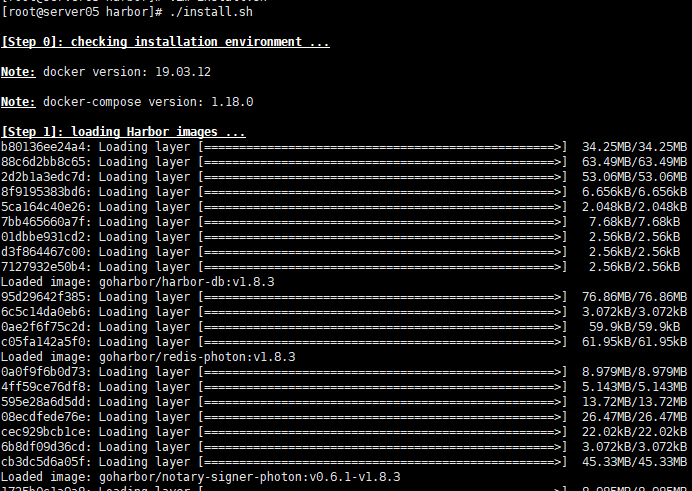
执行安装
# ./install.sh
安装nginx作为harbor的前端反向代理
# yum install -y nginx
[root@server05 ~]# cat /etc/nginx/conf.d/harbor.chinasoft.com.conf
server {
listen 80;
server_name harbor.chinasoft.com;
client_max_body_size 1000m;
location / {
proxy_pass http://127.0.0.1:180;
}
}
# 启动nginx
[root@server05 ~]# systemctl start nginx
[root@server05 ~]# systemctl enable nginx
# 添加内部dns解析server01:10.11.0.206
注意修改serial
[root@server01 ~]# vim /var/named/chinasoft.com.zone
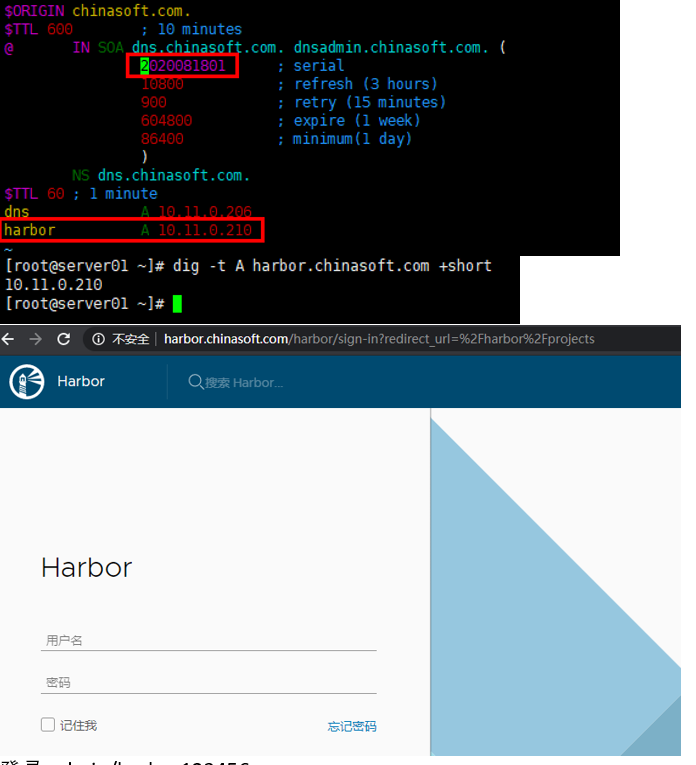
登录admin/harbor123456
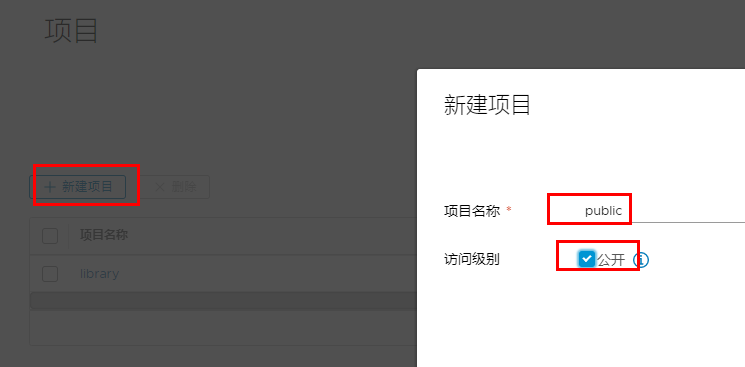
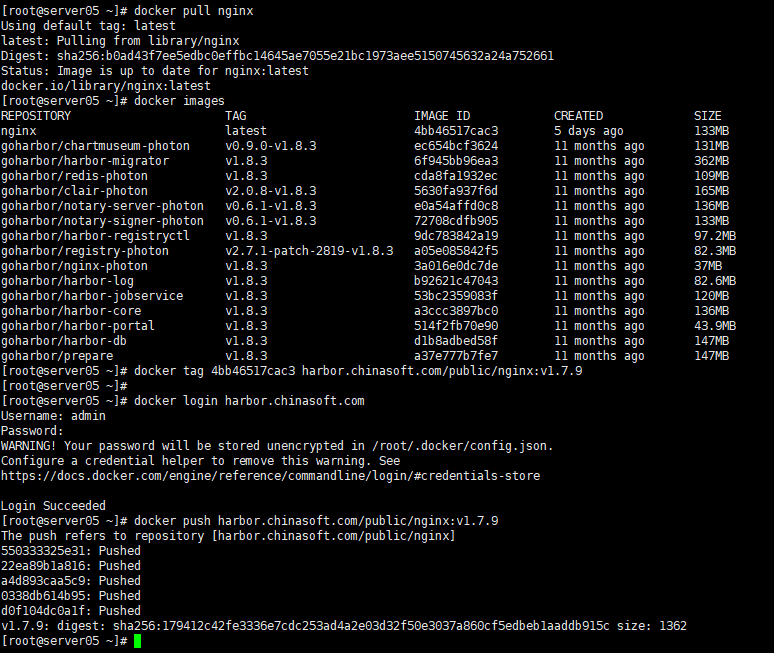
# 下载nginx镜像,并且打上标签,推送到我们的私有仓库中
[root@server05 ~]# docker pull nginx
[root@server05 ~]# docker tag 4bb46517cac3 harbor.chinasoft.com/public/nginx:v1.7.9
[root@server05 ~]# docker login harbor.chinasoft.com
Username: admin
Password:
WARNING! Your password will be stored unencrypted in /root/.docker/config.json.
Configure a credential helper to remove this warning. See
https://docs.docker.com/engine/reference/commandline/login/#credentials-store
Login Succeeded
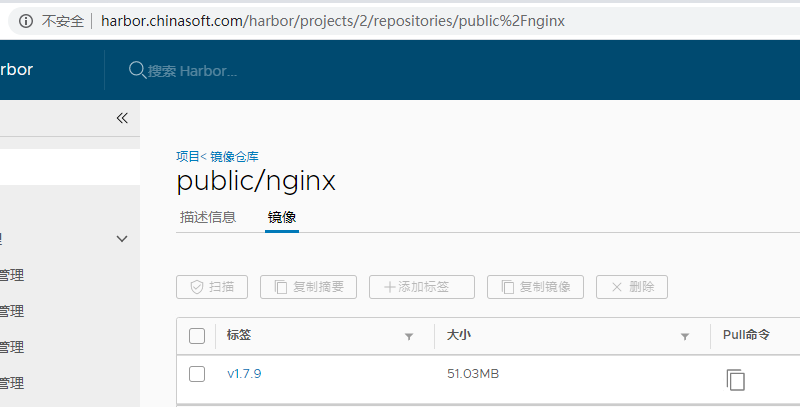
[root@server05 ~]# docker push harbor.chinasoft.com/public/nginx:v1.7.9

 浙公网安备 33010602011771号