人脸识别之Python DLib库进行人脸关键点识别
一、首先安装DLib模块
这里只介绍linux安装的过程,windows安装过程请自行百度
1、首先,安装dlib、skimage前;先安装libboost
sudo apt-get install libboost-python-dev cmake
接下来到dlib官网dlib.net下载最新的dlib版本(我下的是dlib-19.7),进入文件所在目录解压
bzip2 -d dlib-19.7.tar.bz2
tar xvf dlib-19.7.tar
这是一个二级解压过程,解压得到文件dlib-19.7,进入该目录下,执行如下命令安装dlib
python setup.py install
安装完成后,切换到python,键入import dlib,无异常提示表明安装成功!
接着安装skimage
sudo apt-get install python-skimage
二、人脸检测
import sys
import dlib
from skimage import io

detector = dlib.get_frontal_face_detector()
window = dlib.image_window()
img = io.imread("1.jpg")

dets = detector(img, 1)
print("Number of faces detected: {}".format(len(dets)))
for i, d in enumerate(dets):
    print("Detection {}: Left: {} Top: {} Right: {} Bottom: {}".format(i, d.left(), d.top(), d.right(), d.bottom()))

window.clear_overlay()
window.set_image(img)
window.add_overlay(dets)
dlib.hit_enter_to_continue()
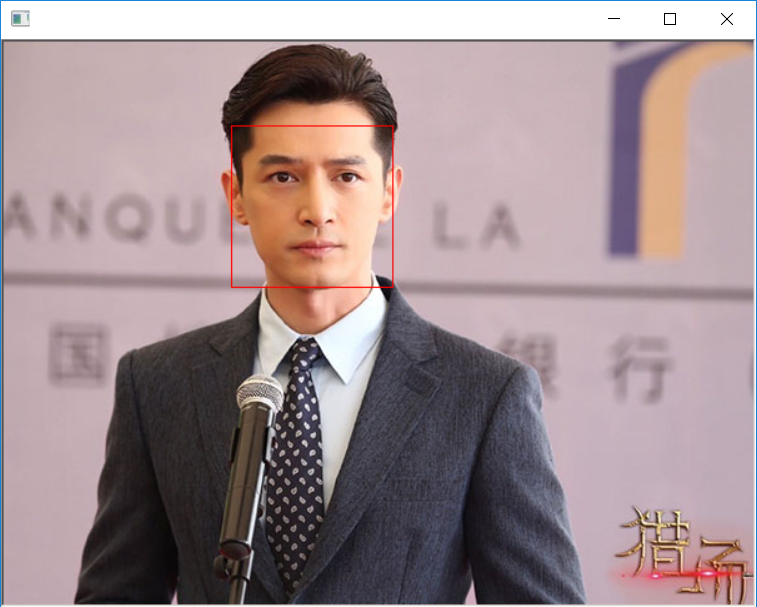
首先调用dlib.get_frontal_face_detector() 来加载dlib自带的人脸检测器
dets = detector(img, 1)将检测器应用在输入图片上,结果返回给dets(参数1表示对图片进行上采样一次,有利于检测到更多的人脸);
dets的个数即为检测到的人脸的个数;
遍历dets可以获取到检测到的每个人脸四个坐标极值。
为了框出检测到的人脸,用dlib.image_window()来加载显示窗口,window.set_image(img)先将图片显示到窗口上,再利用window.add_overlay(dets)来绘制检测到的人脸框;
dlib.hit_enter_to_continue()用于等待点击(类似于opencv的cv2.waitKey(0),不加这个会出现闪退)。
检测结果如下图: 
三、关键点的提取
实现关键点描述需要用到用于特征提取的官方模型,下载地址如下:
http://sourceforge.net/projects/dclib/files/dlib/v18.10/shape_predictor_68_face_landmarks.dat.bz2
# -*- coding: utf-8 -*-

import dlib
import numpy
from skimage import io
import cv2

predictor_path = "../data/shape_predictor_68_face_landmarks.dat"
faces_path = "1.jpg"

'''加载人脸检测器、加载官方提供的模型构建特征提取器'''
detector = dlib.get_frontal_face_detector()
predictor = dlib.shape_predictor(predictor_path)

win = dlib.image_window()
img = io.imread(faces_path)

win.clear_overlay()
win.set_image(img)

dets = detector(img, 1)
print("Number of faces detected: {}".format(len(dets)))

for k, d in enumerate(dets):
    shape = predictor(img, d)
    landmark = numpy.matrix([[p.x, p.y] for p in shape.parts()])
    print("face_landmark:")
    print (landmark)  # 打印关键点矩阵
    win.add_overlay(shape)  #绘制特征点
    for idx, point in enumerate(landmark):
        pos = (point[0, 0], point[0, 1])
        cv2.putText(img, str(idx), pos, fontFace=cv2.FONT_HERSHEY_SCRIPT_SIMPLEX,
                    fontScale=0.3, color=(0, 255, 0))
        # cv2.circle(img, pos, 3, color=(0, 255, 0))
    win.set_image(img)

dlib.hit_enter_to_continue()
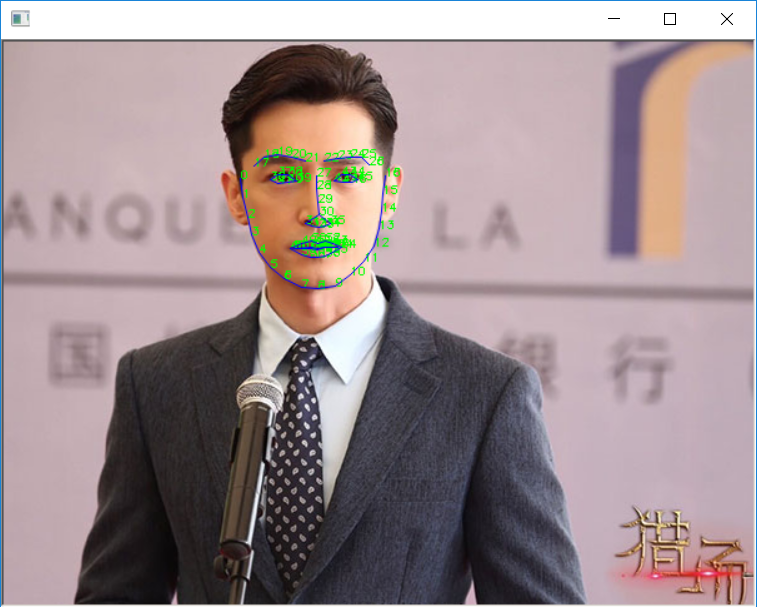
首先通过dlib.shape_predictor(predictor_path)从路径中加载模型,返回的predictor就是特征提取器
对dets遍历,用predictor(img, d)计算检测到的每张人脸的关键点;
获取每个关键点坐标shape.parts()的x,y值,存入landmark矩阵(模型默认提取68个关键点,所以landmark为68×2矩阵)。
关键点提取结果如下: 
源码获取方式,关注公总号RaoRao1994,查看往期精彩-所有文章,即可获取资源下载链接

更多资源获取,请关注公总号RaoRao1994


 浙公网安备 33010602011771号