
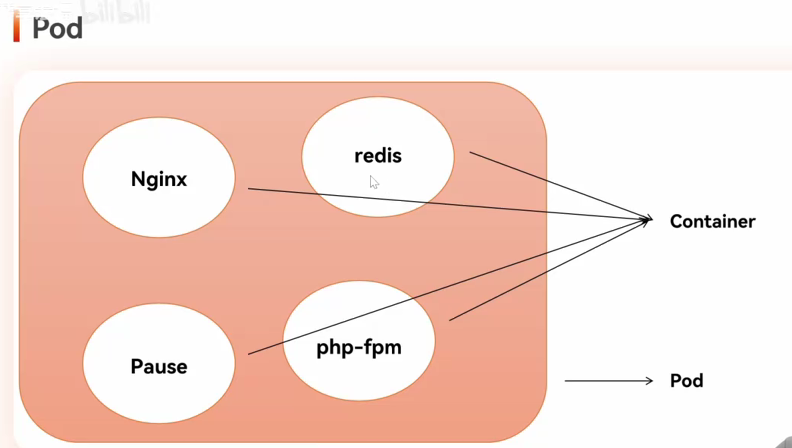
- Pod概念:K8s最小部署模块,必须放在Pod里,Pod是容器组,包含多个容器
![]()
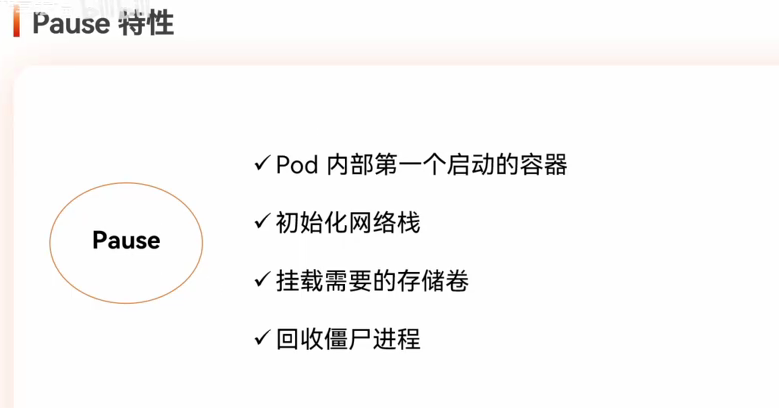
- Pause:划分子网范围,给Pod分配网络
![]()
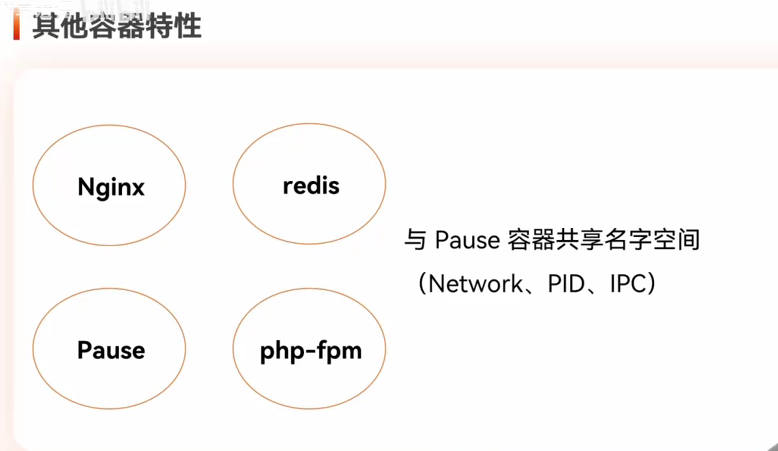
- 其它容器特性
![]()
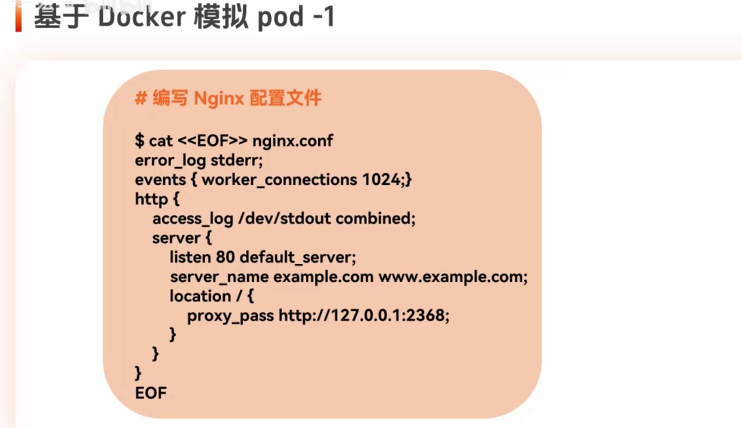
- 基于容器实现Pod
![]()
- 下载镜像地址: https://download.rockylinux.org/pub/rocky/9/isos/x86_64/Rocky-9.4-x86_64-minimal.iso
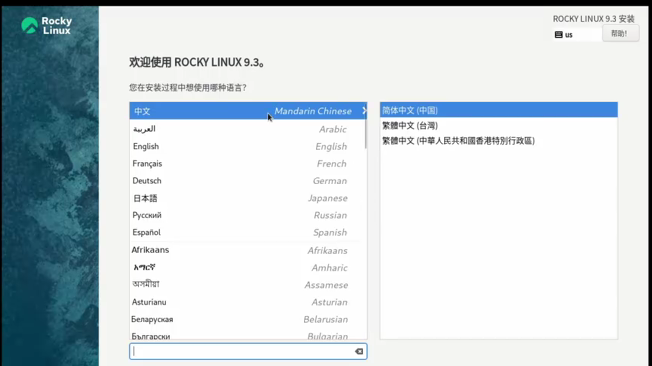
5-1. 使用2核,每个2个核心,磁盘100G,内存4G,2个网卡,一个仅主机,一个NAT
5-2. 开启虚拟机,内存小了,会进入文本化模式,不是如下界面
![]()
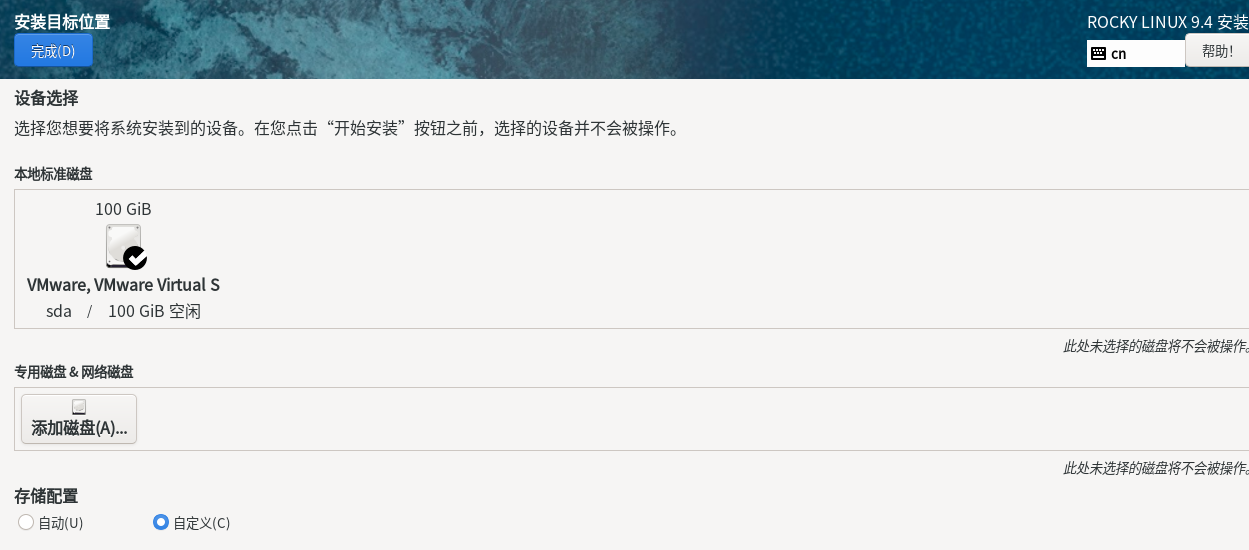
5-3. 点击下一步,选择安装位置,点击自定义,点击完成
![]()
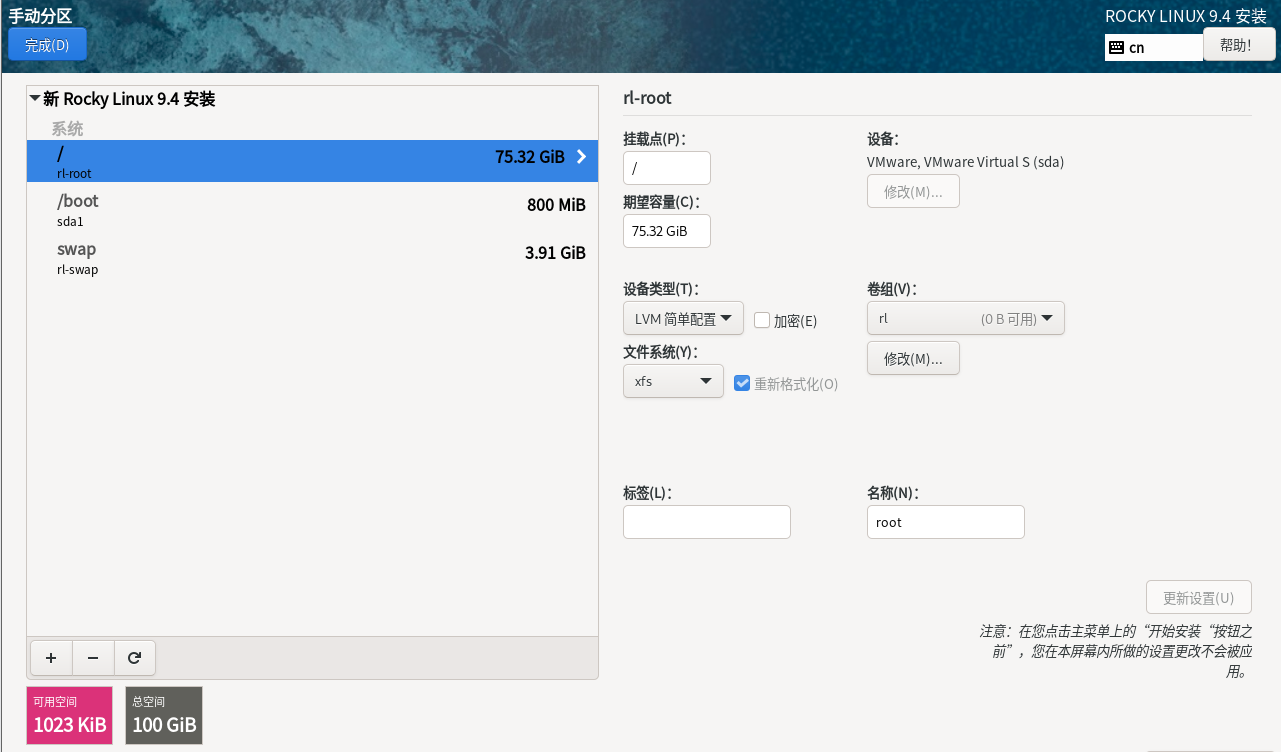
5-4. 手动分区,点击完成,接受更改
![]()
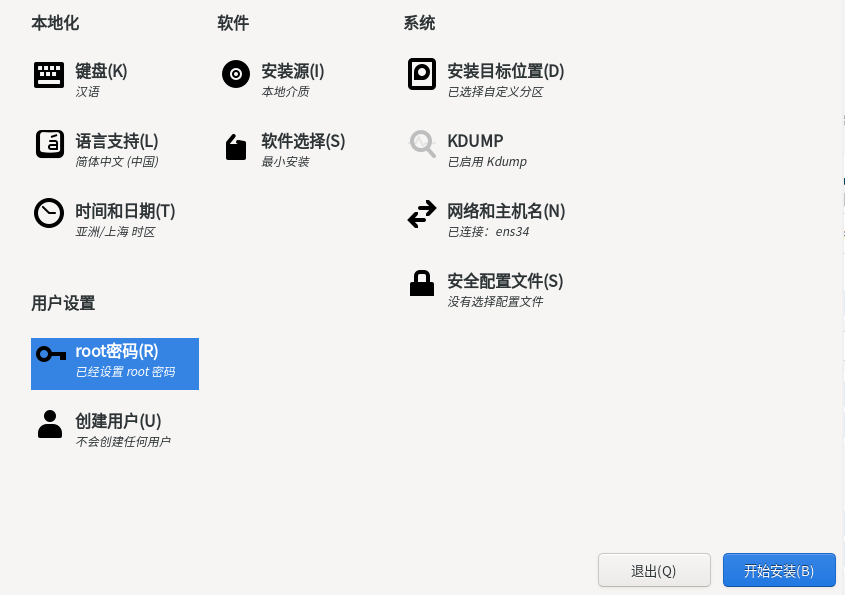
5-5. root密码设置,勾选允许root用户使用,点击完成
![]()
5-6. 点击开始安装,安装完成点击重启系统
![]()
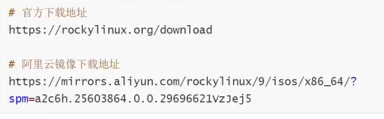
5-7. 其它镜像下载地址
![]()
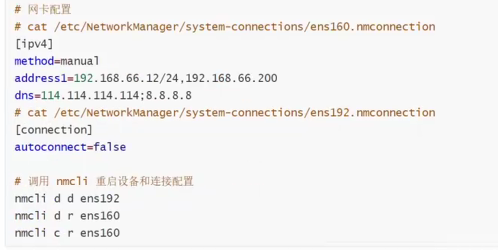
5-8. 网卡配置
![]()
5-9. 关闭蜂鸣
编辑 /etc/inputrc 文件,找到“#set bell-style none”,取消注释
在/.bashrc或者/.cshrc(这取决于你的linux采用的是什么shell)
添加 setterm -blength 0
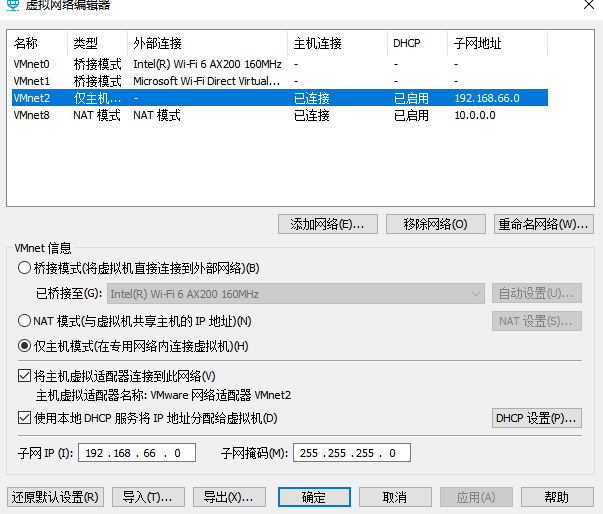
5-10. 配置网络1
![]()
ip a 查看网络ip,如果没有ip,手动添加配置仅主机网络,ip自定义
选择编辑->虚拟网络编辑器
![]()
重新启动 systemctl restart NetworkManager
ping 物理机ip是否通,反之关闭防火墙,虚拟机ping物理机是否通,反之网卡没起来,或者ip设置错误,可以动态获取在编辑为静态.第三方工具连接虚拟机
5-11. 替换源
sed -e 's|^mirrorlist=|#mirrorlist=|g' -e 's|^#baseurl=http://d1.rockylinux.org/$contentdir|baseurl=https://mirrors.aliyun.com/rockylinux|g' -i.bak /etc/yum.repos.d/[Rr]ocky*.repo
5-12. 建立缓存
dnf makecache
5-13. 关闭防火墙
systemctl stop firewalld
systemctl disable firewalld
5-14. 安装iptables 和防火墙2选一,那个熟练使用那个
yum -y install iptables-services
systemctl start iptables
systemctl enable iptables
查看规则: iptables -L
清空: iptables -F
添加规则: sudo iptables -I INPUT -p tcp --dport 443 -j ACCEPT
保存: service iptables save
5-15. 禁用selinux
setenforce 0
sed -i 's|SELINUX=enforcing|SELINUX=disabled|' /etc/selinux/config
cat /etc/selinux/config
grubby --update-kernel ALL --args selinux=0
查看是否禁用:
grubby --info DEFAULT
回滚内核层禁用:
grubby --update-kernel ALL --remove-args selinux=0
设置时区:
timedatectl set-timezone Asia/Shanghai
建议:关闭当前机器,制造机器副本
posted @
2024-11-06 11:05
萝卜干毛豆
阅读(
299)
评论()
收藏
举报


 浙公网安备 33010602011771号