


注:本文是Weidong Shen先生在CodeProject上的文章,为了学习方便,进行了全文翻译,后续将以此程序示例为蓝本,写出自已的实用LOB程序来,在此向Weidong Shen先生表示感谢,欢迎大家对我的翻译进行拍砖。本文是该系列的第2部分。
This article is part two of a series on developing a Silverlight business application using MEF, MVVM Light, and WCF RIA Services.
- Part 1 - Introduction, Installation, and General Application Design Topics
- Part 2 - MVVM Light Topics
- Part 3 - Custom Authentication, Reset Password, and User Maintenance
Contents
- Introduction简介
- RelayCommand中继命令
- Messenger信使
- EventToCommand事件转成命令
- ICleanup InterfaceICleanup接口
- Next Steps下一步
- History更新历史
Introduction简介
In this second part, we will go through various topics on how the MVVM Light Toolkit is used in our sample application. I chose this toolkit mainly because it is lightweight. Also, it is one of the most popular MVVM frameworks supporting Silverlight 4.
在第二部分里,继续进行如何使用MVVM Light Toolkit的议题。选择该工具包的原因是这是一个轻型框架,同时也是最火的支持Silverlight 4的MVVM框架。
RelayCommand中继命令
One of the new features in Silverlight 4 is a pair of properties added to the ButtonBase class named Command and CommandParameter. This commanding infrastructure makes MVVM implementations a lot easier in Silverlight. Let's take a look at how RelayCommand is used for the "Delete User" button from the User Maintenance screen. First, we define the XAML code of the button as follows:
Silverlight 4 的一个新功能是一对添加到ButtonBased类的属性:Command和CommandParameter。这使得Silverlight易于实现MVVM设计模式。下面看一个RelayCommand用于“删除用户”按钮的例子。首先,在XAML代码中定义如下的代码:
<Button Grid.Row="2" Grid.Column="0"
        VerticalAlignment="Top" HorizontalAlignment="Right"
        Width="75" Height="23" Margin="0,5,167,5"
        Content="删除用户"
        Command="{Binding Path=RemoveUserCommand}"
        CommandParameter="{Binding SelectedItem, ElementName=comboBox_UserName,
                          ValidatesOnNotifyDataErrors=False}"/>
The code above specifies that we should call the RemoveUserCommand defined in UserMaintenanceViewModel.cs and pass in a parameter of the currently selected user when the "Delete User" button is clicked. And, the RelayCommand RemoveUserCommand is defined as:
上述代码中,我们调用了RemoveUserCommand属性,该属性定义在在UserMaintenanceViewModel.cs中,同时以当前选定的用户作为参数,当“删除用户”按钮点击后执行命令。RelayCommand RemoveUserCommand定义如下:
private RelayCommand<User> _removeUserCommand = null;

public RelayCommand<User> RemoveUserCommand
{
    get
    {
        if (_removeUserCommand == null)
        {
            _removeUserCommand = new RelayCommand<User>(
                OnRemoveUserCommand,
                g => (issueVisionModel != null) &&
                       !(issueVisionModel.HasChanges) && (g != null));
        }
        return _removeUserCommand;
    }
}

private void OnRemoveUserCommand(User g)
{
    try
    {
        if (!_issueVisionModel.IsBusy)
        {
            // cancel any changes before deleting a user
            if (_issueVisionModel.HasChanges)
            {
                _issueVisionModel.RejectChanges();
            }

            // ask to confirm deleting the current user
            var dialogMessage = new DialogMessage(
                this,
                Resources.DeleteCurrentUserMessageBoxText,
                s =>
                {
                    if (s == MessageBoxResult.OK)
                    {
                        // if confirmed, removing CurrentUser
                        _issueVisionModel.RemoveUser(g);

                        // cache the current user name as empty string
                        _userNameToDisplay = string.Empty;

                        _operation = UserMaintenanceOperation.Delete;
                        IsUpdateUser = true;
                        IsAddUser = false;

                        _issueVisionModel.SaveChangesAsync();
                    }
                })
            {
                Button = MessageBoxButton.OKCancel,
                Caption = Resources.ConfirmMessageBoxCaption
            };

            AppMessages.PleaseConfirmMessage.Send(dialogMessage);
        }
    }
    catch (Exception ex)
    {
        // notify user if there is any error
        AppMessages.RaiseErrorMessage.Send(ex);
    }
}
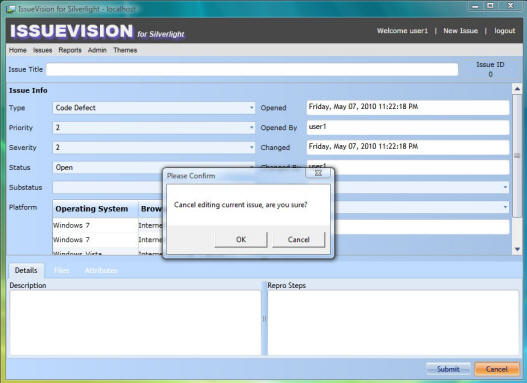
The code snippet above, when called, will first display a message asking to confirm whether to delete the selected user or not. If confirmed, the functions RemoveUser() and SaveChangesAsync(), both defined in the IssueVisionModel class, will get called, thus removing the selected user from the database.
The second parameter of the RelayCommand is the CanExecute method. In the sample code above, it is defined as "g => (_issueVisionModel != null) && !(_issueVisionModel.HasChanges) && (g != null)", which means that the "Delete User" button is only enabled when there are no pending changes and the selected user is not null. Unlike WPF, this CanExecute method is not automatically polled in Silverlight when the HasChanges property changes, and we need to call the RaiseCanExecuteChanged method manually, like the following:
上述的代码片断执行时,首先显示一个对话框询问是否确认删除选定的用户。如果确定,就调用定义在IssueVisionModel类中的RemoveUser()和SaveChangesAsync()方法,这样选定的用户就从数据库中被删除了。
RelayCommand构造函数的第二个参数是CanExecute方法。在上述代码中,这个方法定义为“g => (_issueVisionModel != null) && !(_issueVisionModel.HasChanges) && (g != null)”,意思是指“删除用户”按钮只有在无挂起操作并且选定用户不为空时才是可用的。与WPF不同,CanExecute方法在Silverlight中不是在HasChanged属性变更时自动启用的,需要手工调用RaiseCanExecuteChanged方法,如下所示:
private void _issueVisionModel_PropertyChanged(object sender,
             PropertyChangedEventArgs e)
{
    if (e.PropertyName.Equals("HasChanges"))
    {
        AddUserCommand.RaiseCanExecuteChanged();
        RemoveUserCommand.RaiseCanExecuteChanged();
        SubmitChangeCommand.RaiseCanExecuteChanged();
        CancelChangeCommand.RaiseCanExecuteChanged();
    }
}
Messenger信使
The Messenger class from MVVM Light Toolkit uses a simple Publish/Subscribe model to allow loosely coupled messaging. This facilitates communication between the different ViewModel classes as well as communication from the ViewModel class to the View class. In our sample, we define a static class called AppMessages that encapsulates all the messages used in this application.
Messager类来自于MVVM Light Toolkit,采用发布/订阅模型以松散耦合发布信息功能。该类可以在不同的ViewModel中进行便利的通信,也可以在ViewModel和View类中间进行通信。在我们提供的实例中,定义了一个静态类:AppMessages,封装了所有在程序中使用的信息。
/// <summary>
/// 定义在应用程序中使用的所有信息
/// </summary>
public static class AppMessages
{
    ......

    public static class ChangeScreenMessage
    {
        public static void Send(string screenName)
        {
            Messenger.Default.Send(screenName, MessageTypes.ChangeScreen);
        }

        public static void Register(object recipient, Action<string> action)
        {
            Messenger.Default.Register(recipient,
                      MessageTypes.ChangeScreen, action);
        }
    }

    public static class RaiseErrorMessage
    {
        public static void Send(Exception ex)
        {
            Messenger.Default.Send(ex, MessageTypes.RaiseError);
        }

        public static void Register(object recipient, Action<Exception> action)
        {
            Messenger.Default.Register(recipient,
                      MessageTypes.RaiseError, action);
        }
    }

    public static class PleaseConfirmMessage
    {
        public static void Send(DialogMessage dialogMessage)
        {
            Messenger.Default.Send(dialogMessage,
                      MessageTypes.PleaseConfirm);
        }

        public static void Register(object recipient, Action<DialogMessage> action)
        {
            Messenger.Default.Register(recipient,
                      MessageTypes.PleaseConfirm, action);
        }
    }

    public static class StatusUpdateMessage
    {
        public static void Send(DialogMessage dialogMessage)
        {
            Messenger.Default.Send(dialogMessage,
                      MessageTypes.StatusUpdate);
        }

        public static void Register(object recipient, Action<DialogMessage> action)
        {
            Messenger.Default.Register(recipient,
                      MessageTypes.StatusUpdate, action);
        }
    }

    ......
}
In the code-behind file MainPage.xaml.cs, four AppMessages are registered. The other three AppMessages are all system-wide messages:
在MainPage.xaml.cs文件中,注册了四个AppMessages,分别如下:
ChangeScreenMessageis registered to handle requests from the menu for switching between different screens.ChangeScreenMessage用于处理通过菜单在不同页面切换的请求RaiseErrorMessagewill display an error message if something goes wrong, and immediately logs off from the database.- RaiseErrorMessage用于显示错误信息,并立即从数据库登出。
PleaseConfirmMessageis used to display a message asking for user confirmation, and processes the call back based on user feedback.- PleaseConfirmMessage用于显示用户确认对话框,并根据用户回馈进行处理
StatusUpdateMessageis used to update the user on certain status changes, like a new issue has been successfully created and saved, etc.- StatusUpdateMessage用于某些状态变化的提示,比如新项目成功创建并保存等信息及时通知用户
Here is how we register the StatusUpdateMessage:
如下代码是如何注册StatusUpdateMessage的方法:
public MainPage()
{
    InitializeComponent();

    // register for StatusUpdateMessage
    AppMessages.StatusUpdateMessage.Register(this, OnStatusUpdateMessage);

    ......
}

#region "StatusUpdateMessage"

private static void OnStatusUpdateMessage(DialogMessage dialogMessage)
{
    if (dialogMessage != null)
    {
        MessageBoxResult result = MessageBox.Show(dialogMessage.Content,
            dialogMessage.Caption, dialogMessage.Button);

        dialogMessage.ProcessCallback(result);
    }
}

#endregion "StatusUpdateMessage"
And, here is how we can send a message to the StatusUpdateMessage:
下面的代码示例了如何向StatusUpdateMessage发送消息:
......
// notify user of the new issue ID
var dialogMessage = new DialogMessage(
         this,
         Resources.NewIssueCreatedText + addedIssue.IssueID,
         null)
{
    Button = MessageBoxButton.OK,
    Caption = Resources.NewIssueCreatedCaption
};

AppMessages.StatusUpdateMessage.Send(dialogMessage);
......
EventToCommand
EventToCommand is a Blend behavior that is added as a new feature in the MVVM Light Toolkit V3, and is used to bind an event to an ICommand directly in XAML, which gives us the power to handle pretty much any event with RelayCommand from the ViewModel class.
Following is an example of how drag and drop of files is implemented in the "New Issue" screen. Let's check the XAML code first:
EventToCommand是和种Blend行为,是MVVM Light Toolkit V3新增的功能,用于在XAML中直接绑定事件到ICommand接口实现对象,这可以在ViewModel中使用RelayCommand处理View上的事件,带来很大的灵活性。
如下示例实现在“New Issue”页面的拖放操作。首先看看XAML代码:
<ListBox x:Name="listBox_Files" Grid.Row="1" Grid.Column="0"
         AllowDrop="True"
         ItemsSource="{Binding Path=CurrentIssue.Files, ValidatesOnNotifyDataErrors=False}">
    <ListBox.ItemTemplate>
        <DataTemplate>
            <StackPanel Orientation="Horizontal">
                <TextBlock Text="{Binding Path=FileName, ValidatesOnNotifyDataErrors=False}" />
                <TextBlock Text="{Binding Path=Data.Length, StringFormat=' - \{0:F0\} bytes',
                                  ValidatesOnNotifyDataErrors=False}" />
            </StackPanel>
        </DataTemplate>
    </ListBox.ItemTemplate>
    <i:Interaction.Triggers>
        <i:EventTrigger EventName="Drop">
            <cmd:EventToCommand PassEventArgsToCommand="True"
                    Command="{Binding Path=HandleDropCommand, Mode=OneWay}" />
        </i:EventTrigger>
    </i:Interaction.Triggers>
</ListBox>
The code above basically specifies that the ListBox allows drag-and-drop, and when a Drop event fires, the HandleDropCommand from the IssueEditorViewModel class gets called. Next, let's look at how HandleDropCommand is implemented:
上述代码主要是指定了ListBox允许进行拖放操作。当Drop事件引发后,来自于IssueEditorViewModel 类的HandleDropCommand属性就进行调用,下面看看如何实现该属性:
private RelayCommand<DragEventArgs> _handleDropCommand = null;

public RelayCommand<DragEventArgs> HandleDropCommand
{
    get
    {
        if (_handleDropCommand == null)
        {
            _handleDropCommand = new RelayCommand<DragEventArgs>(
                OnHandleDropCommand,
                e => CurrentIssue != null);
        }
        return _handleDropCommand;
    }
}

private void OnHandleDropCommand(DragEventArgs e)
{
    try
    {
        // get a list of files as FileInfo objects
        var files = e.Data.GetData(DataFormats.FileDrop) as FileInfo[];

        if (files != null)
        {
            // loop through the list and read each file
            foreach (var file in files)
            {
                using (var fs = file.OpenRead())
                using (MemoryStream ms = new MemoryStream())
                {
                    fs.CopyTo(ms);
                    // and then add each file into the Files entity collection
                    CurrentIssue.Files.Add(
                        new Data.Web.File()
                        {
                            FileID = Guid.NewGuid(),
                            IssueID = CurrentIssue.IssueID,
                            FileName = file.Name,
                            Data = ms.GetBuffer()
                        });
                }
            }
        }
    }
    catch (Exception ex)
    {
        // notify user if there is any error
        AppMessages.RaiseErrorMessage.Send(ex);
    }
}
HandleDropCommand will loop through the list of files dropped by the user, reads the content of each file, and then adds them into the Files EntityCollection. The data will later be saved to the database when the user saves the changes.
HandleDropCommand将会循环遍历所有由用户放置的文件列表,读取每个文件中的内容,并将其添加到文件实体集合中。用户实施保存操作时,数据就会被存储到数据库中。
ICleanup Interface
Whenever the user chooses a different screen from the menu, a ChangeScreenMessage is sent, which eventually calls the following OnChangeScreenMessage method:
一旦用户从菜单选择了不同的页面,就会发出一个ChangeScreenMessage,最终会调用如下的OnChangeScreenMessage方法:
private void OnChangeScreenMessage(string changeScreen)
{
    // call Cleanup() on the current screen before switching
    var currentScreen = mainPageContent.Content as ICleanup;
    if (currentScreen != null)
        currentScreen.Cleanup();

    // reset noErrorMessage
    _noErrorMessage = true;

    switch (changeScreen)
    {
        case ViewTypes.HomeView:
            mainPageContent.Content = new Home();
            break;
        case ViewTypes.NewIssueView:
            mainPageContent.Content = new NewIssue();
            break;
        case ViewTypes.AllIssuesView:
            mainPageContent.Content = new AllIssues();
            break;
        case ViewTypes.MyIssuesView:
            mainPageContent.Content = new MyIssues();
            break;
        case ViewTypes.BugReportView:
            mainPageContent.Content = new Reports();
            break;
        case ViewTypes.MyProfileView:
            mainPageContent.Content = new MyProfile();
            break;
        case ViewTypes.UserMaintenanceView:
            mainPageContent.Content = new UserMaintenance();
            break;
        default:
            throw new NotImplementedException();
    }
}
From the code above, we can see that every time we switch to a new screen, the current screen is first being tested to see whether it supports the ICleanup interface. If it is, the Cleanup() method is called before switching to the new screen. In fact, any screen, except the Home screen which does not bind to any ViewModel class, implements the ICleanup interface.
通过上述代码,可以看到每次切换到新页面,当前的页面都需要先进行测试是否支持ICleanup接口。如果支持,在切换到新页面之前就调用Cleanup()方法清除当前页面。事实上,任何页面,除了Home页面未绑定任何ViewModel类以外,都实现了ICleanup接口。
The Cleanup() method defined in any of the View classes will first call the Cleanup() method on its ViewModel class to unregister any event handlers and AppMessages. Next, it will unregister any AppMessages used by the View class itself, and the last step is to release the ViewModel class by calling ReleaseExport<ViewModelBase>(_viewModelExport), thus making sure that there are no memory leaks. Let's look at an example:
Cleanup()方法定义在任何一个View类中,当ViewModel类取消注册任何事件处理函数或AppMessages时都先要调用Cleanup()方法。然后,才取消注册任何由视图类使用的AppMessages,最后通过调用ReleaseExport<ViewModelBase>(_viewModelExport)释放ViewModel类,这样可以确保无内存泄露发生。看一个例子:
public partial class Reports : UserControl, ICleanup
{
    #region "Private Data Members"
    private const double MinimumWidth = 640;
    private Lazy<ViewModelBase> _viewModelExport;
    #endregion "Private Data Members"

    #region "Constructor"
    public Reports()
    {
        InitializeComponent();
        // initialize the UserControl Width & Height
        // 初始化UserControl的宽与高
        Content_Resized(this, null);

        //为 GetChartsMessage进行注册
        AppMessages.GetChartsMessage.Register(this, OnGetChartsMessage);

        if (!ViewModelBase.IsInDesignModeStatic)
        {
            // 使用MEF加载the View Model
            _viewModelExport = App.Container.GetExport<ViewModelBase>(
                ViewModelTypes.BugReportViewModel);
            if (_viewModelExport != null) DataContext = _viewModelExport.Value;
        }
    }
    #endregion "Constructor"

    #region "ICleanup interface implementation"

    public void Cleanup()
    {
        // call Cleanup on its ViewModel在ViewModel上调用Cleanup
        ((ICleanup)DataContext).Cleanup();
        // cleanup itself清理自身
        Messenger.Default.Unregister(this);
        // set DataContext to null and call ReleaseExport()清空数据上下文
        DataContext = null;
        App.Container.ReleaseExport(_viewModelExport);
        _viewModelExport = null;
    }

    #endregion "ICleanup interface implementation"

    ......
}
And here is the Cleanup() method in its ViewModel class:
这里ViewModel中的Cleanup()方法如下:
#region "ICleanup interface implementation"
public override void Cleanup()
{
    if (_issueVisionModel != null)
    {
        // unregister all events
        _issueVisionModel.GetAllUnresolvedIssuesComplete -=
             _issueVisionModel_GetAllUnresolvedIssuesComplete;
        _issueVisionModel.GetActiveBugCountByMonthComplete -=
             _issueVisionModel_GetActiveBugCountByMonthComplete;
        _issueVisionModel.GetResolvedBugCountByMonthComplete -=
             _issueVisionModel_GetResolvedBugCountByMonthComplete;
        _issueVisionModel.GetActiveBugCountByPriorityComplete -=
             _issueVisionModel_GetActiveBugCountByPriorityComplete;
        _issueVisionModel.PropertyChanged -=
             _issueVisionModel_PropertyChanged;
        _issueVisionModel = null;
    }
    // set properties back to null
    AllIssues = null;
    ActiveBugCountByMonth = null;
    ResolvedBugCountByMonth = null;
    ActiveBugCountByPriority = null;
    // unregister any messages for this ViewModel
    base.Cleanup();
}
#endregion "ICleanup interface implementation"
Next Steps下一步
In this article, we visited the topics of how the MVVM Light toolkit is used: namely, RelayCommand, Messenger, EventToCommand, and ICleanup. In our last part, we will focus on how custom authentication, reset password, and user maintenance are done through WCF RIA Services.
I hope you find this article useful, and please rate and/or leave feedback below. Thank you!
这一部分对MVVM Light Toolkit的RelayCommand,Messager,EventToCommand和ICleanup分别进行了介绍,下一节将聚焦在客户验证,重置密码以及用户维护等内容上。希望对您有用,谢谢!
History
- May 2010 - Initial release
- July 2010 - Minor update based on feedback
- November 2010 - Update to support VS2010 Express Edition
- February 2011 - Update to fix multiple bugs including memory leak issues
- July 2011 - Update to fix multiple bugs
License
This article, along with any associated source code and files, is licensed under The Code Project Open License (CPOL)
About the Author

Software Developer (Senior)![]() United States
United States
Member
Weidong has been an information system professional since 1990. He has a Master's degree in Computer Science, and is currently a MCSD .NET

 浙公网安备 33010602011771号