win10中Docker安装、构建镜像、创建容器、Vscode连接实例
Docker方便一键构建项目所需的运行环境:首先构建镜像(Image)。然后镜像实例化成为容器(Container),构成项目的运行环境。最后Vscode连接容器,方便我们在本地进行开发。下面以一个简单的例子介绍在win10中实现:Docker安装、构建镜像、创建容器、Vscode连接使用。
Docker安装
首先进入官网安装Docker软件。安装好打开可能会出现错误:
1、让更新WSL:直接在cmd中输入命令 WSL --update更新即可。
2、An unexpected error was encountered while executing a WSL command... 看:
https://zhuanlan.zhihu.com/p/633252579
修复以上错误之后一般就能进入Docker界面了。
创建镜像
镜像的创建通常在Dockerfile文件中写成代码的形式,以下举例一个简单的镜像创建代码:
# 使用官方 Ubuntu 镜像进行初始化
FROM ubuntu:22.04

# 设置容器目前的工作目录
WORKDIR /app

# Let the python output directly show in the terminal without buffering it first.
ENV PYTHONUNBUFFERED=1

# 更新包以及安装必要的依赖
RUN apt-get update && apt-get install -y \
  wget \
  git \
  bzip2 \
  libglib2.0-0 \
  libxext6 \
  libsm6 \
  libxrender1 \
  make\
  g++
RUN rm -rf /var/lib/apt/lists/*

# 安装最新版本miniconda
RUN wget https://repo.anaconda.com/miniconda/Miniconda3-latest-Linux-x86_64.sh \
  && bash Miniconda3-latest-Linux-x86_64.sh -b -p /opt/conda \
  && rm Miniconda3-latest-Linux-x86_64.sh
ENV PATH /opt/conda/bin:$PATH

# 使用conda创建一个新的python环境HelloDocker
RUN conda create -n HelloDocker python=3.9.7
# 初始化bash shell从而 'conda activate' 可以马上使用
RUN conda init bash

# 激活conda环境
RUN echo "conda activate HelloDocker" >> ~/.bashrc
ENV PATH /opt/conda/envs/HelloDocker/bin:$PATH

# 复制本地当前目录的 requirement.txt 文件到容器的app文件夹中
COPY requirements.txt /app

# 设置pip的镜像源为清华源
RUN pip config set global.index-url https://pypi.tuna.tsinghua.edu.cn/simple
# 根据 requirement.txt 为 python 安装各种包
RUN /bin/bash -c "source ~/.bashrc && pip install --no-cache-dir -r requirements.txt"
然后在Dockerfile目录下使用如下命令即可创建镜像:
docker build -t hello-docker .
以上代码创建了一个Ubuntu系统镜像。除了系统镜像之外,还可以只创建python环境镜像,具体可以查询ChatGPT。以上代码需要去外国镜像网站下载Ubuntu的镜像文件,可能很慢,因此可以在Docker软件设置中修改镜像源,在json中添加:
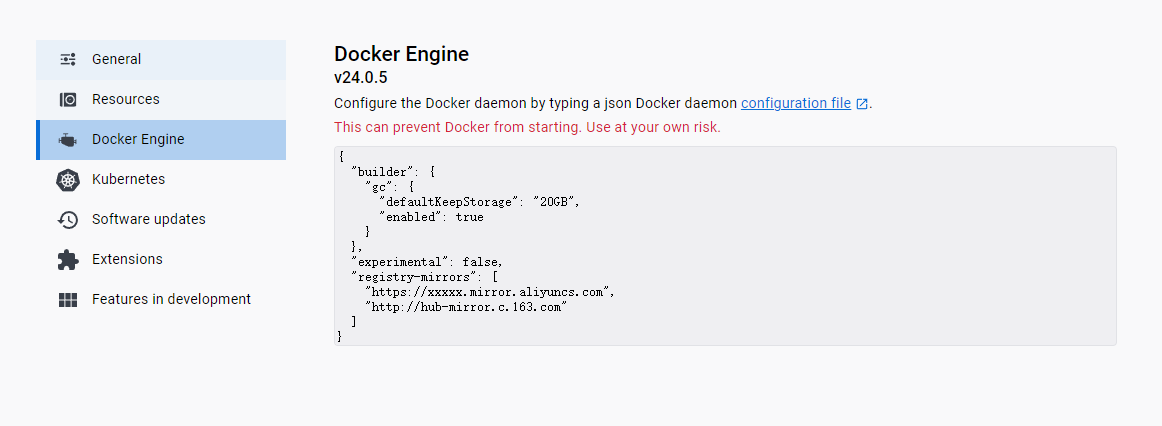
  "registry-mirrors": [
    "https://xxxxx.mirror.aliyuncs.com",
    "http://hub-mirror.c.163.com"
  ]
即修改为清华源。
创建容器及Vscode连接
镜像创建好之后,Vscode先安装Docker插件,然后在需要使用容器运行的项目工作目录下,创建目录.devcontainer,并在该目录下创建devcontainer.json文件,填写容器创建配置:
{
    "name": "HelloDocker Container",
    "image": "hello-docker", // 替换为你构建的Docker镜像名称
    "extensions": ["ms-python.python"],
    "settings": {
      "python.pythonPath": "/opt/conda/envs/HelloDocker/bin/python"
    }
}
以上配置表示,使用我们前面已经创建的名为hello-docker的镜像创建名为HelloDocker Container的容器。之后点击VsCode右下角的绿色图标"><",点击“在容器中重新打开”。等待容器创建好之后,即可使用Vscode在相应的容器环境中进行开发了。

 浙公网安备 33010602011771号