

[转]docker+efk+.net core部署
部署环境
centos7
本主要利用efk实现日志收集
一、创建docker-compose
es地址:https://www.elastic.co/guide/en/elasticsearch/reference/6.4/docker.html
fluentd地址:https://hub.docker.com/r/fluent/fluentd
kibana地址:https://www.elastic.co/guide/en/kibana/current/docker.html
1、利用xshell+xftp在centos7的/root/test下创建文件夹挂载容器内配置、数据等

fluentd
    -config
        fluent.conf
  -plugins   #空文件夹
  Dockerfile
  docker-compose.yml
  fluent.conf #与上面一样
2、创建自己的fluentd镜像 (#因为镜像中不支持es插件输出,以下可以参考上面fluentd地址)
上面目录中的Dockerfile文件如下:
Dockerfile
FROM fluent/fluentd:v1.3-onbuild-1

# Use root account to use apk
USER root

# below RUN includes plugin as examples elasticsearch is not required
# you may customize including plugins as you wish
RUN apk add --no-cache --update --virtual .build-deps \
        sudo build-base ruby-dev \
 && sudo gem install \
        fluent-plugin-elasticsearch \
 && sudo gem sources --clear-all \
 && apk del .build-deps \
 && rm -rf /home/fluent/.gem/ruby/2.5.0/cache/*.gem

USER fluent
fluent.conf 可以根据自己情况设置默认,因为启动fluentd的时候会自己加载/fluentd/etc/fluent.conf这个文件。你可以把它挂在在外面
fluent.conf
<source>
    @type forward
    port 24224
    bind 0.0.0.0
</source>

<filter>
    @type parser
    format json
    emit_invalid_record_to_error false
    time_format %Y-%m-%dT%H:%M:%S.%L%Z
    key_name log
</filter>

<match **>
    @type elasticsearch
    host 192.168.1.157
    port 9200
    logstash_format true
</match>
cd到 /root/test/fluentd 执行
docker build -t custom-fluentd:latest ./
生成支持es的fluentd镜像完毕
3、利用docker-compose.yml启动
version: '3.4'

services:
  elasticsearch:
    image: docker.elastic.co/elasticsearch/elasticsearch:6.4.3
    container_name: elasticsearch
    environment:
      discovery.type: "single-node"
      http.cors.enabled: "true"
    volumes:
      - esdata1:/usr/share/elasticsearch/data
    ports:
      - "9200:9200"
      - "9300:9300"

  kibana:
    image: docker.elastic.co/kibana/kibana:6.4.3
    container_name: kibana
    environment:
      SERVER_NAME: kibana
      ELASTICSEARCH_HOSTS: http://192.168.1.157:9200 # default is http://elasticsearch:9200
    ports:
      - "5601:5601"
    depends_on:
      - elasticsearch

  fluentd:
    image: custom-fluentd
    #build:
    #  context: ./fluentd/
    #  dockerfile: Dockerfile
    container_name: fluentd
    ports:
      - "24224:24224"
      - "24224:24224/udp"
    volumes:
      - /root/test/fluentd/log:/fluentd/log
      - /root/test/fluentd/config:/fluentd/etc
    depends_on:
      - elasticsearch

volumes:
  esdata1:
    driver: local
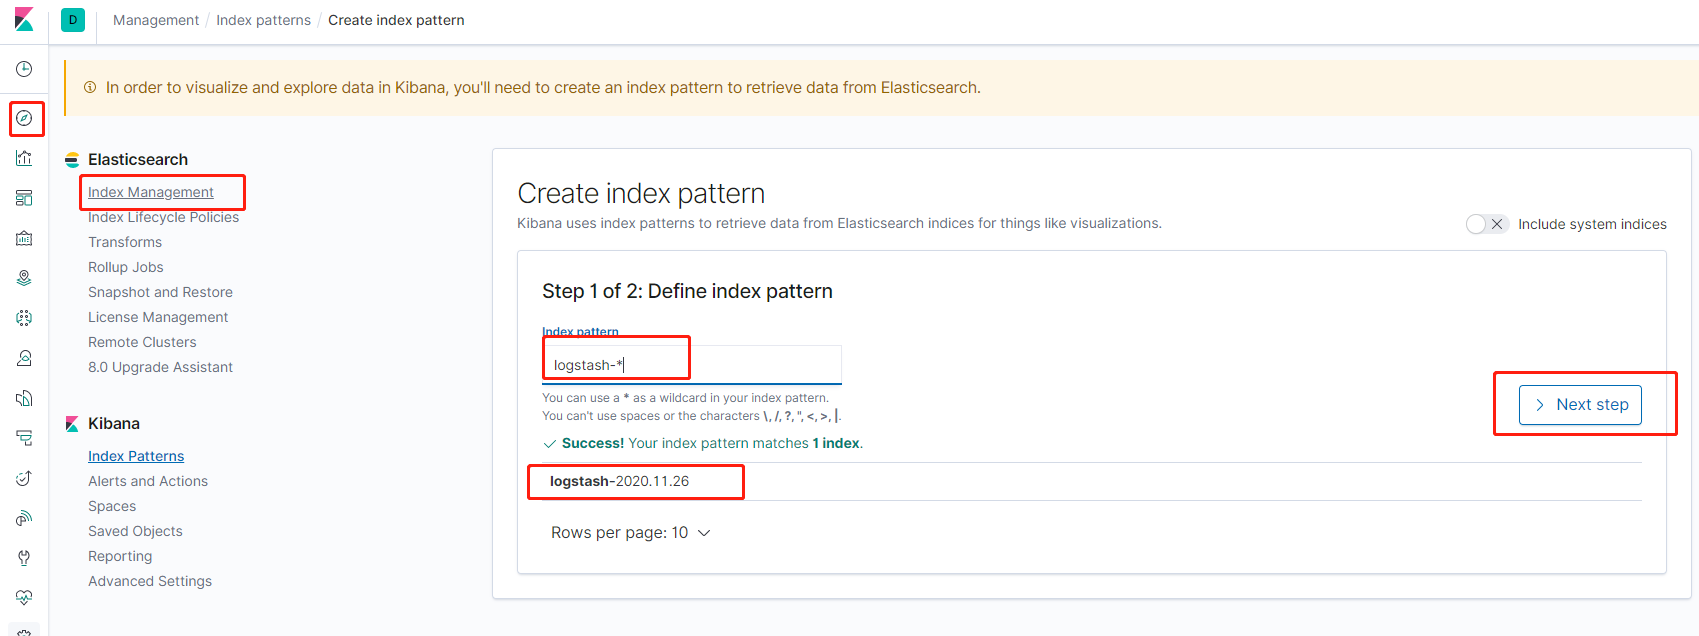
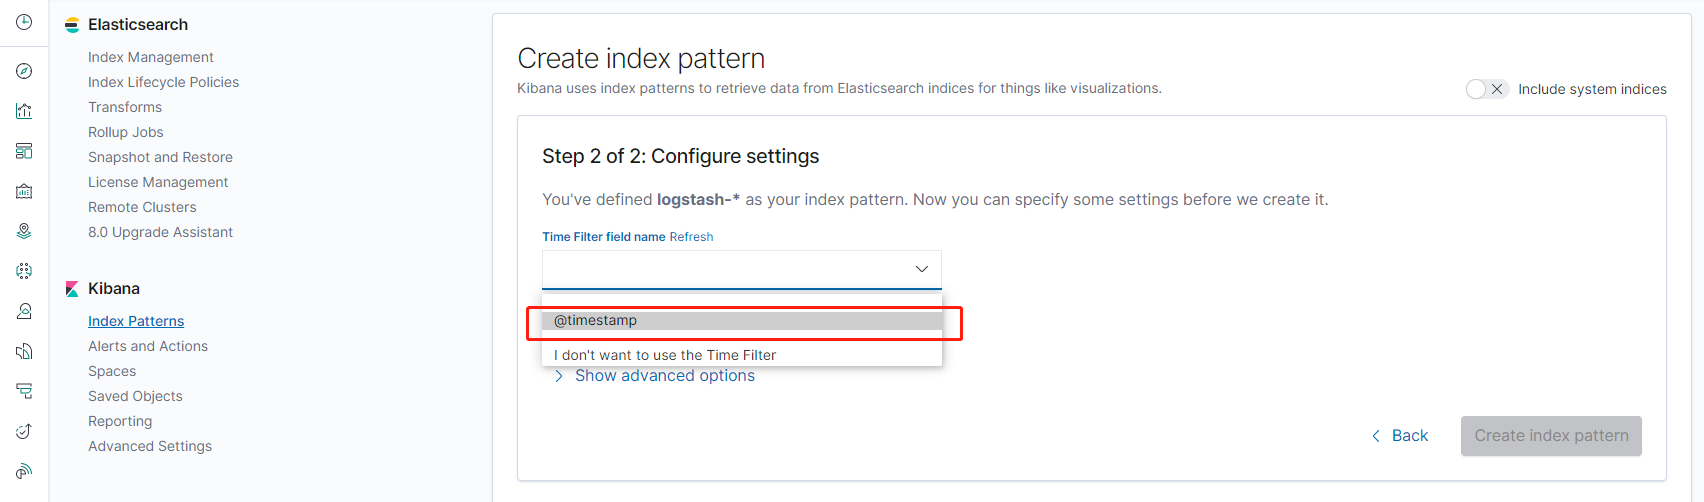
输入http://ip:5601查看kibana
输入http://ip:9200查看es
注意:启动过程可能会因为es还没启动好fluentd就启动导致fluentd没连上es可以通过查看日志docker logs fluentd确定是否连上,如果没连上,可以通过wait-for-it.sh或wait-for进行延迟编排,本文不讲
参考地址:https://my.oschina.net/eacdy/blog/1824219
如果还是不行可以把上面的分开一个一个启动
docker-compose -d up
二、.net core 利用serilog日志组件输出到es
1、项目中NuGet
- Serilog.AspNetCore
- Serilog.Settings.Configuration
- Serilog.Sinks.Console
- Serilog.Sinks.Elasticsearch
2、Appsetting.json中配置
{
"Serilog": {
    "Using":  ["Serilog.Sinks.Console"],
    "MinimumLevel": "Warning",
    "WriteTo": [
      { "Name": "Console" }
    ],
    "Enrich": ["FromLogContext", "WithMachineName", "WithThreadId"],
    "Destructure": [
      { "Name": "ToMaximumDepth", "Args": { "maximumDestructuringDepth": 4 } },
      { "Name": "ToMaximumStringLength", "Args": { "maximumStringLength": 100 } },
      { "Name": "ToMaximumCollectionCount", "Args": { "maximumCollectionCount": 10 } }
    ],
    "Properties": {
      "Application": "ApplicationName"
    }
  }
}
3、program.cs中配置
....
using Serilog;
using Serilog.Sinks.Elasticsearch;
    public static IWebHostBuilder CreateWebHostBuilder(string[] args) =>
            WebHost.CreateDefaultBuilder(args)
                .UseKestrel()
                .UseContentRoot(Directory.GetCurrentDirectory())
                .UseIISIntegration()
                .UseStartup<Startup>()
                .UseSerilog((ctx, config)=> {
                    config.ReadFrom.Configuration(ctx.Configuration);
#if DEBUG
                    config.WriteTo.Console();
#else
                    config.WriteTo.Console(new ElasticsearchJsonFormatter());
#endif
                });
配置好后可以运行起来,这个时候的控制台输出的日志就已经是es类型格式了
4、编写Dockerfile打包项目镜像
Dockerfile
FROM microsoft/dotnet:2.2-aspnetcore-runtime AS base
WORKDIR /app
EXPOSE 80

FROM microsoft/dotnet:2.2-sdk AS publish
WORKDIR /src
COPY . .
RUN dotnet publish -c Release -o /app

FROM base AS final
WORKDIR /app
COPY --from=publish /app .
ENTRYPOINT ["dotnet", "ApplicationName.dll"]
5、利用docker-compose.yml启动项目
docker-compose.yml
ApplicationName:
    image: ApplicationName
    container_name: ApplicationName
    build:
      context: ./ApplicationName/
      dockerfile: Dockerfile
    environment:
      - ASPNETCORE_URLS=http://0.0.0.0:80
    restart: always
    ports:
      - "5000:80"
    logging:
      driver: "fluentd"
      options:
        fluentd-address: "tcp://192.168.1.157:24224"
其中logging要指定日志输出类型及日志输出到fluentd的地址端口
把docker-compose.yml放在项目根目录下,cd到项目根目录运行
docker-compose -d up
就可以启动完成
在浏览器中输入ip:port即可查看
注意:这里的所有docker-compose.yml都是分开的所以启动后可能会分布在不同的网络中,可以创建一个网络docker network create netname,然后保证他们在同一个网络里面这样就可以直接用容器名来连接而不需要用宿主机的ip


 浙公网安备 33010602011771号