分布式监控系统之Zabbix部署
 首先zabbix的配置、管理以及展示都是通过zabbix web GUI这个组件进行的,管理员通过zabbix web GUI把要监控的主机、监控项、触发器等等一系列配置写进zabbix-database,然后zabbix-server到数据库中拿到对应的配置,进行应用;zabbix-server通过配置信息定义的各个信道,去采集对应主机或设备上要监控的指标数据,将采集到的数据进行处理以后存放到数据库,最后通过web GUI到数据库取数据进行展示;
1、为什么要使用监控系统?
我们知道一个系统不管怎么讲它都会出故障,我们为了保证线上业务的最大化的可用性,通常我们要给关键业务做高可用;做高可用的目的是为了让故障发生时,能够有一个备用的解决方案,将故障转移,从而实现服务的高可用性;那么问题来了,我们怎么知道系统发生了故障或者将要发生故障呢?怎么去把将要发生的故障扼杀在摇篮里呢?这个时候我们就需要用到监控系统;监控系统本质上不是业务系统,没有监控系统,线上业务系统也是可以正常运行的,它的存在主要是方便我们对业务系统的重要指标数据做采集、分析,使得我们能够更加清楚的了解线上系统正处于什么状态,cpu,内存,io等等一系列我们需要关心的点,都可以通过监控系统帮我们监控着,一旦被监控的主机或设备对应指标数据出现异常,能够及时的反馈并通知相关人员,使得我们能够及时的发现问题,从而解决问题;简单讲,监控系统就是辅助我们时时了解线上系统各指标数据,当被监控的主机或设备或服务出现异常时或即将出现异常时,它能够通过即时通信的方式通知管理员(比如发邮件、短信等等),从而使得管理员能够提前知道线上系统处于什么状态,从而针对特定的异常排查原因,修复异常,对即将发生的故障扼杀在摇篮里;
2、zabbix是什么?zabbix组件以及其各组件的作用
zabbix是一个开源的分布式监控系统,它主要有zabbix-server 、zabbix-database、zabbix-web GUI 、zabbix-agent、zabbix-proxy五大组件组成;其中zabbix-server主要提供收集数据、处理数据,并将数据保存在zabbix-database中;zabbix-database主要就是提供存储zabbix系统所需数据的数据存储服务;zabbix-web GUI主要作用是提供配置、展示、管理zabbix监控系统的一个web前端工具,它能将管理员的管理、配置操作通过web接口保存到zabbix-database中,并将zabbix-database中保存的指标数据通过web接口进行展示;zabbix-agent是zabbix的一个专有客户端代理,它主要运行在各个被监控的主机之上,其作用是接受zabbix-server发送的各种采集数据指令,并将采集到的数据通过专有代理zabbix-agent发送或响应给zabbix-server;zabbix-proxy是zabbix的一个服务端代理,主要作用是代理zabbix-server接收各个zabbix-agent发送或响应的指标数据;
3、zabbix架构图
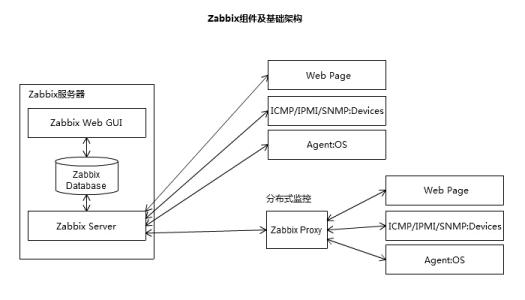
上图主要描述了zabbix监控系统的组件间的工作过程;首先zabbix的配置、管理以及展示都是通过zabbix web GUI这个组件进行的,管理员通过zabbix web GUI把要监控的主机、监控项、触发器等等一系列配置写进zabbix-database,然后zabbix-server到数据库中拿到对应的配置,进行应用;zabbix-server通过配置信息定义的各个信道,去采集对应主机或设备上要监控的指标数据,将采集到的数据进行处理以后存放到数据库,最后通过web GUI到数据库取数据进行展示;
4、zabbix监控系统部署
环境说明
| 主机名 | 角色 | ip地址:端口 |
| node01 | zabbix web GUI | 192.168.0.41:80 |
| node02 | zabbix database | 192.168.0.42:3306 |
| node03 | zabbix-server/zabbix-agent | 192.168.0.43:10051/10050 |
zabbix-database部署
zabbix-databse本质上就是一个数据库服务,zabbix主要支持mysql(或者mariadb)和pgsql,两种数据库系统,我们部署zabbix-database就是部署一个mysql(或mariadb)或pgsql即可;
准备mariadb yum源
[root@node02 ~]# cat /etc/yum.repos.d/mariadb.repo
[mariadb]
name=mariadb repo
baseurl=https://mirrors.tuna.tsinghua.edu.cn/mariadb/mariadb-10.0.38/yum/centos/7/x86_64/
gpgcheck=0
[root@node02 ~]#
安装MariaDB-server
[root@node02 ~]# yum install -y MariaDB-server
添加zabbix-databse.cnf配置到/etc/my.cnf.d/目录下
[root@node02 ~]# cat /etc/my.cnf.d/zabbix-database.cnf
[mysqld]
bind-address = 0.0.0.0
default-storage-engine = innodb
innodb_file_per_table = on
max_connections = 4096
collation-server = utf8_general_ci
character-set-server = utf8
skip_name_resolve
[root@node02 ~]#
启动maridb
[root@node02 ~]# systemctl start mariadb
Failed to start mariadb.service: Unit not found.
[root@node02 ~]# /etc/init.d/mysql start
Starting MariaDB.201117 23:15:28 mysqld_safe Logging to '/var/lib/mysql/node02.test.org.err'.
201117 23:15:28 mysqld_safe Starting mysqld daemon with databases from /var/lib/mysql
 SUCCESS!
[root@node02 ~]# ss -tnl
State      Recv-Q Send-Q           Local Address:Port                          Peer Address:Port
LISTEN     0      128                          *:22                                       *:*
LISTEN     0      100                  127.0.0.1:25                                       *:*
LISTEN     0      128                          *:3306                                     *:*
LISTEN     0      128                         :::22                                      :::*
LISTEN     0      100                        ::1:25                                      :::*
[root@node02 ~]#
提示:清华源装的MariaDB-server没有提供unit file,只有一个启动脚本,所以启动时不能用systemctl 方式启动;当然也可以写一个unit file,使用systemctl方式启动;
设置mysql开机启动
[root@node02 ~]# chkconfig --level 3 mysql on
[root@node02 ~]# chkconfig --list mysql

Note: This output shows SysV services only and does not include native
      systemd services. SysV configuration data might be overridden by native
      systemd configuration.

      If you want to list systemd services use 'systemctl list-unit-files'.
      To see services enabled on particular target use
      'systemctl list-dependencies [target]'.

mysql           0:off   1:off   2:on    3:on    4:on    5:on    6:off
[root@node02 ~]#
设置root密码,清除test库和相关账号信息
[root@node02 ~]# mysql_secure_installation

NOTE: RUNNING ALL PARTS OF THIS SCRIPT IS RECOMMENDED FOR ALL MariaDB
      SERVERS IN PRODUCTION USE!  PLEASE READ EACH STEP CAREFULLY!

In order to log into MariaDB to secure it, we'll need the current
password for the root user.  If you've just installed MariaDB, and
you haven't set the root password yet, the password will be blank,
so you should just press enter here.

Enter current password for root (enter for none):
OK, successfully used password, moving on...

Setting the root password ensures that nobody can log into the MariaDB
root user without the proper authorisation.

Set root password? [Y/n] y
New password:
Re-enter new password:
Password updated successfully!
Reloading privilege tables..
 ... Success!


By default, a MariaDB installation has an anonymous user, allowing anyone
to log into MariaDB without having to have a user account created for
them.  This is intended only for testing, and to make the installation
go a bit smoother.  You should remove them before moving into a
production environment.

Remove anonymous users? [Y/n] y
 ... Success!

Normally, root should only be allowed to connect from 'localhost'.  This
ensures that someone cannot guess at the root password from the network.

Disallow root login remotely? [Y/n] y
 ... Success!

By default, MariaDB comes with a database named 'test' that anyone can
access.  This is also intended only for testing, and should be removed
before moving into a production environment.

Remove test database and access to it? [Y/n] y
 - Dropping test database...
 ... Success!
 - Removing privileges on test database...
 ... Success!

Reloading the privilege tables will ensure that all changes made so far
will take effect immediately.

Reload privilege tables now? [Y/n] y
 ... Success!

Cleaning up...

All done!  If you've completed all of the above steps, your MariaDB
installation should now be secure.

Thanks for using MariaDB!
[root@node02 ~]#
创建zabbix数据库,并设置默认字符集为utf8
[root@node02 ~]# mysql -uroot -p
Enter password:
Welcome to the MariaDB monitor.  Commands end with ; or \g.
Your MariaDB connection id is 12
Server version: 10.0.38-MariaDB MariaDB Server

Copyright (c) 2000, 2018, Oracle, MariaDB Corporation Ab and others.

Type 'help;' or '\h' for help. Type '\c' to clear the current input statement.

MariaDB [(none)]> create database zabbix character set utf8 collate utf8_bin;
Query OK, 1 row affected (0.00 sec)

MariaDB [(none)]>
创建zabbix用户,授权允许从192.168.的网络连入管理zabbix数据库,并设置其密码为admin123.com
MariaDB [(none)]> grant all privileges on zabbix.* to zabbix@'192.168.%.%' identified by 'admin123.com';
Query OK, 0 rows affected (0.00 sec)

MariaDB [(none)]> flush privileges;
Query OK, 0 rows affected (0.00 sec)

MariaDB [(none)]>
到此zabbix-database就准备好了
在node03上安装zabbix-server、zabbix-agent
配置yum源
[root@node03 ~]# cat /etc/yum.repos.d/zabbix.repo
[zabbix-server]
name=zabbix-server repo
baseurl=https://mirrors.aliyun.com/zabbix/zabbix/4.0/rhel/7/x86_64/
gpgcheck=0

[non-supported]
name=non-supported repo
baseurl=https://mirrors.aliyun.com/zabbix/non-supported/rhel/7/x86_64/
gpgcheck=0
[root@node03 ~]#
将zabbix.reop复制到node01
[root@node03 ~]# scp /etc/yum.repos.d/zabbix.repo node01:/etc/yum.repos.d/
zabbix.repo                                                                   100%  242   165.8KB/s   00:00
[root@node03 ~]#
在node03上安装zabbix-server和zabbix-agent
[root@node03 ~]# yum install -y zabbix-server-mysql zabbix-agent
提示:如果数据库用的是pgsql就安装zabbix-server-pgsql;在zabbix-server上安装agent的主要原因是可以监控zabbix-server自身的一些指标;
使用zabbix用户导入表到zabbix库
[root@node03 ~]# zcat /usr/share/doc/zabbix-server-mysql*/create.sql.gz | mysql -h192.168.0.42 -uzabbix -p zabbix
Enter password:
[root@node03 ~]#
验证:查看zabbix库是否有表生成?
[root@node03 ~]# mysql -h192.168.0.42 -uzabbix -padmin123.com zabbix -e 'show tables;'|wc -l
145
[root@node03 ~]#
提示:只要能够统计到对应库下有表的数量,说明我们导入表达操作就没有什么问题,通常这个导入表,会导入很多张表;
配置zabbix-server
[root@node03 ~]# grep -Ei ^[^#] /etc/zabbix/zabbix_server.conf
ListenPort=10051
LogFile=/var/log/zabbix/zabbix_server.log
LogFileSize=0
PidFile=/var/run/zabbix/zabbix_server.pid
SocketDir=/var/run/zabbix
DBHost=192.168.0.42
DBName=zabbix
DBUser=zabbix
DBPassword=admin123.com
DBPort=3306
SNMPTrapperFile=/var/log/snmptrap/snmptrap.log
Timeout=4
AlertScriptsPath=/usr/lib/zabbix/alertscripts
ExternalScripts=/usr/lib/zabbix/externalscripts
LogSlowQueries=3000
[root@node03 ~]#
提示:配置zabbix-server主要配置连接数据库相关的配置,其他配置可以保持默认即可;
配置zabbix-agent
[root@node03 ~]# grep -Ei ^[^#] /etc/zabbix/zabbix_agentd.conf
PidFile=/var/run/zabbix/zabbix_agentd.pid
LogFile=/var/log/zabbix/zabbix_agentd.log
LogFileSize=0
Server=127.0.0.1
ListenPort=10050
ListenIP=0.0.0.0
StartAgents=3
ServerActive=127.0.0.1
Hostname=Zabbix server
HostnameItem=system.hostname
Include=/etc/zabbix/zabbix_agentd.d/*.conf
[root@node03 ~]#
提示:zabbix-server主机上的zabbix-agent几乎不用修改配置,保持默认即可;
启动zabbix-server,并将其设置为开机启动
[root@node03 ~]# systemctl start zabbix-server.service
[root@node03 ~]# systemctl enable zabbix-server.service
Created symlink from /etc/systemd/system/multi-user.target.wants/zabbix-server.service to /usr/lib/systemd/system/zabbix-server.service.
[root@node03 ~]# ss -tnl
State      Recv-Q Send-Q           Local Address:Port                          Peer Address:Port
LISTEN     0      128                          *:22                                       *:*
LISTEN     0      100                  127.0.0.1:25                                       *:*
LISTEN     0      128                          *:10051                                    *:*
LISTEN     0      128                         :::22                                      :::*
LISTEN     0      100                        ::1:25                                      :::*
LISTEN     0      128                         :::10051                                   :::*
[root@node03 ~]#
提示:zabbix-server默认监听10051,请确保10051端口处于正常监听状态即可;到此zabbix-server就配置启动成功;
启动zabbix-agent,并设置开机自启动
[root@node03 ~]# systemctl start zabbix-agent.service
[root@node03 ~]# systemctl enable zabbix-agent.service
Created symlink from /etc/systemd/system/multi-user.target.wants/zabbix-agent.service to /usr/lib/systemd/system/zabbix-agent.service.
[root@node03 ~]# ss -tnl
State      Recv-Q Send-Q           Local Address:Port                          Peer Address:Port
LISTEN     0      128                          *:22                                       *:*
LISTEN     0      100                  127.0.0.1:25                                       *:*
LISTEN     0      128                          *:10050                                    *:*
LISTEN     0      128                          *:10051                                    *:*
LISTEN     0      128                         :::22                                      :::*
LISTEN     0      100                        ::1:25                                      :::*
LISTEN     0      128                         :::10051                                   :::*
[root@node03 ~]#
提示:请确保10050端口正常监听;
在node01上安装zabbix-web-mysql
[root@node01 ~]# yum install -y zabbix-web-mysql
修改时区信息

提示:除了修改以上配置可以修改时区以外,我们也可以编辑/etc/php.ini文件,找到date.timezone将其注释去掉,写上对应的时区信息保存退出即可;这两种方式选一种修改就行;
启动httpd,并将其设置为开机自动启动
[root@node01 ~]# systemctl start httpd
[root@node01 ~]# systemctl enable httpd
Created symlink from /etc/systemd/system/multi-user.target.wants/httpd.service to /usr/lib/systemd/system/httpd.service.
[root@node01 ~]# ss -tnl
State      Recv-Q Send-Q           Local Address:Port                          Peer Address:Port
LISTEN     0      128                          *:22                                       *:*
LISTEN     0      100                  127.0.0.1:25                                       *:*
LISTEN     0      128                         :::80                                      :::*
LISTEN     0      128                         :::22                                      :::*
LISTEN     0      100                        ::1:25                                      :::*
[root@node01 ~]#
提示:请确保80端口正常监听即可;到此zabbix-web组件就安装配置好了;接下来我们就可以使用浏览器访问zabbix-web服务;
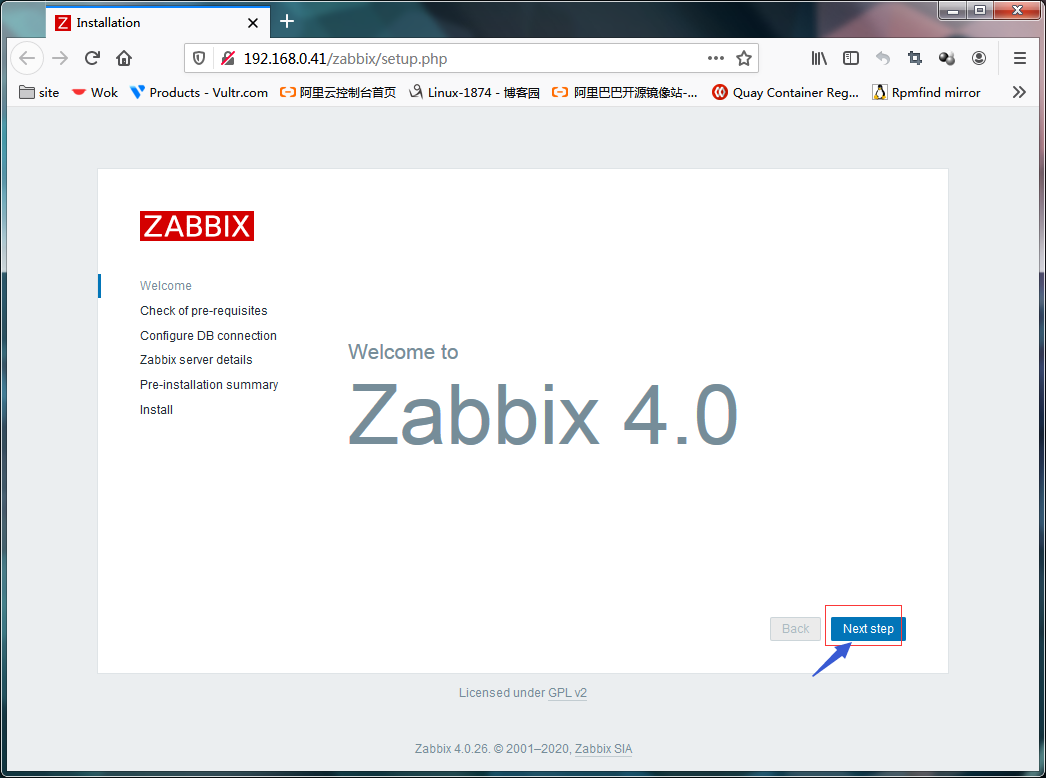
用浏览器访问zabbix-web,进行zabbix安装
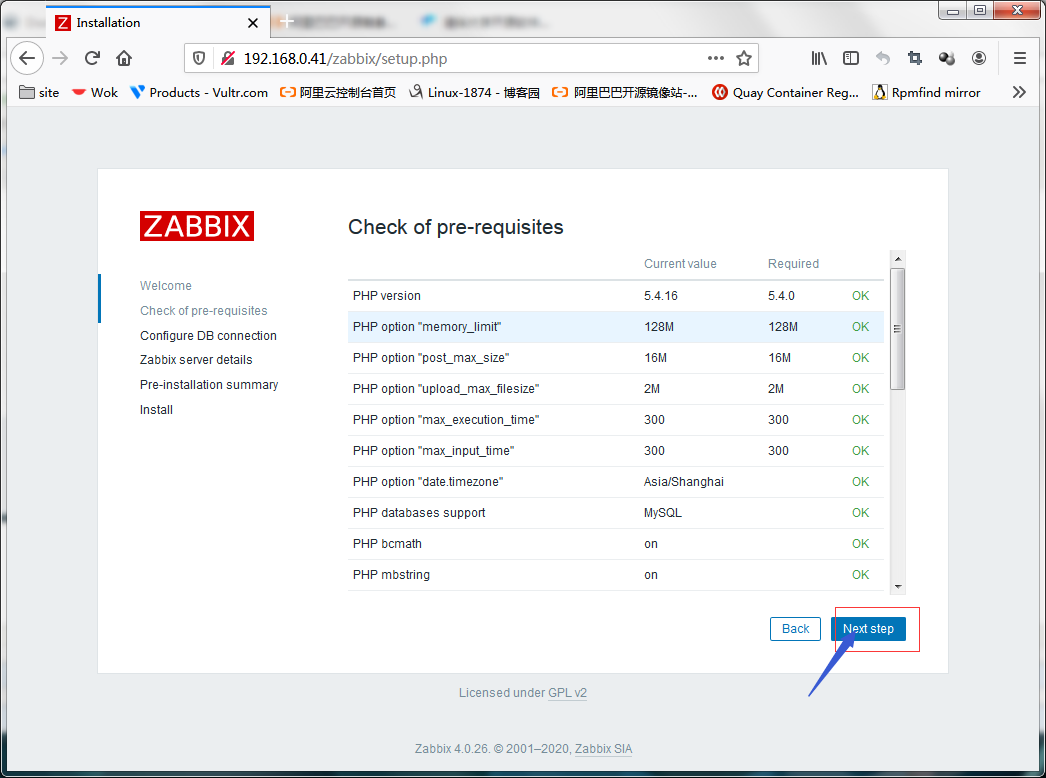
提示:这里主要是验证环境,要全部是ok状态才可以;
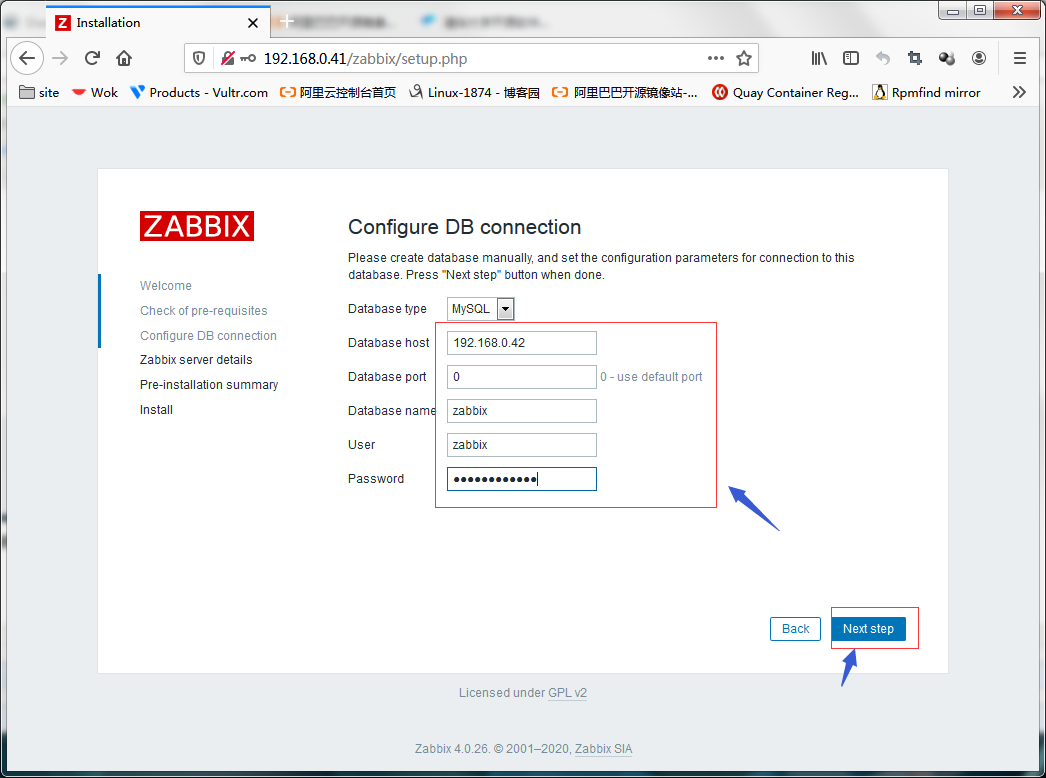
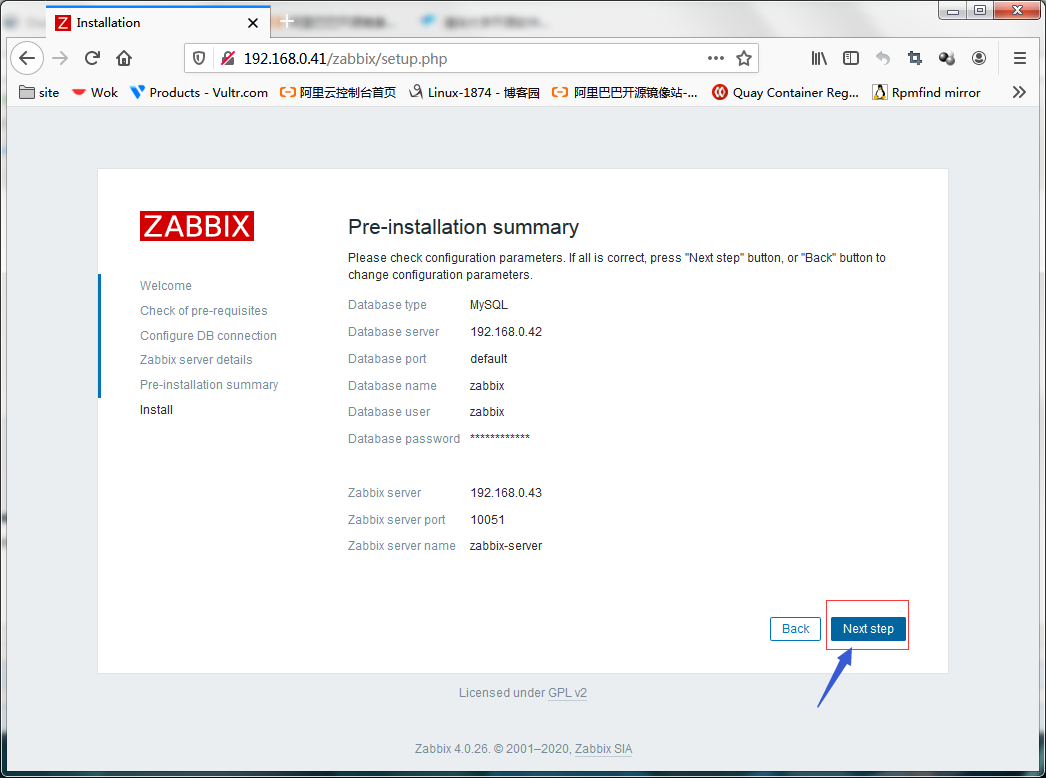
提示:这里是配置数据库连接相关信息,填写对应数据库相关信息,点击下一步即可;
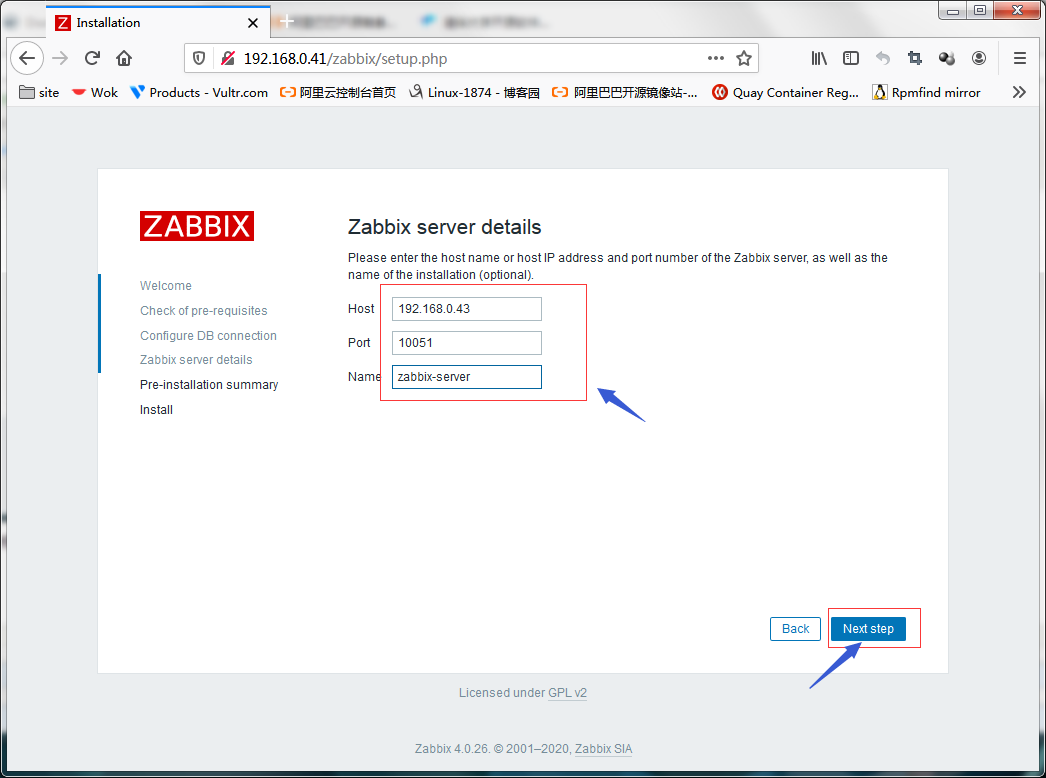
提示:这里是填写zabbix-server相关信息;
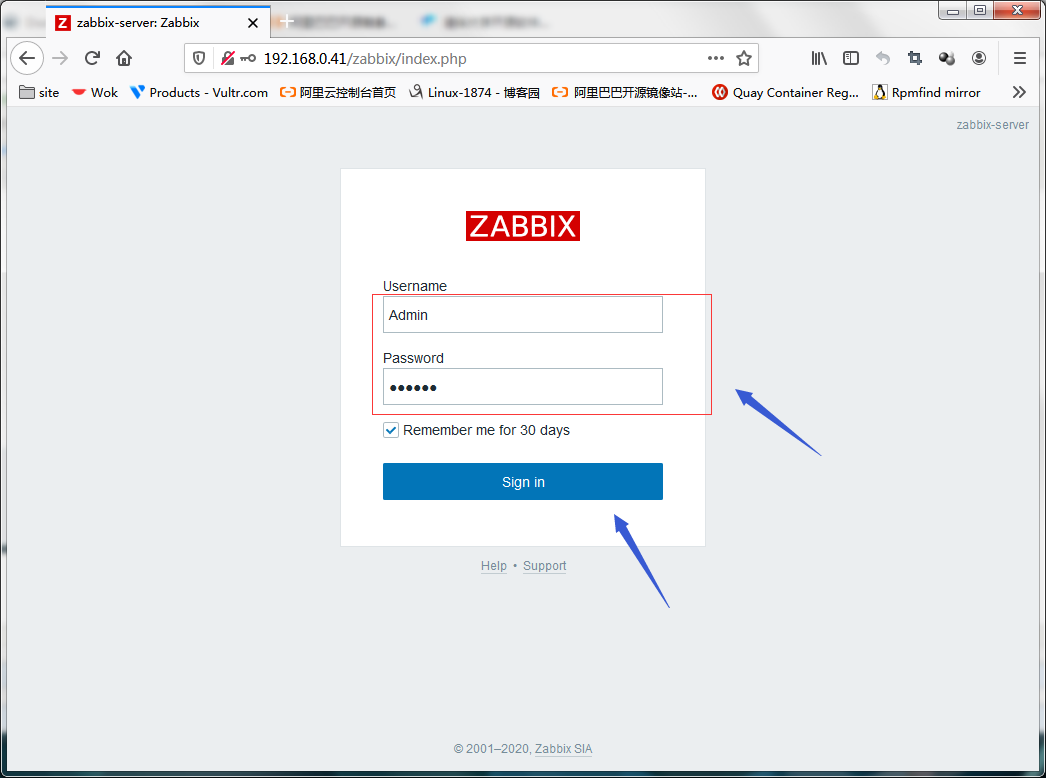
提示:默认用户名是Admin密码是zabbix;
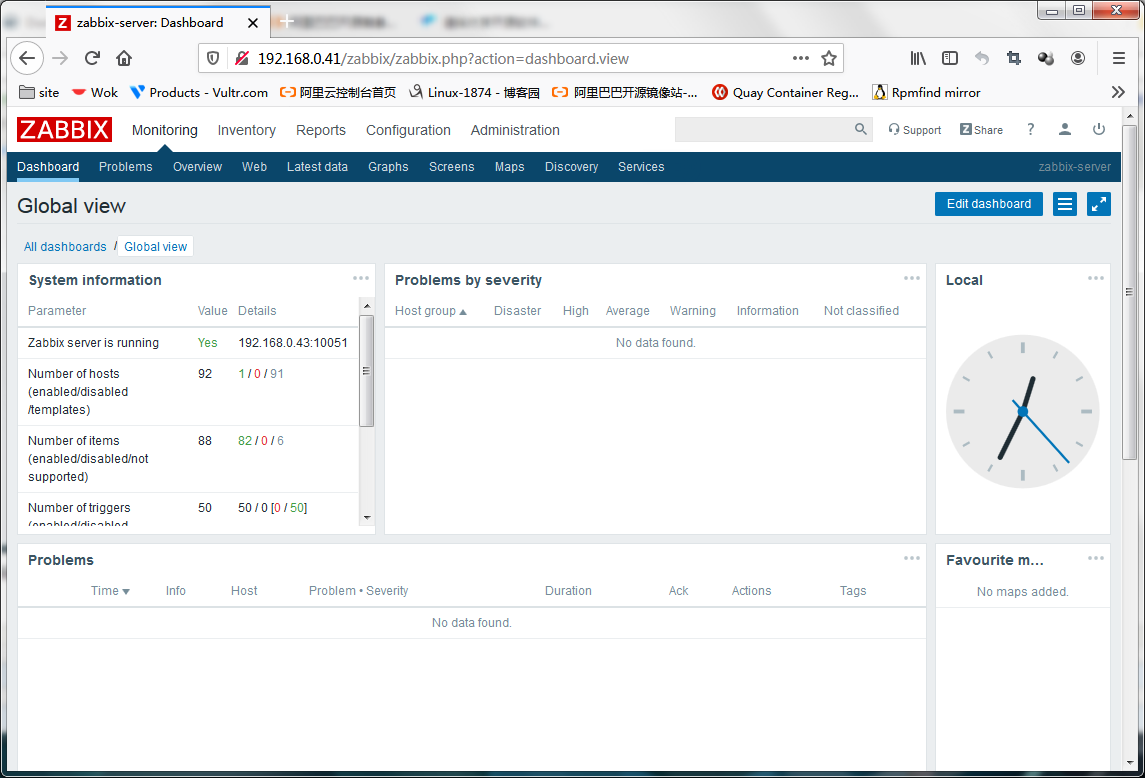
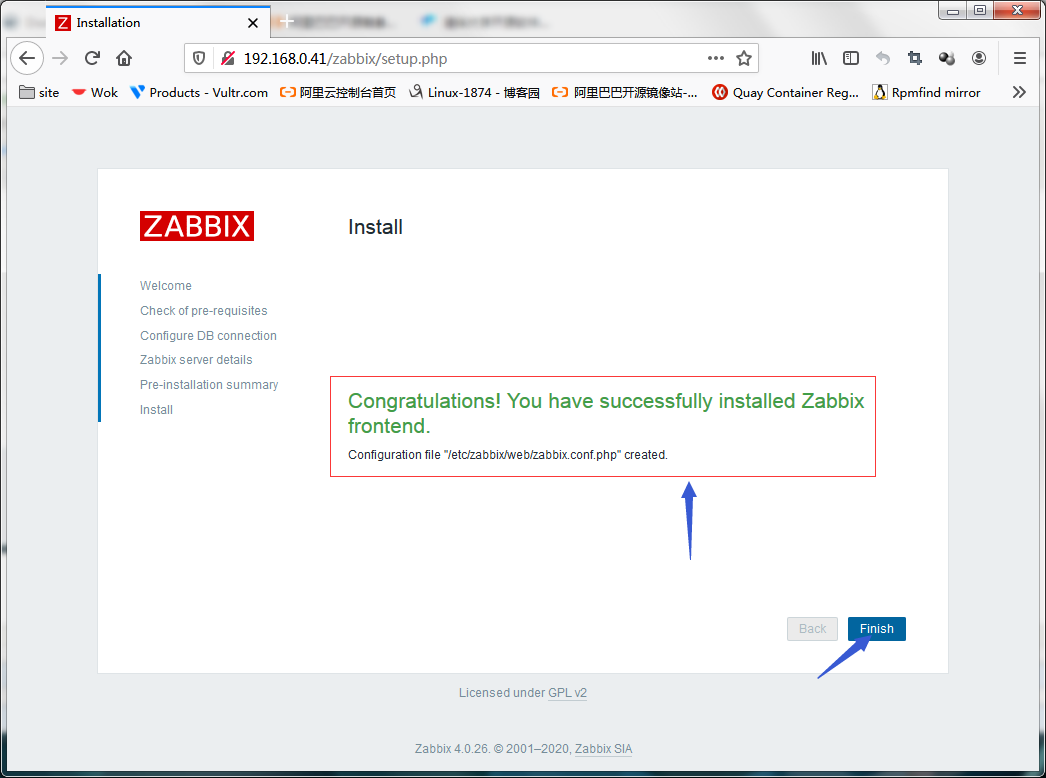
到此zabbix监控系统基础环境就搭建好了;后续我们就可以在这个web页面上做监控配置和管理以及监控数据的展示;

 浙公网安备 33010602011771号