


20182333 2019-2020-1 《数据结构与面向对象程序设计》实验9报告
20182333 2019-2020-1 《数据结构与面向对象程序设计》实验9报告
课程:《程序设计与数据结构》
班级: 1823
姓名: 钱佳禹
学号:20182333
实验教师:王志强
实验日期:2019年11月25日
必修/选修: 必修
1.实验内容
完成图的综合实践
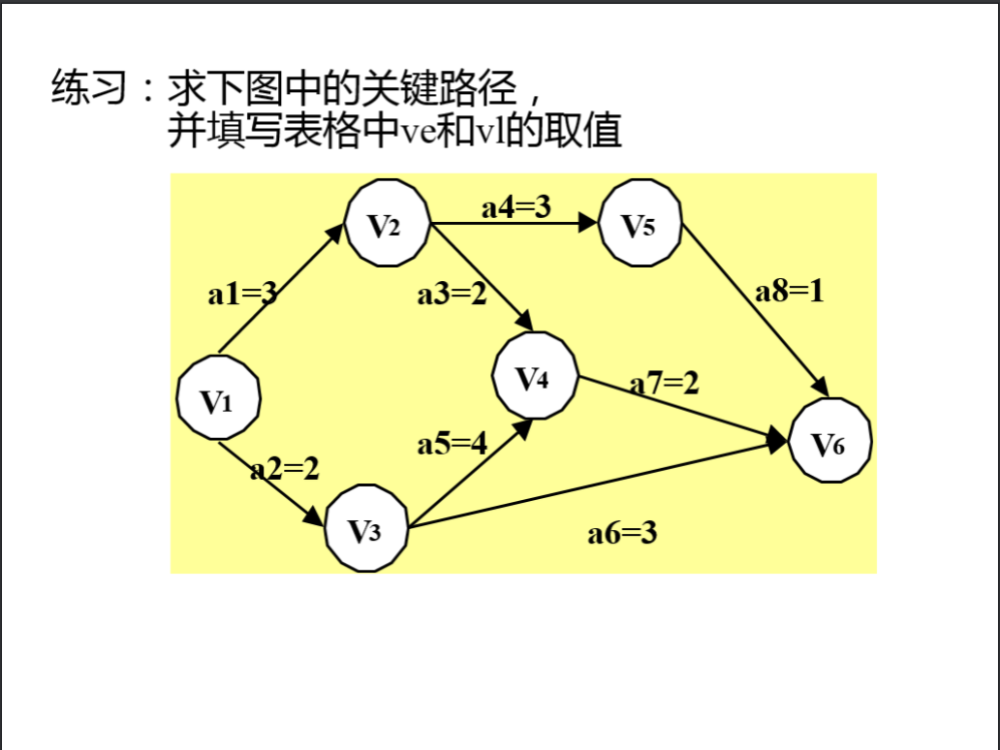
(1)初始化:根据屏幕提示(例如:输入1为无向图,输入2为有向图)初始化无向图和有向图(可用邻接矩阵,也可用邻接表),图需要自己定义(顶点个数、边个数,建议先在草稿纸上画出图,然后再输入顶点和边数)
(2)图的遍历:完成有向图和无向图的遍历(深度和广度优先遍历)
(3)完成有向图的拓扑排序,并输出拓扑排序序列或者输出该图存在环
(4)完成无向图的最小生成树(Prim算法或Kruscal算法均可),并输出
(5)完成有向图的单源最短路径求解(迪杰斯特拉算法)
2. 实验过程及结果
1.初始化无向图和有向图

- 有向图的部分代码
System.out.println("请按‘头节点 尾节点 回车’的形式依次输入边的信息");
for (int i=0;i<edgeNum;i++){
String preName = scan.next();
String folName = scan.next();
Vertex preV = getVertex(preName);
Vertex folV = getVertex(folName);
if (preV == null || folV == null){
System.out.println("输入错误,输入了不存在的顶点!请重新输入");
i--;
continue;
}
Edge edge = new Edge();
edge.tailName = folName;
//将边加入到节点的链表中去
edge.broEdge = preV.edgeLink;//循环
preV.edgeLink = edge;//放在出始地的后面
- 无向图再加上下面这段就ok了
Edge edgeelse = new Edge();
edgeelse.tailName = preName;
edgeelse.broEdge = folV.edgeLink;
folV.edgeLink = edgeelse;
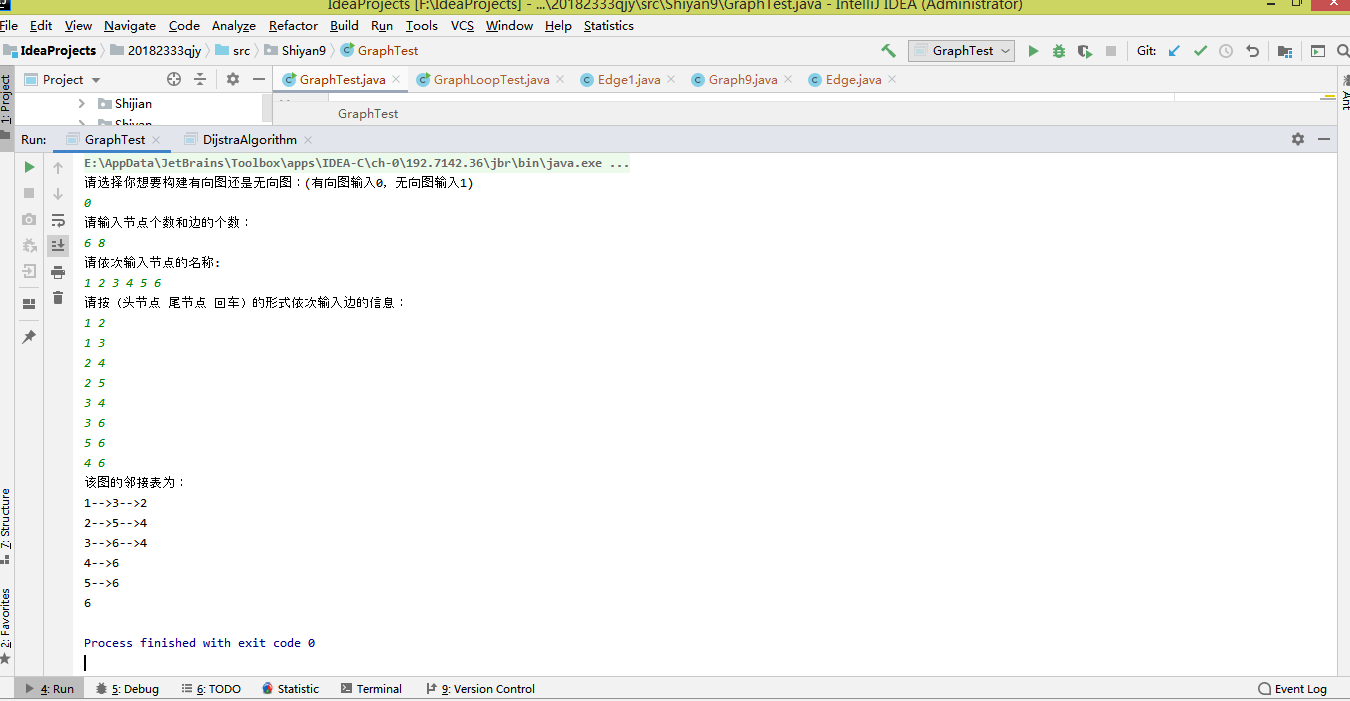
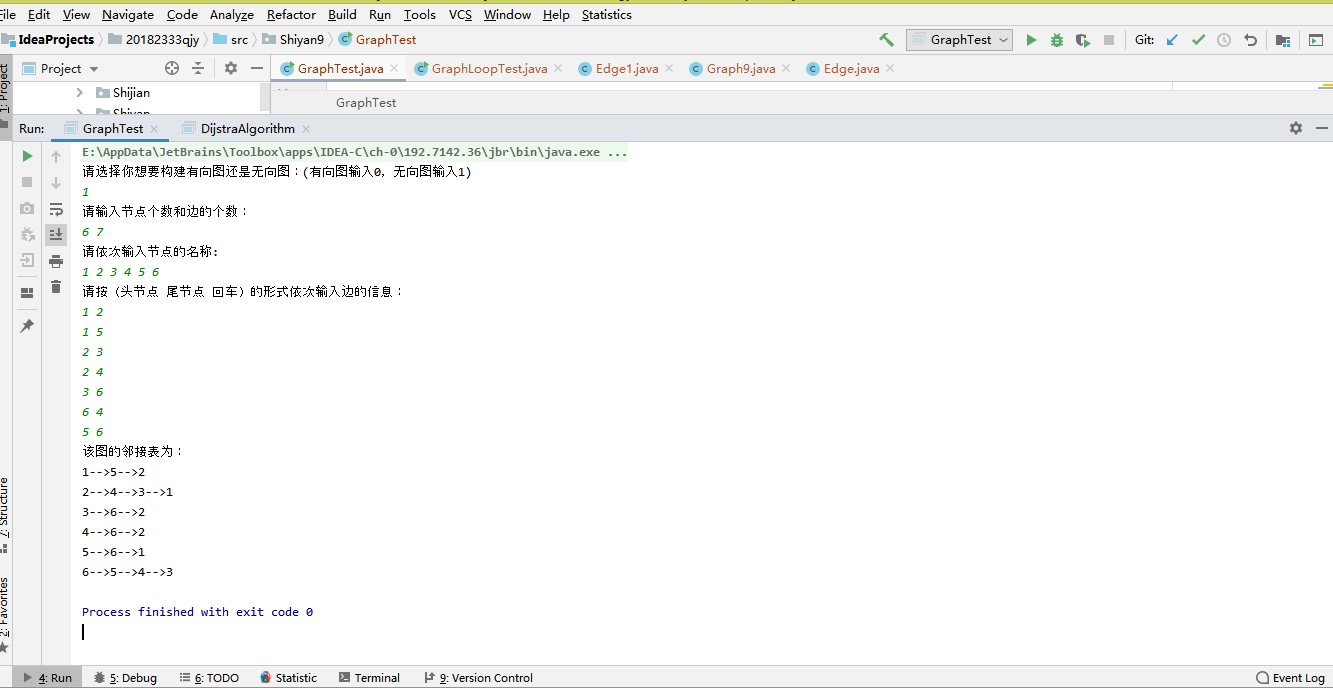
- 实验截图
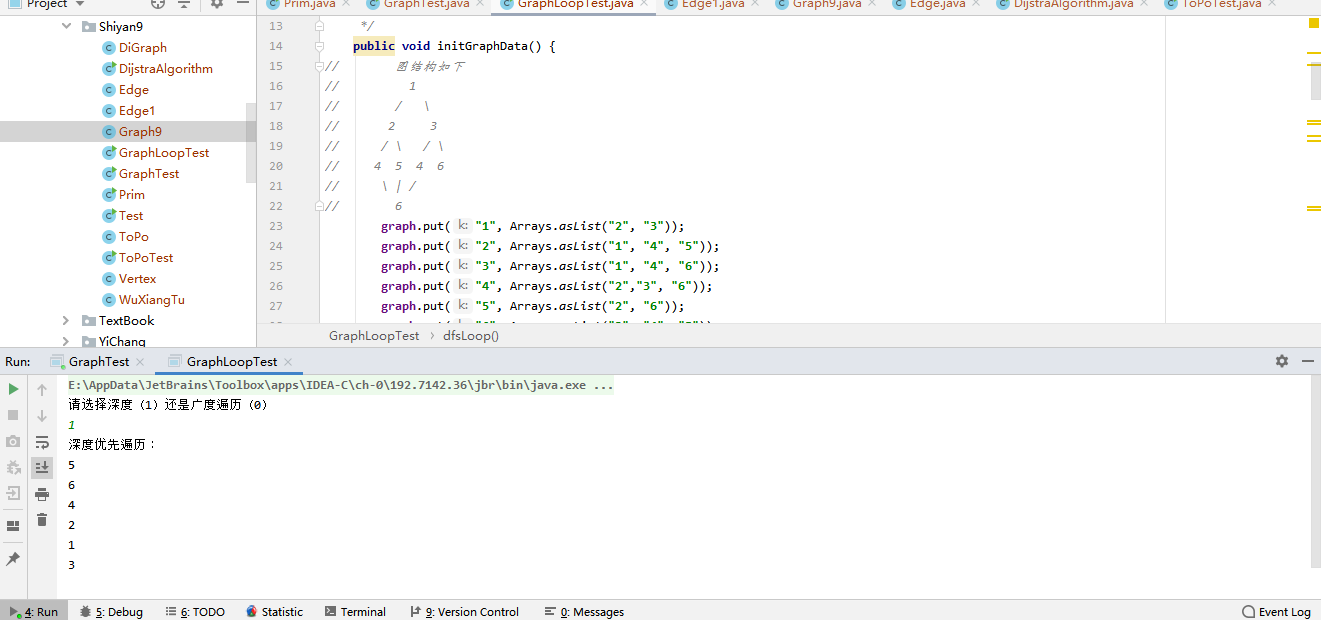
#### 2.有向图和无向图的广度和深度遍历

- 广度优先遍历部分代码
private Queue
private Map<String, Boolean> status = new HashMap<String, Boolean>();
public void BFSSearch(String startPoint) {
    //1.把起始点放入queue;
    queue.add(startPoint);
    status.put(startPoint, false);
    bfsLoop();
}

private void bfsLoop() {
    //  1) 从queue中取出队列头的点;更新状态为已经遍历。
    String currentQueueHeader = queue.poll(); //出队
    status.put(currentQueueHeader, true);
    System.out.println(currentQueueHeader);
    //  2) 找出与此点邻接的且尚未遍历的点,进行标记,然后全部放入queue中。
    List<String> neighborPoints = graph.get(currentQueueHeader);
    for (String poinit : neighborPoints) {
        if (!status.getOrDefault(poinit, false)) { //未被遍历
            if (queue.contains(poinit)) continue;
            queue.add(poinit);
            status.put(poinit, false);
        }
    }
    if (!queue.isEmpty()) {  //如果队列不为空继续遍历
        bfsLoop();
    }
}
- 深度优先遍历部分代码
private Stack
public void DFSSearch(String startPoint) {
stack.push(startPoint);
status.put(startPoint, true);
dfsLoop();
}
private void dfsLoop() {
    if(stack.empty()){
        return;
    }
    //查看栈顶元素,但并不出栈
    String stackTopPoint = stack.peek();
    //  2) 找出与此点邻接的且尚未遍历的点,进行标记,然后全部放入queue中。
    List<String> neighborPoints = graph.get(stackTopPoint);
    for (String point : neighborPoints) {
        if (!status.getOrDefault(point, false)) { //未被遍历
            stack.push(point);
            status.put(point, true);
            dfsLoop();
        }
    }
    String popPoint =  stack.pop();
    System.out.println(popPoint);
}
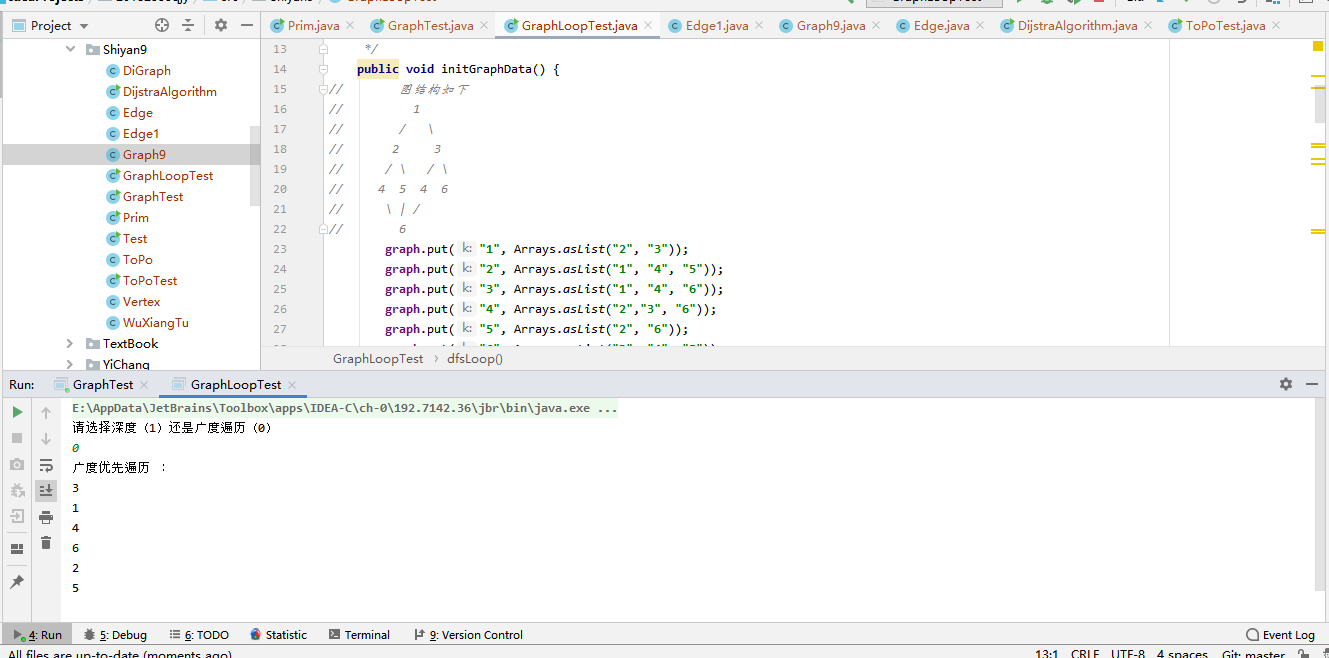
- 实验截图
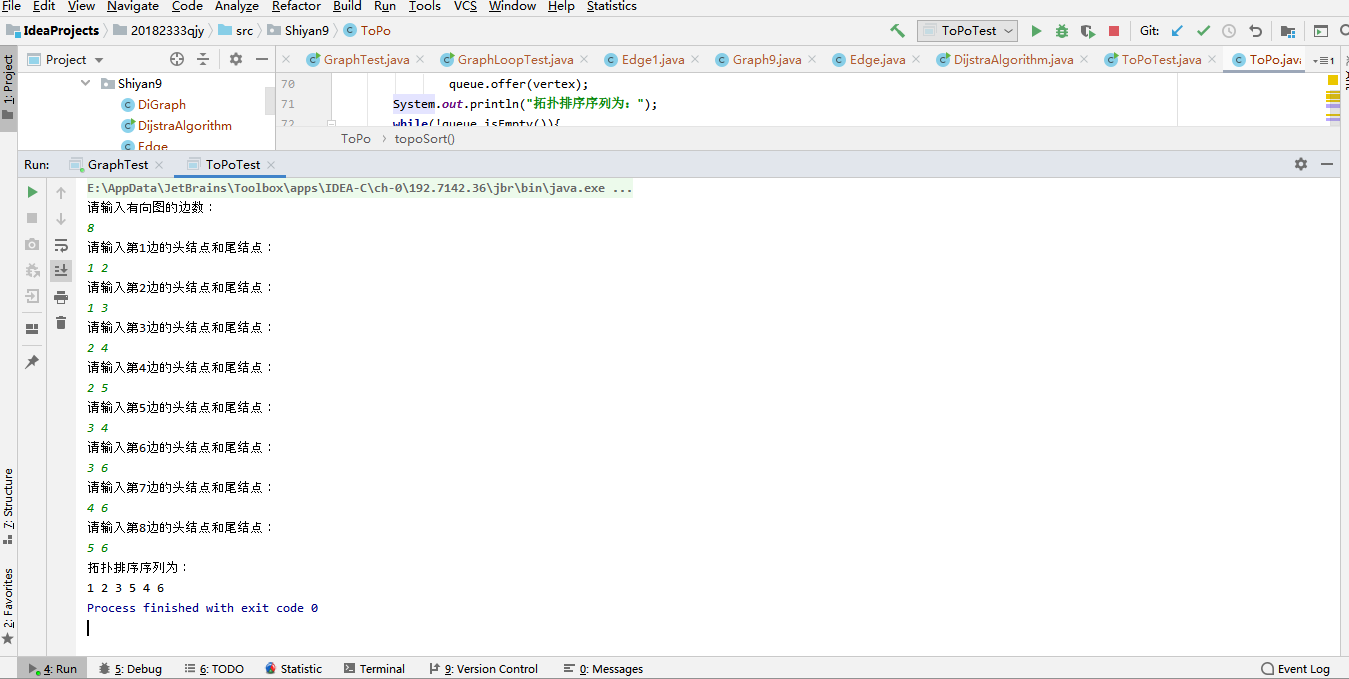
#### 3.拓扑排序序列

- 部分代码
startNode = directedGraph.get(startNodeLabel);
if (startNode == null) {
startNode = new Vertex(startNodeLabel);
directedGraph.put(startNodeLabel, startNode);
}
endNode = directedGraph.get(endNodeLabel);
if (endNode == null) {
endNode = new Vertex(endNodeLabel);
directedGraph.put(endNodeLabel, endNode);
}
e = new Edge(endNode);//每读入一行代表一条边
startNode.adjEdges.add(e);//每读入一行数据,起始顶点添加一条边
endNode.inDegree++;//每读入一行数据,终止顶点入度加1
Queue
//扫描所有的顶点,将入度为0的顶点入队列
Collection
for (Vertex vertex : vertexs)
if(vertex.inDegree == 0)
queue.offer(vertex);
    while(!queue.isEmpty()){
        Vertex v = queue.poll();
        System.out.print(v.vertexLabel + " ");
        count++;
        for (Edge e : v.adjEdges)
            if(--e.endVertex.inDegree == 0)
                queue.offer(e.endVertex);
    }
    if(count != directedGraph.size()){
        throw new Exception("Graph has circle");
    }
- 实验截图
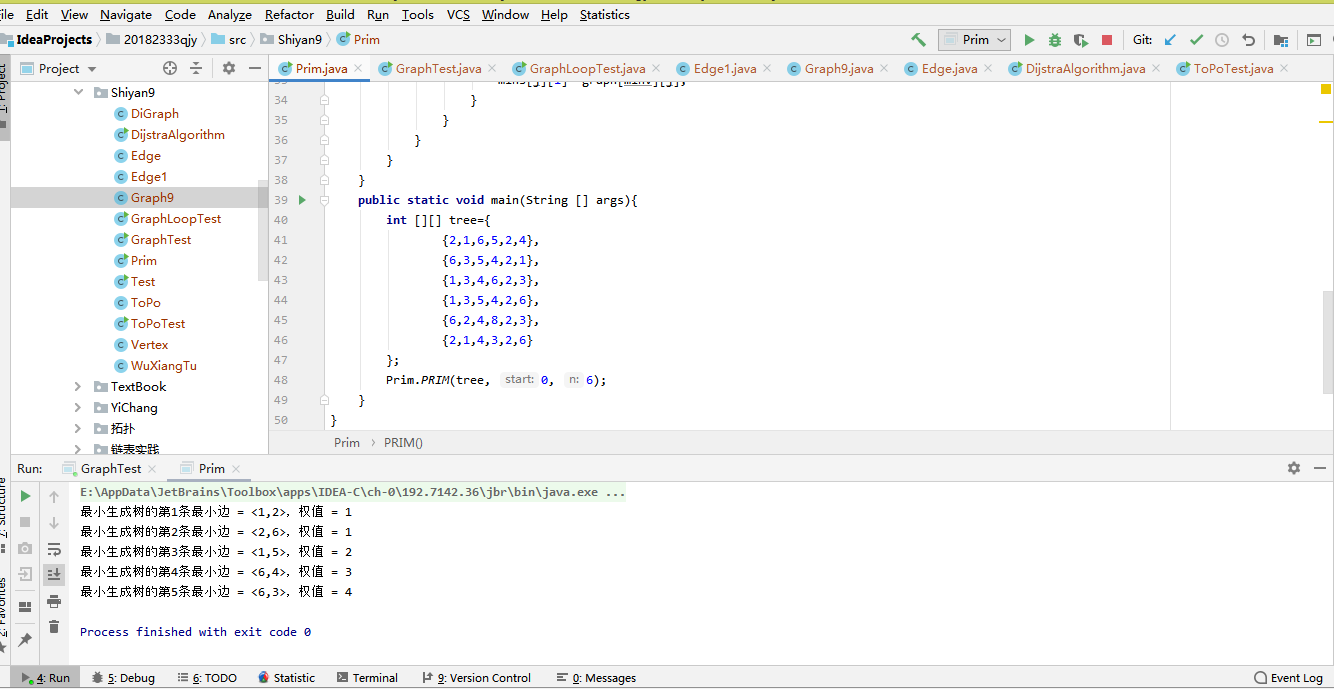
#### 4.Prim最小生成树
- 部分代码
public Edge(int i,int j,int w){
this.i=i;
this.j=j;
this.w=w;
}
@Override
public int compareTo(Object o) {
    Edge to=(Edge)o;
    if(this.w>to.w) return 1;
    else if(this.w==to.w) return 0;
    else return -1;
}
- 实验截图
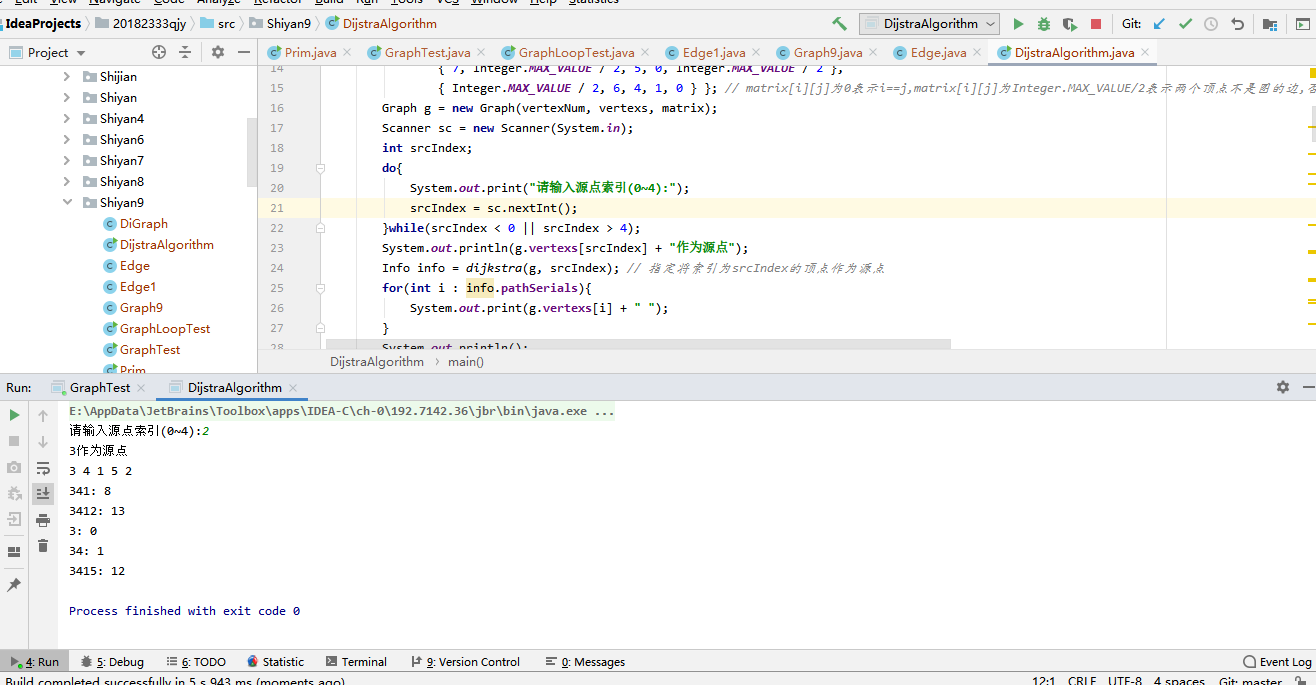
#### 5.迪杰斯特拉算法单源最短路径求解
- 部分代码
- 得到指定顶点i的从源点到顶点i的最短路径
public static int[] getPath(int[] path, int i){
Stack
s.push(i);
int pre = path[i];
while(pre != -1){
s.push(pre);
pre = path[pre];
}
int size = s.size();
int[] pathOfVertex = new int[size];
while(!s.isEmpty()){
pathOfVertex[size - s.size()] = s.pop();
}
return pathOfVertex;
}
- 最短路径求解
public static class Info{
private int[] distances; // 源点到各个顶点的最短距离
private int[] pathSerials; // 整个最短路径序列
private ArrayList<int[]> paths; // 源点到各个顶点的确切最短路径序列
    public Info(int[] distances, int[] pathSerials, ArrayList<int[]> paths) {
        this.distances = distances;
        this.pathSerials = pathSerials;
        this.paths = paths;
    }

}
- 实验截图
## 3. 实验过程中遇到的问题和解决过程
- 问题1:输入时有些麻烦。尤其是对边进行输入时(确定哪些结点是相连的)
- 问题1解决方案:如果输入错误,就要将程序重新开始,重新进行之前的所有步骤,很麻烦。我在写这个代码时候,加入了一些循环和判断,来避免出现输入错误导致程序直接结束。增加容错率。但是有一些关键步骤,比如确定边,没办法用程序进行修正,还是需要在输入时小心。
## 其他(感悟、思考等)
本次实验是JAVA课的最后一个实现,是将之前学过的许多内容进行结合和综合运用,但还是有一定的难度,需要细细思考和耐心理解。不然还有很多地方容易出错。
## 参考资料
- [《Java程序设计与数据结构教程(第二版)》](https://book.douban.com/subject/26851579/)
- [《Java程序设计与数据结构教程(第二版)》学习指导](http://www.cnblogs.com/rocedu/p/5182332.html)

 浙公网安备 33010602011771号