
陆
1、自建yum仓库,分别为网络源和本地源。
答:
本地源:
① mount /dev/cdrom /mnt:把光盘挂载到/mnt目录中。
[root@centos7mini ~]#mount /dev/cdrom /mnt
mount: /dev/sr0 is write-protected, mounting read-only
[root@centos7mini ~]#ls /mnt
CentOS_BuildTag  GPL       LiveOS    RPM-GPG-KEY-CentOS-7
EFI              images    Packages  RPM-GPG-KEY-CentOS-Testing-7
EULA             isolinux  repodata  TRANS.TBL
[root@centos7mini ~]#
② gzip /etc/yum.repos.d/*:打包/etc/yum.repos.d/目录中的文件。
[root@centos7mini ~]#ls /etc/yum.repos.d/
CentOS-Base.repo  CentOS-Debuginfo.repo  CentOS-Media.repo    CentOS-Vault.repo
CentOS-CR.repo    CentOS-fasttrack.repo  CentOS-Sources.repo  CentOS-x86_64-kernel.repo
[root@centos7mini ~]#gzip /etc/yum.repos.d/*
[root@centos7mini ~]#ls /etc/yum.repos.d/
CentOS-Base.repo.gz  CentOS-Debuginfo.repo.gz  CentOS-Media.repo.gz    CentOS-Vault.repo.gz
CentOS-CR.repo.gz    CentOS-fasttrack.repo.gz  CentOS-Sources.repo.gz  CentOS-x86_64-kernel.repo.gz
[root@centos7mini ~]#
③ 通过vim工具,在/etc/yum.repos.d/cd.repo文件中,输入以下内容:
[cd]
name=cd repo
baseurl=file:///mnt
enabled=1
gpgcheck=1
gpgkey=file:///etc/pki/rpm-gpg/RPM-GPG-KEY-centosofficial
[root@centos7mini ~]#cd /etc/yum.repos.d/
[root@centos7mini yum.repos.d]#vim cd.repo
[root@centos7mini yum.repos.d]#cat cd.repo
[cd]
name=cd repo
baseurl=file:///mnt
enabled=1
gpgcheck=1
gpgkey=file:///etc/pki/rpm-gpg/RPM-GPG-KEY-centosofficial
[root@centos7mini yum.repos.d]#
④ yum clean all:清除/var/cache/yum目录缓存。
yum makecache:构建完整缓存。
yum repolist:查看已启用的仓库列表。
[root@centos7mini yum.repos.d]#yum clean all
Loaded plugins: fastestmirror
Cleaning repos: base extras updates
Cleaning up list of fastest mirrors
Other repos take up 162 M of disk space (use --verbose for details)
[root@centos7mini yum.repos.d]#yum makecache
Loaded plugins: fastestmirror
Determining fastest mirrors
cd                                                                                                                           | 3.6 kB  00:00:00
(1/4): cd/group_gz                                                                                                           | 153 kB  00:00:00
(2/4): cd/primary_db                                                                                                         | 3.3 MB  00:00:00
(3/4): cd/filelists_db                                                                                                       | 3.3 MB  00:00:00
(4/4): cd/other_db                                                                                                           | 1.3 MB  00:00:00
Metadata Cache Created
[root@centos7mini yum.repos.d]#yum repolist
Loaded plugins: fastestmirror
Loading mirror speeds from cached hostfile
repo id                             repo name                     status
cd                                  cd repo                       4,070
repolist: 4,070
[root@centos7mini yum.repos.d]#
网络源:
仓库服务器配置:
① yum -y install httpd createrepo yum-utils:安装httpd服务和createrepo程序、yum-utils程序包。
注:reposync命令来自于yum-utils程序包。
② systemctl enable --now httpd:持久开启httpd服务。
systemctl status httpd:查看httpd服务的状态。
[root@repo-server ~]#systemctl enable --now httpd
Created symlink from /etc/systemd/system/multi-user.target.wants/httpd.service to /usr/lib/systemd/system/httpd.service.
[root@repo-server ~]#ls /var/www/html
[root@repo-server ~]#
③ yum repolist:查看已启用的仓库列表。
[root@repo-server ~]#yum repolist
Loaded plugins: fastestmirror
Loading mirror speeds from cached hostfile
repo id                             repo name                     status
base                                base                          10,072
epel                                epel                          13,734
extras                              extras                           500
updates                             updates                        3,414
repolist: 27,720
[root@repo-server ~]#
④ reposync --repoid=extras --download-metadata -p /var/www/html/centos/7/extras/x86_64/:从互联网上,下载extras的yum仓库,到/var/www/html/centos/7/extras/x86_64/目录中。
前提:配置好/etc/yum.repos.d/*.repo文件。
注:模仿阿里云下载路径。
注:在CentOS7中,即使使用--download-metadata选项,也不能自动生成repodata目录,需要使用createrepo命令。
⑤ createrepo /var/www/html/centos/7/extras/x86_64:创建yum仓库的meta数据(repodata目录)。
[root@repo-server x86_64]#pwd
/var/www/html/centos/7/extras/x86_64
[root@repo-server x86_64]#ls
extras
[root@repo-server x86_64]#createrepo /var/www/html/centos/7/extras/x86_64
Spawning worker 0 with 500 pkgs
Workers Finished
Saving Primary metadata
Saving file lists metadata
Saving other metadata
Generating sqlite DBs
Sqlite DBs complete
[root@repo-server x86_64]#ls
extras  repodata
[root@repo-server x86_64]#
客户端配置:
① gzip /etc/yum.repos.d/*:打包/etc/yum.repos.d/目录中的文件。
[root@repo-client ~]#ls /etc/yum.repos.d/
CentOS-Base.repo  CentOS-Debuginfo.repo  CentOS-Media.repo    CentOS-Vault.repo
CentOS-CR.repo    CentOS-fasttrack.repo  CentOS-Sources.repo  CentOS-x86_64-kernel.repo
[root@repo-client ~]#gzip /etc/yum.repos.d/*
[root@repo-client ~]#ls /etc/yum.repos.d/
CentOS-Base.repo.gz  CentOS-Debuginfo.repo.gz  CentOS-Media.repo.gz    CentOS-Vault.repo.gz
CentOS-CR.repo.gz    CentOS-fasttrack.repo.gz  CentOS-Sources.repo.gz  CentOS-x86_64-kernel.repo.gz
[root@repo-client ~]#
② 通过vim工具,在/etc/yum.repos.d/extras.repo文件中,输入以下内容:
[extras]
name=extras
baseurl=http://10.0.0.17/centos/7/extras/x86_64/
enabled=1
gpgcheck=1
gpgkey=file:///etc/pki/rpm-gpg/RPM-GPG-KEY-CentOS-7
[root@repo-client ~]#cd /etc/yum.repos.d/
[root@repo-client yum.repos.d]#vim extras.repo
[root@repo-client yum.repos.d]#cat extras.repo
[extras]
name=extras
baseurl=http://10.0.0.17/centos/7/extras/x86_64/
enabled=1
gpgcheck=1
gpgkey=file:///etc/pki/rpm-gpg/RPM-GPG-KEY-CentOS-7
[root@repo-client yum.repos.d]#
③ yum clean all:清除/var/cache/yum目录缓存。
yum makecache:构建完整缓存。
yum repolist:查看已启用的仓库列表。
[root@repo-client yum.repos.d]#yum clean all
Loaded plugins: fastestmirror
Repository extras is listed more than once in the configuration
Repodata is over 2 weeks old. Install yum-cron? Or run: yum makecache fast
Cleaning repos: base extras
Cleaning up list of fastest mirrors
Other repos take up 76 M of disk space (use --verbose for details)
[root@repo-client yum.repos.d]#yum makecache
Loaded plugins: fastestmirror
Determining fastest mirrors
extras                                                                                                                       | 2.9 kB  00:00:00
(1/3): extras/filelists_db                                                                                                   | 259 kB  00:00:00
(2/3): extras/primary_db                                                                                                     | 243 kB  00:00:00
(3/3): extras/other_db                                                                                                       | 145 kB  00:00:00
Metadata Cache Created
[root@repo-client yum.repos.d]#yum repolist
Loaded plugins: fastestmirror
Loading mirror speeds from cached hostfile
repo id                             repo name                     status
extras                              extras                        500
repolist: 500
[root@repo-client yum.repos.d]#
2、编译安装http 2.4,实现可以正常访问,并将编译步骤和结果提交。
答:① yum -y install gcc make apr-devel apr-util-devel pcre-devel openssl-devel redhat-rpm-config:安装相关程序包。
② 下载httpd-2.4程序包,并解压缩包。
tar xf httpd-2.4.43.tar.gz -C /usr/local/src:解压缩httpd-2.4.43.tar.gz,到/usr/local/src目录中。
[root@centos7mini ~]#tar xf httpd-2.4.43.tar.gz -C /usr/local/src
[root@centos7mini ~]#ls /usr/local/src
httpd-2.4.43
[root@centos7mini ~]#
③ ./configure --prefix=/apps/httpd24 --sysconfdir=/etc/httpd24:配置httpd-2.4,指定安装路径为/apps/httpd24目录,指定配置文件路径为/etc/httpd24目录,然后生成Makefile文件。
注:在CentOS7中,没有启用特性。
[root@centos7mini ~]#cd /usr/local/src/httpd-2.4.43/
[root@centos7mini httpd-2.4.43]#ls
ABOUT_APACHE     CMakeLists.txt  INSTALL         NWGNUmakefile
acinclude.m4     config.layout   InstallBin.dsp  os
Apache-apr2.dsw  configure       LAYOUT          README
Apache.dsw       configure.in    libhttpd.dep    README.cmake
apache_probes.d  docs            libhttpd.dsp    README.platforms
ap.d             emacs-style     libhttpd.mak    ROADMAP
build            httpd.dep       LICENSE         server
BuildAll.dsp     httpd.dsp       Makefile.in     srclib
BuildBin.dsp     httpd.mak       Makefile.win    support
buildconf        httpd.spec      modules         test
CHANGES          include         NOTICE          VERSIONING
[root@centos7mini httpd-2.4.43]#./configure --prefix=/apps/httpd24 --sysconfdir=/etc/httpd24
[root@centos7mini httpd-2.4.43]#
④ make 或 make -j 4:编译。
⑤ make install:安装。
配置、编译、安装完毕,生成以下文件:
[root@centos7mini httpd-2.4.43]#ls /apps/httpd24/
bin  build  cgi-bin  error  htdocs  icons  include  logs  man  manual  modules
[root@centos7mini httpd-2.4.43]#ls /etc/httpd24/
extra  httpd.conf  magic  mime.types  original
[root@centos7mini httpd-2.4.43]#
⑥ 配置环境。
[root@centos7mini httpd-2.4.43]#echo 'PATH=/apps/httpd24/bin:$PATH' > /etc/profile.d/http24.sh
[root@centos7mini httpd-2.4.43]#. /etc/profile.d/http24.sh
[root@centos7mini httpd-2.4.43]#
⑦ apachectl 或 apachectl start:启动httpd服务,测试运行。
[root@centos7mini httpd-2.4.43]#apachectl
AH00558: httpd: Could not reliably determine the server's fully qualified domain name, using fe80::20c:29ff:fe8c:ef1b. Set the 'ServerName' directive globally to suppress this message
[root@centos7mini httpd-2.4.43]#
⑧ 创建系统用户apache。
[root@centos7mini httpd-2.4.43]#useradd -r -u 48 -c Apache -d /var/www -s /sbin/nologin apache
[root@centos7mini httpd-2.4.43]#getent passwd apache
apache:x:48:48:Apache:/var/www:/sbin/nologin
[root@centos7mini httpd-2.4.43]#
⑨ 把系统用户apache,关联到httpd-2.4。
[root@centos7mini httpd-2.4.43]#sed -i.bak -e 's@User daemon@User apache@' -e 's@Group daemon@Group apache@' /etc/httpd24/httpd.conf
[root@centos7mini httpd-2.4.43]#
⑩ apachectl restart:重新启动httpd服务,并验证。
[root@centos7mini httpd-2.4.43]#apachectl restart
AH00558: httpd: Could not reliably determine the server's fully qualified domain name, using fe80::20c:29ff:fe8c:ef1b. Set the 'ServerName' directive globally to suppress this message
[root@centos7mini httpd-2.4.43]#
⑪ 查看进程。
[root@centos7mini httpd-2.4.43]#ps aux
...
apache    36571  0.0  0.2 390580  4320 ?        Sl   16:45   0:00 /apps/httpd24/bin/httpd
apache    36572  0.0  0.2 390580  4320 ?        Sl   16:45   0:00 /apps/httpd24/bin/httpd
apache    36573  0.0  0.2 390580  4328 ?        Sl   16:45   0:00 /apps/httpd24/bin/httpd
...
[root@centos7mini httpd-2.4.43]#
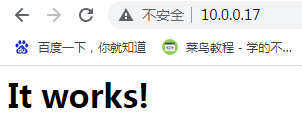
⑫ 查看浏览器。
3、利用sed 取出ifconfig命令中本机的IPv4地址。
答:方法一:分布式。
[root@centos7mini ~]#ifconfig eth0
eth0: flags=4163<UP,BROADCAST,RUNNING,MULTICAST>  mtu 1500
        inet 10.0.0.17  netmask 255.255.255.0  broadcast 10.0.0.255
        inet6 fe80::20c:29ff:fe8c:ef1b  prefixlen 64  scopeid 0x20<link>
        ether 00:0c:29:8c:ef:1b  txqueuelen 1000  (Ethernet)
        RX packets 2487  bytes 210156 (205.2 KiB)
        RX errors 0  dropped 0  overruns 0  frame 0
        TX packets 2550  bytes 678388 (662.4 KiB)
        TX errors 0  dropped 0 overruns 0  carrier 0  collisions 0

[root@centos7mini ~]#
[root@centos7mini ~]#ifconfig eth0 | sed -n '2p'
        inet 10.0.0.17  netmask 255.255.255.0  broadcast 10.0.0.255
[root@centos7mini ~]#
[root@centos7mini ~]#ifconfig eth0 | sed -n '2p' | sed -E 's@^[^0-9]+@@'
10.0.0.17  netmask 255.255.255.0  broadcast 10.0.0.255
[root@centos7mini ~]#
[root@centos7mini ~]#ifconfig eth0 | sed -n '2p' | sed -E 's@^[^0-9]+@@' | sed -E 's@ .*$@@'
10.0.0.17
[root@centos7mini ~]#
方法二:组合式。
[root@centos7mini ~]#ifconfig eth0
eth0: flags=4163<UP,BROADCAST,RUNNING,MULTICAST>  mtu 1500
        inet 10.0.0.17  netmask 255.255.255.0  broadcast 10.0.0.255
        inet6 fe80::20c:29ff:fe8c:ef1b  prefixlen 64  scopeid 0x20<link>
        ether 00:0c:29:8c:ef:1b  txqueuelen 1000  (Ethernet)
        RX packets 3260  bytes 283953 (277.2 KiB)
        RX errors 0  dropped 0  overruns 0  frame 0
        TX packets 3114  bytes 743794 (726.3 KiB)
        TX errors 0  dropped 0 overruns 0  carrier 0  collisions 0

[root@centos7mini ~]#
[root@centos7mini ~]#ifconfig eth0 | sed -En '2s@^[^0-9]+([0-9.]+) .*$@\1@p'
10.0.0.17
[root@centos7mini ~]#
4、删除/etc/fstab文件中所有以#开头,后面至少跟一个空白字符的行的行首的#和空白字符。
答:
[root@centos7mini ~]#cat /etc/fstab

#
# /etc/fstab
# Created by anaconda on Thu May 13 20:29:02 2021
#
# Accessible filesystems, by reference, are maintained under '/dev/disk'
# See man pages fstab(5), findfs(8), mount(8) and/or blkid(8) for more info
#
UUID=39e66903-b3bb-4664-844e-9cf1e1726ec9 /                       xfs     defaults        0 0
UUID=2a13f5bb-2492-4f2f-a446-c4ce2df5dbd4 /boot                   xfs     defaults        0 0
UUID=84966365-16e6-408f-aff3-92156186ae70 /data                   xfs     defaults        0 0
UUID=0ebd701e-9490-4871-ac93-748168c60cfc swap                    swap    defaults        0 0
[root@centos7mini ~]#
[root@centos7mini ~]#sed 's@^# *@@' /etc/fstab


/etc/fstab
Created by anaconda on Thu May 13 20:29:02 2021

Accessible filesystems, by reference, are maintained under '/dev/disk'
See man pages fstab(5), findfs(8), mount(8) and/or blkid(8) for more info

UUID=39e66903-b3bb-4664-844e-9cf1e1726ec9 /                       xfs     defaults        0 0
UUID=2a13f5bb-2492-4f2f-a446-c4ce2df5dbd4 /boot                   xfs     defaults        0 0
UUID=84966365-16e6-408f-aff3-92156186ae70 /data                   xfs     defaults        0 0
UUID=0ebd701e-9490-4871-ac93-748168c60cfc swap                    swap    defaults        0 0
[root@centos7mini ~]#
5、处理/etc/fstab路径,使用sed命令取出其目录名和基名。
答:目录名:
[root@centos7mini ~]#ls /etc/fstab | sed -E 's@(^/.*/)([^/]+/?)@\1@'
/etc/
[root@centos7mini ~]#
基名:
[root@centos7mini ~]#ls /etc/fstab | sed -E 's@(^/.*/)([^/]+/?)@\2@'
fstab
[root@centos7mini ~]#

 浙公网安备 33010602011771号