GitLab使用
GitLab简介:
GitLab是一个用于仓库管理系统的开源项目。使用Git作为代码管理工具,并在此基础上搭建起来的Web服务。可以通过Web界面进行访问公开的或者私人项目。它拥有与Github类似的功能,能够浏览源代码,管理缺陷和注释。可以管理团队对仓库的访问,它非常易于浏览提交过的版本并提供一个文件历史库。团队成员可以利用内置的简单聊天程序(Wall)进行交流。它还提供一个代码片段手机功能可以轻松实现代码复用。
常用的网站:
官网:https://about.gitlab.com/
国内镜像:https://mirrors.tuna.tsinghua.edu.cn/gitlab-ce/yum/
安装环境:
CentOS 6或7
实验环境(至少2G内存) 生产环境(至少4G内存)
常用的网站:
  官网:https://about.gitlab.com/
  国内镜像:https://mirrors.tuna.tsinghua.edu.cn/gitlab-ce/yum/

安装环境:
  CentOS 6或7
  实验环境(至少2G内存) 生产环境(至少4G内存)

GitLab安装:
1)安装依赖包
[root@GitServer ~]# yum install -y curl policycoreutils-python openssh-server
1.1)如果关闭了防火墙,可以不用设置此项
[root@GitServer ~]# firewall-cmd --permanent --add-service=http && firewall-cmd --permanent --add-service=https
[root@GitServer ~]# systemctl reload firewalld
1.2)下载gitlab安装包
[root@GitServer ~]# wget https://mirrors.tuna.tsinghua.edu.cn/gitlab-ce/yum/el7/gitlab-ce-10.2.2-ce.0.el7.x86_64.rpm
1.3)开始安装
[root@GitServer ~]# rpm -ivh gitlab-ce-10.2.2-ce.0.el7.x86_64.rpm
....
Thank you for installing GitLab!
GitLab was unable to detect a valid hostname for your instance.
Please configure a URL for your GitLab instance by setting `external_url`
configuration in /etc/gitlab/gitlab.rb file.
Then, you can start your GitLab instance by running the following command:
  sudo gitlab-ctl reconfigure

For a comprehensive list of configuration options please see the Omnibus GitLab readme
https://gitlab.com/gitlab-org/omnibus-gitlab/blob/master/README.md
2)修改gitlab配置文件
[root@GitServer ~]# vim /etc/gitlab/gitlab.rb
....
external_url 'http://192.168.11.225'    #将此处URL地址修改成本地IP
....

一些配置说明以及指令:
/opt/gitlab                  #gitlab的程序安装目录
/var/opt/gitlab              #gitlab目录数据目录
/var/opt/gitlab/git-data    #存放仓库数据
gitlab-ctl status            #查看目前gitlab所有服务运维状态
gitlab-ctl stop              #停止gitlab服务
gitlab-ctl stop nginx        #单独停止某个服务
gitlab-ctl tail              #查看所有服务的日志
gitlab-ctl reconfigure       #更改配置文件后需重新配置

2.1)重新配置gitlab
[root@GitServer ~]# gitlab-ctl reconfigure
2.2)登录GitLab:http://192.168.11.225,默认账户是:root  密码首次登录时设置

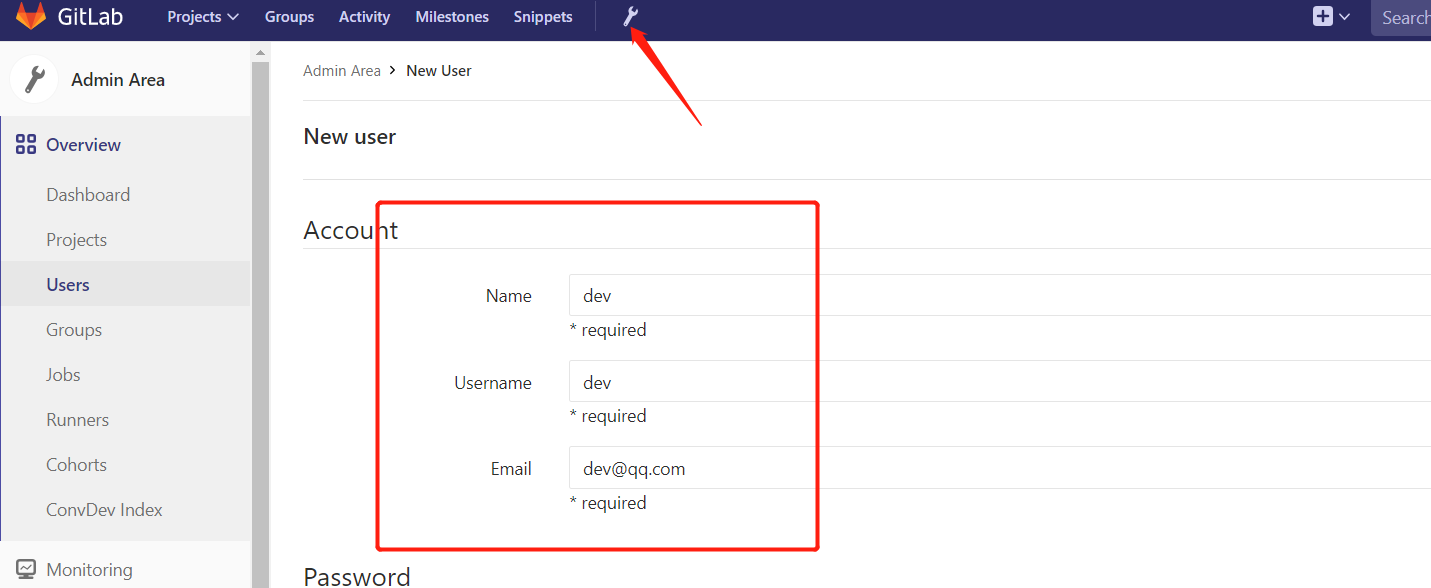
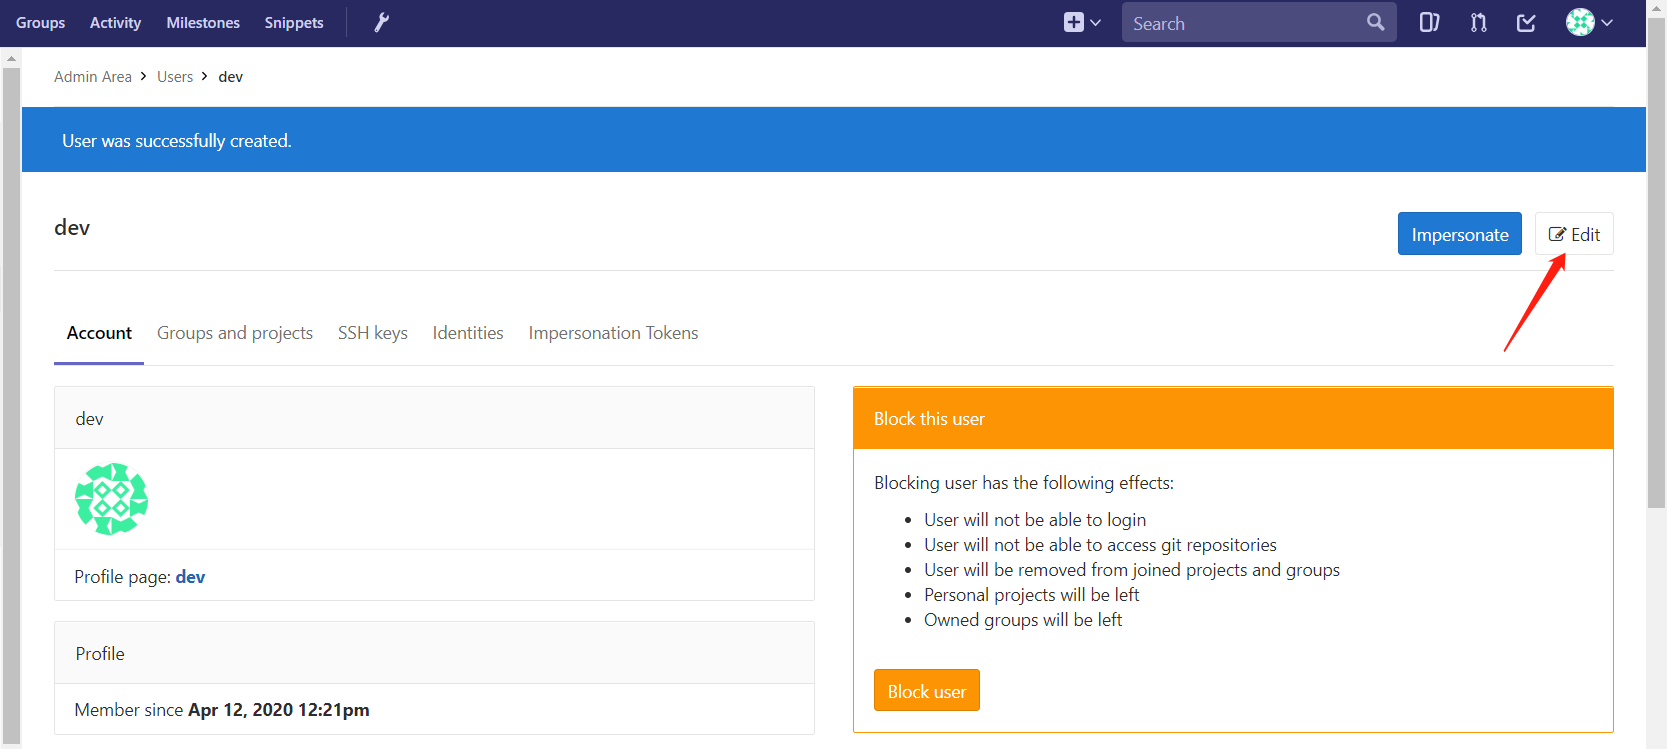
创建用户
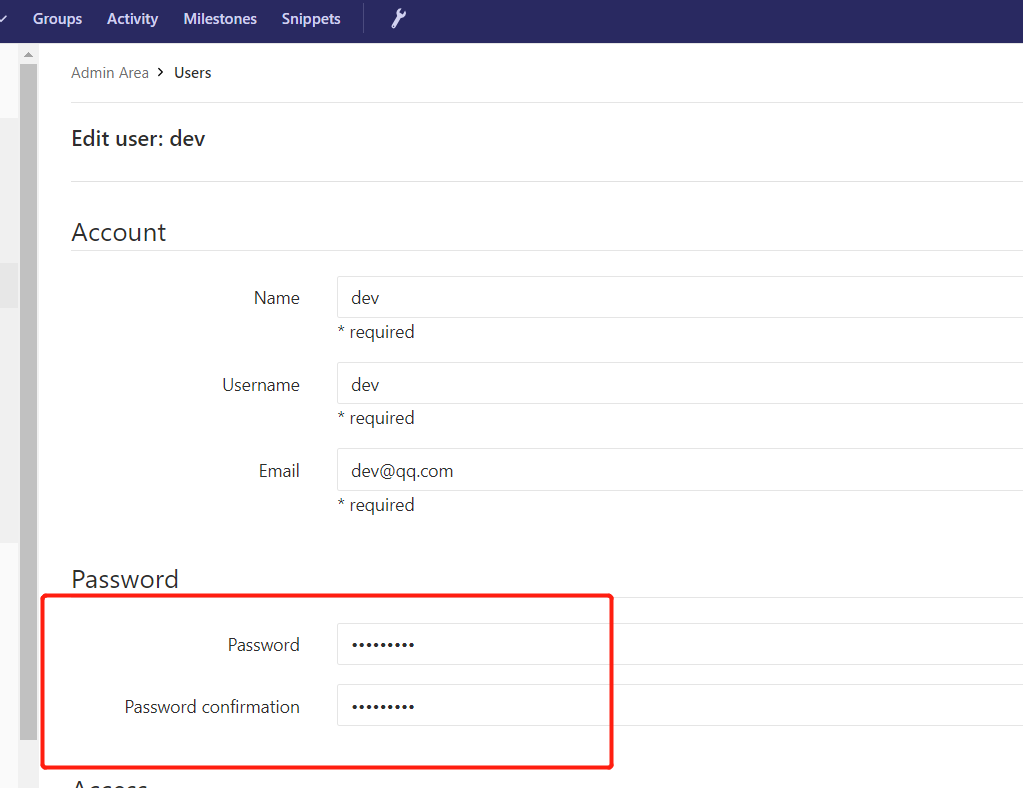
为用户设置密码
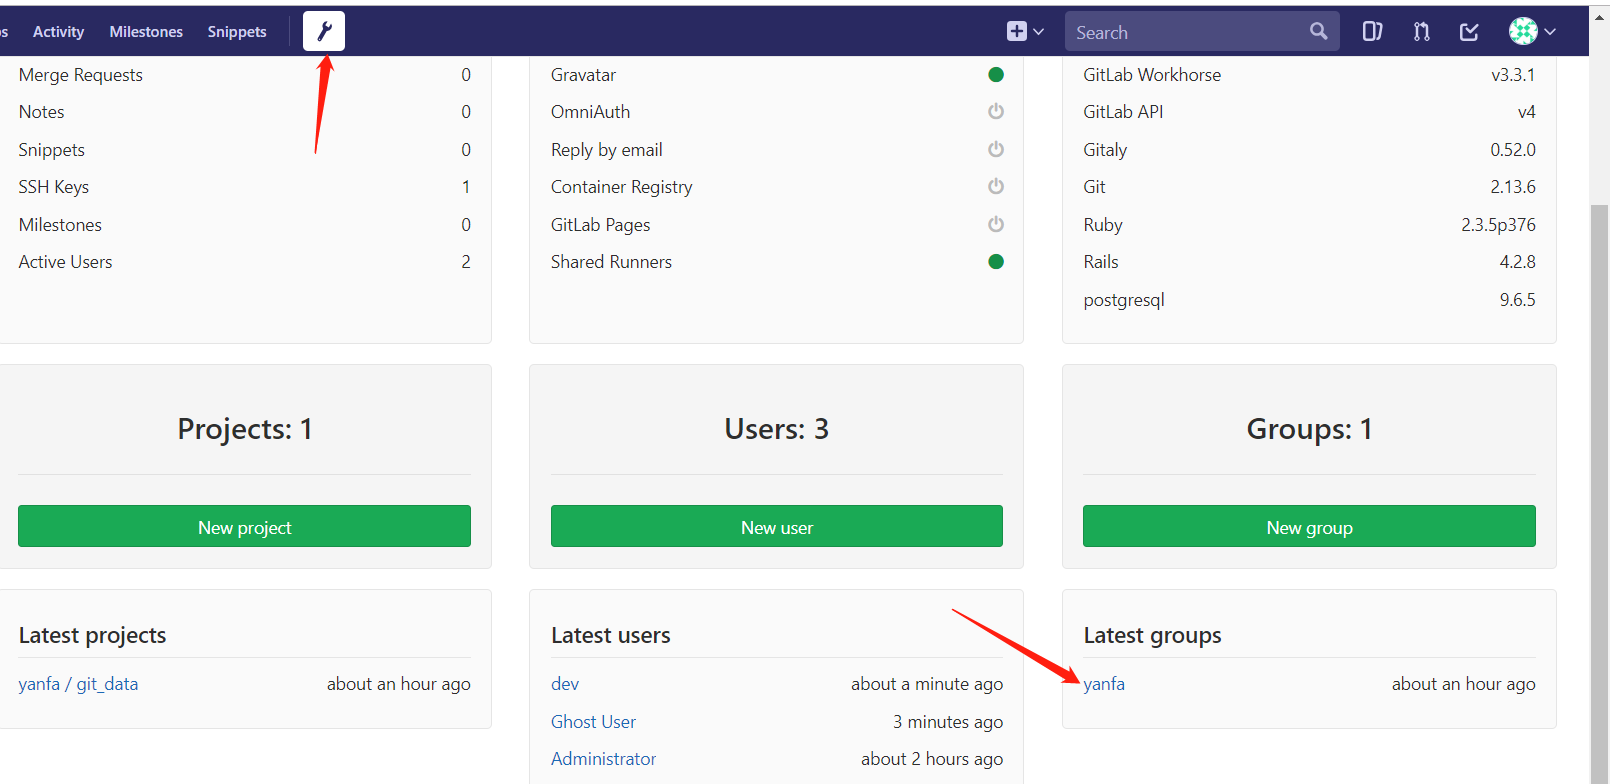
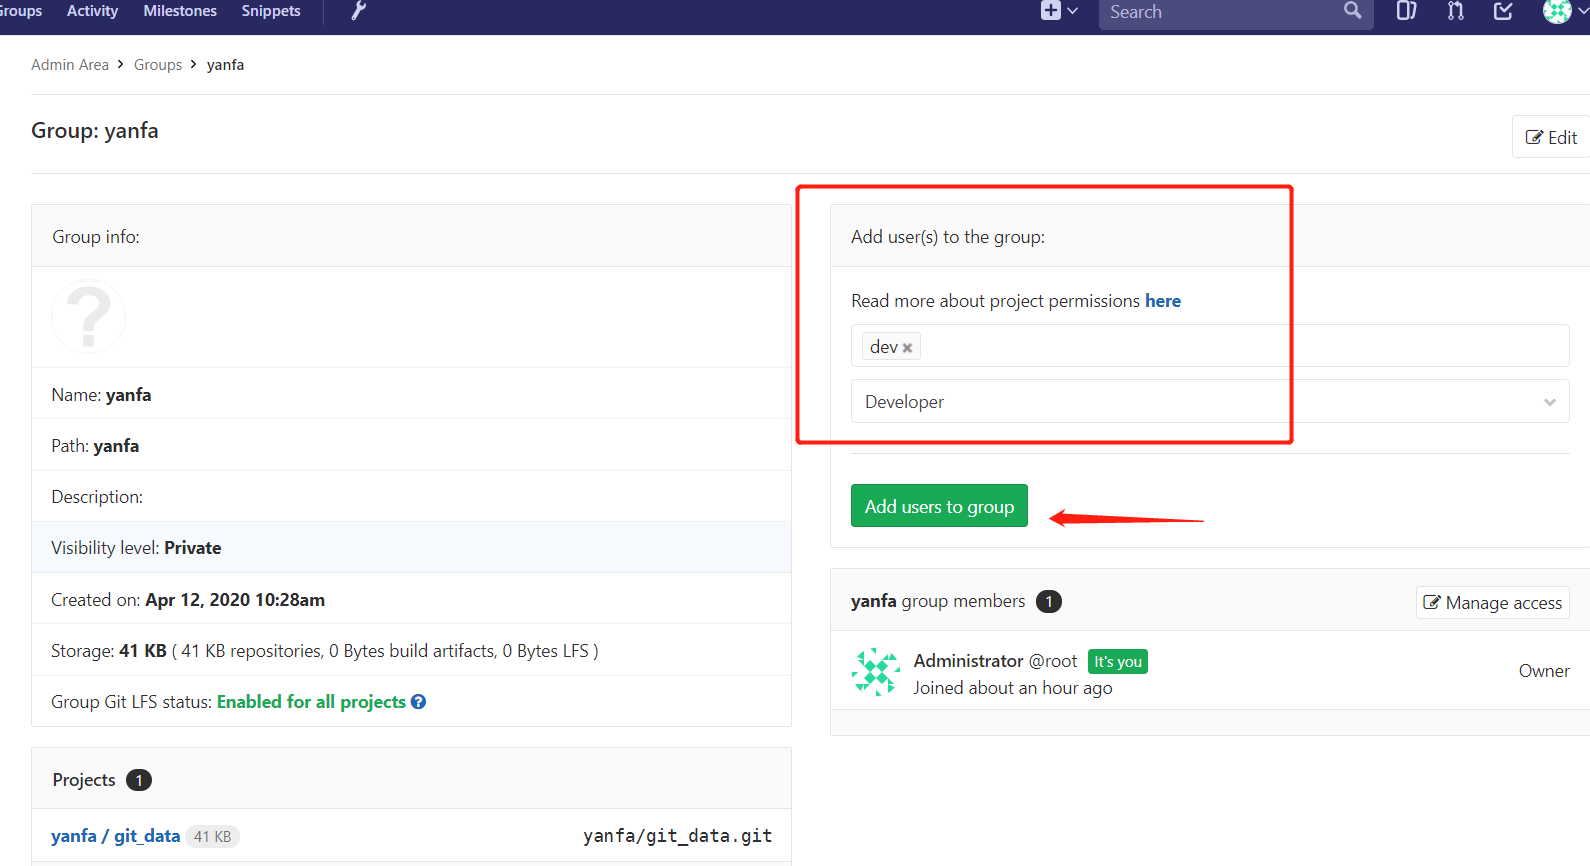
创建yanfa组

将用户加入到yanfa组,并授予研发权限
通过dev(普通用户)登录到gitlab,点开项目通过SSH方式登录远程仓库,点击SSH,然后输入公钥内容,就可以下载上传代码了

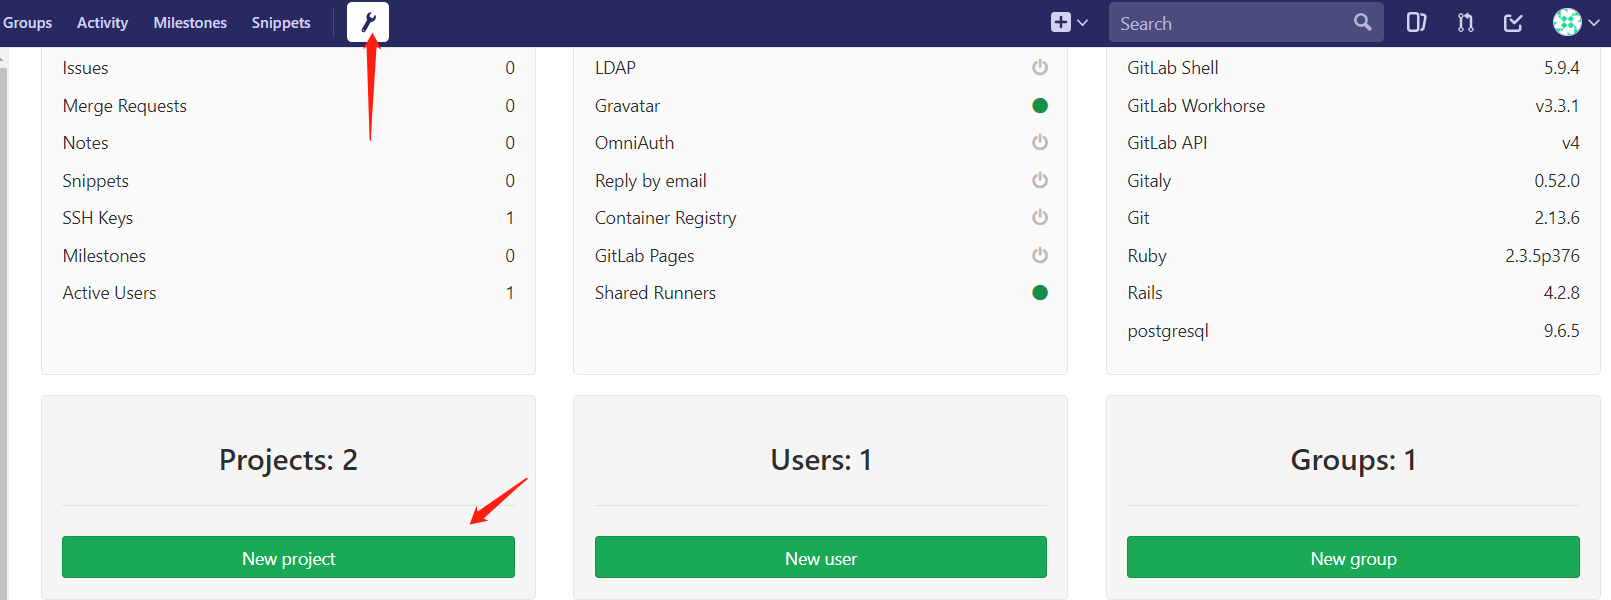
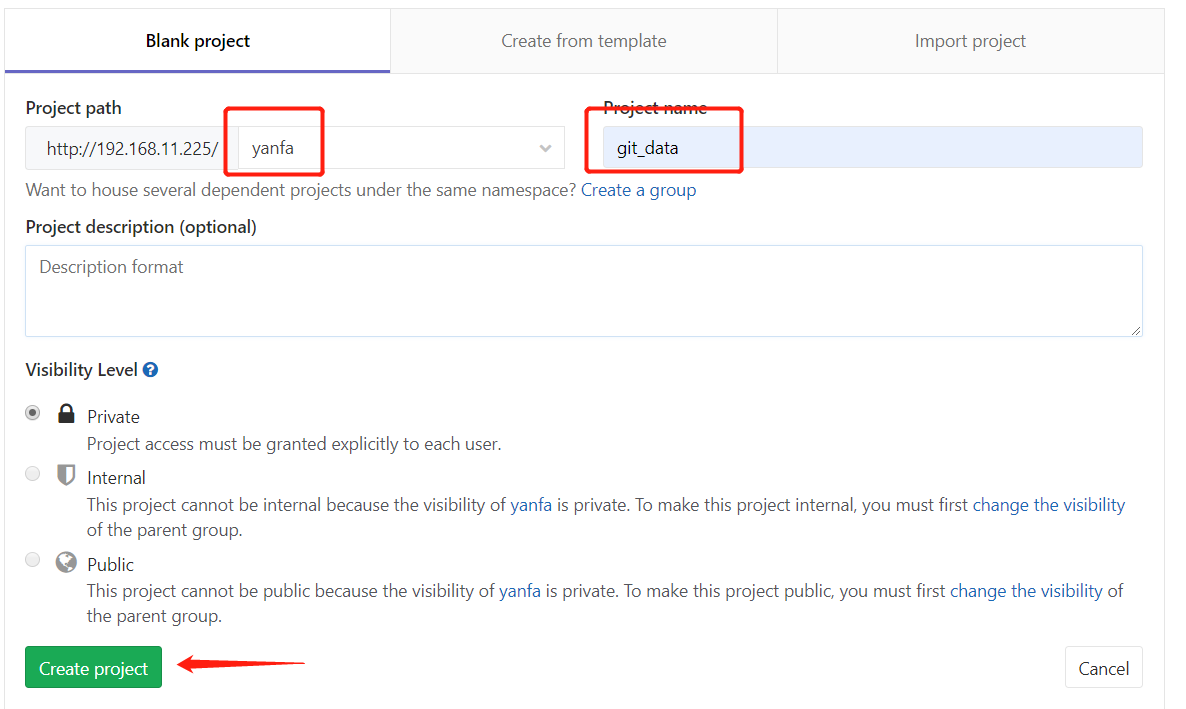
创建 yanfa 组管理的新项目 git_data
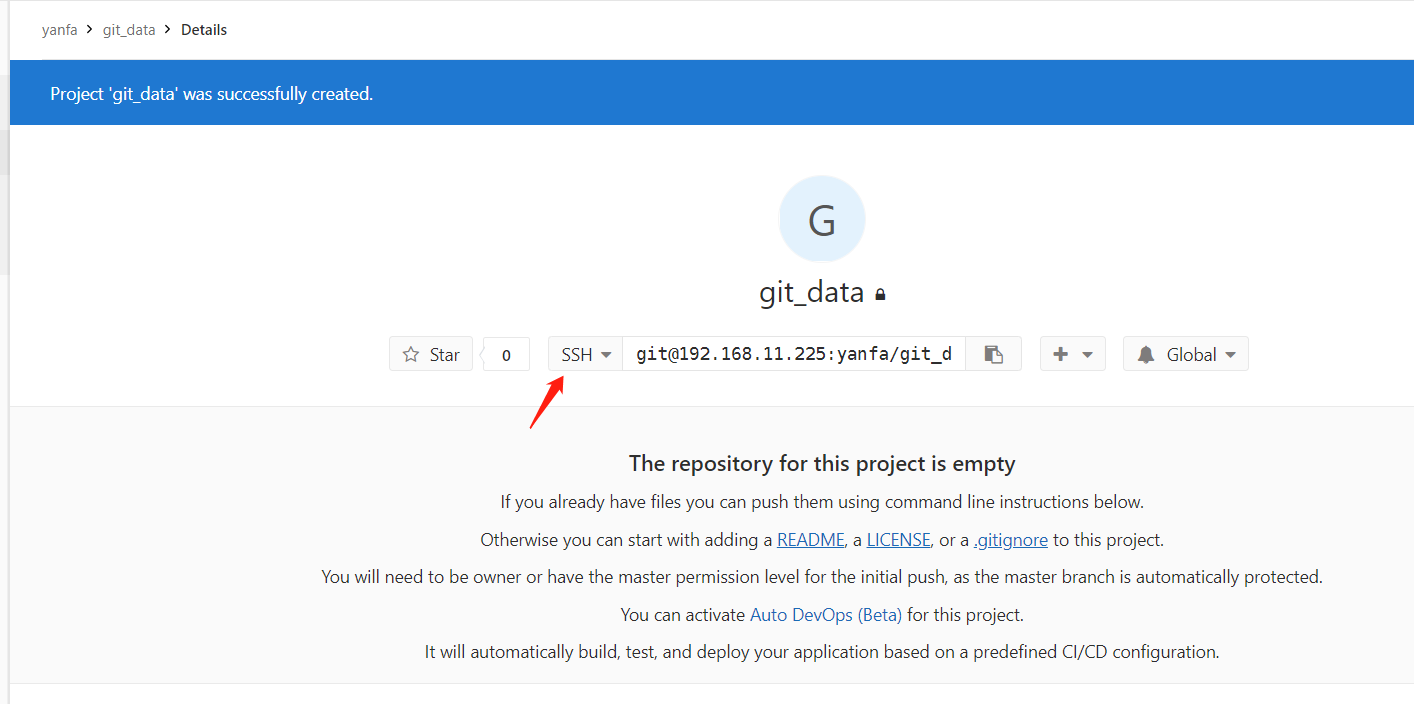
点击使用SSH登录,并将root公钥 id_rsa.pub 中的内容添加到SSH_KEY文本框中
将本地代码添加到gitlab远程仓库
进入到本地仓库目录
[root@GitServer ~]# cd /data
删除旧远程仓库
[root@GitServer ~]# git remote remove origin
添加Gitlab远程仓库到本地
[root@GitServer ~]# git remote add origin git@192.168.11.225:yanfa/git_data.git
上传代码
[root@GitServer ~]# git push -u origin --all
Counting objects: 5, done.
Compressing objects: 100% (4/4), done.
Writing objects: 100% (5/5), 346 bytes | 0 bytes/s, done.
Total 5 (delta 1), reused 0 (delta 0)
To git@192.168.11.225:yanfa/git_data.git
 * [new branch]      master -> master
 * [new branch]      testing -> testing
Branch master set up to track remote branch master from origin.
Branch testing set up to track remote branch testing from origin.
到Github上面查看,代码文件已经上传成功

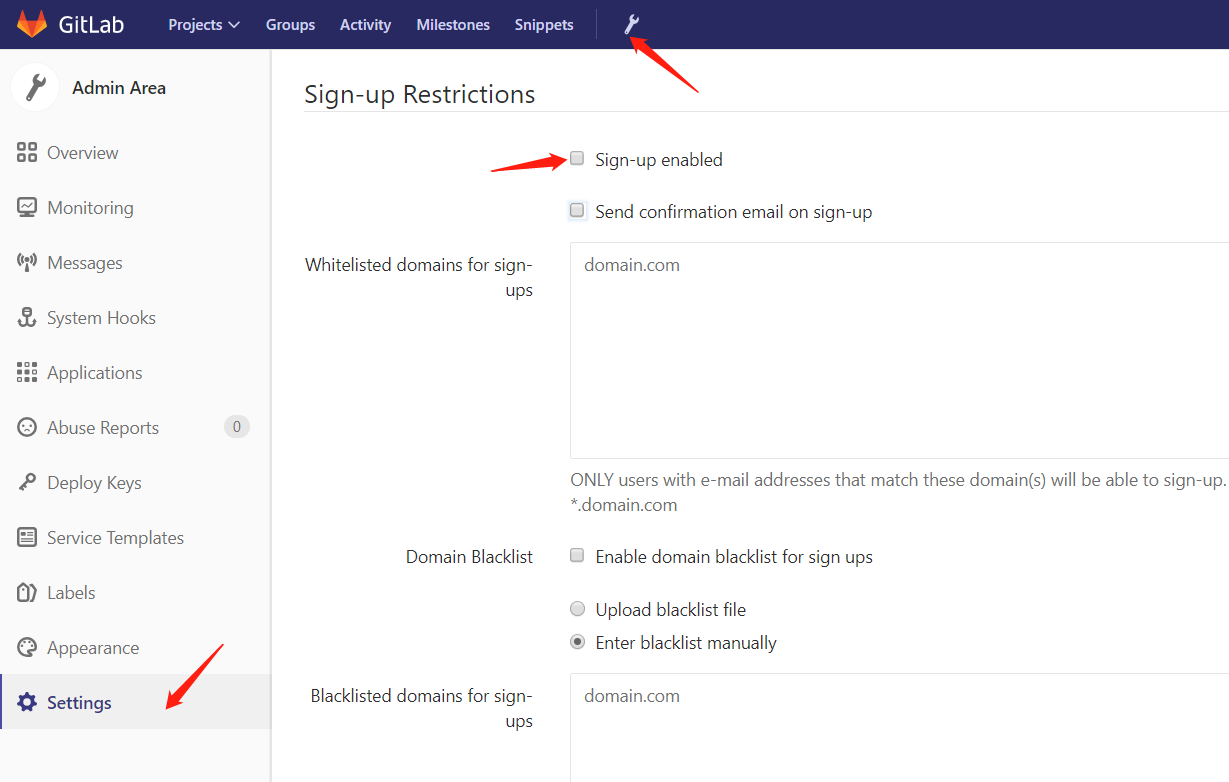
关闭自动注册,比较安全,账户全部由管理分配(取消掉下图中的勾即可)
GitLab汉化
Gitlab汉化: #注意汉化前先备份或者快照,可能会崩溃
1、下载汉化补丁
git clone https://gitlab.com/xhang/gitlab.git
2、查看全部分支版本
git branch -a
3、对比版本、生成补丁包
git diff remotes/origin/10-2-stable remotes/origin/10-2-stable-zh > ../10.2.2-zh.diff
4、停止服务器
gitlab-ctl stop
5、打补丁
patch -d /opt/gitlab/embeded/service/gitlab-rails -p1 < /tmp/10.2.2-zh.diff
6、启动和重新配置
gitlab-ctl start
gitlab-ctl reconfigure

 浙公网安备 33010602011771号