urllib和urllib2的使用和区别
在python中,urllib2并不是urllib的升级版,urllib和urllib2不可相互替代的,urllib一般和urllib2一起搭配使用。
整体来说,urllib2是urllib的增强,但是urllib中有urllib2中所没有的函数。
- urllib2可以用urllib2.openurl中设置Request参数,来修改Header头。如果你访问一个网站,想更改User Agent(可以伪装你的浏览器),你就要用urllib2.
- urllib支持设置编码的函数,urllib.urlencode()在模拟登陆的时候,经常要post编码之后的参数,所以要想不使用第三方库完成模拟登录,你就需要使用urllib。
urillb2在python3中的变化
在Pytho2.x中使用import urllib2——-对应的,在Python3.x中会使用import urllib.request,urllib.error。
在Pytho2.x中使用import urllib——-对应的,在Python3.x中会使用import urllib.request,urllib.error,urllib.parse
在Pytho2.x中使用import urlparse——-对应的,在Python3.x中会使用import urllib.parse。
在Pytho2.x中使用import urlopen——-对应的,在Python3.x中会使用import urllib.request.urlopen。
在Pytho2.x中使用import urlencode——-对应的,在Python3.x中会使用import urllib.parse.urlencode。
在Pytho2.x中使用import urllib.quote——-对应的,在Python3.x中会使用import urllib.request.quote。
在Pytho2.x中使用cookielib.CookieJar——-对应的,在Python3.x中会使用http.CookieJar。
在Pytho2.x中使用urllib2.Request——-对应的,在Python3.x中会使用urllib.request.Request。
urllib包括四个模块
1.urllib.request:请求模块
2.urllib.error:异常处理模块
3.urllib.parse:url解析模块
4.urllib.robotparster:robots.txt解析模块
urlencode():把字典转换为查询字符串:
import urllib.parse
ada={
    'name':'linhai',
    'password':'1234',
     'wokd':'中国'
}
#url编码
f=urllib.parse.urlencode(ada)
print(f)
#把url编码后的字符串,转换为普通字符串
hel=urllib.parse.unquote(f)
print(hel)
#url编码,连=号都进行编码,几乎没用
result=urllib.parse.quote(f)
print(f)
一、urllib.request模块
1.urllib.request.urlopen(url,data=None,[timeout,],cafile=None,capath=None,cadefault=False,context=None)
'''
def urlopen(url, data=None, timeout=socket._GLOBAL_DEFAULT_TIMEOUT,
            *, cafile=None, capath=None, cadefault=False, context=None)
url:发送请求的url
data:用于发送post的请求,如果有data参数发送的请求就是post请求,如果没有参数发送的就是get请求,只有http协议可以使用该参数
     要求:
     1.参数必须是bytes的对象
     2.必须符合application/x-form-urlencoded format 标准
       可以通过使用urllib.parse.urlencode(),传入参数字典实现
timeout:超过时间没有响应就会报错,单位为秒,用户检测代理的质量
'''
data={
    'name':'linhai'
}
#对参数进行url编码
data=urllib.parse.urlencode(data)
#把字符串转换为字节数据、参数要求必须是bytes对象
data=bytes(data.encode())
#测试post请求的网址:httpbin.org/post
response=urllib.request.urlopen('http://httpbin.org/post',data=data)
#打印结果
print(response.read().decode())
#演示超时参数
print('*'*100)
response=urllib.request.urlopen('http://httpbin.org/get',timeout=0.1)
print(response.read().decode())
请求对象,返回一个HTTPResponse类型的对象,包含的方法和属性:
方法:read()、readinto()、getheader(name)、getheaders()、fileno()
属性:msg、version、status、reason、bebuglevel、close
import urllib.request
import urllib.parse
#发送url,获取响应数据
respones=urllib.request.urlopen('http://www.baidu.com'#
#查看常用属性的方法
print(dir(respones))
import urllib.request
#发送url,获取响应数据
respones=urllib.request.urlopen('http://www.baidu.com')
#读取url的响应数据,并且将二进制的数据进行解密,decode()默认使用‘utf-8’进行解密
result=respones.read().decode()
#打印读取结果
# print(result)
#以列表元组对的形式返回响应头信息
for i in respones.getheaders():
    print(i)
print(respones.version)
#返回状态码200
print(respones.status)
#返回索引的url
print(respones.geturl())
#返回网页的头信息
print(respones.info())
#返回响应的HTTP状态码
print(respones.getcode())
#访问成功则返回ok
print(respones.msg)
#返回状态信息
print(respones.reason)
#返回调试等级
print(respones.debuglevel)
#返回响应头中的server值
print(respones.getheader('server'))
2.urllib.request.Request
urllib.request.Request(url,data=None,headers={},origin_req_host=None,unverifiable=False,method=None)
参数:
url:请求的URL,必须传递的参数,其他都是可选参数
data:上传的数据,必须传bytes字节流类型的数据,如果它是字典,可以先用urllib.parse模块里的urlencode()编码
headers:它是一个字典,传递的是请求头数据,可以通过它构造请求头,也可以通过调用请求实例的方法add_header()来添加
import urllib.request
import urllib.parse

#发送post的请求,http://httpbin.org/posts;要求传入数据和指定请求头

#1.构造参数(data参数)
data={
    'name':'linhai789'
}
#对url进行编码,把字典转换为普通字符串
data=urllib.parse.urlencode(data)
print(data)
#把普通字符串转换为字节数据,python中使用的是unicode进行编码,所以必须先进行编码再进行类型的转换
data=bytes(data.encode())
print(data)
#2.构造headers

headers={
'user-Agent':'Mozilla/5.0 (Windows NT 10.0; Win64; x64) AppleWebKit/537.36 (KHTML, like Gecko) Chrome/86.0.4240.111 Safari/537.36 Edg/86.0.622.51'
}
request=urllib.request.Request('http://httpbin.org/post',data=data,headers=headers)
response=urllib.request.urlopen(request)
print('*'*100)
print(response.read().decode())
例如:修改User_Agent头的值来伪装浏览器,比如火狐浏览器可以这样设置:
{'User-Agent':'Mozilla/5.0 (compatible; MSIE 5.5; Windows NT)'}
origin_req_host:指请求方的host名称或者IP地址
unverifiable:表示这个请求是否是无法验证的,默认为False,如我们请求一张图片如果没有权限获取图片那它的值就是true
method:是一个字符串,用来指示请求使用的方法,如:GET,POST,PUT等
备注:post的请求是代data参数的,没有data参数就是get请求,data的数据构造使用urllib.requesst.Request,提交给urllib.request.urlopen方法提交,也可以直接urllib.requset.urlopen方法提交data数据
3.自定义opener,urlopen(处理cookie以及代理服务器,用户登录等)
Handler处理器 和 自定义Opener
opener是 urllib.request.OpenerDirector 的实例,之前使用的urlopen,是一个特殊的opener(模块帮我们构建好的)。
但是基本的urlopen()方法不支持代理、cookie等其他的HTTP/HTTPS高级功能。所以要支持这些功能:
- 使用相关的 Handler处理器 来创建特定功能的处理器对象;
- 然后通过 urllib.request.build_opener()方法使用这些处理器对象,创建自定义opener对象;
- 使用自定义的opener对象,调用open()方法发送请求。
如果程序里所有的请求都使用自定义的opener,可以使用urllib.request.install_opener() 将自定义的 opener 对象 定义为 全局opener,表示如果之后凡是调用urlopen,都将使用这个opener(根据自己的需求来选择)
import urllib.request

#构造一个httphandle处理对象,支持http请求
http_handle=urllib.request.HTTPHandler(debuglevel=1)

#构造一个httphandle处理对象,支持http请求
# http_handle=urllib.request.HTTPSHandler()
#创建支持http请求的opener对象
opener=urllib.request.build_opener(http_handle)
#构造一个Request请求
headers={
'user-agent': 'Mozilla/5.0 (Windows NT 10.0; Win64; x64) AppleWebKit/537.36 (KHTML, like Gecko) Chrome/86.0.4240.111 Safari/537.36 Edg/86.0.622.51'
}
request=urllib.request.Request('http://www.baidu.com/',headers=headers)
response=opener.open(request)
print(response.read().decode())
这种方式发送请求得到的结果,和使用urllib.request.urlopen()发送HTTP/HTTPS请求得到的结果是一样的。
如果在 HTTPHandler()增加 debuglevel=1参数,还会将 Debug Log 打开,这样程序在执行的时候,会把收包和发包的报头在屏幕上自动打印出来,方便调试,有时可以省去抓包的工作。
ProxyHandler处理器(ip代理设置)
使用代理IP,这是爬虫/反爬虫的第二招,通常也是最好用的。
很多网站会检测某一段时间某个IP的访问次数(通过流量统计,系统日志等),如果访问次数多的不像正常人,它会禁止这个IP的访问。
所以我们可以设置一些代理服务器,每隔一段时间换一个代理,就算IP被禁止,依然可以换个IP继续爬取。
urllib.request中通过ProxyHandler来设置使用代理服务器,下面代码说明如何使用自定义opener来使用代理:
from urllib.request import ProxyHandler
from urllib.request import build_opener
import urllib.request
import random
# 准备代理IP
proxy_list=[
    {'http':'60.173.35.218:13429'},
    {'http':'180.111.139.87:49092'},
    {'http':'27.153.9.30:32646'},


]
proxy_list=random.choice(proxy_list)
print(proxy_list)
# 构造一个ProxyHandler对象
proxy=ProxyHandler(proxy_list)
#构造opener对象
opener=build_opener(proxy)
headers={
'user-agent': 'Mozilla/5.0 (Windows NT 10.0; Win64; x64) AppleWebKit/537.36 (KHTML, like Gecko) Chrome/86.0.4240.111 Safari/537.36 Edg/86.0.622.51'
}
#构造request对象
request=urllib.request.Request('http://www.baidu.com',headers=headers)
# 2. 将opener应用到全局,之后所有的,不管是opener.open()还是urlopen() 发送请求,都将使用自定义代理。
#定义opener全局变量
urllib.request.install_opener(opener)
response =urllib.request.urlopen(request)
#发送请求
#未定义全局变量的操作方式
# respose=opener.open(request,timeout=50)
#打印响应结果
print(response.read().decode())
urllib高级用法--登陆和cookies的使用
对于一些更高级的操作(比如Cookies处理,代理设置,登陆验证),urllib怎么实现?需要更强大的工具Handler登场了,有专门处理登录验证的,有处理Cookies的,用处理代理设置的,几乎做到http请求的所有事情。
Handler子类继承BaseHandler 类
HITPDefaultErrorHandler :用于处理Http响应错误,错误都会抛出 HTTPError 类型的异常。
HTTPRedirectHandler :用于处理重定向。
HTTPCookieProcessor :用于处理Cookies。
ProxyHandler :用于设置代理,默认代理为空。
HTTPPasswordMgr :用于管理密码,它维护了用户名和密码的表。
HTTPBasicAuthHandler :用于管理认证,如果一个链接打开时需要认证,那么可以用它来解决认证问题.
更多详情参考:https://docs.python.org/3/library/urllib.request.html#urllib.request.BaseHandler
利用Handler来构建Opener
验证:有些网站打开就会提示输入用户名和密码,验证成功后才能查看页面
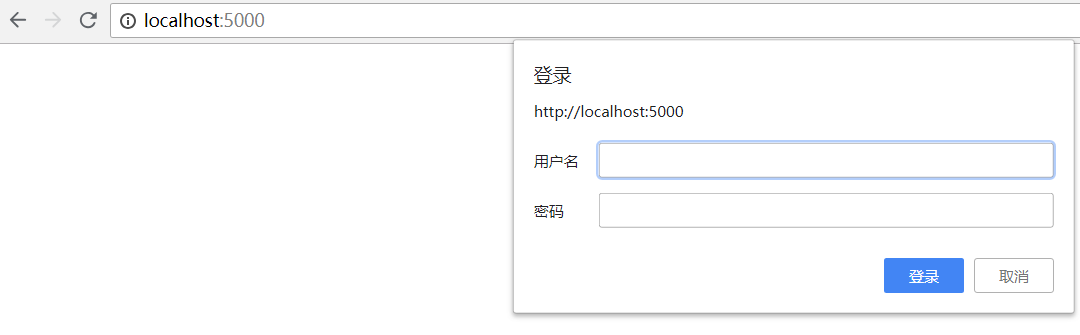
类似以上图片
import urllib.request
user='13556109223'
password='ni123456'
url='http://www.xiongmaodaili.com'
#1构造一个秘密管理对象,用来保存需要处理的用户名和密码
passuser=urllib.request.HTTPPasswordMgrWithDefaultRealm()
#2添加用户信息到密码管理对象中,实例化对象
passuser.add_password(None,url,user,password)
#3构造一个Http基础用户名/密码验证的HTTPBasicAuthHandler处理对象,参数就是创建的密码管理对象
http_handler=urllib.request.HTTPBasicAuthHandler(passuser)
#4.自定义opener,使用build_opener()方法自定义
opener=urllib.request.build_opener(http_handler)
#5构造request对象
request=urllib.request.Request(url)
#发送请求
response=opener.open(request)
#打印响应结果
print(response.read().decode())
处理cookie
import urllib.request
import http.cookiejar

cookie=http.cookiejar.CookieJar()
http_handler=urllib.request.HTTPCookieProcessor(cookie)
opener=urllib.request.build_opener(http_handler)
response=opener.open('http://www.baidu.com')
print(response.read().decode())
for i in cookie:
    print(i.name+'='+i.value)
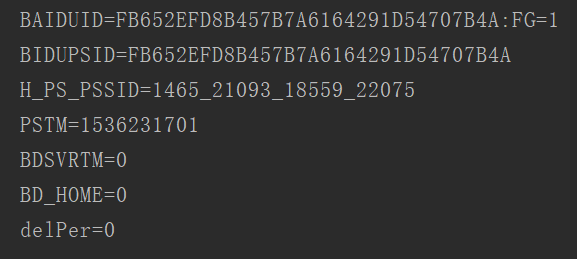
这里输出了每条Cookie的名称和值
如何输出成文件格式呢?代码如下:
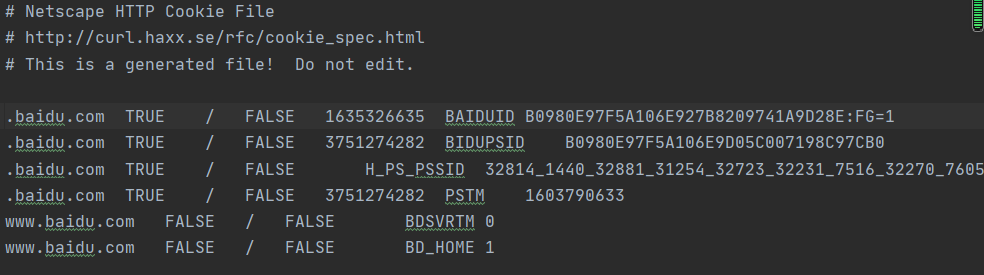
import http.cookiejar
import urllib.request

filename = 'cookies.txt'
cookie = http.cookiejar.MozillaCookieJar(filename)
handler = urllib.request.HTTPCookieProcessor(cookie)
opener = urllib.request.build_opener(handler)
response = opener.open('http://www.baidu.com')
cookie.save(ignore_discard=True, ignore_expires=True)
运行程序后,生成cookies.txt文件,内容如下:
另外,LWPCookieJar同样可以读取和保存Cookies,但是保存的格式和MozillaCookieJar不一样,要保存成LWP格式的Cookies文件,
可以在声明时就改为:cookie = http.cookiejar.LWPCookieJar(filename),代码如下:
import http.cookiejar
import urllib.request

filename = 'cookies.txt'
cookie = http.cookiejar.LWPCookieJar(filename)
handler = urllib.request.HTTPCookieProcessor(cookie)
opener = urllib.request.build_opener(handler)
response = opener.open('http://www.baidu.com')
cookie.save(ignore_discard=True, ignore_expires=True)
运行后,生成cookies.txt文件内容如下:

生成Cookies文件后,怎样从文件中读取并利用呢?
下面以LWPCookieJar格式为例来看一下:
import http.cookiejar
import urllib.request

cookie = http.cookiejar.LWPCookieJar()
cookie.load('cookies.txt', ignore_discard=True, ignore_expires=True)
handler = urllib.request.HTTPCookieProcessor(cookie)
opener = urllib.request.build_opener(handler)
response = opener.open('http://www.baidu.com')
print(response.read().decode('utf8'))
运行结果如下:

注释:这里调用load()方法来读取本地的Cookies文件,获取到了Cookies的内容,前提是首先生成了LWPCookieJar格式的Cookies,并保存成文件,然后读取Cookies使用同样的方法构建Handler和Opener即可完成操作
这些是urllib库中request模块的基本用法,想知道更多,可以参考:
官方文档说明:https://docs.python.org/3/library/urllib.request.html#basehandler-objects

 浙公网安备 33010602011771号