专栏目录:
Python爬虫与数据分析之python教学视频、python源码分享,python
Python爬虫与数据分析之基础教程:Python的语法、字典、元组、列表
Python爬虫与数据分析之进阶教程:文件操作、lambda表达式、递归、yield生成器
Python爬虫与数据分析之模块:内置模块、开源模块、自定义模块
Python爬虫与数据分析之爬虫技能:urlib库、xpath选择器、正则表达式
Python爬虫与数据分析之京东爬虫实战:爬取京东商品并存入sqlite3数据库
Python爬虫与数据分析之python开源爬虫项目汇总
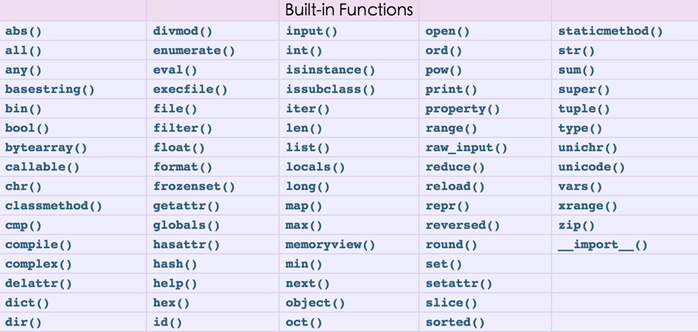
python常用内置函数:
文件操作
操作文件时,一般需要经历如下步骤:
- 打开文件
- 操作文件
- 关闭文件
一、打开文件
|
1 |
|
注:python中打开文件有两种方式,即:open(...) 和 file(...) ,本质上前者在内部会调用后者来进行文件操作,推荐使用 open。
打开文件时,需要指定文件路径和以何等方式打开文件,打开后,即可获取该文件句柄,日后通过此文件句柄对该文件操作。
打开文件的模式有:
- r,只读模式(默认)。
- w,只写模式。【不可读;不存在则创建;存在则删除内容;】
- a,追加模式。【可读; 不存在则创建;存在则只追加内容;】
"+" 表示可以同时读写某个文件
- r+,可读写文件。【可读;可写;可追加】
- w+,写读
- a+,同a
"U"表示在读取时,可以将 \r \n \r\n自动转换成 \n (与 r 或 r+ 模式同使用)
- rU
- r+U
"b"表示处理二进制文件(如:FTP发送上传ISO镜像文件,linux可忽略,windows处理二进制文件时需标注)
- rb
- wb
- ab
二、操作函数


 1 class file(object):
 2
 3     def close(self): # real signature unknown; restored from __doc__
 4         关闭文件
 5         """
 6         close() -> None or (perhaps) an integer.  Close the file.
 7
 8         """
 9
10     def fileno(self): # real signature unknown; restored from __doc__
11         文件描述符
12          """
13         fileno() -> integer "file descriptor".
14
15         This is needed for lower-level file interfaces, such os.read().
16         """
17         return 0
18
19     def flush(self): # real signature unknown; restored from __doc__
20         刷新文件内部缓冲区
21         """ flush() -> None.  Flush the internal I/O buffer. """
22         pass
23
24
25     def isatty(self): # real signature unknown; restored from __doc__
26         判断文件是否是同意tty设备
27         """ isatty() -> true or false.  True if the file is connected to a tty device. """
28         return False
29
30
31     def next(self): # real signature unknown; restored from __doc__
32         获取下一行数据,不存在,则报错
33         """ x.next() -> the next value, or raise StopIteration """
34         pass
35
36     def read(self, size=None): # real signature unknown; restored from __doc__
37         读取指定字节数据
38         """
39         read([size]) -> read at most size bytes, returned as a string.
40
41         """
42         pass
43
44     def readinto(self): # real signature unknown; restored from __doc__
45         读取到缓冲区,不要用,将被遗弃
46         """ readinto() -> Undocumented.  Don't use this; it may go away. """
47         pass
48
49     def readline(self, size=None): # real signature unknown; restored from __doc__
50         仅读取一行数据
51         """
52         readline([size]) -> next line from the file, as a string.
53          """
54         pass
55
56     def readlines(self, size=None): # real signature unknown; restored from __doc__
57         读取所有数据,并根据换行保存值列表
58         """
59         readlines([size]) -> list of strings, each a line from the file.
60         """
61         return []
62
63     def seek(self, offset, whence=None): # real signature unknown; restored from __doc__
64         指定文件中指针位置
65         """
66         seek(offset[, whence]) -> None.  Move to new file position.
67         """
68         pass
69
70     def tell(self): # real signature unknown; restored from __doc__
71         获取当前指针位置
72         """ tell() -> current file position, an integer (may be a long integer). """
73         pass
74
75     def truncate(self, size=None): # real signature unknown; restored from __doc__
76         截断数据,仅保留指定之前数据
77         """
78         pass
79
80     def write(self, p_str): # real signature unknown; restored from __doc__
81         写内容
82         """
83         write(str) -> None.  Write string str to file.
84         """
85         pass
86
87     def writelines(self, sequence_of_strings): # real signature unknown; restored from __doc__
88         将一个字符串列表写入文件
89         """
90         writelines(sequence_of_strings) -> None.  Write the strings to the file.
91         """
92         pass
93
94     def xreadlines(self): # real signature unknown; restored from __doc__
95         可用于逐行读取文件,非全部
96         """
97         xreadlines() -> returns self.
98         """
99         pass
三、with
为了避免打开文件后忘记关闭,可以通过管理上下文,即:
|
1 2 3 |
|
如此方式,当with代码块执行完毕时,内部会自动关闭并释放文件资源。
在Python 2.7 后,with又支持同时对多个文件的上下文进行管理,即:
|
1 2 |
|
四、python文件操作实例
自定义函数
一、背景
在学习函数之前,一直遵循:面向过程编程,即:根据业务逻辑从上到下实现功能,其往往用一长段代码来实现指定功能,开发过程中最常见的操作就是粘贴复制,也就是将之前实现的代码块复制到现需功能处,如下
|
1 2 3 4 5 6 7 8 9 10 11 12 13 14 15 16 17 18 |
|
腚眼一看上述代码,if条件语句下的内容可以被提取出来公用,如下:
|
1 2 3 4 5 6 7 8 9 10 11 12 13 14 15 |
|
对于上述的两种实现方式,第二次必然比第一次的重用性和可读性要好,其实这就是函数式编程和面向过程编程的区别:
- 函数式:将某功能代码封装到函数中,日后便无需重复编写,仅调用函数即可
- 面向对象:对函数进行分类和封装,让开发“更快更好更强...”
函数式编程最重要的是增强代码的重用性和可读性
二、 函数的定义和使用
|
1 2 3 4 5 |
|
函数的定义主要有如下要点:
- def:表示函数的关键字
- 函数名:函数的名称,日后根据函数名调用函数
- 函数体:函数中进行一系列的逻辑计算,如:发送邮件、计算出 [11,22,38,888,2]中的最大数等...
- 参数:为函数体提供数据
- 返回值:当函数执行完毕后,可以给调用者返回数据。
以上要点中,比较重要有参数和返回值:
1、返回值
函数是一个功能块,该功能到底执行成功与否,需要通过返回值来告知调用者。
2、参数
函数的有三中不同的参数:
- 普通参数
- 默认参数
- 动态参数
View Code
lambda表达式
学习条件运算时,对于简单的 if else 语句,可以使用三元运算来表示,即:
|
1 2 3 4 5 6 7 8 |
|
对于简单的函数,也存在一种简便的表示方式,即:lambda表达式
|
1 2 3 4 5 6 7 8 9 10 11 12 13 14 15 |
|
lambda存在意义就是对简单函数的简洁表示
内置函数 二
一、map
遍历序列,对序列中每个元素进行操作,最终获取新的序列。
1 li = [11, 22, 33]
2
3 new_list = map(lambda a: a + 100, li)
4
5
6 li = [11, 22, 33]
7 sl = [1, 2, 3]
8 new_list = map(lambda a, b: a + b, li, sl)
二、filter
对于序列中的元素进行筛选,最终获取符合条件的序列
1
2 li = [11, 22, 33]
3
4 new_list = filter(lambda arg: arg > 22, li)
5
6 #filter第一个参数为空,将获取原来序列
三、reduce
对于序列内所有元素进行累计操作
li = [11, 22, 33]

result = reduce(lambda arg1, arg2: arg1 + arg2, li)

# reduce的第一个参数,函数必须要有两个参数
# reduce的第二个参数,要循环的序列
# reduce的第三个参数,初始值
yield生成器
1、对比range 和 xrange 的区别
|
1 2 3 4 |
|
如上代码所示,range会在内存中创建所有指定的数字,而xrange不会立即创建,只有在迭代循环时,才去创建每个数组。
1 def nrange(num):
2     temp = -1
3     while True:
4         temp = temp + 1
5         if temp >= num:
6             return
7         else:
8             yield temp
2、文件操作的 read 和 xreadlinex 的的区别
|
1 2 |
|
 1 def NReadlines():
 2     with open('log','r') as f:
 3         while True:
 4             line = f.next()
 5             if line:
 6                 yield line
 7             else:
 8                 return
 9
10 for i in NReadlines():
11     print i
12
13
14  def NReadlines():
15     with open('log','r') as f:
16         seek = 0
17         while True:
18             f.seek(seek)
19             data = f.readline()
20             if data:
21                 seek = f.tell()
22                 yield data
23             else:
24                 return
25
26 for item in NReadlines():
27     print item
28
装饰器
装饰器是函数,只不过该函数可以具有特殊的含义,装饰器用来装饰函数或类,使用装饰器可以在函数执行前和执行后添加相应操作。
|
1 2 3 4 5 6 7 8 9 10 |
|
 1 import functools
 2
 3
 4 def wrapper(func):
 5     @functools.wraps(func)
 6     def wrapper():
 7         print 'before'
 8         func()
 9         print 'after'
10     return wrapper
11
12 @wrapper
13 def foo():
14     print 'foo'
15
16
17 #!/usr/bin/env python
18 #coding:utf-8
19
20 def Before(request,kargs):
21     print 'before'
22
23 def After(request,kargs):
24     print 'after'
25
26
27 def Filter(before_func,after_func):
28     def outer(main_func):
29         def wrapper(request,kargs):
30
31             before_result = before_func(request,kargs)
32             if(before_result != None):
33                 return before_result;
34
35             main_result = main_func(request,kargs)
36             if(main_result != None):
37                 return main_result;
38
39             after_result = after_func(request,kargs)
40             if(after_result != None):
41                 return after_result;
42
43         return wrapper
44     return outer
45
46 @Filter(Before, After)
47 def Index(request,kargs):
48     print 'index'
49
50
51 if __name__ == '__main__':
52     Index(1,2)
53
冒泡算法
需求:请按照从小到大对列表 [13, 22, 6, 99, 11] 进行排序
思路:相邻两个值进行比较,将较大的值放在右侧,依次比较!
 1  li = [13, 22, 6, 99, 11]
 2
 3 for m in range(4):     # 等价于 #for m in range(len(li)-1):
 4     if li[m]> li[m+1]:
 5         temp = li[m+1]
 6         li[m+1] = li[m]
 7         li[m] = temp
 8
 9
10 li = [13, 22, 6, 99, 11]
11
12 for m in range(4):     # 等价于 #for m in range(len(li)-1):
13     if li[m]> li[m+1]:
14         temp = li[m+1]
15         li[m+1] = li[m]
16         li[m] = temp
17
18 for m in range(3):     # 等价于 #for m in range(len(li)-2):
19     if li[m]> li[m+1]:
20         temp = li[m+1]
21         li[m+1] = li[m]
22         li[m] = temp
23
24 for m in range(2):     # 等价于 #for m in range(len(li)-3):
25     if li[m]> li[m+1]:
26         temp = li[m+1]
27         li[m+1] = li[m]
28         li[m] = temp
29
30 for m in range(1):     # 等价于 #for m in range(len(li)-4):
31     if li[m]> li[m+1]:
32         temp = li[m+1]
33         li[m+1] = li[m]
34         li[m] = temp
35 print li
36
37
38 li = [13, 22, 6, 99, 11]
39
40 for i in range(1,5):
41     for m in range(len(li)-i):
42         if li[m] > li[m+1]:
43             temp = li[m+1]
44             li[m+1] = li[m]
45             li[m] = temp
46
递归
利用函数编写如下数列:
斐波那契数列指的是这样一个数列 0, 1, 1, 2, 3, 5, 8, 13, 21, 34, 55, 89, 144, 233,377,610,987,1597,2584,4181,6765,10946,17711,28657,46368
1 def func(arg1,arg2):
2     if arg1 == 0:
3         print arg1, arg2
4     arg3 = arg1 + arg2
5     print arg3
6     func(arg2, arg3)
7
8 func(0,1)
公告
更多python源码,视频教程,欢迎关注公众号:南城故梦
>零起点大数据与量化分析PDF及教程源码
>利用python进行数据分析PDF及配套源码
>大数据项目实战之Python金融应用编程(数据分析、定价与量化投资)讲义及源码
>董付国老师Python教学视频
1. 课堂教学管理系统开发:在线考试功能设计与实现
2. Python+pillow图像编程;
3. Python+Socket编程
4. Python+tkinter开发;
5. Python数据分析与科学计算可视化
6. Python文件操作
7. Python多线程与多进程编程
8. Python字符串与正则表达式
.....
>数据分析教学视频
1. 轻松驾驭统计学——数据分析必备技能(12集);
2. 轻松上手Tableau 软件——让数据可视化(9集);
3. 竞品分析实战攻略(6集);
4. 电商数据化运营——三大数据化工具应用(20集);
>大数据(视频与教案)
1. hadoop
2. Scala
3. spark
>Python网络爬虫分享系列教程PDF
>【千锋】Python爬虫从入门到精通(精华版)(92集)


 浙公网安备 33010602011771号