
Android RemoteViews 11问11答
1.什么是RemoteView?
答:其实就是一种特殊的view结构,这种view 能够跨进程传输。并且这种remoteview 还提供了一些方法 可以跨进程更新界面。具体在android里面 一个是通知 一个是桌面小部件。
这2个就是remoteview 最直接的应用了
2.RemoteView在通知上的应用?
答:这里给出一个小例子,比较粗糙 仅做演示使用。


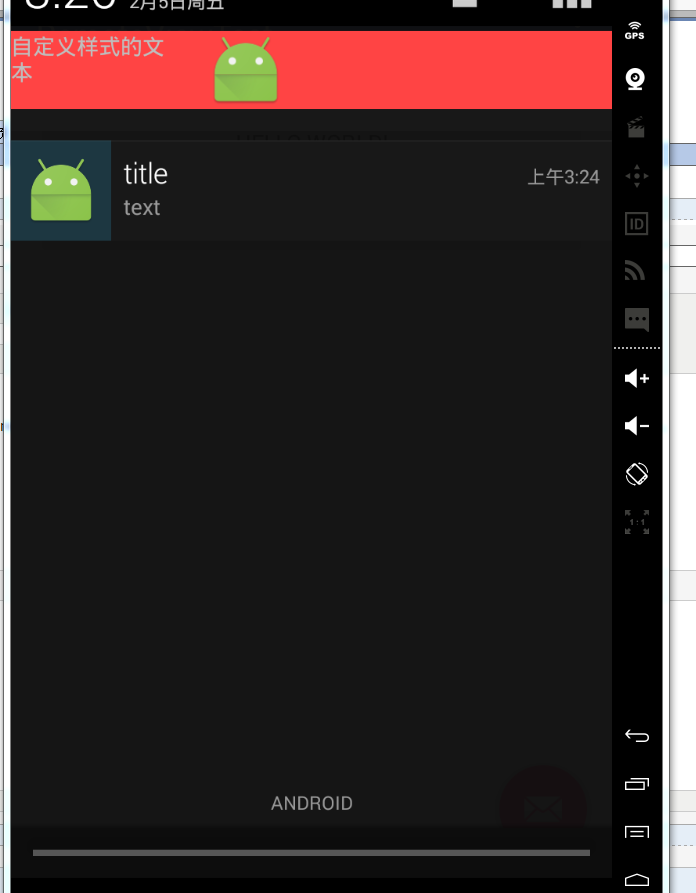
 1  //默认样式的notification
 2     private void normalStyleNotification() {
 3         Intent intent = new Intent(MainActivity.this, MainActivity.class);
 4         PendingIntent pendingIntent = PendingIntent.getActivity(MainActivity.this, 0, intent, PendingIntent.FLAG_UPDATE_CURRENT);
 5         Notification.Builder builder = new Notification.Builder(MainActivity.this);
 6         Notification notification = builder.setContentIntent(pendingIntent).setContentTitle("title").setContentText("text").setSmallIcon(R.mipmap.ic_launcher).build();
 7         NotificationManager manager = (NotificationManager) getSystemService(Context.NOTIFICATION_SERVICE);
 8         manager.notify(1, notification);
 9     }
10
11     //自定义样式
12     private void customStyleNotification() {
13         Intent intent = new Intent(MainActivity.this, MainActivity.class);
14         PendingIntent pendingIntent = PendingIntent.getActivity(MainActivity.this, 0, intent, PendingIntent.FLAG_UPDATE_CURRENT);
15         Notification.Builder builder = new Notification.Builder(MainActivity.this);
16         RemoteViews remoteViews = new RemoteViews(getPackageName(), R.layout.notification_layout);
17         remoteViews.setTextViewText(R.id.tv, "自定义样式的文本");
18         remoteViews.setImageViewResource(R.id.iv, R.mipmap.ic_launcher);
19         Notification notification = builder.setSmallIcon(R.mipmap.ic_launcher).setContentIntent(pendingIntent).setContent(remoteViews).build();
20         NotificationManager manager = (NotificationManager) getSystemService(Context.NOTIFICATION_SERVICE);
21         manager.notify(2, notification);
22     }
效果如下:
3.小部件开发 大概流程如何?
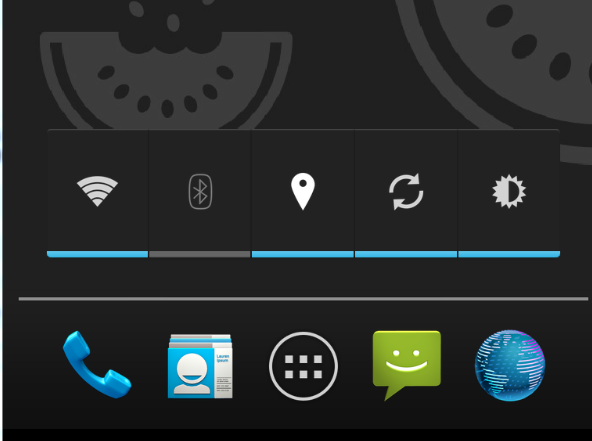
答:android的小部件开发就全都是用的remoteviews。其实就是一个广播接收器+ui显示 ,诸如下图显示:
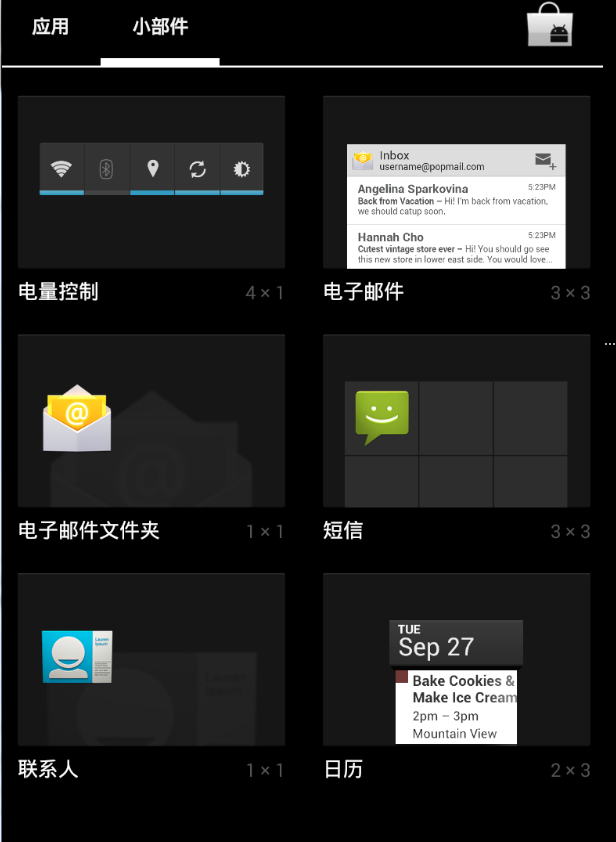
启动某个小部件以后就可以看到:
下面给出一个简单的例子 ,示范下小部件的基本开发流程,其实非常简单,毕竟就只是一个广播而已。只不过在具体app中 小部件或许会变的非常复杂。
既然是广播,我们就首先要给他一个接收器,保证能接收到广播:
 1  <receiver android:name=".MyWidgetProvider">
 2             <meta-data
 3                 android:name="android.appwidget.provider"
 4                 android:resource="@xml/widget_info"></meta-data>
 5             <intent-filter>
 6                 <!--这个是单击事件的action-->
 7                 <action android:name="com.example.administrator.remoteviewtest.CLICK"></action>
 8                 <!--这个必须要有 属于默认需要添加的-->
 9                 <action android:name="android.appwidget.action.APPWIDGET_UPDATE"></action>
10             </intent-filter>
11         </receiver>
然后在res/xml下 建立我们的widget配置文件:
1 <?xml version="1.0" encoding="utf-8"?>
2 <appwidget-provider xmlns:android="http://schemas.android.com/apk/res/android"
3     android:initialLayout="@layout/layout_widget"
4     android:minHeight="100dp"
5     android:minWidth="200dp"
6     android:updatePeriodMillis="160000"
7     ></appwidget-provider>
然后写一个最简单的widget 的 layout文件:
 1 <?xml version="1.0" encoding="utf-8"?>
 2 <LinearLayout xmlns:android="http://schemas.android.com/apk/res/android"
 3     android:layout_width="match_parent"
 4     android:background="@android:color/holo_red_light"
 5     android:layout_height="match_parent"
 6     android:orientation="vertical">
 7
 8     <ImageView
 9         android:id="@+id/iv2"
10         android:layout_gravity="center"
11         android:layout_width="wrap_content"
12         android:layout_height="wrap_content"
13         android:src="@mipmap/shuqi" />
14
15 </LinearLayout>
最后 我们来编写我们的appwidgetProvider: 只完成一件事 就是点击他以后 图片就翻转
 1 package com.example.administrator.remoteviewtest;
 2
 3 import android.app.PendingIntent;
 4 import android.appwidget.AppWidgetManager;
 5 import android.appwidget.AppWidgetProvider;
 6 import android.content.ComponentName;
 7 import android.content.Context;
 8 import android.content.Intent;
 9 import android.graphics.Bitmap;
10 import android.graphics.BitmapFactory;
11 import android.graphics.Matrix;
12 import android.os.SystemClock;
13 import android.util.Log;
14 import android.widget.RemoteViews;
15 import android.widget.Toast;
16
17 /**
18  * Created by Administrator on 2016/2/5.
19  */
20 public class MyWidgetProvider extends AppWidgetProvider {
21
22     public static final String CLICK_ACTION = "com.example.administrator.remoteviewtest.CLICK";
23
24
25     @Override
26     public void onReceive(final Context context, Intent intent) {
27         super.onReceive(context, intent);
28         if (intent.getAction().equals(CLICK_ACTION)) {
29             Toast.makeText(context, "收到单击事件", Toast.LENGTH_SHORT).show();
30             new Thread(new Runnable() {
31                 @Override
32                 public void run() {
33
34                     Bitmap srcBitmap = BitmapFactory.decodeResource(context.getResources(), R.mipmap.shuqi);
35                     AppWidgetManager appwidgetManager = AppWidgetManager.getInstance(context);
36                     //点击以后就让图片不断旋转
37                     for (int i = 0; i < 37; i++) {
38                         float degree = (i * 10) % 360;
39                         RemoteViews remoteviews = new RemoteViews(context.getPackageName(), R.layout.layout_widget);
40                         remoteviews.setImageViewBitmap(R.id.iv2, rotateBitmap(context, srcBitmap, degree));
41                         //每次更新的时候 都别忘记了给他添加点击事件
42                         Intent intentClick = new Intent();
43                         intentClick.setAction(CLICK_ACTION);
44                         PendingIntent pendingIntent = PendingIntent.getBroadcast(context, 0, intentClick, 0);
45                         remoteviews.setOnClickPendingIntent(R.id.iv2, pendingIntent);
46                         appwidgetManager.updateAppWidget(new ComponentName(context, MyWidgetProvider.class), remoteviews);
47                         SystemClock.sleep(30);
48                     }
49                 }
50             }).start();
51         }
52     }
53
54
55     @Override
56     public void onUpdate(Context context, AppWidgetManager appWidgetManager, int[] appWidgetIds) {
57         super.onUpdate(context, appWidgetManager, appWidgetIds);
58         //这个地方couter 其实就是你widget 布局里面 带有id的 view的总数,比如我们这个例子里面就只有
59         //一个imageview 有id 所以这个地方counter的值就是1
60         final int counter = appWidgetIds.length;
61         for (int i = 0; i < counter; i++) {
62             int appWidgetId = appWidgetIds[i];
63             //每次添加小部件或者小部件自己有更新时,我们都要重新更新小部件里面点击事件 等view相关的资源
64             updateWidget(context, appWidgetManager, appWidgetId);
65         }
66     }
67
68     private void updateWidget(Context context, AppWidgetManager appWidgetManager, int appWidgetId) {
69         RemoteViews remoteviews = new RemoteViews(context.getPackageName(), R.layout.layout_widget);
70
71         //单击小部件以后发生的事
72         Intent intentClick = new Intent();
73         intentClick.setAction(CLICK_ACTION);
74         PendingIntent pendingIntent = PendingIntent.getBroadcast(context, 0, intentClick, 0);
75         remoteviews.setOnClickPendingIntent(R.id.iv2, pendingIntent);
76         appWidgetManager.updateAppWidget(appWidgetId, remoteviews);
77     }
78
79     //将图片翻转一定的角度
80     private Bitmap rotateBitmap(Context context, Bitmap srcBitmap, float degree) {
81         Matrix matrix = new Matrix();
82         matrix.reset();
83         matrix.setRotate(degree);
84         Bitmap dstBitmap = Bitmap.createBitmap(srcBitmap, 0, 0, srcBitmap.getWidth(), srcBitmap.getHeight(), matrix, true);
85         return dstBitmap;
86     }
87
88
89 }
最后看一下简单的效果:
4.简述一下 widget开发中 几个重要的生命周期函数 都在什么情况下被调用?
答:onEnable :当widget第一次被添加到桌面时调用,添加行为可以多次,但是这个函数只有在第一次时能得到执行。
onUpdate:widget被添加或者更新时就会执行
onDeleted:删除的时候执行
onDisabled:最后一个该类型的widget被删除的时候 调用他
onReceive:分发广播的。我们主要的逻辑一般都写在这里。
5.intent和PendingIntent有什么区别。
答:intent代表的行为 是马上就要发生。而pendingIntent代表 这个行为是在将来的某个不确定的时间发生。 我们给RemoteView 添加点击事件的时候 都用pendingIntent。
pendingIntent通过set和cancel 方法来发送和取消 那些intent。
6.pendingIntent 支持哪几种?
答:三种。分别是getActivity getService 和getBroadcast。
7.pendingIntent的匹配规则是什么?
答:内部的intent和requestCode 都相同的时候 系统就认为这2个pendingIntent是相同的。intent相同的判定原则是 intent-filter和componentName相同。
8.如何理解pendingIntent的 flags 标志位?
答:可以从通知的角度来理解。manager.notify(1, notification); 我们平常发通知的时候 这个函数的 第一个参数 ,我们一般都是写一个常量。注意notification里面是有pendingintent的。
当我们这一个参数是写死的常量的时候 那不管notification里面的pendingIntent 是什么,这个通知都是永远老的被新的直接替代。
如果这notify的第一个参数 每次都不相同,情况就复杂的多,要分开来看:
notify函数的第一个参数不相同,notification里的pendingintent不相同时:通知和通知之间互相不干扰,可以看看效果:
notify函数的第一个参数不相同,notification里的pendingintent相同时,这个时候就要看flags的参数了。
如果flag=FLAG_ONE_SHOT,那后续的pendingIntent就和第一个保持一致,哪怕是intent里面的参数extras 都是一致的。
而且如果点击任何一个通知,其他的通知都无法打开了。
flag=FLAG_CANCEL_CURRENT 只有最新的通知才能打开,以前的通知点击都无效无法打开。
flag=FLAG_UPDATE_CURRENT 之前的通知会被更新成 和最新的那条通知是一样的 里面的extras都是一样的。并且都可以打开。
9.remoteView 支持所有的view类型吗?
答:remoteview 仅仅支持少部分系统自带的view。开发者的自定义view 是一律都不支持的,具体支持哪些系统的view和viewgroup,可以自行谷歌。
10.简述remoteViews的 原理?
答:通知栏和widget 都是运行在 NotificationManagerService和AppWidgetService的,并且是在systemt server进程中。我们在apk代码里
使用notificationmanager或者appwidgetmanager实际上都是通过binder 来进行与system server的进程间通信的。
1 public class RemoteViews implements Parcelable, Filter {
可以看到remotviews是继承了Parcelable接口。所以这个remoteviews会通过binder 传递到system server 这个系统进程里。然后系统进程
会解析这个remotview 拿到他的包名和布局文件等信息 然后就通过layoutInflater 来加载这个布局了。
对于system server来说 remoteview就好像是自己这个进程里的 资源一样,而对于调用者 也就是我们自己的apk程序员来说,这个view
就显然是remoteviews 远程的了。并且值得注意的是,view的更新操作 是由action对象的apply方法来执行的!这一点千万要记住。
我们可以从源码的角度来逐一分析。
  1
  2
  3 //假设我们remoteviews是调用了这个方法 我们就来看看这个方法的过程
  4    public void setTextViewText(int viewId, CharSequence text) {
  5         setCharSequence(viewId, "setText", text);
  6     }
  7
  8 //这里就明白了 你看 到这还没有实际调用view的方法,而是调用了addAciton方法 好像是新增了一个action
  9      public void setCharSequence(int viewId, String methodName, CharSequence value) {
 10         addAction(new ReflectionAction(viewId, methodName, ReflectionAction.CHAR_SEQUENCE, value));
 11     }
 12
 13 //这个方法就很简单 就是remoteviews内部有一个mActions对象 他是一个list 每次我们调用remoteviews的set方法的时候
 14 //实际上都是往这个列表里面 新增了一个action
 15 private void addAction(Action a) {
 16         if (hasLandscapeAndPortraitLayouts()) {
 17             throw new RuntimeException("RemoteViews specifying separate landscape and portrait" +
 18                     " layouts cannot be modified. Instead, fully configure the landscape and" +
 19                     " portrait layouts individually before constructing the combined layout.");
 20         }
 21         if (mActions == null) {
 22             mActions = new ArrayList<Action>();
 23         }
 24         mActions.add(a);
 25
 26         // update the memory usage stats
 27         a.updateMemoryUsageEstimate(mMemoryUsageCounter);
 28     }
 29
 30
 31 //真正的执行view的方法 就是在apply函数里
 32     public View apply(Context context, ViewGroup parent, OnClickHandler handler) {
 33         RemoteViews rvToApply = getRemoteViewsToApply(context);
 34
 35         View result;
 36         // RemoteViews may be built by an application installed in another
 37         // user. So build a context that loads resources from that user but
 38         // still returns the current users userId so settings like data / time formats
 39         // are loaded without requiring cross user persmissions.
 40         final Context contextForResources = getContextForResources(context);
 41         Context inflationContext = new ContextWrapper(context) {
 42             @Override
 43             public Resources getResources() {
 44                 return contextForResources.getResources();
 45             }
 46             @Override
 47             public Resources.Theme getTheme() {
 48                 return contextForResources.getTheme();
 49             }
 50             @Override
 51             public String getPackageName() {
 52                 return contextForResources.getPackageName();
 53             }
 54         };
 55
 56         LayoutInflater inflater = (LayoutInflater)
 57                 context.getSystemService(Context.LAYOUT_INFLATER_SERVICE);
 58
 59         // Clone inflater so we load resources from correct context and
 60         // we don't add a filter to the static version returned by getSystemService.
 61         inflater = inflater.cloneInContext(inflationContext);
 62         inflater.setFilter(this);
 63         result = inflater.inflate(rvToApply.getLayoutId(), parent, false);
 64         //前面的就是加载资源而已 真正的调用 还是在perform函数里
 65         rvToApply.performApply(result, parent, handler);
 66
 67         return result;
 68     }
 69
 70 //每次remoteviews的apply方法 实际上就是遍历里面的action 然后调用每个action的 applay方法
 71 private void performApply(View v, ViewGroup parent, OnClickHandler handler) {
 72         if (mActions != null) {
 73             handler = handler == null ? DEFAULT_ON_CLICK_HANDLER : handler;
 74             final int count = mActions.size();
 75             for (int i = 0; i < count; i++) {
 76                 Action a = mActions.get(i);
 77                 a.apply(v, parent, handler);
 78             }
 79         }
 80     }
 81
 82 //继续跟 我们会发现action是一个抽象类 他的apply方法要交给他的子类自己去实现
 83      private abstract static class Action implements Parcelable {
 84         public abstract void apply(View root, ViewGroup rootParent,
 85                 OnClickHandler handler) throws ActionException;
 86 //我们就看看ReflectionAction 这个子类的实现吧
 87 //很明显的 最终的反射调用 都是由子类自己来实现的,action的子类很多 有兴趣可以自己查
 88         public void apply(View root, ViewGroup rootParent, OnClickHandler handler) {
 89             final View view = root.findViewById(viewId);
 90             if (view == null) return;
 91
 92             Class<?> param = getParameterType();
 93             if (param == null) {
 94                 throw new ActionException("bad type: " + this.type);
 95             }
 96
 97             try {
 98                 getMethod(view, this.methodName, param).invoke(view, wrapArg(this.value));
 99             } catch (ActionException e) {
100                 throw e;
101             } catch (Exception ex) {
102                 throw new ActionException(ex);
103             }
104         }
基本流程就是这样,另外注意apply和reapply的区别,后者只更新界面 而前者还要加载布局。
11.除了 通知和widget 我们还能怎样使用remoteviews?
答:remoteview 既然是被设计用来 跨进程 更新ui的。所有跨进程更新ui的 场景都可以使用他来做,这里给出2个范例。
第一个范例:同一个apk下,2个进程 ,其中一个activity另外一个activity的ui。
首先我们看主activity,就是用广播接收一个remoteviews 然后显示出来而已
 1 package com.example.administrator.remoteviewsameproject;
 2
 3 import android.content.BroadcastReceiver;
 4 import android.content.Context;
 5 import android.content.Intent;
 6 import android.content.IntentFilter;
 7 import android.os.Bundle;
 8 import android.support.design.widget.FloatingActionButton;
 9 import android.support.design.widget.Snackbar;
10 import android.support.v7.app.AppCompatActivity;
11 import android.support.v7.widget.Toolbar;
12 import android.view.View;
13 import android.view.Menu;
14 import android.view.MenuItem;
15 import android.widget.Button;
16 import android.widget.LinearLayout;
17 import android.widget.RemoteViews;
18
19 public class MainActivity extends AppCompatActivity {
20
21     private Button bt;
22
23     private BroadcastReceiver mBroadcastReceiver = new BroadcastReceiver() {
24
25
26         @Override
27         public void onReceive(Context context, Intent intent) {
28             RemoteViews remoteViews = intent.getParcelableExtra("remoteViewsFlag");
29             if (remoteViews != null) {
30                 View view = remoteViews.apply(MainActivity.this, remoteViewsLayout);
31                 remoteViewsLayout.addView(view);
32             }
33         }
34     };
35
36     private LinearLayout remoteViewsLayout;
37
38     @Override
39     protected void onCreate(Bundle savedInstanceState) {
40         super.onCreate(savedInstanceState);
41         setContentView(R.layout.activity_main);
42         registerReceiver(mBroadcastReceiver,new IntentFilter("updateRemoteview"));
43         remoteViewsLayout = (LinearLayout) findViewById(R.id.ll);
44         bt = (Button) findViewById(R.id.bt);
45         bt.setOnClickListener(new View.OnClickListener() {
46
47             @Override
48             public void onClick(View v) {
49                 Intent intent = new Intent();
50                 intent.setClass(MainActivity.this, OtherActivity.class);
51                 startActivity(intent);
52             }
53         });
54
55
56         Toolbar toolbar = (Toolbar) findViewById(R.id.toolbar);
57         setSupportActionBar(toolbar);
58
59         FloatingActionButton fab = (FloatingActionButton) findViewById(R.id.fab);
60         fab.setOnClickListener(new View.OnClickListener() {
61             @Override
62             public void onClick(View view) {
63                 Snackbar.make(view, "Replace with your own action", Snackbar.LENGTH_LONG)
64                         .setAction("Action", null).show();
65             }
66         });
67     }
68
69     @Override
70     public boolean onCreateOptionsMenu(Menu menu) {
71         // Inflate the menu; this adds items to the action bar if it is present.
72         getMenuInflater().inflate(R.menu.menu_main, menu);
73         return true;
74     }
75
76     @Override
77     public boolean onOptionsItemSelected(MenuItem item) {
78         // Handle action bar item clicks here. The action bar will
79         // automatically handle clicks on the Home/Up button, so long
80         // as you specify a parent activity in AndroidManifest.xml.
81         int id = item.getItemId();
82
83         //noinspection SimplifiableIfStatement
84         if (id == R.id.action_settings) {
85             return true;
86         }
87
88         return super.onOptionsItemSelected(item);
89     }
90 }
然后看运行在另外一个进程里的activity 这个activity负责发送remoteviews,注意你们自己写的时候 要在manifest里 更改android:process的值
 1 package com.example.administrator.remoteviewsameproject;
 2
 3 import android.app.PendingIntent;
 4 import android.content.Intent;
 5 import android.os.Bundle;
 6 import android.support.design.widget.FloatingActionButton;
 7 import android.support.design.widget.Snackbar;
 8 import android.support.v7.app.AppCompatActivity;
 9 import android.support.v7.widget.Toolbar;
10 import android.view.View;
11 import android.widget.RemoteViews;
12 import android.widget.TextView;
13
14 public class OtherActivity extends AppCompatActivity {
15
16     private TextView tv;
17
18
19     @Override
20     protected void onCreate(Bundle savedInstanceState) {
21         super.onCreate(savedInstanceState);
22         setContentView(R.layout.activity_other);
23         tv=(TextView)findViewById(R.id.tv);
24         tv.setOnClickListener(new View.OnClickListener() {
25
26             @Override
27             public void onClick(View v) {
28                 RemoteViews remoteViews=new RemoteViews(getPackageName(),R.layout.content_other);
29                 remoteViews.setTextViewText(R.id.tv,"虽然是otherActivity的布局 但是我显示在mainActivity了");
30                 PendingIntent pendingIntent=PendingIntent.getActivity(OtherActivity.this,0,new Intent(OtherActivity.this,MainActivity.class),PendingIntent.FLAG_UPDATE_CURRENT);
31                 remoteViews.setOnClickPendingIntent(R.id.tv,pendingIntent);
32                 Intent intent=new Intent("updateRemoteview");
33                 intent.putExtra("remoteViewsFlag",remoteViews);
34                 sendBroadcast(intent);
35
36             }
37         });
38
39
40
41
42         Toolbar toolbar = (Toolbar) findViewById(R.id.toolbar);
43         setSupportActionBar(toolbar);
44
45         FloatingActionButton fab = (FloatingActionButton) findViewById(R.id.fab);
46         fab.setOnClickListener(new View.OnClickListener() {
47             @Override
48             public void onClick(View view) {
49                 Snackbar.make(view, "Replace with your own action", Snackbar.LENGTH_LONG)
50                         .setAction("Action", null).show();
51             }
52         });
53     }
54
55 }
然后看一下运行效果:
然后考虑第二种场景,就是不同apk 不同进程之间用remoteview 更新ui的例子。
因为不同apk的话,资源id是不同的,所以remoteview更新的时候 方法要改变一下。
你看我们上面的例子,取view 什么的 都是直接通过id 因为是一个apk么。
但是你想一下 2个apk的时候,你的id 和我的id 怎么可能一样?所以这种情况
我们2个apk 就要事先约定好remoteview里面的 资源名称。
然后我们在 根据名称 查找对应的布局文件 再进行加载。
针对这种情况 实际上我们只要修改主activity的代码即可
 1  public void onReceive(Context context, Intent intent) {
 2             RemoteViews remoteViews = intent.getParcelableExtra("remoteViewsFlag");
 3             if (remoteViews != null) {
 4                 int layoutId = getResources().getIdentifier("content_main", "layout", getPackageName());
 5                 ViewGroup view =(ViewGroup) getLayoutInflater().inflate(layoutId, remoteViewsLayout, false);
 6                 remoteViews.reapply(MainActivity.this, view);
 7                 remoteViewsLayout.addView(view);
 8
 9             }
10         }
然后我们就可以看到 另外一个apk的 remoteview 显示在我们的主apk的主页面里了

 浙公网安备 33010602011771号