centos7.6部署zabbix4.0LTS
系统环境
- 系统基础环境
[root@zabbix_server ~]# cat /etc/redhat-release
CentOS Linux release 7.6.1810 (Core)
[root@zabbix_server ~]# uname -r
3.10.0-957.el7.x86_64
| zabbix_server | 192.168.1.128 master | 安装:zabbix-server zabbix-agent |
| zabbix_agent | 192.168.1.130 node | 安装:zabbix-server |
注:本地采用LAMP换环境,原因就是访问监控的人很少,无大并发。
Zabbix-Server端安装:
- 添加zabbix的yum源
[root@zabbix_server ~]# wget https://mirrors.tuna.tsinghua.edu.cn/zabbix/zabbix/4.0/rhel/7/x86_64/zabbix-release-4.0-1.el7.noarch.rpm - yum安装
[root@zabbix_server ~]# yum -y install zabbix-server-mysql zabbix-web-mysql zabbix-get zabbix-agent
- 安装mariadb数据库
[root@zabbix_server ~]# yum -y install mariadb-server mariadb
[root@zabbix_server ~]# systemctl start mariadb
[root@zabbix_server ~]# systemctl enable mariadb.service
[root@zabbix_server ~]# mysql_secure_installation
NOTE: RUNNING ALL PARTS OF THIS SCRIPT IS RECOMMENDED FOR ALL MariaDB #数据库安全初始化
SERVERS IN PRODUCTION USE! PLEASE READ EACH STEP CAREFULLY!In order to log into MariaDB to secure it, we'll need the current
password for the root user. If you've just installed MariaDB, and
you haven't set the root password yet, the password will be blank,
so you should just press enter here.Enter current password for root (enter for none): 回车
OK, successfully used password, moving on...Setting the root password ensures that nobody can log into the MariaDB
root user without the proper authorisation.Set root password? [Y/n] n
... skipping.By default, a MariaDB installation has an anonymous user, allowing anyone
to log into MariaDB without having to have a user account created for
them. This is intended only for testing, and to make the installation
go a bit smoother. You should remove them before moving into a
production environment.Remove anonymous users? [Y/n] y
... Success!Normally, root should only be allowed to connect from 'localhost'. This
ensures that someone cannot guess at the root password from the network.Disallow root login remotely? [Y/n] y
... Success!By default, MariaDB comes with a database named 'test' that anyone can
access. This is also intended only for testing, and should be removed
before moving into a production environment.Remove test database and access to it? [Y/n] y
- Dropping test database...
... Success!
- Removing privileges on test database...
... Success!Reloading the privilege tables will ensure that all changes made so far
will take effect immediately.Reload privilege tables now? [Y/n] y
... Success!Cleaning up...
All done! If you've completed all of the above steps, your MariaDB
installation should now be secure.Thanks for using MariaDB!
-
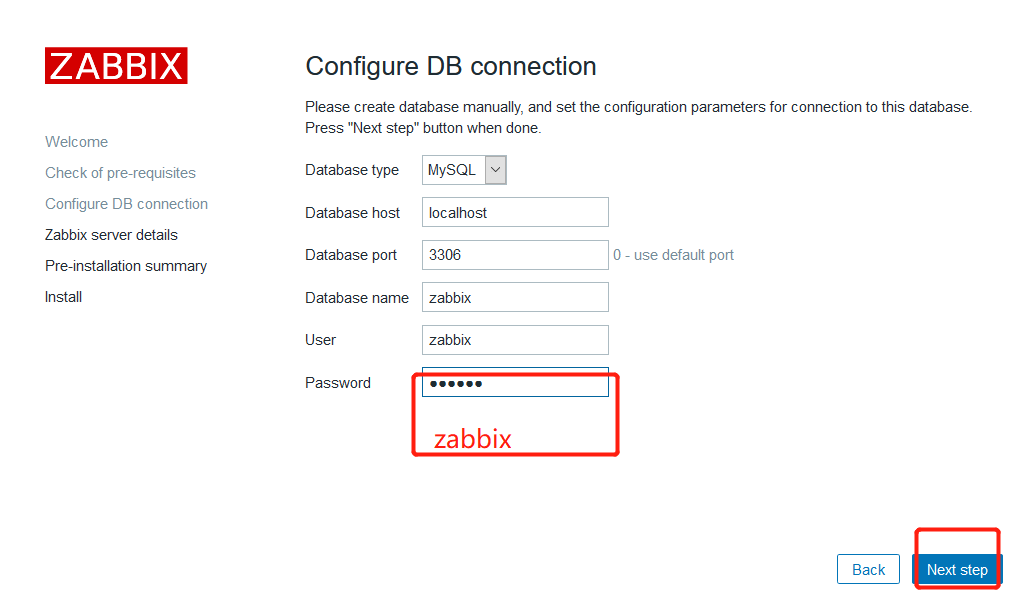
创建数据库并授权
[root@zabbix_server ~]# mysql
Welcome to the MariaDB monitor.  Commands end with ; or \g.
Your MariaDB connection id is 8
Server version: 5.5.65-MariaDB MariaDB Server

Copyright (c) 2000, 2018, Oracle, MariaDB Corporation Ab and others.

Type 'help;' or '\h' for help. Type '\c' to clear the current input statement.

MariaDB [(none)]> create database zabbix character set utf8 collate utf8_bin;
Query OK, 1 row affected (0.00 sec)

MariaDB [(none)]> grant all privileges on zabbix.* to zabbix@localhost identified by 'zabbix';
Query OK, 0 rows affected (0.00 sec)

MariaDB [(none)]> flush privileges;
Query OK, 0 rows affected (0.00 sec)

MariaDB [(none)]> exit
Bye
-
初始化数据结构并导入数据
[root@zabbix_server ~]# zcat /usr/share/doc/zabbix-server-mysql*/create.sql.gz | mysql -uzabbix -pzabbix zabbix
-
修改zabbix_server.conf配置文件
[root@zabbix_server ~]# egrep -v "^$|#" /etc/zabbix/zabbix_server.conf LogFile=/var/log/zabbix/zabbix_server.log LogFileSize=0 PidFile=/var/run/zabbix/zabbix_server.pid SocketDir=/var/run/zabbix DBHost=localhost DBName=zabbix DBUser=zabbix DBPassword=zabbix SNMPTrapperFile=/var/log/snmptrap/snmptrap.log Timeout=4 AlertScriptsPath=/usr/lib/zabbix/alertscripts ExternalScripts=/usr/lib/zabbix/externalscripts LogSlowQueries=3000 -
启动zabbix-server
[root@zabbix_server ~]# systemctl start zabbix-server.service
[root@zabbix_server ~]# systemctl enable  zabbix-server.service
-
安装httpd服务
[root@zabbix_server ~]# yum -y install httpd
[root@zabbix_server ~]# sed -i.ori '18a php_value date.timezone  Asia/Shanghai' /etc/httpd/conf.d/zabbix.conf
[root@zabbix_server ~]# systemctl start httpd
[root@zabbix_server ~]# systemctl enable httpd
注意事项:关闭selinux和firwealld
-
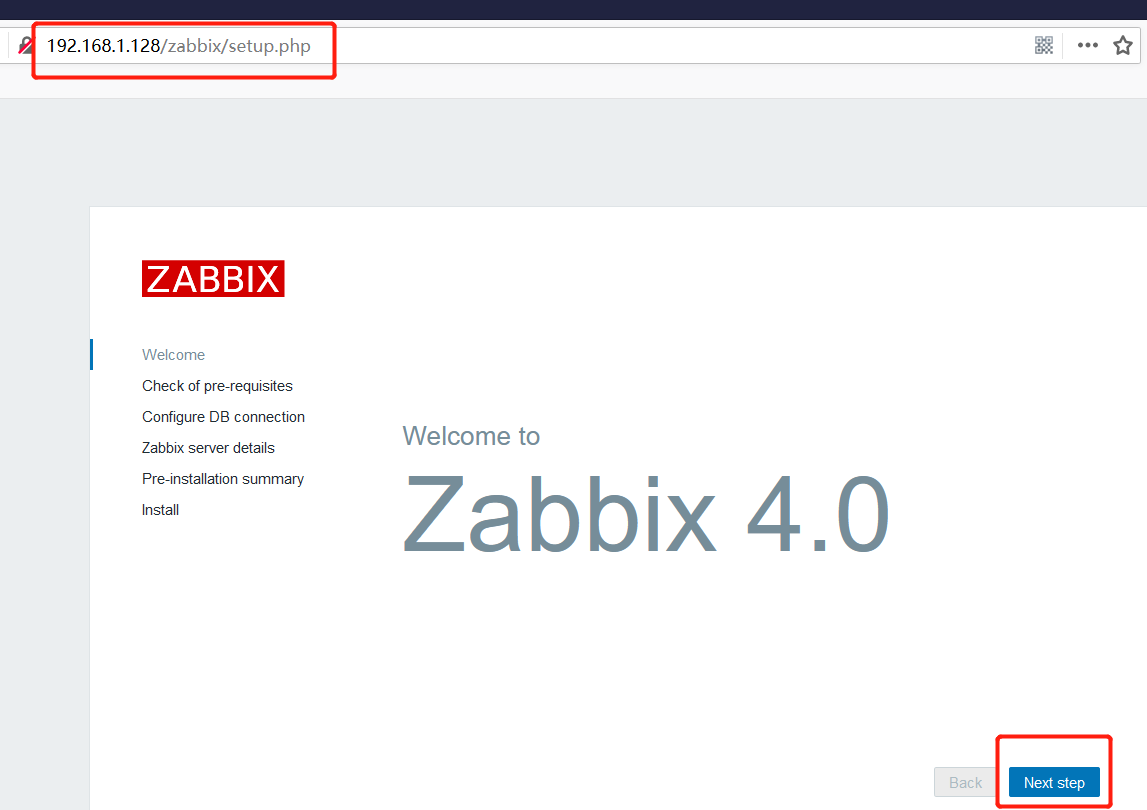
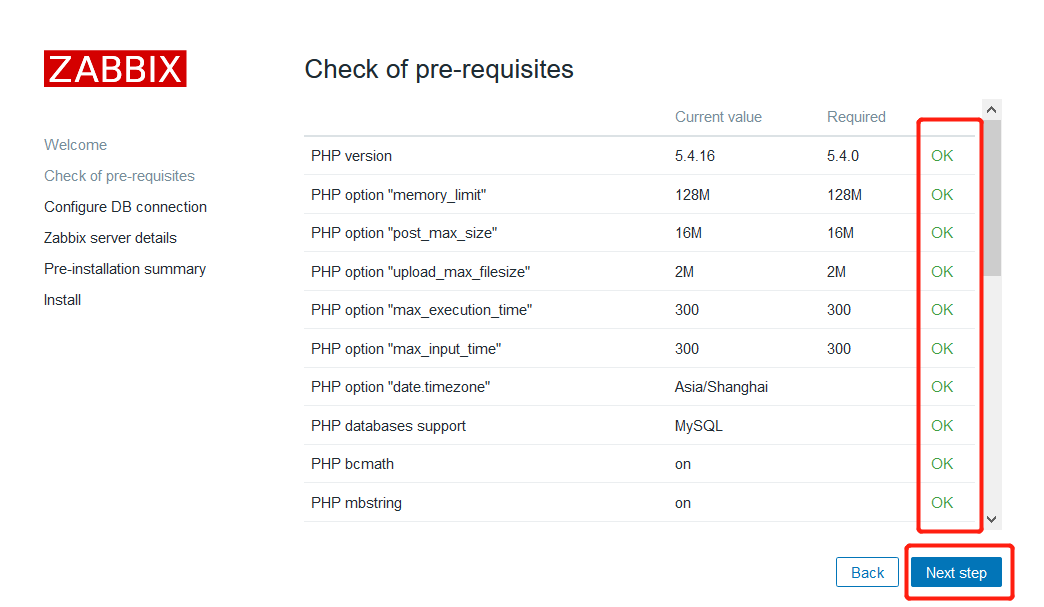
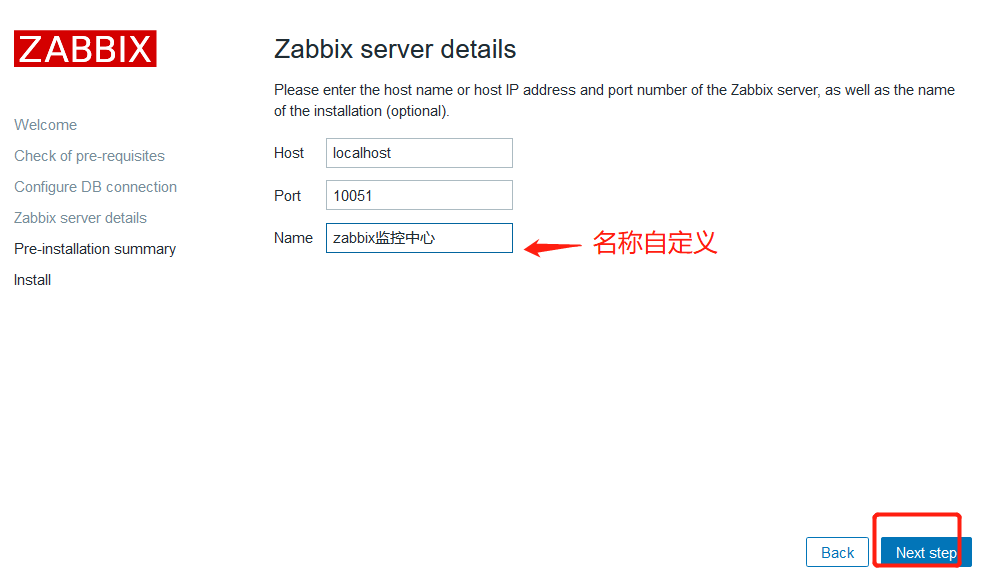
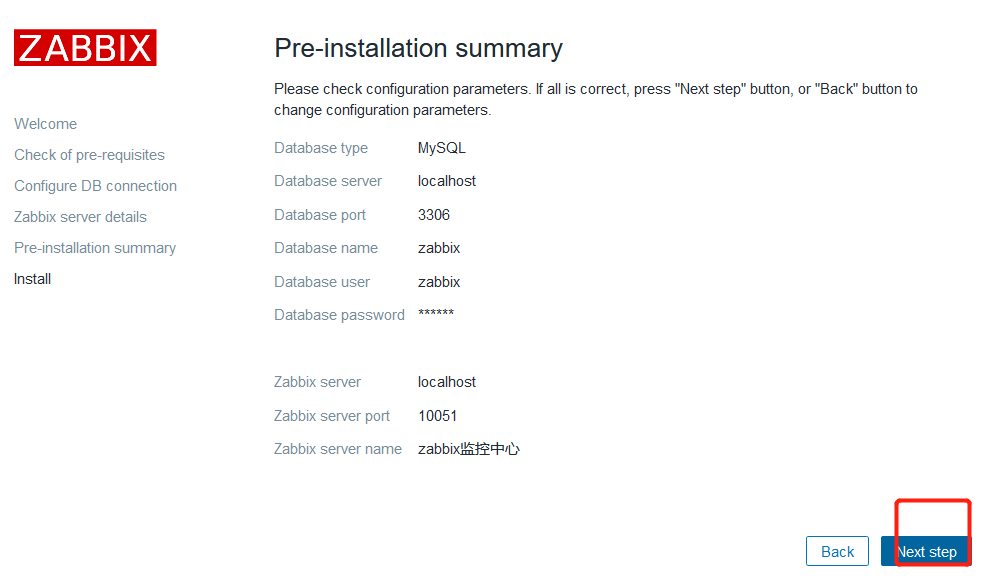
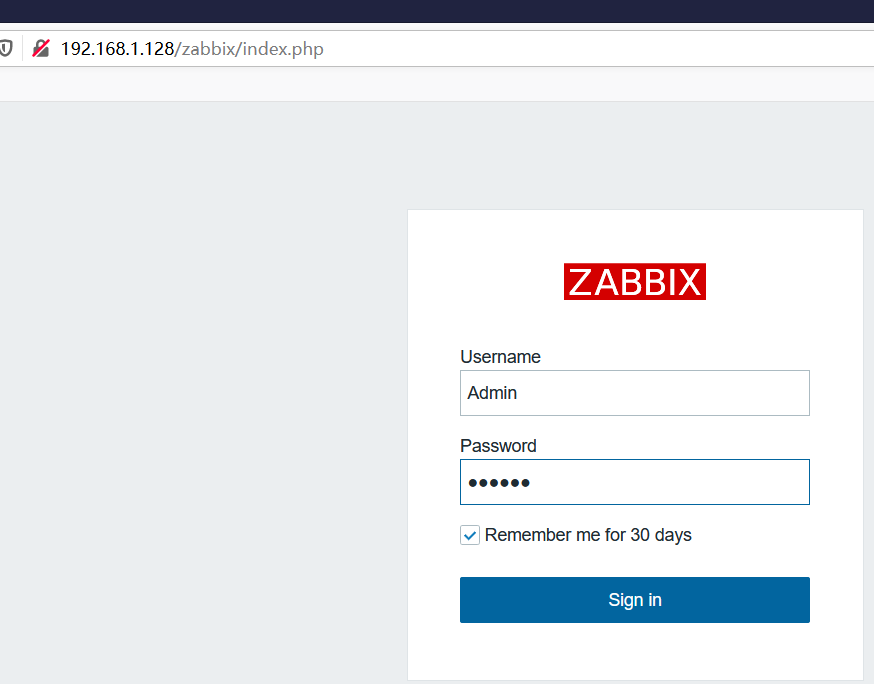
打开http://192.168.1.128/zabbix
默认的用户名:Admin 密码:zabbix
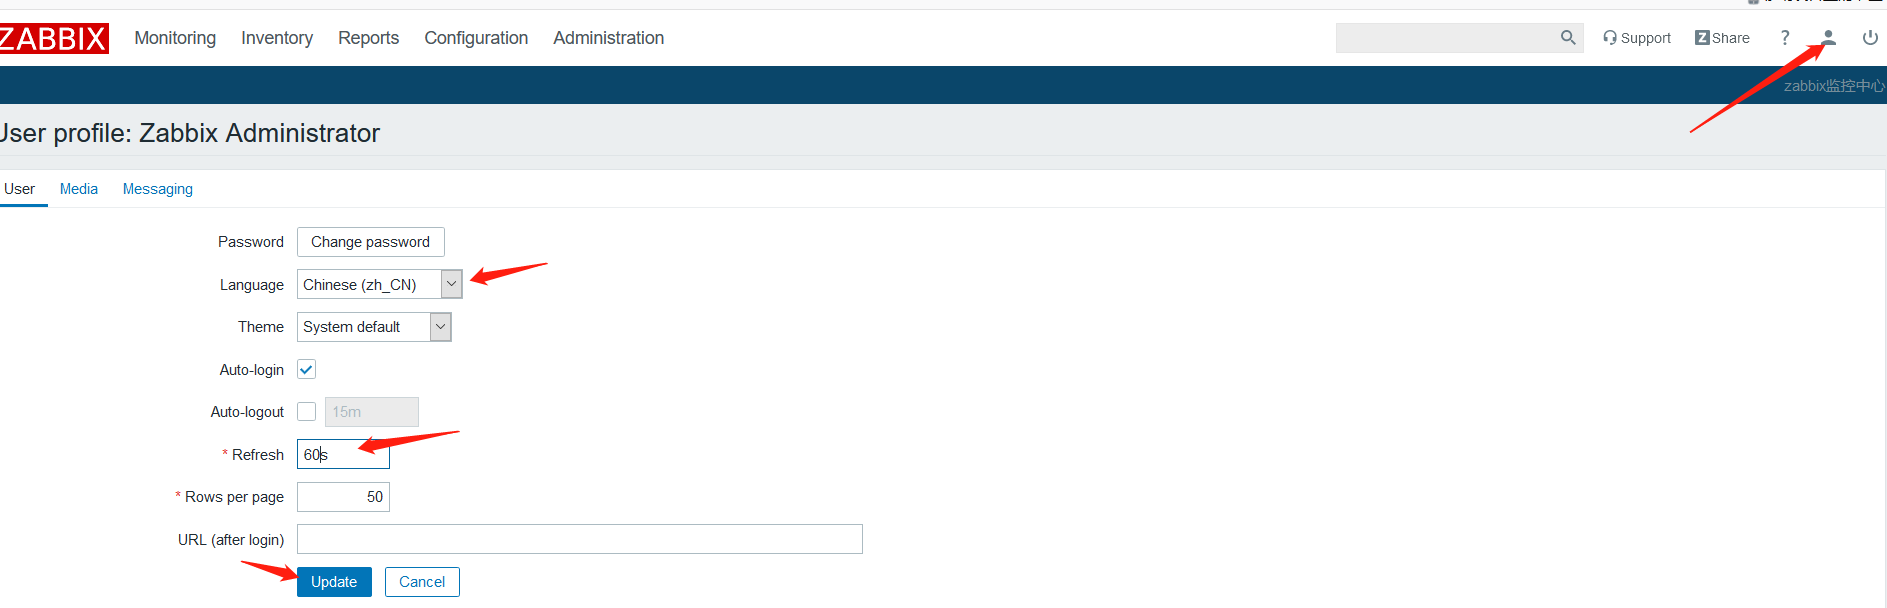
- 调整语言,选择中文
- 启动服务端zabbix_agent
[root@zabbix_server ~]# systemctl start zabbix-agent
[root@zabbix_server ~]# systemctl enable zabbix-agent
至此,zabbix-server部署告一段落!!
Zabbix-agent安装:
- 添加zabbix-agent的yum源
root@zabbix_agent ~]# rpm -ivh https://mirrors.tuna.tsinghua.edu.cn/zabbix/zabbix/4.0/rhel/7/x86_64/zabbix-agent-4.0.10-1.el7.x86_64.rpm
[root@zabbix_agent ~]# yum -y install zabbix-agent
[root@zabbix_agent ~]# systemctl start zabbix-agent
[root@zabbix_agent ~]# systemctl enable  zabbix-agent
[root@zabbix_agent ~]# ps -ef | grep zabbix_agent
- 修改zabbix_agent配置文件
[root@zabbix_agent ~]# vim /etc/zabbix/zabbix_agentd.conf
Server=192.168.1.128                                                    #服务端IP地址
- 重启服务
[root@zabbix_agent ~]# systemctl restart zabbix-agent
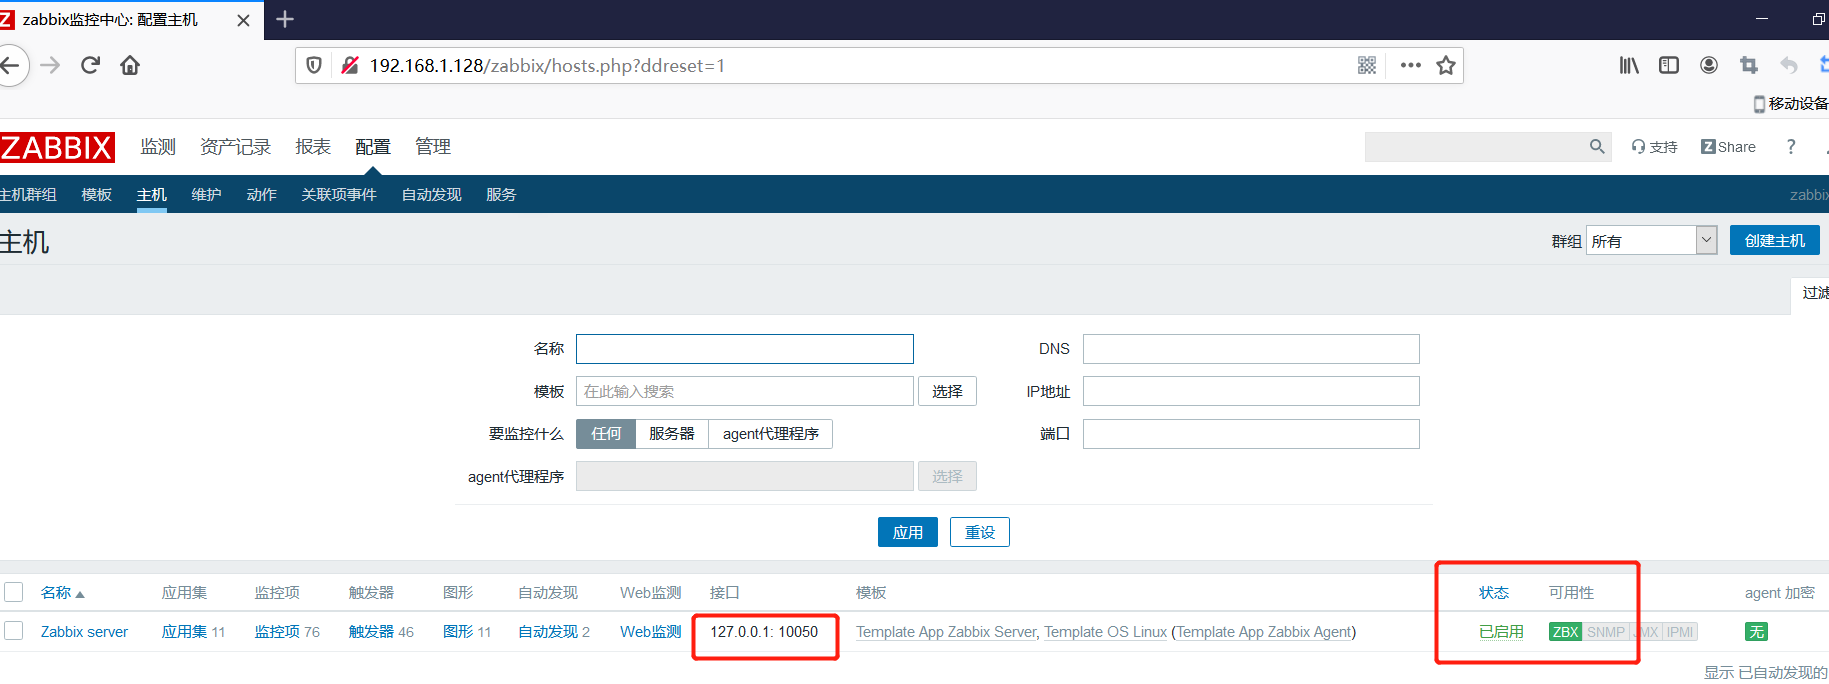
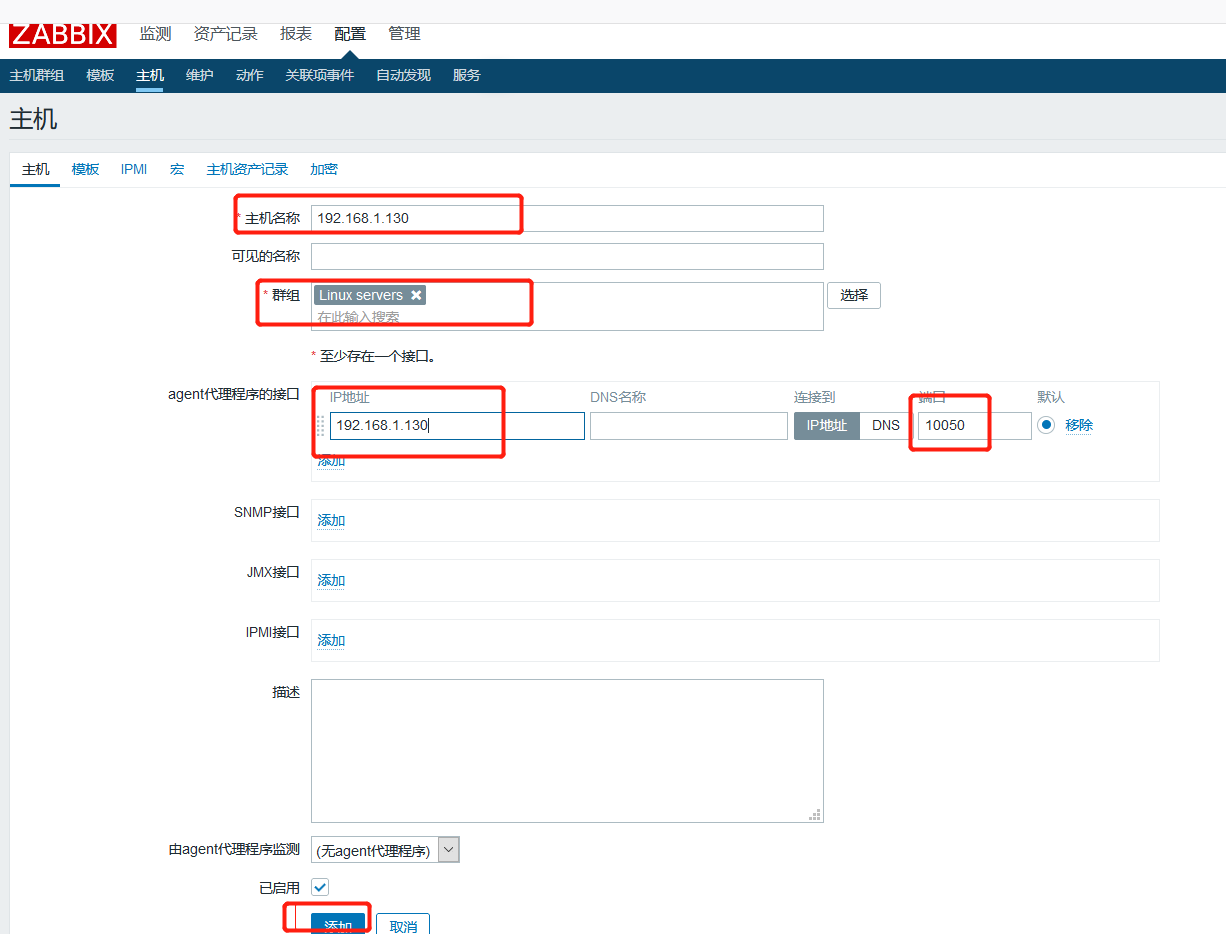
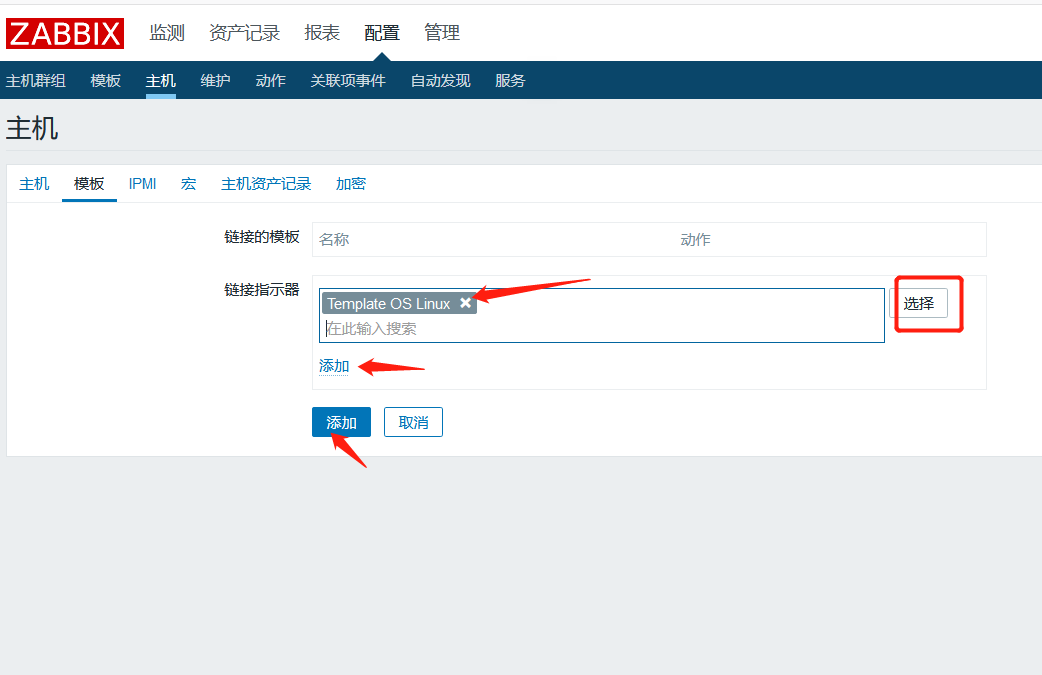
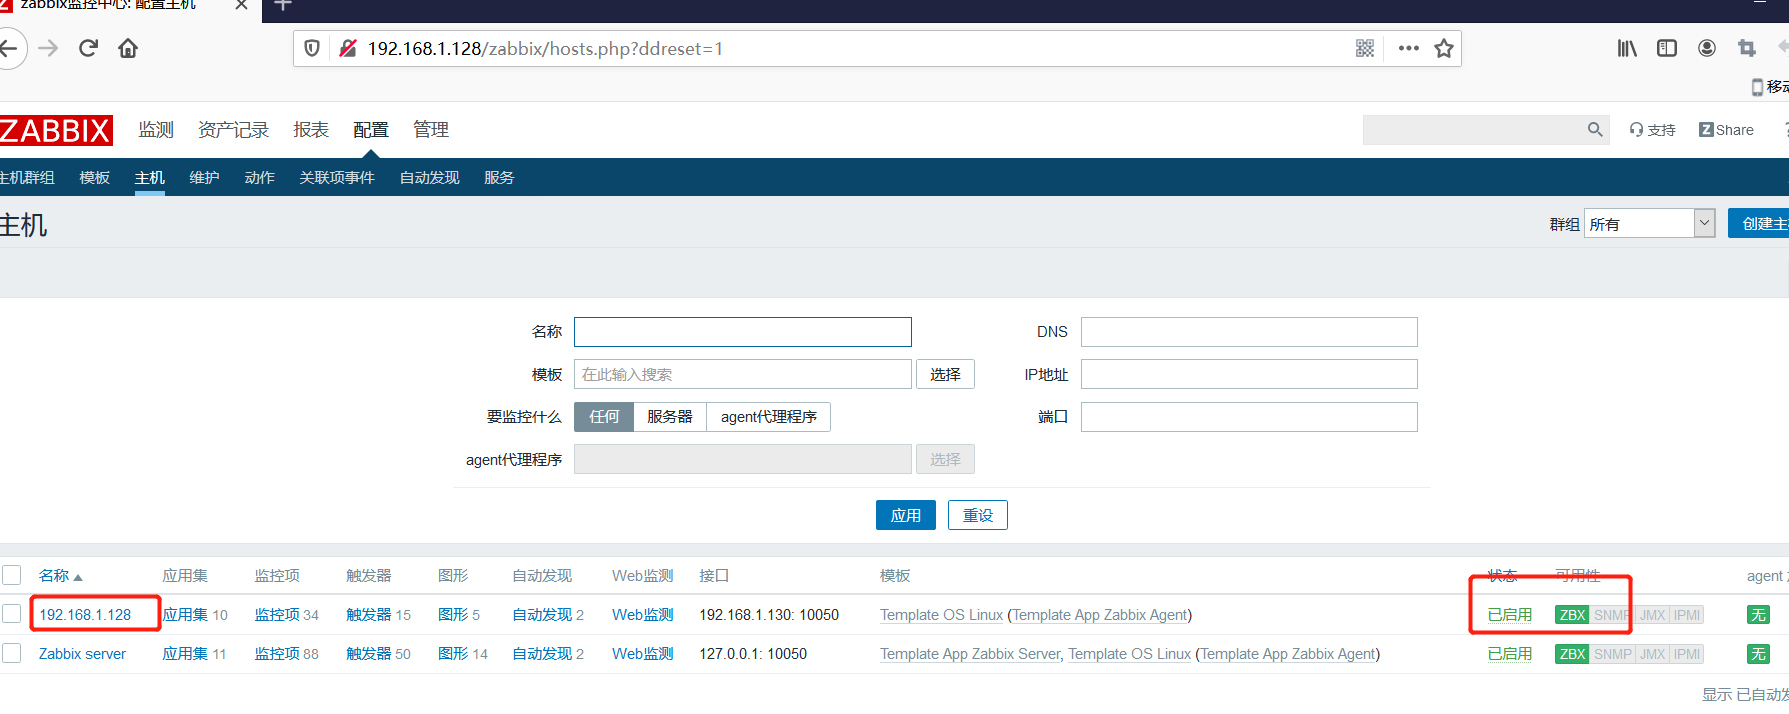
- 创建主机
- 客户端监控完成
完成 !!

 浙公网安备 33010602011771号