分页插件pagehelper
1、配置环境
maven依赖
 <!--分页pagehelper-->
 <dependency>
     <groupId>com.github.pagehelper</groupId>
     <artifactId>pagehelper</artifactId>
     <version>5.1.4</version>
 </dependency>
 <dependency>
     <groupId>com.github.jsqlparser</groupId>
     <artifactId>jsqlparser</artifactId>
     <version>1.0</version>
 </dependency>
在mybatis配置文件中添加<plugins>,(configuration报错 写其它配置下面)
 <configuration>
     <!-- 批量设置类的别名 -->
     <typeAliases>
         <package name="com.wanglz.pojo"/>
     </typeAliases>
     <!--PageHelper分页-->
     <plugins>
         <plugin interceptor="com.github.pagehelper.PageInterceptor"></plugin>
     </plugins>
 </configuration>
2、测试分页
1.基本实现
只要调用startPage静态方法即可
 @RequestMapping("/page")
 public String testPageHelper(@RequestParam(value = "currentPage", defaultValue = "1")Integer currentPage,
                              @RequestParam(value = "pageSize", defaultValue = "5") Integer pageSize,
                              Map<String, Object> map) {
     PageHelper.startPage(currentPage, pageSize);
     //getEmployee的语句select * from employee
     List<Employee> list = employeeService.getEmployee();
     map.put("emps", list);
     return "success";
 }
2.上一页、下一页等
根据上面的代码new一个PageInfo类,就会有很多分页的信息供选择
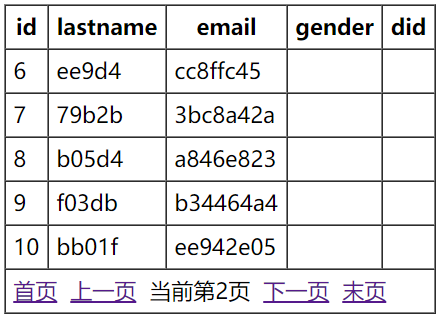
样式:
java代码:
@RequestMapping("/page")
public String testPageHelper(@RequestParam(value = "currentPage", defaultValue = "1")Integer currentPage,
@RequestParam(value = "pageSize", defaultValue = "5") Integer pageSize,
Map<String, Object> map) {
PageHelper.startPage(currentPage, pageSize);
//getEmployee的语句select * from employee
List<Employee> list = employeeService.getEmployee();
//将查询结果放pageinfo中,就会有很多可用的功能
PageInfo<Employee> pageInfo = new PageInfo<>(list);
System.out.println("当前页:"+pageInfo.getPageNum());
System.out.println("总页数:"+pageInfo.getPages());
System.out.println("总记录数:"+pageInfo.getTotal());
System.out.println("当前共几条记录:"+pageInfo.getSize());
System.out.println("前一页:"+pageInfo.getPrePage());
System.out.println("下一页:"+pageInfo.getNextPage());
System.out.println("当前结果:"+pageInfo.getList());
map.put("pageInfo", pageInfo);
return "success";
}
jsp代码:
 <table cellpadding="5" cellspacing="0" border="1">
     <tr>
         <th>id </th>
         <th>lastname </th>
         <th>email </th>
         <th>gender </th>
         <th>did </th>
     </tr>
     <c:forEach items="${pageInfo.list}" var="emp" >
         <tr>
             <td>${emp.id}</td>
             <td>${emp.lastname}</td>
             <td>${emp.email}</td>
             <td>${emp.gender}</td>
             <td>${emp.dId}</td>
         </tr>
     </c:forEach>
     <tr>
         <td colspan="5">
             <a href="page?currentPage=1">首页</a>
             <a href="page?currentPage=${pageInfo.prePage}">上一页</a>
             当前第${pageInfo.pageNum}页
             <a href="page?currentPage=${pageInfo.nextPage}">下一页</a>
             <a href="page?currentPage=${pageInfo.pages}">末页</a>
         </td>
     </tr>
 </table>
3.连续分页
样式 :

修改上面的Java代码
PageHelper.startPage(currentPage, pageSize);
//getEmployee的语句select * from employee
List<Employee> list = employeeService.getEmployee();
//将查询结果放pageinfo中,就会有很多可用的功能,PageInfo()第二个参数是连续分页数
PageInfo<Employee> pageInfo = new PageInfo<>(list,6);
int[] nums = pageInfo.getNavigatepageNums();
// nums相当上面返回得list结果
System.out.println("连续页"+nums);
map.put("pageInfo", pageInfo);
return "success";
jsp代码,遍历navigatepageNums
<a href="page?currentPage=1">首页</a>
<a href="page?currentPage=${pageInfo.prePage}">上一页</a>
<c:forEach items="${pageInfo.navigatepageNums}" var="num">
<%--标记当前页,不可点--%>
<c:if test="${num eq pageInfo.pageNum}">
【${num}】
</c:if>
<c:if test="${num ne pageInfo.pageNum}">
<a href="page?currentPage=${num}">[${num}]</a>
</c:if>
</c:forEach>
<a href="page?currentPage=${pageInfo.nextPage}">下一页</a>
<a href="page?currentPage=${pageInfo.pages}">末页</a>

 浙公网安备 33010602011771号